Einleitung

In this guide, you will learn how to replace the touchpad of a Lenovo ThinkPad X1 Carbon 6th Gen. This may be necessary if your touchpad is no longer working properly. If you are having issues with your touchpad, see our troubleshooting guide. Before replacing the touchpad, try updating or reinstalling the drivers first. Be sure to power off your device and disconnect it from any power source before beginning.

  1. NFtYMIq2pIVe1NLS
    NFtYMIq2pIVe1NLS
    f3HPZLtAIooGCgUh
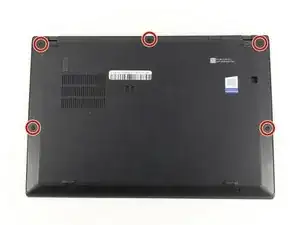
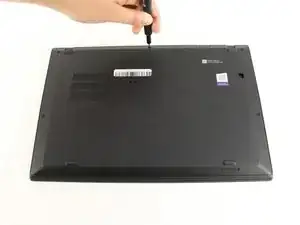
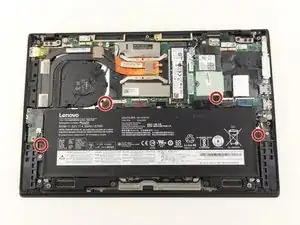
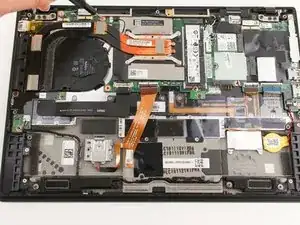
    • Use a Phillips #0 screwdriver to unscrew the five screws that secure the back cover to the laptop.

    • The screws do not completely come off from the back cover. Loosen until the screws are completely loose.

  2. HKMFZVKrjam3PWWH
    HKMFZVKrjam3PWWH
    6ZP1DMLSvgYbwIhX
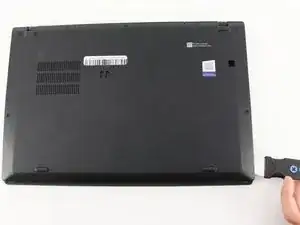
    • Use a Jimmy to lift the cover directly up off of the locating pins.

    • Though a metal opening tool is shown in the image, we recommend using plastic opening tools to minimize any cosmetic damage.

    • Remove the back cover.

    • If you encounter resistance when lifting the cover, revisit the screws to see if any of them are still threaded on to the device.

    I thank you for these instructions. They were quite helpful and I successfully replaced the fan. There is one thing however. Your instructions stated the following: "Be sure to pull on all of the cables at the same time."

    I disagree. One should never pull the wires. I was able to nudge the one part of the connector loose from the other part that it fit into." I then put the new fan in and gently and carefully pushed the connecting parts together.

    Otherwise, your instructions were clear and to the point. Thank you very much

    ALAN L SILBERLIGHT -

  3. 2xBAZNGktDaK54Lm
    2xBAZNGktDaK54Lm
    IIjEKPgWLiLkttCO
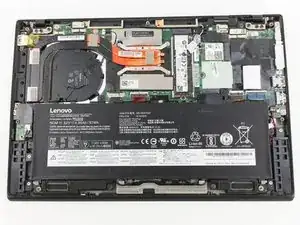
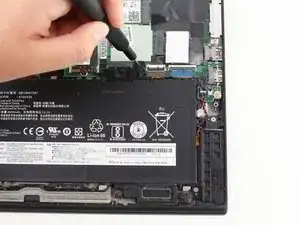
    • Use the Phillips #0 screwdriver to remove the four 5 mm screws that secure the battery to the laptop frame.

    The screw holes do not align 100%. Dont tighten all the screws as you re-insert them, leave just a little bit of play so that you can push the battery slightly until all the screws fit nicely, then tighten them. A little bit of DIY wisdom helps here. :-)

    Michael Dauer -

  4. OBGNfvQoRcUkViXt
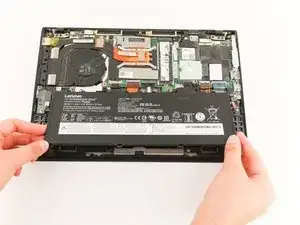
    • Take out the battery by lifting it from the bottom edge of the laptop, and then pulling away from the motherboard.

    Recommend changing the command language to lifting from the TOP edge, as the BOTTOM edge is secured.

    Alexander Van Auker -

    Thank you, was wondering what I'm doing wrong

    Ash Weber-Campbell -

    You forgot to tell people to disconnect the battery from the motherboard before removing…

    Becky -

    Agree with both comments above: lift from top left and top right of battery. This disconnects it and it lifts out and away.

    Marc G -

    In my 6th generation X1 Carbon there are two wires that are routed on the edge of the battery and have to be moved out of the way. These are antenna cables, be gentle with them, kinks and indents change their high frequency properties and may lead to problems with your WIFI.

    Michael Dauer -

    Before removing laptop cover you can disable the battery in the bios before beginning work for extra safety. Battery will be re-enabled at next startup automatically.

    Darryl S -

    How do I know the generation of my X1 Carbon?

    Does this batter fit all generations?

    eric gofreed -

  5. IXbn4VLwZlisD1dc
    IXbn4VLwZlisD1dc
    1kuRjBdNyocMBBkm
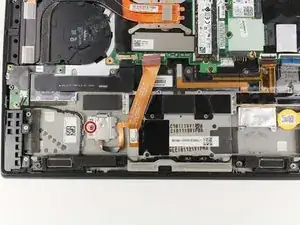
    • Use the Phillips #0 screwdriver to remove the 2mm screw that secures the cover of the fingerprint scanner.

  6. Q2DvjQrrrEiKXSIW
    • Remove the cover by grabbing it and gently pulling up and to the left.

  7. TGEEE16RSDVInE6x
    TGEEE16RSDVInE6x
    KfStEb1OAVeMR1fW
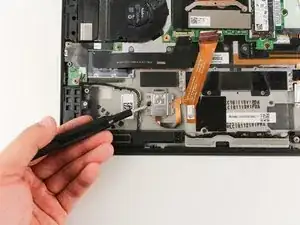
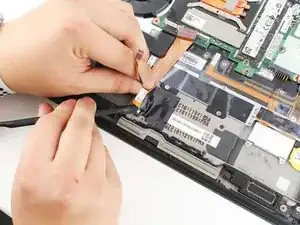
    • Use a nylon spudger to lift up the black bar that secures the cable.

    • Disconnect the ribbon cable from the fingerprint scanner by pulling the cable directly out.

  8. EKjNXoYOvk33INgU
    EKjNXoYOvk33INgU
    WGoXAp4V4cVgjpGC
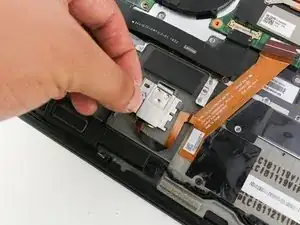
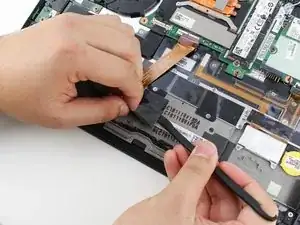
    • Use a spudger to peel back the black adhesive pad.

    • Be gentle; the black adhesive pad is delicate and may rip.

  9. HLoXU5ID4stRiIXt
    HLoXU5ID4stRiIXt
    5AIavD4oTIYF6AU3
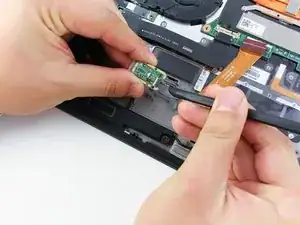
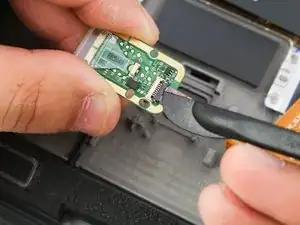
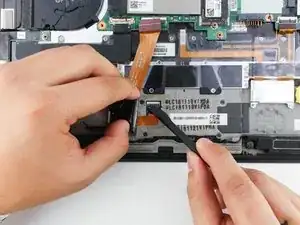
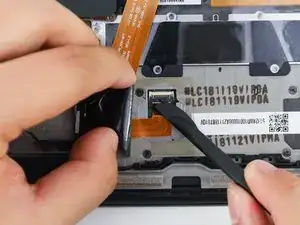
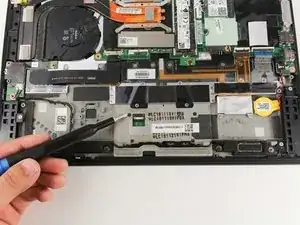
    • Lift the lever that secures the cable.

    • Pull the cable out to disconnect the ribbon cable that connects to the touchpad.

    • This is the same procedure for removing most of the ribbon cables.

  10. mvtiiZTaW3CuQ5LW
    mvtiiZTaW3CuQ5LW
    x3pc4qXpWb652Ibu
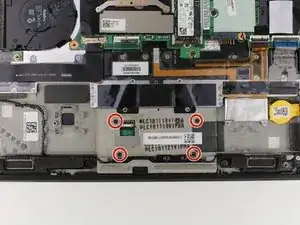
    • Use a Phillips #00 screwdriver to remove the four 1mm screws that secure the touchpad to the laptop.

  11. hIBM3GEBotJKYbbb
    hIBM3GEBotJKYbbb
    Ovpr6dwpFQXcFsId
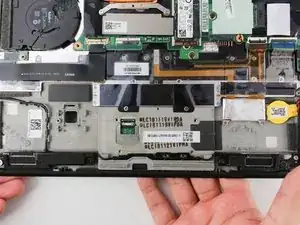
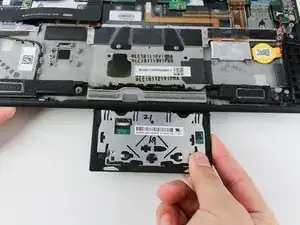
    • Once the screws are removed, the touchpad can be removed.

    • The touchpad may even fall out once the screws are removed. Be sure to secure the touchpad before it falls out.

Abschluss

To reassemble your device, follow these instructions in reverse order.

Michael Megna

Mitglied seit: 23/01/20

1177 Reputation

Ein Kommentar

Where do I get a new mouse pad after I have taken it off?
Jeremiah Gregg -