Einleitung

If you are encountering issues with your keyboard, there is a possibility that you might have to replace it. You can utilize this guide to receive step by step instruction to complete this task manually by yourself.

  1. OLhIEK4QWMxYeQnn
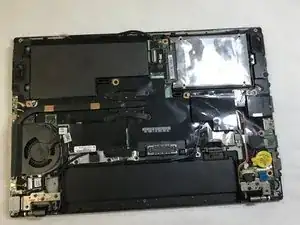
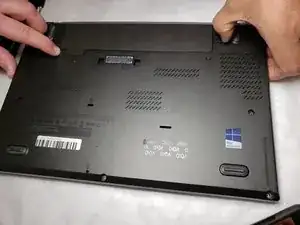
    • Remove the battery by pulling on the two sliding buttons next to the battery.

  2. A5TgTVSIQVFjIewD
    A5TgTVSIQVFjIewD
    cMMh1EBUpyVKpDFN
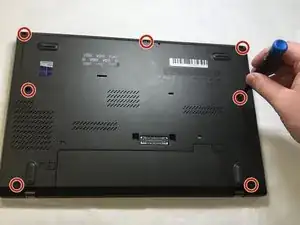
    • Remove the seven 5mm screws on the back cover using the Phillips #0 screwdriver.

    There is no need to remove the back panel for a keyboard replacement on the T450s

    Daniel Hathorn -

    Also, there are eight (8) screws: one is right under the battery.

    Fei Yeh -

  3. DsebtRTuZmXmGmag
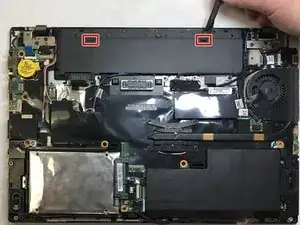
    • Remove the two rubber stoppers from where the battery previously was.

    This can be done without removing the back cover. Slightly more difficult but only by about 1mm or less.

    Fei Yeh -

  4. N26rQoZ1I3fdtqmD
    N26rQoZ1I3fdtqmD
    24o2ymjsPayYxWQB
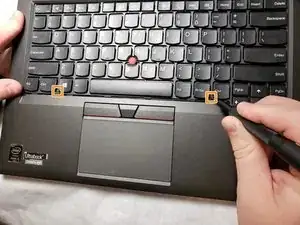
    • Flip the laptop, shift the keyboard upwards by applying force to the two indents on the keyboard.

    • Remove the six 5mm screws that are on the keyboard using the Phillips #0 screwdriver.

    • These screws are located above the left ctrl key, S, F, J, semicolon, and up arrow keys.

    Use a #00 screwdriver.

    Daniel Hathorn -

  5. nhUWwqT62CHFXxxt
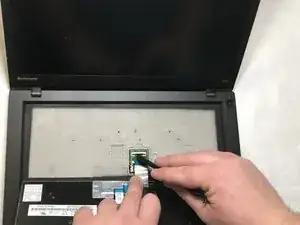
    • Lift the keyboard and flip over exposing the connection to the motherboard.

  6. niKXEKkjCFewqYIv
    • Remove the plastic covering and detach touch point and keyboard cable.

    There are TWO keyboard cables, one is hidden below the other, be careful not to yank it. To undo the cables, lift the black part up and away.

    Daniel Hathorn -

Abschluss

To reassemble your device, follow these instructions in reverse order.

Nathan Morgan

Mitglied seit: 11/11/19

439 Reputation

Ein Kommentar

If after replacement your keyboard has some keys clacking, make sure you slid the keyboard all the way back. Even a small amount can make some keys feel weird.
Ivan Veloz -