Einleitung
This guide will help you replace your original keyboard either with the same type, or changed keys. You can also upgrade to a back-lit version.
Werkzeuge
Ersatzteile
-
-
Ensure that any internal batteries are powered down in the BIOS.
-
Remove external battery using the two finger clips on the underside.
-
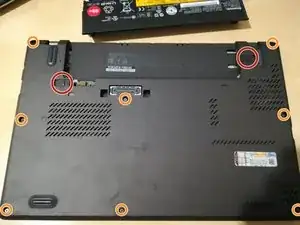
Loosen all eight (8) screws on the underside of the laptop. These screws have retention clips so should not be removed completely from the back plate.
-
Remove back plate of laptop and set aside.
-
-
-
Identify and remove the internal battery.
-
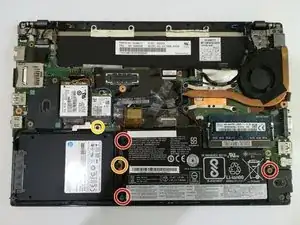
The internal battery is held in by up to three screws, circled in red in the photo.
-
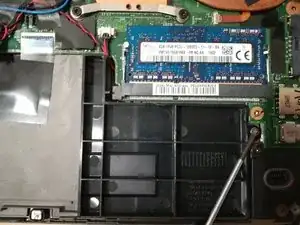
If there is no internal battery then remove the spacer shown in the second photo. This is held in by one screw.
-
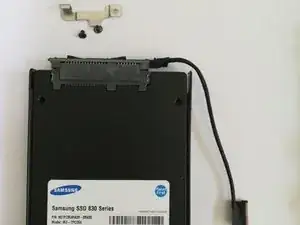
Remove the internal HDD or SDD.
-
This is held in a carrier tray which is attached to the frame by a single screw circled in orange.
-
The data connection to the motherboard has a silver shield which is held in place by a single screw, circled in yellow in the photo.
-
Set the HDD and internal battery aside.
-
-
-
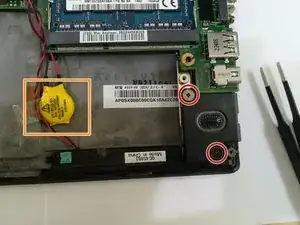
Remove right speaker by taking out the screws marked in red.
-
Remove tape holding BIOS battery marked in orange.
-
-
-
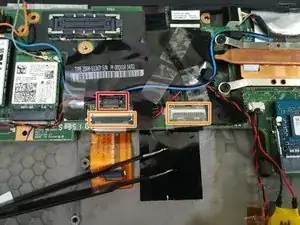
Remove connectors
-
Start with the large connector in the middle at the bottom of the motherboard. Here it is marked in red.
-
Then ease up the two connectors, one underneath the large connector just removed. These are done by raising the black tab on the connector to vertical then pulling gently on the ribbon cable. These are marked in orange in the photo.
-
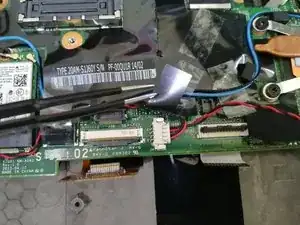
Also lift the connector on the upper left of the keyboard, marked in orange. Just unplug it by lifting it up with your nails or with a small screw driver
-
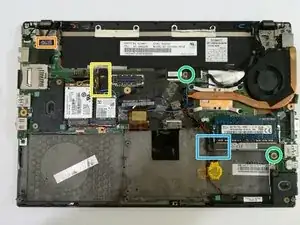
Ease the antenna cables for the wifi and 3G out of their black holder, and pull the holder off the motherboard towards the top side of the laptop. This is marked in yellow.
-
Underneath you will find one screw, which you should remove.
-
Another two motherboard screws are marked in green, these should be removed.
-
Remove the motherboard by easing it to the right from under a tab marked in blue near the BIOS battery, and gently placing it back towards the top of the laptop.
-
-
-
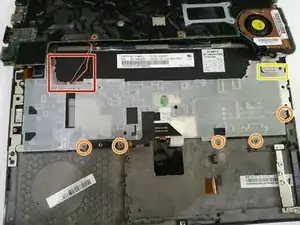
Remove keyboard tray, starting by moving the antenna wires out of their clips, shown in red on the photo.
-
Then remove the 5 screws holding the keyboard tray to the frame. These are marked in orange.
-
Finally ease the tray away by pulling it downwards and from under the top tab, marked in yellow.
-
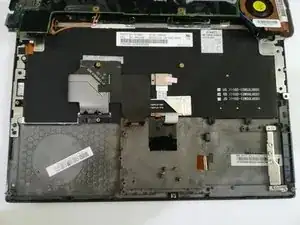
The keyboard and touchpad connectors should be visible.
-
-
-
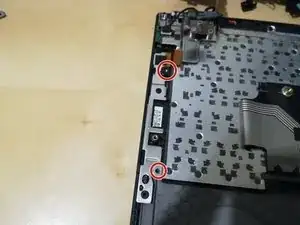
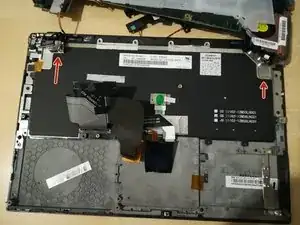
The keyboard is held down by 6 screws that should be removed.
-
There are two at the left side
-
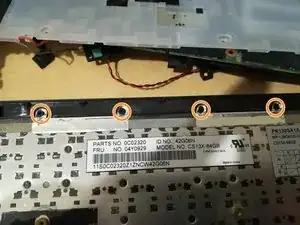
There are four at the back under the main battery, marked here in orange.
-
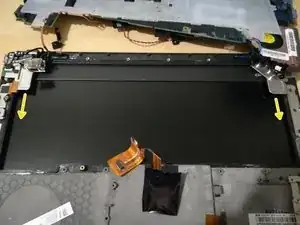
Slide the old keyboard forward towards you and remove from under the frame on the left and right. The screen should be visible underneath.
-
-
-
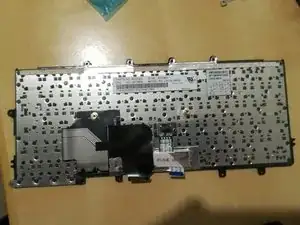
With the old keyboard placed to one side, insert the new keyboard under the frame tabs and into position.
-
Ensure connectors are correctly laying flat before reversing process and reassembling.
-
To reassemble your device, follow these instructions in reverse order.
6 Kommentare
i just replaced the keyboard on one of these and forgot to put the plastic keyboard tray back in ! doh! how important is it ? everything is working fine , does it prevent shorts etc ? will i get away without it ? thanks
cillian -
One of the reasons for those trays is for liquid spills so if you plan to never drop any coffee or sticky sugar drinks then you should be okay. Oh, and you’ll feel a bit more ‘bounce’ on the keys I guess? I think they are pretty robust mechanisms.
Doug -
Thanks for this excellent guide. All done in about 20 mins.
thx, but now my trackpoint doesnt work :-( I checked the orange marked connector in step four several times and connected it again
