Einleitung

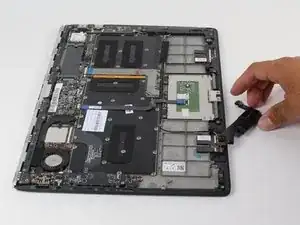
Using the speakers at the maximum setting for extended periods of time can damage the speakers, causing distorted and/or below average sound. The reason for dysfunctional speakers is not limited to the aforementioned. Should the speakers not be operating at peak performance or one is not satisfied with the speakers, this guide will help with their removal. The speakers in this laptop come connected as a pair, so remember to take out both when replacing them.

  1. L4UY2Ehcpga5T6FU
    • Before opening your laptop, make sure it is powered off.

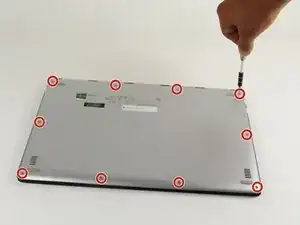
    • Remove the ten 3.3 mm screws from the base cover using a T5 Torx screwdriver.

  2. FhZsNHb4GEEZ1old
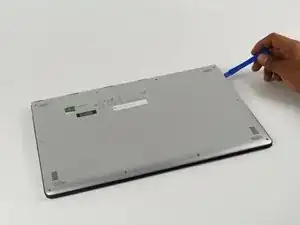
    • Slide the plastic opening tool between the base cover and the frame to pry open the computer.

    • Slowly go around the entire perimeter of the computer until all edges are loose.

    • Make sure the plastic opening tool doesn't go too far into the device.

  3. 2ManvTSsWRrd1BvD
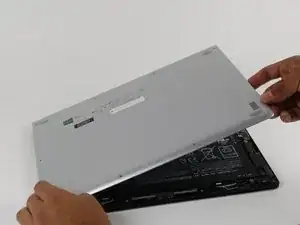
    • Remove the panel and place it in a safe location.

  4. Zu2hXZW5EjLqRLkC
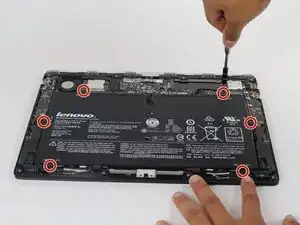
    • Remove the six 3.5 mm screws surrounding the battery using a Phillips 00 screwdriver.

    Hi

    I have a Lenovo Yoga 3 pro - 1370

    I take off the SSD without remove the battery. Is this a problem?

    TKS

    Stanley

    Stanleyslaw Castro -

  5. SeLo6RSnCK6ciITI
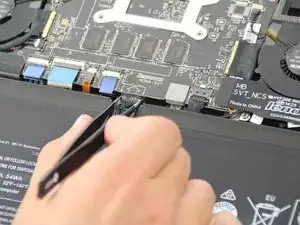
    • Using either tweezers or your fingers, disconnect the black battery cable by pinching either side of the connector and pulling towards the battery.

  6. Mb2uUJk5vWNA46Mp
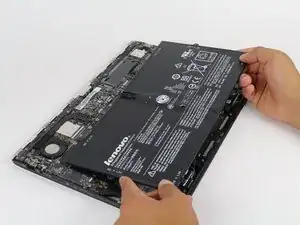
    • Carefully lift and remove the battery.

    If you have the right tools, this is really straightforward to do. Took me about 10 minutes. The instructions are very accurate.

    Kevin Lawless -

    Regarding the battery connector, the male plug is attached to the battery wiring (you will know what I mean when you look at it) and the female socket is attached to the logic board. There are small ridges on either side of the plug that can be grasped with fingernails to gently tease the plug out of the socket.

    Ron Westfall -

  7. uMhHBFZsS4gUjXyd
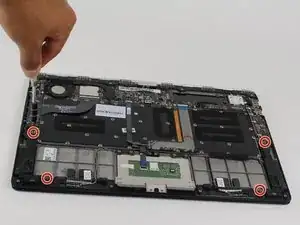
    • Remove the four 4 mm screws using the Phillips 00 screwdriver.

  8. X6XVkeoFi5fQAjWT
    X6XVkeoFi5fQAjWT
    qOPnZqtEjjgKQXHZ
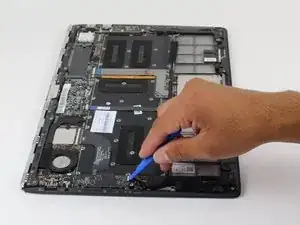
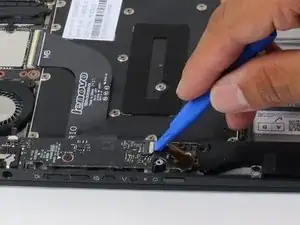
    • Using the plastic opening tool, flip open tab as shown.

  9. AypKV124EaeYHCE3
    AypKV124EaeYHCE3
    vUojveAolDdVXJOh
    iIOQYym5oOEgbgrm
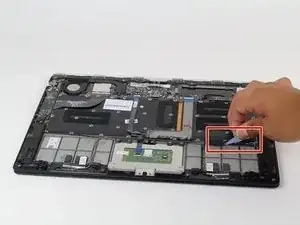
    • Remove the adhesive tape.

    • Flip open the ribbon connecting tab.

    • Carefully lift the ribbon connector from its adhesive.

  10. uSnP2hYEiehEBHCU
    uSnP2hYEiehEBHCU
    y1YrxnuDXU4GLX2Q
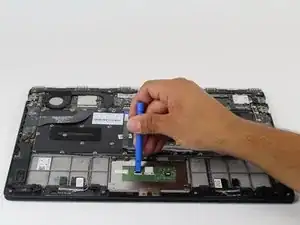
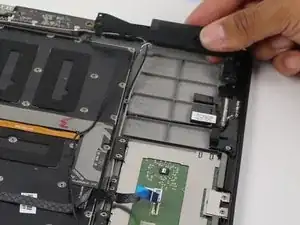
    • Remove the speaker and set it on the side.

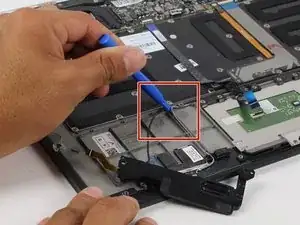
    • Use the plastic opening tool to remove the cables.

    • Be careful of other cables.

  11. tEwZ5UMEMmDQepeu
    tEwZ5UMEMmDQepeu
    WAgAoPxEJMbnkSnG
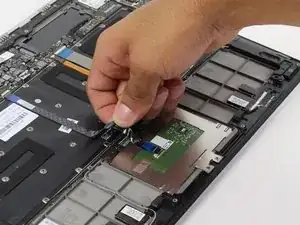
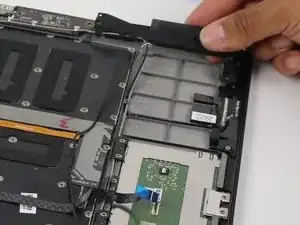
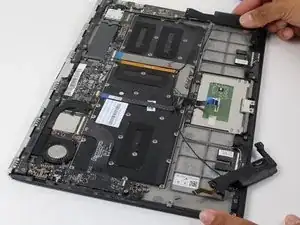
    • Removing the other speaker by unwinding cables.

    • Lift both speakers carefully.

Abschluss

To reassemble your device, follow these instructions in reverse order.
Caroline Seifert

Mitglied seit: 01/10/15

535 Reputation

0 Kommentare