Einleitung

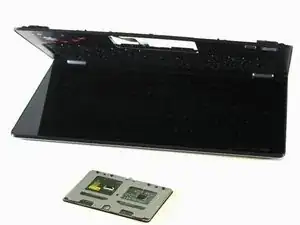
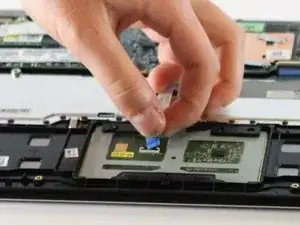
If your touchpad not registering your touch or not responding as it should, you may have to replace your touchpad unit. Use this guide to replace the touchpad unit so you can use interact with your Yoga 700 again.

  1. LlQnlAIoTrkuTHBr
    LlQnlAIoTrkuTHBr
    Mt5sSIIJ4bjaiLw6
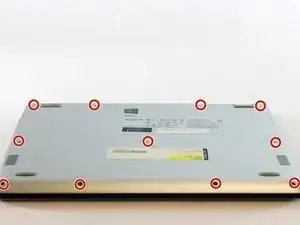
    • Flip your device so that the bottom panel is facing up.

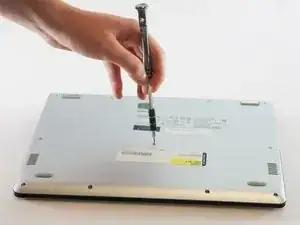
    • Remove the eleven 5mm Torx T5 screws from the back panel.

    Your list of t7 screwdriver costed me to order a wrong one.

    it should be T5 but the ad listed T7!!!!!

    it is frustrating.

    Remy Williams -

    Mine had T5 as well.

    alan -

  2. rQkkNs5SM4tXG32o
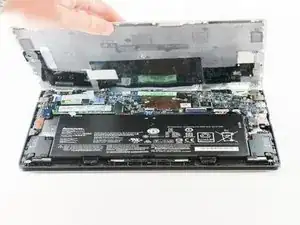
    • Use a spudger to unclip clips on the front and near the USB ports on each side

    • Lift the back panel off

    where can I buy the back panel?

    malinthae -

    The back panel is also held on by a few clips, but a spudger can come in handy here.

    alan -

    The clips on the sides are between the USB ports on the left side, and just in front of the USB port on the right.

    alan -

  3. BnC3hxSKVWoUk4Wb
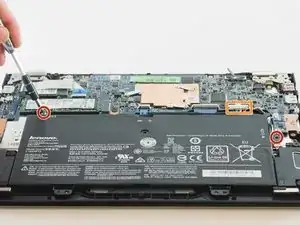
    • Remove the two 3mm Phillips #1 screws holding the battery to the laptop chassis.

    • Disconnect the battery from the IO board by holding the connector by the sides and gently pulling the connector out.

    The left screw is hidden below a tamper-evident sticker.

    alan -

    There is a plastic channel along the right edge of the battery that has wires running through it to a different board. It works best if the other connector next to the battery connector is unclipped and those wires are taken out of that channel.

    alan -

  4. fVjxEjAvUfciRHtg
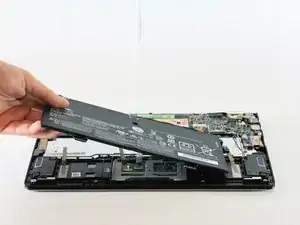
    • Carefully remove the battery from the laptop.

    • Make sure that all wires still connected to the laptop are out of the way and not pulled out with the battery.

    Along the right edge of the battery, there is a channel with wires running to a connector next to the battery connector. It works better to disconnect that connector too and fold the battery to the right.

    alan -

    Re: the above “fold the battery to the right” comment: If all you’re doing is replacing the touchpad, the “fold over” method works as it keeps the wires in the channel. If you’re replacing the battery or whatever those wires connect to, obviously that won’t work.

    alan -

  5. qimJ5k6bdr6INWjK
    qimJ5k6bdr6INWjK
    GUSXuAde5R1OCdnw
    CieUN3gr5pHn5GfO
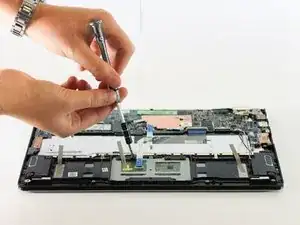
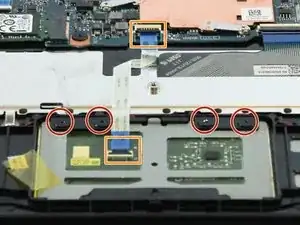
    • Remove the four 4mm Phillips #1 screws holding the touchpad onto the laptop.

    • Use a spudger to lift up the two black tabs on the ZIF connectors and then pull the cable out by the blue tab.

    • The cable should slide in and out effortlessly. If there is resistance when pulling the cable, double check the black tabs.

  6. TEqXcITYxLXDLmAy
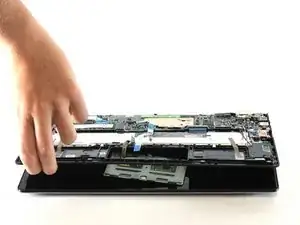
    • Slightly separate the two halves of the laptop with one hand and slide the touchpad out from the laptop with the other.

    • There may be silver tape holding the touchpad to the laptop. You do not need to replace the tape when reassembling the device.

Abschluss

To reassemble your device, follow these instructions in reverse order.

Sean Wong

Mitglied seit: 06/10/16

859 Reputation

Ein Kommentar

The “Tools Required” section says “Torx T7” but Step 1 lists, and (more importantly) the actual device has Torx T5 screws.

Step 5 suggests using a spudger, so perhaps that should be listed too.

alan -