Einleitung

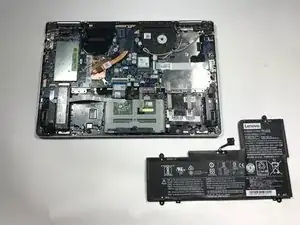
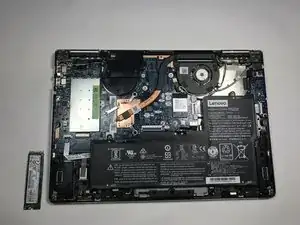
This simple guide will show you how to unscrew and remove all cables from the motherboard of a Lenovo Yoga 710-14KB besides the display cable, which will need to be unsoldered.

  1. kChZtk6LroZc6IPB
    • Ensure your device is completely OFF before starting this guide.

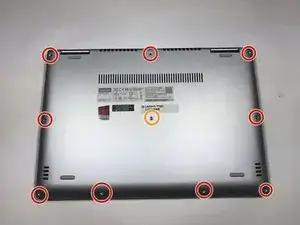
    • Use a Torx T4 screwdriver to unscrew the nine 5 mm screws holding the cover in place.

    • Use a Torx T4 screwdriver to unscrew the 8 mm screw in the center.

    • When, reassembling, make sure not to tighten the screws too much or you may risk cracking the plastic cover.

  2. VIJmpowuxHAU4ny2
    VIJmpowuxHAU4ny2
    hHUtHNSiWAutT3po
    yjYeZmFvbMOIDjFK
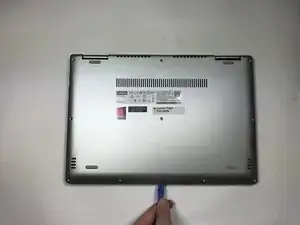
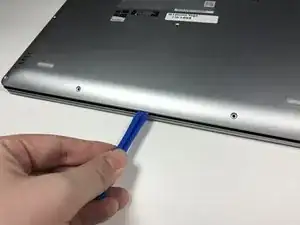
    • Use the plastic opening tool to pry the cover up and away from the laptop, starting at one end and working your way around the cover.

    • The cover is large and flat and made of thin plastic. It cracks easily, so make sure not to pry too hard.

  3. Rqxe5g5ODfRvFmcZ
    Rqxe5g5ODfRvFmcZ
    BpMthSlCaApxuAJZ
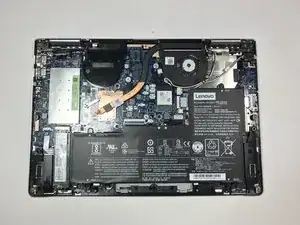
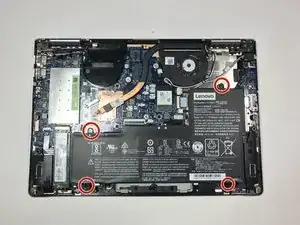
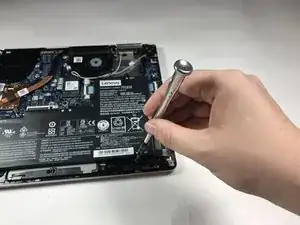
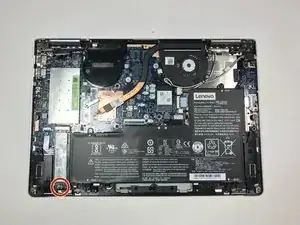
    • Use a Phillips #00 screwdriver to remove the four 3 mm screws holding the battery in place.

    • Be careful not to cross-thread the screws. Also, don't let the screws fall down into the laptop case.

  4. 6FW4Jb22b6AjnqrC
    6FW4Jb22b6AjnqrC
    y6wbOKAXniNN6nbf
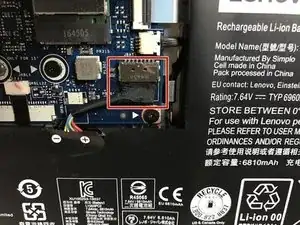
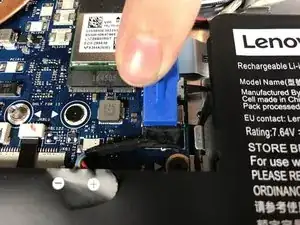
    • Use your fingers or an opening tool to slide the battery connector out of its motherboard socket.

    The connector slides out of the metal housing, not up from the board.

    Matthew Karmel -

    Thanks for the comment! I’ve corrected the step.

    Arthur Shi -

  5. vVeZeSsnHrNIWyeX
    • Remove the battery.

    i just bought a battery for my lenovo yoga 710-14ikb from ifixit..and now battery is not detected.

    jeffrey orr -

  6. oCY46Wye4PCXXkOm
    oCY46Wye4PCXXkOm
    BmFXCunMsPpvLmNL
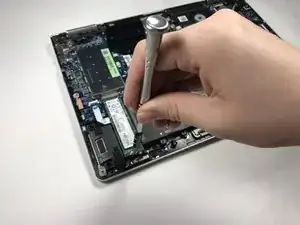
    • Use a Phillips #00 screwdriver to remove the 3mm screw on the SSD.

  7. q4324X1yWYTIKQBa
    q4324X1yWYTIKQBa
    oDLTmxyUdCbojZZE
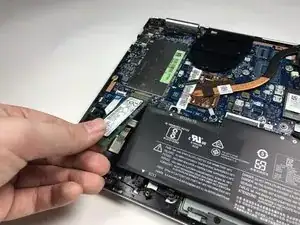
    • Use your fingers to lift up the SSD and pull away from the socket removing it from the laptop.

  8. FggbjU6OaAYnyuAo
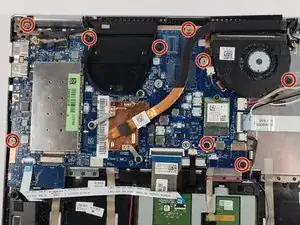
    • Use a PH00 screwdriver to remove the nine 3mm screws.

  9. JpSgw6vIVJbaRCYh
    JpSgw6vIVJbaRCYh
    4tnpP53MpZ2ZUR5U
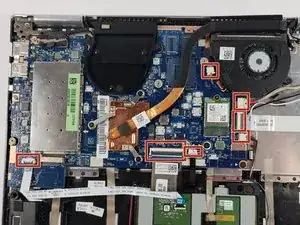
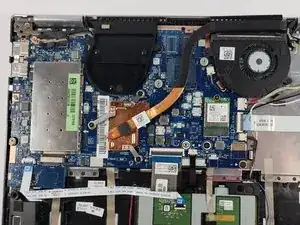
    • Disconnect the indicated cables from the motherboard.

    • Be careful when removing cables. Do not pull or yank cables from their slots.

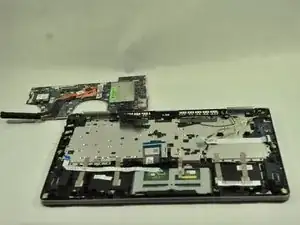
    • Remove the motherboard.

    • If you want to fully remove the motherboard, you must desolder the display cable.

Abschluss

To reassemble your device, follow these instructions in reverse order.
Evan Cruzen

Mitglied seit: 01/11/18

253 Reputation

0 Kommentare