Einleitung

This guide is useful for broken, inefficient, or defective fans within a Lenovo Yoga 710-15IKB. For loud or overheating fans, use this guide after confirming that dust is not the cause for fan issues.

  1. NXFpoZRYK4m5PiQO
    • Ensure your computer is completely OFF before starting this guide.

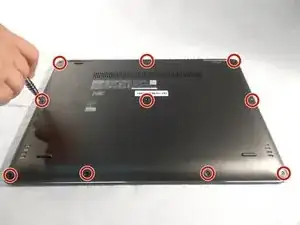
    • Remove the ten 3.3 mm T5 screws from the base cover.

    • The screws aren't all the same length. Be sure to keep the screws sorted as you work.

    ¿Son Vdes. conscientes de que están haciendo una mala traducción del inglés? Están traduciendo “remove”, que en castellano se traduce por retirar, como remover, que en inglés se traduce por “stir”. No aconsejo remover los tornillos ni las baterías.

    stuart.medina -

    Be cognizant of which screws come from which locations. I did not notice that three of the screws were longer than the others. I ended up reinstalling mine along the hinge side of the back cover.

    jcorrell68 -

    Thanks for the tip! I’ll add that into the guide.

    Arthur Shi -

  2. QlnFtxWwW2FaCViE
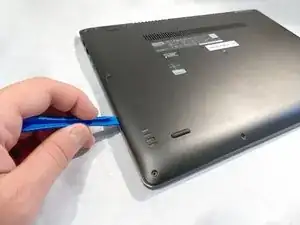
    • Slide an opening tool between the base and back cover and work your way around the entire device to release the back cover.

    Wow, this is extremely difficult. Wondering why Lenovo didn’t provide small grooves to simplify this process. This is my first and last time purchasing a Lenovo. I’ve experienced so many issue with this laptop

    Feleisa -

  3. OmvQpWs3CrTtjFag
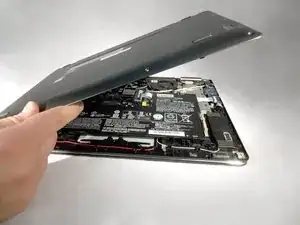
    • Lift and remove the back cover.

  4. k4YkyUuCxxUuMUnJ
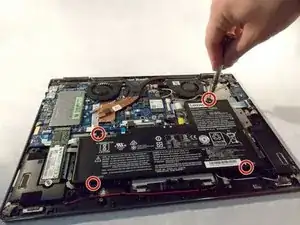
    • Remove the four 3.5 mm screws around the battery using a Phillips #1 screwdriver.

    The ones in mine were a Philips #1

    Phil -

    The screws securing my battery were also PH1. Be careful as it would be extremely easy to strip the heads on these screws using the incorrect size.

    jcorrell68 -

    Thanks! I’ll update the step to reflect this.

    Arthur Shi -

  5. EA2WDmIKtGrWYLdM
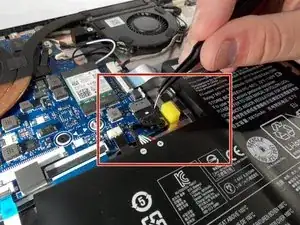
    • Disconnect the battery by pulling its cable away from the hinge with a pair of tweezers or your fingers.

    There is no latch or anything. Just pull it out gently towards the battery.

    Brian Sheppard -

    I had to put a bit of elbow grease and patience into this step. Looking at the replacement battery as reference help to understand what would work best

    Feleisa -

    This step made me nervous! I wasn't sure how much elbow grease to use. It took a good firm horizontal yank, holding the cord near the plug. It's probably not a good idea to yank it by grasping the battery.

    Kyrsten Wilson -

  6. iRdiMHdXEtbsOQNE
    • Gently lift and remove the battery.

  7. mllXsoudBWlKZT46
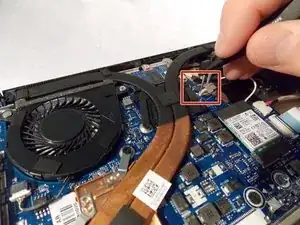
    • Use tweezers to grab the fan harness.

    • Gently pull the harness to disconnect from motherboard.

  8. aOLmRL6J1WNCCSDG
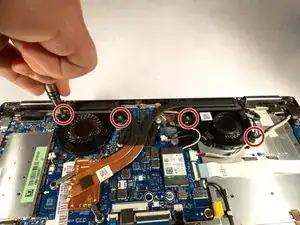
    • Use a Phillips #1 screwdriver to remove the four screws holding down the fans.

Abschluss

To reassemble your device, follow these instructions in reverse order.
Stephanie Alexander

Mitglied seit: 28/09/17

622 Reputation

0 Kommentare