Einleitung

This guide shows you how to replace the Lenovo Yoga 720 15-IKB (88YG7000828‎) battery. Batteries tend to wear out over time, so if your battery isn’t holding a charge as long as it should, you might need to replace it. Refer to the troubleshooting page for more information about symptoms.

  1. vFEwIFZ3MVTH1nnn
    vFEwIFZ3MVTH1nnn
    TufvlOlR6gIHLoDs
    eJpPegArgcoHKc3r
    • Power off the device before starting.

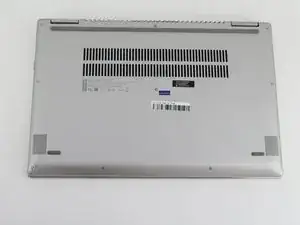
    • Flip the device over with the hinges facing away from you.

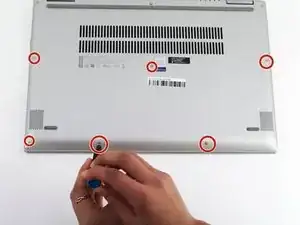
    • Remove seven 5.0 mm Torx T5 screws.

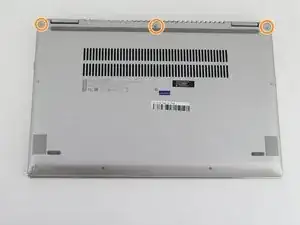
    • Remove three 9.5 mm Torx T5 screws.

  2. C3gcIiqxUYFsnUCL
    C3gcIiqxUYFsnUCL
    JWcuvryfEdQwmrLU
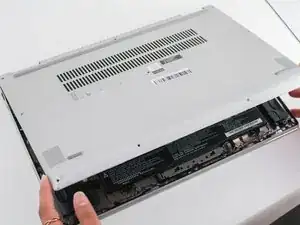
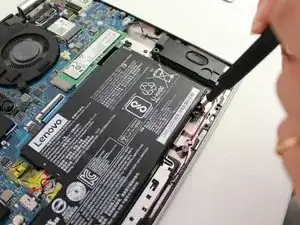
    • Pry around the edges from one side to another with a plastic opening tool.

    • Do not pry on the side with the hinges because this can break the cover.

    • Lift the case from the front until you feel resistance.

    • Do not keep lifting after you feel resistance, or the bottom cover can break.

    • Pull the cover towards you, away from the hinges.

    • Completely lift off the cover.

  3. AUGRSDAuVRyQGx3H
    AUGRSDAuVRyQGx3H
    YGpJHrvULjuapra2
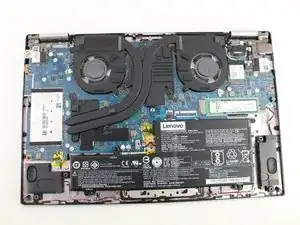
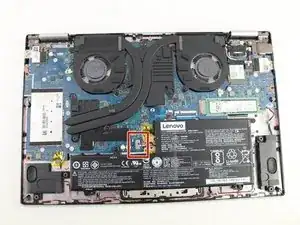
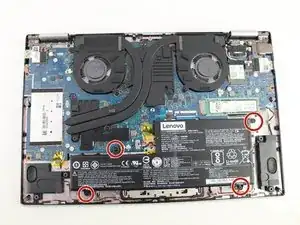
    • Remove the four 4mm screws surrounding the battery with a Phillips #0 screwdriver.

    • Each is marked by "M2x5" with a small white arrow pointing to the screw itself.

  4. VlRyy5DU4MXddOkc
    VlRyy5DU4MXddOkc
    Qh1TEoECYBoNOHhh
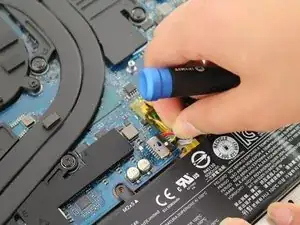
    • Pull firmly on the battery connector to disconnect it.

  5. hZNsXA2HbVB3jH11
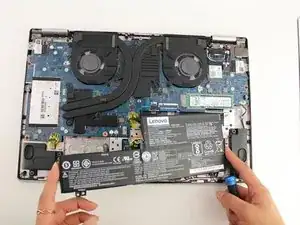
    • Lift the battery out of the case to remove it.

    Before installing the new battery. I recomend doing a battery drain, hold the power button for 30 seconds to discharge any capaciters.

    I ran into an issue where once i pulled the battery out and tried to put either the new or old battery back in. When i would try to turn the laptop back on with the power switch, the keyboard back light would blink every few seconds and nothing would come on the screen at all. Doing a battery drain between pulling a battery and puting a new one in fixed the issue.

    Ryan McLaughlin -

Abschluss

To reassemble your device, follow these instructions in reverse order.

Matthew Bornhorst

Mitglied seit: 23/01/20

420 Reputation

2 Kommentare

Excellent guide. Made the job a snap. Especially identifying the screwdriver bit requird.

James Smith -

Good guide. Fairly easy project. Getting the battery connector back in on the replacement battery was by far the hardest part. Be patient with it. It took me a few tries, but it slid in fairly easily once it was all lined up correctly.
Mark Haakenson -