Einleitung

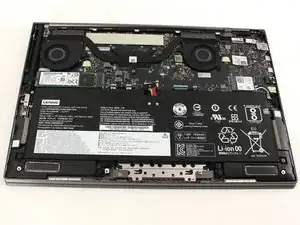
If you are having Wi-Fi problems and none of the solutions found on this troubleshooting page work, you may need to replace the physical Wi-Fi card in your Lenovo Yoga C930-13IKB. The only Wi-Fi card that is compatible with the Lenovo Yoga C930-13IKB is the Intel 9260 Wi-Fi card. Do not install a different Wi-Fi card.

Before buying a new card, check if all the wires are connected to the Wi-Fi card currently in your laptop. Poor physical connection to the motherboard or antenna will cause Wi-Fi problems.

  1. PGwdSeNHuIIRRAXY
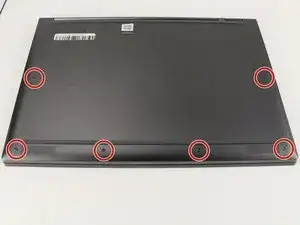
    • Flip the device over so that the underside is facing up.

    • Remove the six 3.5 mm T5 Torx screws.

  2. FiWHDiuuINDJFtQr
    FiWHDiuuINDJFtQr
    t5ZLbWjWV6hmBpOI
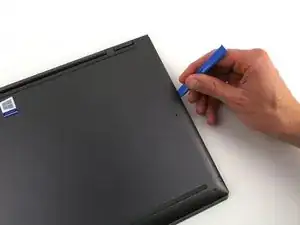
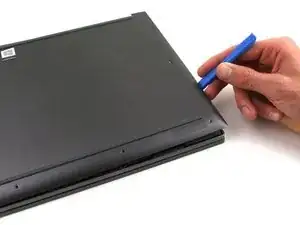
    • Pry off the back cover using the plastic opening tool.

    • Loosen the back cover in multiple spots using the opening tool, then remove the whole back.

    • You may have to run the plastic tool along the edges until you find a small gap to separate the back cover from the laptop.

    • Do not use a metal tool when working with your device.

    The gap is so small that I wasn’t able to insert anything to pry the cover up. The suction cup tool lifted the cover off easily.

    Thomas Capobianco -

    There is a very convenient spot to begin the prying process. Up by the hinge, where the metal back turns in perpendicular to the edge to get around the hinge mechanism, there is a gap between the cover and the rest of the laptop where it can be pried up easily. From there it is easy to run a tool and widen the gap all the way around.

    Alex Yantis -

  3. DeoIJJRpX2hNONcY
    DeoIJJRpX2hNONcY
    k1uvqt3b2ScVvJ5s
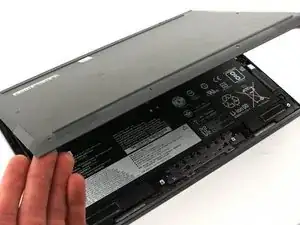
    • Carefully lift the cover off with your hands.

  4. pYH16T6NMxLJScyS
    pYH16T6NMxLJScyS
    tBXnMWp13hAZUhdd
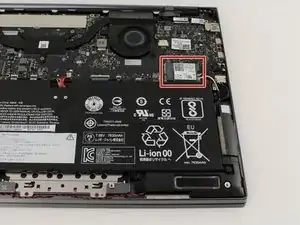
    • Find the Wi-Fi card located on the right just above the battery. It is a green chip with a white label that says "Intel 9260" somewhere on it.

  5. 3aYlQGWXlnCSmbEW
    3aYlQGWXlnCSmbEW
    eGKiR5vq5ee2RJRr
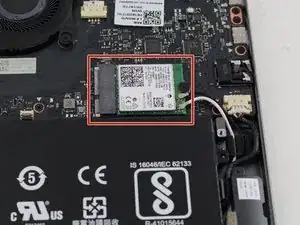
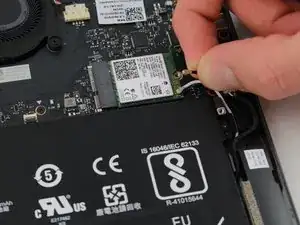
    • Use a Phillips #00 screwdriver to remove the single 2 mm screw that attaches the card to the motherboard.

    This step is not needed unless you are transferring the card, the post that it is attached to is fixed to the main board not the case.

    imark7777777 -

  6. YrtCUmVa4E3eFFbM
    YrtCUmVa4E3eFFbM
    qOXqAbiyYPEVZ1He
    GNDmBLTor5etCdLR
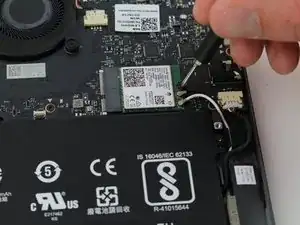
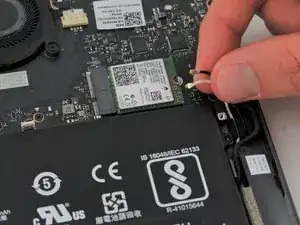
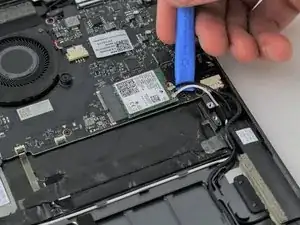
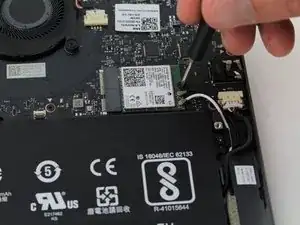
    • Gently pull or use the iFixit opening tool to detach the black and white wires from the card.

    • When reassembling, these wires are difficult to reattach, so be patient. Line the wires up with your fingers and press down on the connections with the opening tool.

  7. kIgi5plVlkZAAhPX
    kIgi5plVlkZAAhPX
    R4Y5PUHQMq3YtbBt
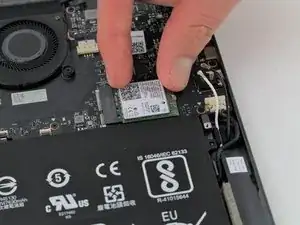
    • Pinch the card on either side and pull to the right to unplug it from the motherboard.

    Again unless you are transferring the card it does not need to be removed as it is fixed to the main board.

    imark7777777 -

Abschluss

To reassemble your device, follow these instructions in reverse order.
Jessie Boucher

Mitglied seit: 23/01/20

277 Reputation

0 Kommentare