Einleitung

  1. TFCqsMnEXfVtFqHT
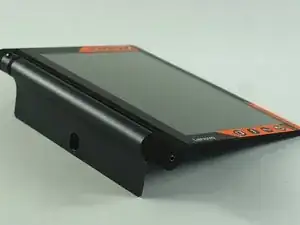
    • Klappe den eingebauten Ständer aus.

  2. Tl2Pfk4toNRLpZ5A
    Tl2Pfk4toNRLpZ5A
    CFbtiXi3pgk6vwtR
    oJdGFSBDZrIXmsXe
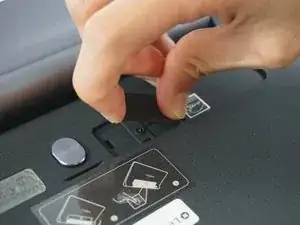
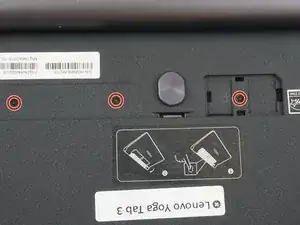
    • Entferne den Aufkleber unter dem eingebauten Ständer, um die beiden 0,75 mm Schrauben freizulegen.

    • Entferne die Abdeckung über dem microSD-Kartenslot. Wenn eine microSD-Karte eingesetzt ist, entferne sie.

    • Entferne die drei 00,75 mm Schrauben mit einem Kreuzschlitzschraubendreher.

    On 3 plus model the third screw is not under microSD card but rather under a small sticker on the right side. Plus has longer battery.

    George -

    on the Tab 3 plus , the third screw is not under the sd card but a little further over under another sticker and is painted white

    dan o brien -

  3. yVF45qKSubHrYrZH
    yVF45qKSubHrYrZH
    4RGONwjDhHHduEnv
    UIJQgTfd6e12AOcU
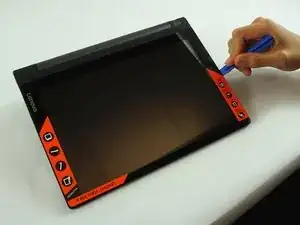
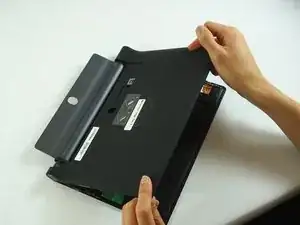
    • Drehe das Display zu dir.

    • Schiebe ein Öffnungswerkzeug vorsichtig in die Naht zwischen Display und Rückabdeckung und trenne die Rückabdeckung sanft vom Geräterahmen.

    • Löse die Rückabdeckung weiter vom Rahmen, indem du das Öffnungswerkzeug einmal um das Gerät herum arbeitest.

    • Du braucht einige Kraft, um die kleinen Clips zu lösen, mit denen die Rückabdeckung gehalten wird.

    On some models there is glue pad under the sim/sdcard tray.

    Ervins Stepanovs -

    Ein Hinweis auf den Federrahmen an der Kamera wäre nützlich. Er ist sehr empfindlich. Ich habe ihn beim Öffnen zerstört und jetzt stellt die Kamera nicht mehr scharf.

    Thomas Spieker -

    Hallo Thomas, tut mir leid, dass deine Kamera nicht mehr schart stellt. Aber die Anleitungen funktionieren wie Wikipedia: Wenn du mehr Infos hast, stelle sie gern allen anderen zur Verfügung!

    Fabian Neidhardt -

    (at least on the Plus model) the most difficult plastic clips are near the micro-SD/SIM. So it is easier to release the other side, where the camera not is. or pull the casing "down" towards the battery/stand.

    Hans Wurst -

  4. X5ukkDjWqikAAJrI
    X5ukkDjWqikAAJrI
    VbOyBPHabQPDAGKx
    tvTZ5BWIlQGRtJDU
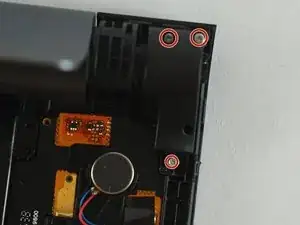
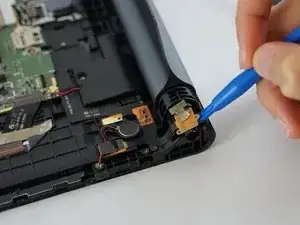
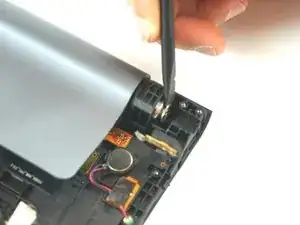
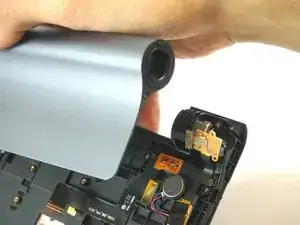
    • Entferne die drei Schrauben, mit denen die Abdeckung über dem AUX Anschluss befestigt ist und hebe sie ab.

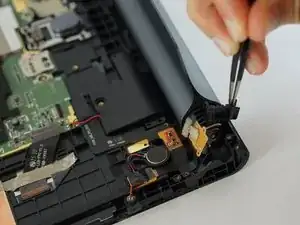
    • Ziehe das Modul behutsam zurück und schiebe es aus dem Weg.

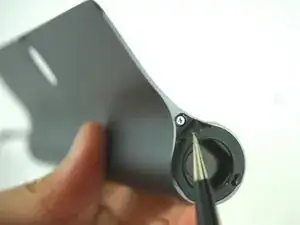
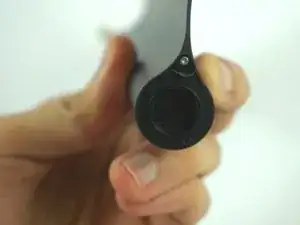
    • Entferne das Kunststoffteil gegenüber des Scharniers.

    In some versions there is only 2 screws (top left and bottom) and the cover is now integrated with step 3 plastic block as one piece. Australian version.

    Amelia Filmer -

    From where do I buy the battery?

    Aneesh Grover -

    I could not find the right battery for my 3 Plus and ended up buying cells and re-soldering them into a new battery. Bought 3 of Panasonic 18650 Li-ion NCR18650G Japan 3600mAh 3.7V from Orbtronic. Used a process similar to described in this video to rebuild the battery - https://www.youtube.com/watch?v=ZXiMgPBA...

    George -

  5. u3QJEwQHqpEtFcTe
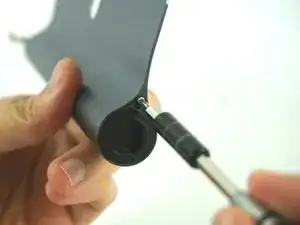
    • Blockiere den Schließmechanismus mit einem Spudger.

    as shown in the picture, the kickstand must be closed all the way in order to extract the locking mechanism far enough to remove the battery!

    Bryan Jurish -

  6. qGsNSHfirduVTvCQ
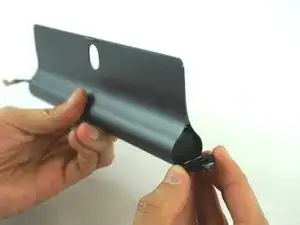
    • Hebe das Akkufach hoch und löse es ab.

  7. otXKpKeAoRZcdrAE
    otXKpKeAoRZcdrAE
    jioNMcmvuJ56LQxo
    • Ziehe mit einer Pinzette das Klebeband über der Schraube ab.

    • Wenn deine Pinzette sehr scharf ist, dann achte darauf, dass du nicht den dünnen Aufkleber beschädigst.

    Booking to battery

    Akshai Roy -

    This Instruction is good. Step 5 isnt as easy as described. Its difficult to get the locking mechanism out, also not easy to get it back in again. I am a computer technician and needed 20 Minutes, 5 Minutes as described is way to short.

    Guido Schmitz -

    Hi, how we disconnect the cable from the tablet on the other side ?

    Manuel GRILO -

    I used this you tube video to remove camera and disconnect cables on my 3 Plus version. Don’t use the brute force to remove the battery on the cables side as shown in that video - cables can be damaged. Work out the hinge as recommended here this is the right way!

    George -

  8. bWKeGUEuMVfqF5Yw
    • Entferne die Kreuzschlitzschraube.

  9. xJZwsnE261dhCcRr
    xJZwsnE261dhCcRr
    aQB2DrWTlm12rYS3
    S6CAVKySw1hXH4WH
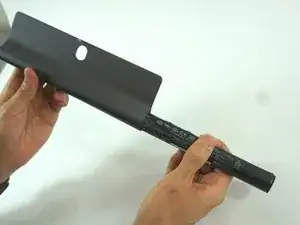
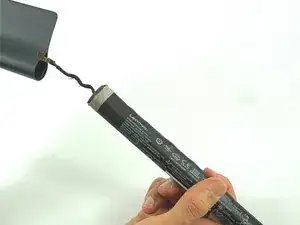
    • Öffne den Deckel und entferne den Akku.

    • Achte beim Ausbau auf das gegenüber liegende Anschlusskabel.

    I also had to remove the metal cover on the upper left-hand side of the mainboard (directly under the camera) in order to safely remove the battery cable; it’s also helpful to disengage the camera lock (see “camera replacement” guide) and remove the camera+battery cable guide to make it easier to fiddle the cable out of the housing.

    Bryan Jurish -

    I would love a tutorial on how to remove and replace the power button? Does anyone know a link please..cheers

    Carmel Lacy -

    Die Anleitung ist gut, es fehlt bloß das lösen vom Bateriekonnektor und das lösen der Spange

    Markus Brandenburg -

    How hard should it be to remove the battery pack from the hinge?

    Mine just won't seem to budge.

    Xander Squier -

Abschluss

Um dein Gerät wieder zusammenbauen, folge den Schritten in umgekehrter Reihenfolge.

Phanudej

Mitglied seit: 20/02/17

1166 Reputation

17 Kommentare

Very good. Nice operation. For me it takes 10 minutes for get the battery out the device and 4 minutes to replace all. Thanks!!

Adriaan Velleman -

Seem to be missing the step where you disconnect the battery. That seemed real important as I'm sitting here with the tablet in bits trying to see how to do that bit.

matt hoppo -

Matt, I just pulled mine apart and the problem might be that you have a different revision of your tablet. Mine had three screws on the backplate but one of them is next to, not in the sd card slot, and there were only 2 screws on the “aux port" (speaker for me) not three.

If so, I had to remove the camera module to get the battery cabling free, it is threaded through a shared camera/kickstand bracket that looks permanent. Removing the camera was creepy, it takes more force than I like, but doable:

Pull the camera wiring harness from the motherboard, unscrew, I'm my case, everything in that area, I have broken enough stuff because of missed screws. The camera itself has 2 screws holding it down via the same plate that the battery cable snakes through. After that it's just a lift/pry thing until the module pops out.

Wish I could put up some pictures but I don't see a way, hope this helps you or anyone else. This tablet is easier to get into then most, but it would be easy to fubar on this if not careful.

rfrostling -

Hi, I have a problem with the battery of lenovo yoga tab 3 10.1 and need a replacement for it. Could any one please let me me know where I can get the battery?

Prasad -

I have the same problem. Where to find the battery for YOGA Tablet 3 PRO 10 YT3-X90F 32GB, ASIN B015MOQP02 on Amazon. Many thanks
Fabio Ciolli -

@Matt You can get the battery wire out by gently moving the camera cable out of the way and feeding the battery cable through the hole.

Amelia Filmer -

Thank you for this. Lenovo was very sneaky on this one using super strong clips and making sure to hide the screws well. (EDIT: To be fair I only used this info for getting into the tablet to replace the charge port)

Kyle -

hello, and the model with projector?

Harris Goulimis -

I've got a b8080-f that won't power on. It shows as zero percent full and sits for hours without taking a charge. Is a new battery likely to resolve this?

Aidan Bree -

If the computer functions while connected to power, yet dies immediately when disconnected and will not hold a charge, a new battery would likely resolve the problem.

Austin Blakely -

Bonjour,

Est-ce identique pour le modèle avec vidéoprojecteur ? (Lenovo Yoga Tab 3 Pro YT3-X90F)

matitia33 -

Where can I find a battery

topher_gab -

Es gibt den Akku nicht zu kaufen, dann könnte ich mir das Ganze sparen

Günther Dorscheid -

https://www.aliexpress.com/item/32851379... searchweb0_0, searchweb201602_, searchweb201603_

reset67.tom -

icant see any screws to undo

jenmango23 -

This needs to include which models this tutorial covers since there are more than 1 version of this tablet.

Thomas Robinson -

Hi, have you a trust website to buy a real functional battery?

tonton polak -