Einleitung

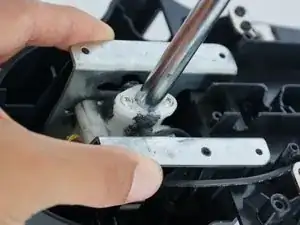
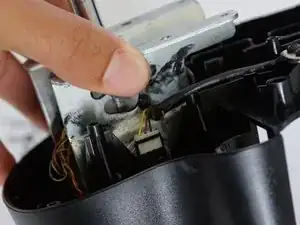
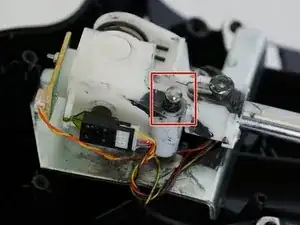
Wenn die Schaltung in deinem Logitech G27 Lenkrad nicht mehr funktioniert, hilft möglicherweise ein Austausch des Potentiometers im Inneren. Mit Hilfe des Potentiometers kann das Lenkrad feststellen, welcher Gang grade eingelegt ist. Der Austausch ist nicht sehr schwierig, es müssen nur eine Menge von Schrauben ausgebaut werden.

  1. nfGS5qqvVeCKdyEO
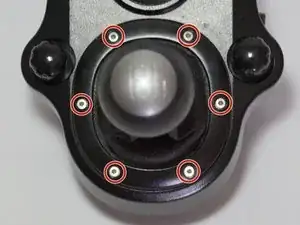
    • Entferne sechs 9,0 mm Schrauben mit Hilfe eines 2,5 mm Inbusschlüssels.

  2. Hfg1y5I3SALhGiC6
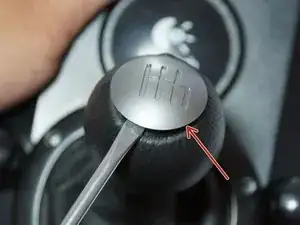
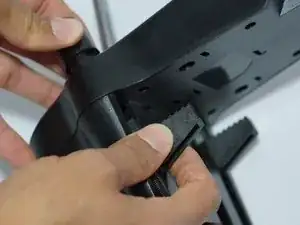
    • Löse die Kappe auf dem Schalthebel mit einem Flachschraubendreher oder einem Öffnungswerkzeug aus Kunststoff ab.

  3. TnXkPIh6UMdiDXDS
    TnXkPIh6UMdiDXDS
    MrcCibEZyEGshfb1
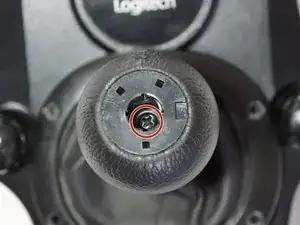
    • Entferne die schwarze 12,3 mm Kreuzschlitzschraube #1 innen im Schalthebel.

    • Ziehe dann den Schaltknauf und die Abdeckschürze nach oben und entferne sie.

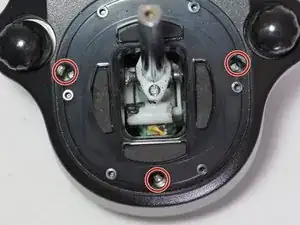
    • Entferne die drei 15,6 mm Kreuzschlitzschrauben #1.

    And remove the three 15.6mm screws with a Phillips #1 screwdriver.

    Marco van 't Wout -

    seconded, please add the 3 “missing” screws into the guide. Almost started to try and pry the cover off with prying tools.

    Ruben Kristensen -

  4. 6YETxgRNfNnCv2tZ
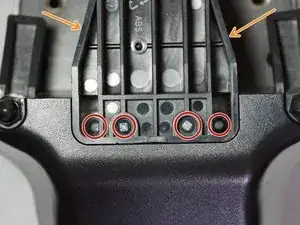
    • Drehe das Gerät herum und entferne vier 15,6 mm Kreuzschlitzschrauben #1.

    • Ziehe die untere Halterung nach oben aus der Schalteinheit heraus.

    The screws on the far left and right are too tight! What do I do?

    Ethan Fleming -

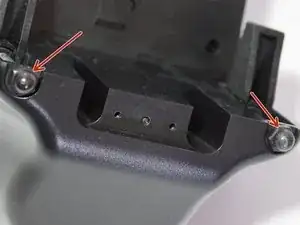
    This step isn't necessary.

    Adam Clarke -

  5. LUKfXHEEVLteJlpG
    LUKfXHEEVLteJlpG
    uxqr3vf3QBZppBS1
    ar6PlUaIg462AqXA
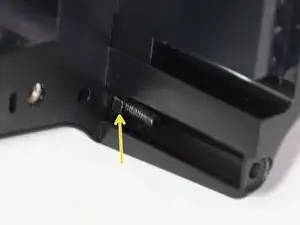
    • Entferne die beiden 10 mm Muttern mit einem geeigneten Werkzeug.

    • Halte den Teil des Schalthebels fest, schraube das obere Teil ab und entferne die Klemmen.

    • Entferne auch die Mutter, wenn du es vorher nicht schon getan hast.

  6. HYYSIhXwsdtRqXcC
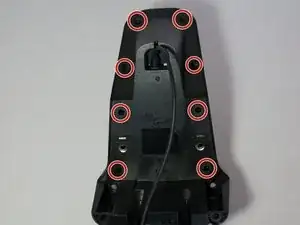
    • Entferne die acht schwarzen 11,9 mm Kreuzschlitzschrauben #1 vom Gehäuseunterteil.

  7. IEOEsLTthutrn5uE
    IEOEsLTthutrn5uE
    F3slHlZImbJB2T4e
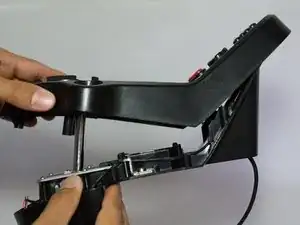
    • Entferne das Gehäuseoberteil behutsam vom Unterteil.

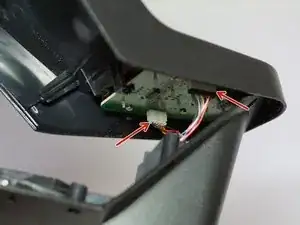
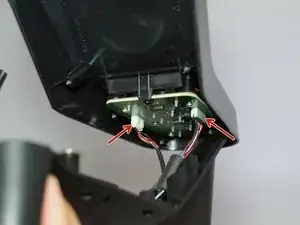
    • Beachte die beiden Kabel, die an der Leiterplatte angeschlossen sind. Beschädige sie auf keinen Fall.

    I was completely unable to seperate the top half from the bottom, and that’s with my prying at it with screwdrivers and flatheads for about 20 minutes. There are absolutely zero screws visible from the bottom so i don’t know what that’s all about. Any thoughts? other than the fact that the plastic is disfigured forever.

    Venstoma -

    After you remove the shift knob and the leather, three more screw holes become visible. You need to remove those as well (which this guide conveniently doesn’t mention).

    janhendrikman -

  8. sFEnC24Ky6Jw2PPQ
    • Entferne die beiden Kunststoffstecker mit einem Plastiköffnungswerkzeug oder deinen Fingern.

  9. JXUxUT3NN664SUAL
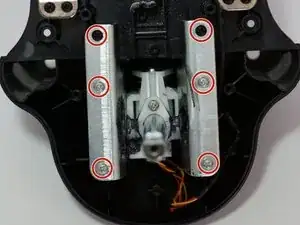
    • Entferne im unteren Teil des Schalthebels die beiden schwarzen und vier silberfarbenen 15,9 mm Kreuzschlitzschrauben #1.

  10. NvTiRXiZCfDKERYb
    NvTiRXiZCfDKERYb
    jfNKKcSdOuD4Axlp
    • Der ganze Schalthebel ist im Inneren gut eingefettet, du wirst dir wahrscheinlich beim Ausbau die Hände schmutzig machen.

    • Drücke die beiden Metallplatten zusammen und ziehe sie langsam nach oben. Die Feder in der Einheit steht unter Spannung und fällt auseinander, wenn sie nicht zusammengedrückt wird.

  11. 2MhMbMCnQ5AQM6Xo
    2MhMbMCnQ5AQM6Xo
    kOc3gfTKjNcmevCZ
    • Entferne die Schalteinheit und lege sie auf die Arbeitsfläche. Entferne dann die Metallplatte mit der eingesetzten Kugel und der Feder.

    • Das ist die schwierigste Stelle beim Wiederzusammenbau. Achte darauf, dass die Feder richtig im Inneren des Gehäuses sitzt und die Kugel darüber. Lege dann die Metallplatte obendrauf.

  12. pIVPvaVPRRidGiIL
    pIVPvaVPRRidGiIL
    YtB4aVSE46o1AnQP
    MHUdAIeXkkH3ZPtR
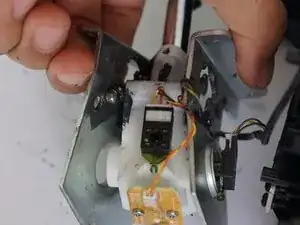
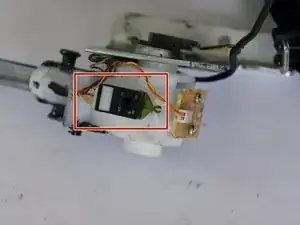
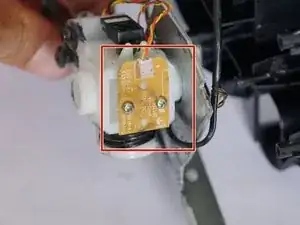
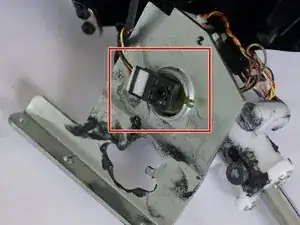
    • Nun kommst du endlich an die beiden Potentiometer an den Seiten der Einheit heran. Kontrolliere die Anschlüsse und tausche sie aus, wenn benötigt.

    Anyone knows what type of potentiometers these are? I haven't been able to source them for years now.

    Kostas Theo -

    The light brown circuitboard is for the down spdt switch to detect reverse

    Matthew Adler -

    Where do you get replacement potentiometers ? , Iv not taken mine apart to look yet , but reverse no longer works on my shifter

    bertovzki@hotmail.co.nz -

    Weet iemand waar ik de achter draadjes voor de achteruit kan vinden. Wil er een handrem bij solderen.

    Zal dat mogelijk zijn denken jullie

    Leroy l -

Abschluss

Um dein Gerät wieder zusammenbauen, folge den Schritten in umgekehrter Reihenfolge.

Nicholas Gholdoian

Mitglied seit: 21/04/15

1090 Reputation

15 Kommentare

Where can I buy replacement pots?

Riccardo Flask -

Great guide, thanks a lot for the effort. It turned out that one of the cables connecting the pot to the pcb had snapped. Just going to test now.....fingers crossed. :-)

Cheers. Andy M.

Andy Mitchell -

Hey did It work?

Levente Gergely -

I didn't even have to replace them. Only cleaning with electronic cleaning spray and move the pots fully was enough to fix it. However, and I think that was the real problem, one of the pots was damaged because the plastic pointer it has to be inplace in the assembly was broken. Only one half was in place. I used something here we call "type cleaner clay", some sort of clay not use to play but to fix things to the wall or clenaning old typewriters. Comonly blue. Other forums says damaged pots are not common, only dirty or may be, as mine broken. Easy to fix
Ricker Silva -

Has anybody found a source for these pots? I'm guessing they're proprietary? Possibly some version of CTS 252 series? Anything they can be replaced with? I've worked on a couple of these where people opened up the shifter pots trying to clean them and damaged them, and I cannot for the life of me find any replacements and I've searched high and low through every joystick potentiometer source I could find.

David Riley -

if the potentiometer is broken do the other buttons on the shifter still work?

bradhunt1 -

Hey do you know where I can get these piece for spare?

Thanks

Jennifer juarez -

Oh no! I do not know where to draw the spring.

valtsuhoo -

Could this fix my shifter problem? First and second works fine but 3 recognises it as 1. 4th recognises as second fifth as first sixth as second and reverse is first. Could this fix it?

Levente Gergely -

I had the same problem you have. I removed both pots and putted them in a cup of petrolum solvant (i used kerosene) for few minutes then put them back and the problem gone. Try to use cable tie before u bring the mechanisim out of its place so it will be easy for you to do the job.

Zeynep Cruze -

this worked for my shifter too. i got the newer one as to date, the one thats for the g920. let my lil brothers friend use it, they hit it hard and gear one did respond, but kept going to neutral, when checked in devices and printers, the button was flickering a lot. the process was not exactly the same but most of it is. when in doubt, unscrew everything anyway. I accidentally put the metal ball into where the spring was supposed to be, it got stuck. I got a drill and drilled a whole on the side behind where i got the ball stuck. that did the trick. thanks m8, ma shifter works again

Jamil ahmed -

Do I need to buy new potetiometers? Cause I cant find any, or do I just need to remove them and place them in again?

PiG_Be4sT -

Where can i buy new potentiometer such as the original one’s?

CreepyPic -

Does anyone know what kind of JST connector that is that connects to the Potentiometer? the cable of mine snapped right infront of the port and i have no idea which JST connector they are preferabbly with the Cable connected so i can just solder them together.

rw13 Bot -

Is it worth it to buy a G29 shifter and just replace the whole internals/potentiometers and connect it to the main pcb , not the g29 shifter’s pcb?

robin2012 -