Einleitung
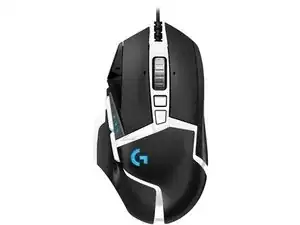
In dieser Anleitung wird gezeigt, wie du eine Logitech G502 Hero-Maus sicher auseinanderbauen kannst, um die internen Teile der Maus zur Reperatur oder Instandsetzung auszutauschen.
-
-
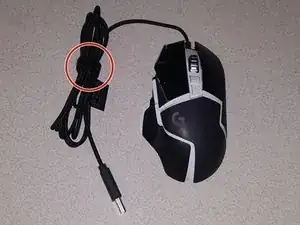
Um das Kabel aus dem Weg zu halten, wickele das USB-Kabel mit dem integrierten Klettverschluss-Kabelbinder ein.
-
-
-
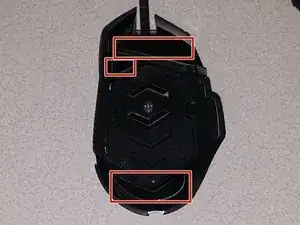
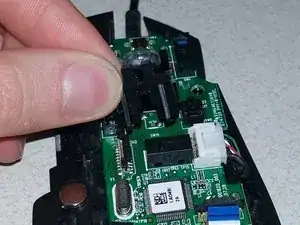
Erhitze die drei Mausfüße jeweils einige Sekunden lang mit einer Heißluftpistole auf niedriger Stufe.
-
Schiebe ein Plektrum unter den Mausfuß und den Klebstoff darunter.
-
Wenn du alles richtig gemacht hast, solltest du die Mausfüße abziehen können, ohne dass der Klebstoff abgeht.
-
-
-
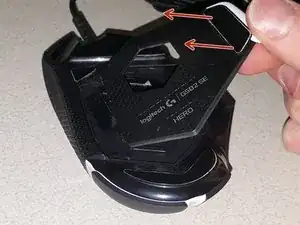
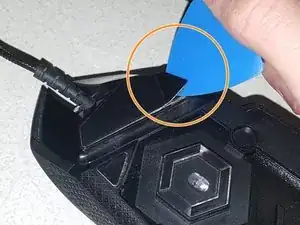
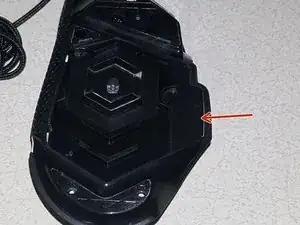
Stecke das flache Ende eines Plastikspudgers in den abgebildeten Bereich zwischen der Ober- und Unterschale.
-
-
-
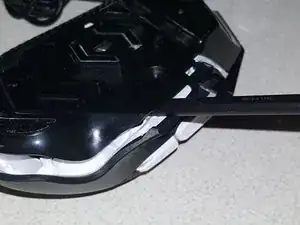
Setze das flache Ende eines Plastik-Spudgers zwischen Gehäuseoberteil und Gehäuseunterteil auf der linken Seite der Maus in der Nähe der Links-Taste an.
-
-
-
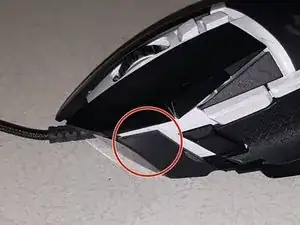
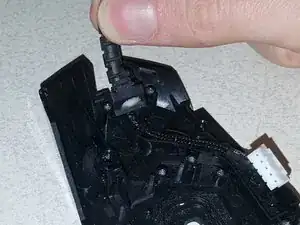
Mit dem flachen Ende des Plastik-Spudgers vorsichtig das breite Kabel aus dem Stecker lösen. Der Stecker muss dazu von beiden Seiten gelöst werden.
-
-
-
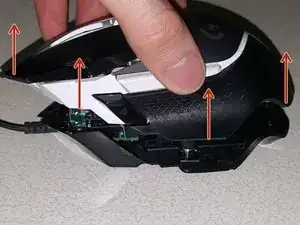
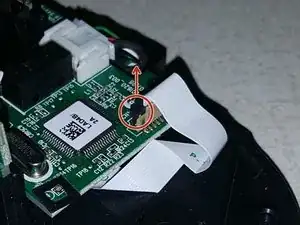
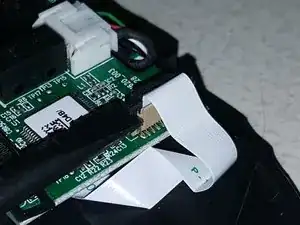
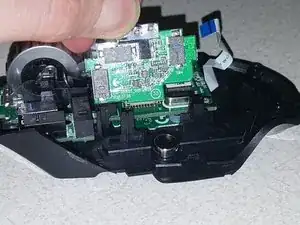
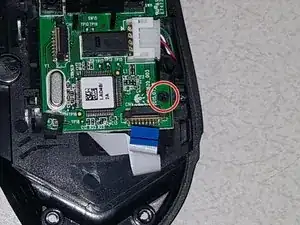
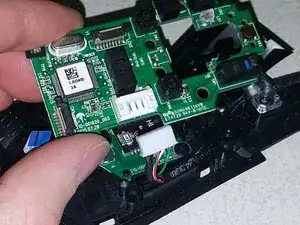
Hebe die Seitenplatine an, um an den Stecker des Datenkabels zu gelangen.
-
Mit derselben Technik wie im Schritt zuvor kann nun der Kabelstecker entfernt werden.
-
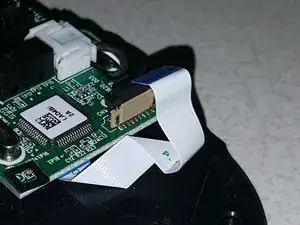
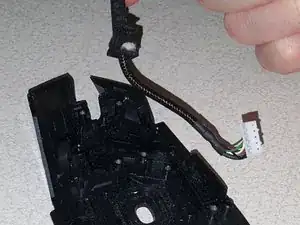
Lege die Seitenplatine samt Kabel zur Seite.
-
-
-
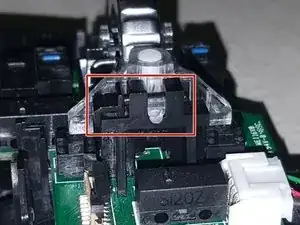
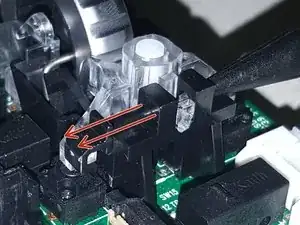
Das Scroll-Rad wird von einer kleinen Stange gehalten, die entfernt werden muss.
-
Mit dem spitzen Ende eines Plastik-Spudgers drückt man die Haltestange von der rechten Seite aus heraus.
-
Danach kann die Haltestange entfernt werden.
-
-
-
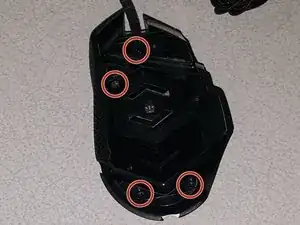
Entferne die vier Kreuzschlitzschrauben am vorderen Ende der Maus.
-
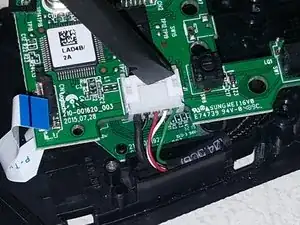
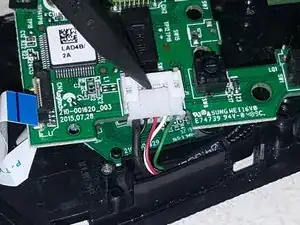
Entferne die Kreuzschlitzschraube am Kabelstecker des Hero-Sensors.
-
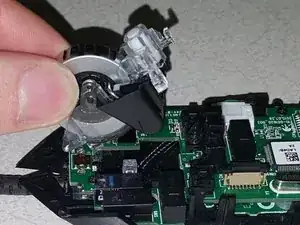
Die Halterung der gesamten Baugruppe des Scroll-Rads kann nun entfernt werden.
-
-
-
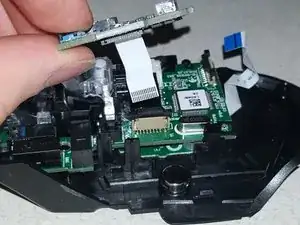
Trenne den Stecker des USB-Kabels mit dem flachen Ende eines Plastik-Spudgers von der Hauptplatine, indem du den Stecker herausdrückst.
-
Wenn genug Platz zwischen Stecker und Anschluss entstanden ist, kann der Spudger zum Entfernen angesetzt werden.
-
Entferne die Hauptplatine vom Gehäuseunterteil.
-
-
-
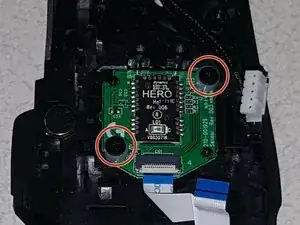
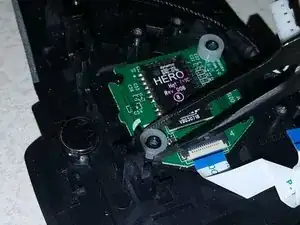
Wenn die Hauptplatine entfernt wurde, wird der Hero-Sensor zugänglich.
-
Entferne die zwei Kreuzschlitzschrauben, die den Sensor halten.
-
Entferne mit einer Pinzette vorsichtig die beiden Nylon-Abstandshalter.
-
Entferne die Platine mit dem Hero-Sensor.
-
-
-
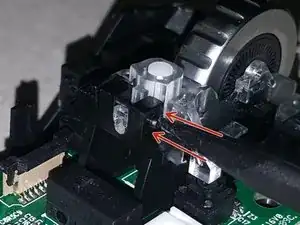
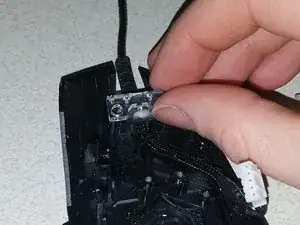
Entferne das durchsichtige Plastikstück oben auf dem Kabelzugentlaster.
-
Sobald das durchsichtige Plastikstück entfernt wurde, kann das Kabel am Kabelzugentlaster und dem Gehäuseunterteil entfernt werden.
-
-
-
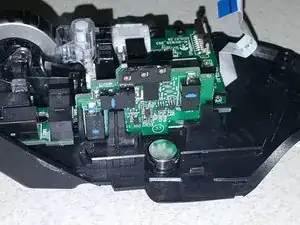
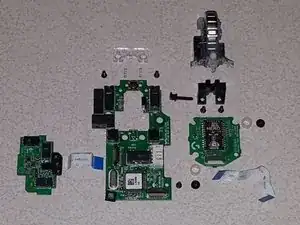
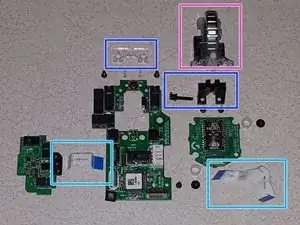
Hier alle internen Teile zur Übersicht.
-
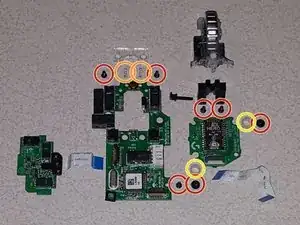
Kreuzschlitzschrauben
-
Federn des Scroll-Rads
-
Nylon-Abstandshalter (Spacer) des Hero-Sensors
-
Kabel für die Seitenplatine sowie des Hero-Sensors.
-
Scroll-Rad-Baugruppe
-
Halterung des Scroll-Rads sowie Haltestange
-


Ersetze die erforderlichen Teile und befolge dann die Anleitung in der umgekehrten Reihenfolge, um das Gerät wieder zusammenzusetzen.

20 Kommentare
What’s that button near at the spring on top. Is that a middle mouse button? (yellow button thing at the middle at the top)
You are correct, that is the middle mouse button
spslizer -
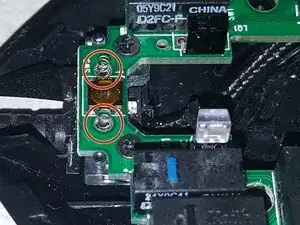
What’s a good replacement switch for the 2 main left/right buttons? They say OMRON 3159C21 D2FC-F-K
That’s a good switch to replace them with
Me personally, I like to pull the switches off of other mice, like those rebranded Logitech ones that are bundled with some computers
The G502 is easy enough to pull apart and put back together that I don't mind replacing the switches on occasion
spslizer -
Oh shoot, you have to do soldering to replace switches? Those black boxes? Yikes, may be something I dont want to mess with if so. If I can just figure out how to clean them I will try that, but if I have to replace them with soldering, I am doomed lol
@spslizer sorry I wasn’t clearer before: the switches that are on the primary/secondary buttons are the OMRON D2FC-F-K and the primary switch has failed. I’m replacing them both with Kailh GM 8.0 switches since they seemed to have a good reputation.
I definitely need to study desoldering more though, I am having a lot of trouble removing the bad switches!!
I find that the easiest way to desolder them is to heat up the existing solder, add more new solder, then use a desolder vacuum pump as close as you can to the pin while your iron is still there. If there's still a small residual amount “tacking” it on, heat up the pad around the hole and then wiggle the switch around
It helps to have a helping hands station and a pair of tweezers or hemostats to hold the switch, as the switch and pads will get hot
spslizer -