
Einleitung
Schalte die Maus aus und entferne die Batterie, bevor du diese Reparatur durchführst.
-
-
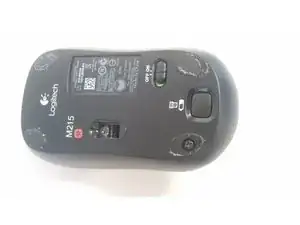
Der Batteriefachdeckel befindet sich oben an der Maus. Die Naht, welche quer über die Maus verläuft, ist der obere Rand des Batteriefachdeckels.
-
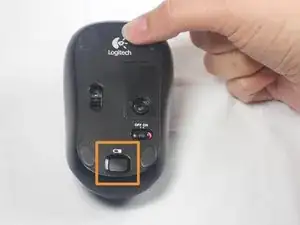
Auf der Unterseite der Maus befindet sich eine Taste, mit der sich der Batteriefachddeckel öffnen lässt. Du musst ihn eventuell recht kräftig eindrücken, damit sich der Deckel ablöst.
-
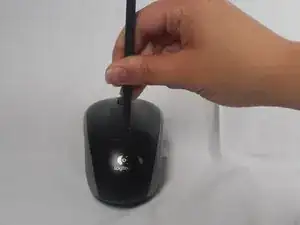
Wenn diese Taste nicht funktionieren solte, kannst du versuchen, den Deckel mit Hilfe der Fingernägel oder eines Plastiköffnungswerkzeuges hochzuheben, so wie im dritten Bild gezeigt.
-
-
-
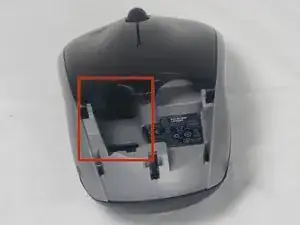
Achte beim Einsetzen der neuen Batterie darauf, dass sie die gleiche Orientierung wie die alte hat. Das positive Ende - der Pluspol - zeigt von den Tasten weg.
-
-
-
Löse die beiden Gleitfüße am dicken Teil auf der Unterseite der Maus (gegenüber den Tasten) mit den Fingernägeln sorgfältig ab. Darunter befinden sich zwei Kreuzschlitzschrauben. Entferne diese und löse die Bodenplatte ab. Achte darauf, dass die Klebeseite der Gleitfüße nicht verschmutzt.
-
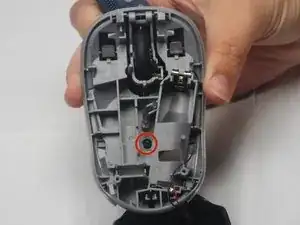
Entferne dann die Tasten. Sie sind beide mit einer 0,5 mm Kreuzschlitzschraube in der Mitte der oberen Abdeckung befestigt.
-
-
-
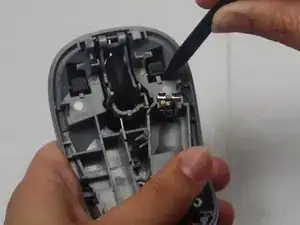
Die Tasten sind nur noch mit einerkleinen Klinke nahe der Vorderseite einggerastet. Du kannst die Tasten der Tastenplatte mit einem Plastiköffnungswerkzeug aus der Klinke herausdrücken.
-
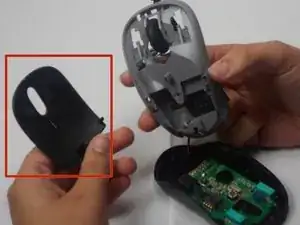
Jetzt sollte sich die Tastenplatte ganz entfernen lassen.
-
-
-
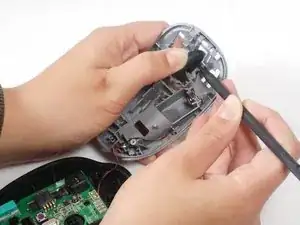
Entferne das Scrollrad mit einem Spudger. Das Rad wird mit zwei Stiften festgehalten, welche im Kunststoffrahmen festklemmen.
-

Um dein Gerät wieder zusammenzusetzen, folge den Schritten in umgekehrter Reihenfolge.

6 Kommentare
glad I was able to find this info on disassembly. Gave it a good cleaning and works better than it did before. Had the Phillips screwdriver. and used another small screwdriver and a small pocket knife to pry with. Be gentle - doesn’t look like it would take much force to break those plastic bits.
Thanks! Mouse wheel windows were blocked by lint.
Very useful. Cleaned coffee out of mouse wheel spokes/windows and off of chipboard. Works better than before. Thanks!
Probably the BROWN stuff wasn’t coffee, I too cleaned the spokes/windows. the brown stuff is oil from out hands which lands on scroll wheel, then by heat gets transferred to the spokes. touch a finger on the mirror, the fingerprint on the mirror is because of OIL on hands. it is the same oil in that mouse wheel spokes.
The battery lid lifts up from the back. It does not slide back.
Bob Peters -
U need to keep clean…& battery compartment needs gently pried off. Make sure to put back lid cover, pushing down on black prong..OR will not make contact.
cconradmoore -
Thanks to u, i succeeded
aresa0519 -