Einleitung

Nur vorbereitend

  1. ACYdKk1tahTrOWBn
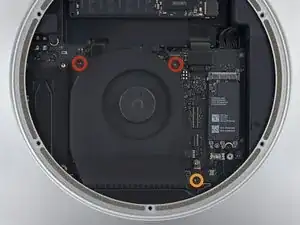
    • Entferne die zwei 12 mm T6 Schrauben vom Lüfter.

    • Lockere die unverlierbare 27 mm T6 Schraube.

    That 27mm screw should be very loose, since it attaches the motherboard to the case. When you’re trying to remove the motherboard, if the AC connection side of the board is not moving back easily, you need to make sure this screw is fully backed out from the case.

    There’s no danger in removing it completely.

    marklfarley -

    I suggest removing the 27 mm tool, otherwise Step 23 will not work.

    Arvin Bhatnagar -

    Actually you don’t need to remove 27mm from the fan. I was able to tilt a little when I take the logic board out in Step 23. I also didn’t take the fan cable too. When you pull the logic board out, put the fan on the back of logic board as you pull it out.

    Kenneth Z -

  2. Tc6N5Bx5oYZkhGD6
    Tc6N5Bx5oYZkhGD6
    fOPDPIGZhFS13ixe
    hyYPmCyjEMUGJMPj
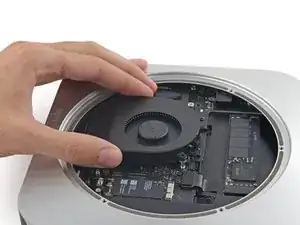
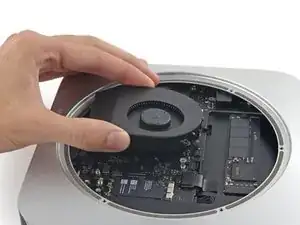
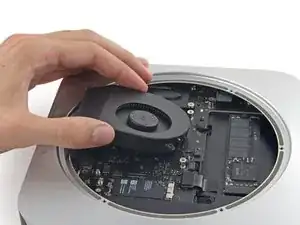
    • Der Lüfteranschluss kann nicht getrennt werden, ohne den Lüfter zu bewegen, da der Anschluss unter der Ecke des Lüfters liegt.

    • Versuche nicht, den Lüfter vollständig zu entfernen.

    • Hebe den Lüfter gerade nach oben, um die unverlierbare Schraube aus dem Logic Board zu lösen.

    • Ziehe den Lüfter von der SSD weg, bis du mühelos an den Lüfteranschluss kommst.

  3. 1ZiXtkcKkWCPJbIT
    1ZiXtkcKkWCPJbIT
    wTIdO6a4sSrNnxAq
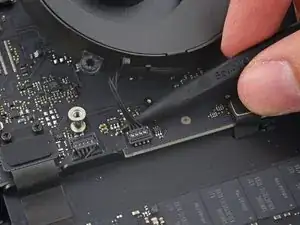
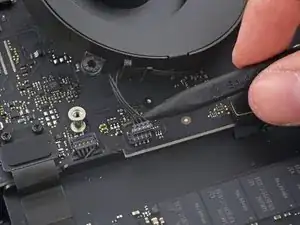
    • Trenne den Stecker des Lüfters mit der Spitze eines Spudgers von seinem Anschluss auf dem Logic Board.

    When I did this the entire socket came off the logic board. What do I do now?

    Tyler -

    I broke off the connector. More photos of the connector may help. I lifted it but the pins broke off. It took me awhile to find points on the board to solder the wires to. I got 3 of 4 wires and the fan operates.

    Beryl Sachs -

    I would suggest NOT using the point end of the Spudger but the wide end. Place behind connector (wire side) and twist gently.

    If I may be so bold as to also suggest that a torch be used for those small components/connections.

    TisMise -

    Thank you, @TisMise! I placed the wide end of the spudger on the wire end of the connector and wiggled it up. The connector comes lose up - NOT out front in direction of the wires. Hope this helps. ?

    CK3 -

    I also broke the socket off. I don’t have the ability to solder little $@$* like that. I’m sad.

    Daniel Rackerby -

    broke it… how bad is the no fan option?

    Kris Chu -

    @TisMise you’re right thanks a lot! ;)

    Stefania Izzo -

    You don’t need to disconnect the fan cable to take out the logic board. When you slip the logic board out, put the the fan behind the logic board as you push it out.

    Kenneth Z -

    Definitely use wide end.

    Peter Harrison -

    That’s it, I used a needle! After reading so much people broke it, I rejected this step instruction and put a needle between the socket and the connector. It came out fine. Good that I also fix clothes, other than computers. :)

    Seff -

    As Kenneth Z said, I just left the fan attached to the board for the entire process (I removed the screws so it was just connected with the cable). After reading all the comments, I was too afraid to try to force it and it did not come off easily. Keeping the connector on is a little dangerous because you have to be careful not to pull on that connector too much but it seems pretty robust, which is probably why it is so difficult to removed. I just slipped the fan through after I pulled out the main board assembly.

    Richard Daley -

  4. XgWWO1X4PAcylZFd
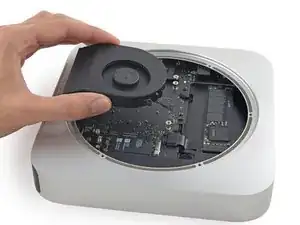
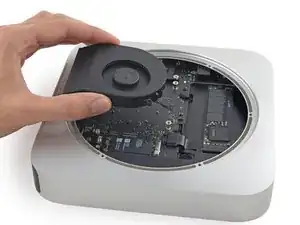
    • Entferne den Lüfter aus dem Mac Mini.

Abschluss

Befolge die Schritte dieser Anleitung in umgekehrter Reihenfolge, um dein Gerät wieder zusammenzubauen.
Sam Goldheart

Mitglied seit: 19/10/12

457712 Reputation

0 Kommentare