Einleitung

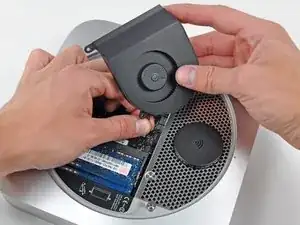
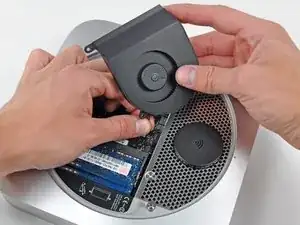
Hier wird der Austausch des Lüfters gezeigt.

  1. EHeE3OSxnGBpG5cR
    EHeE3OSxnGBpG5cR
    nrQsgSGm4FLoIsDn
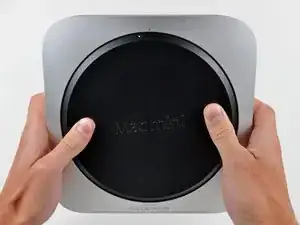
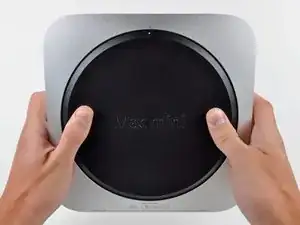
    • Lege deine Daumen in die Vertiefungen der unteren Abdeckung.

    • Drehe die untere Abdeckung entgegen dem Uhrzeigersinn, bis der weiße Markierungspunkt am Rand der Abdeckung dem kleinen Kreis am Gehäuse gegenübersteht.

  2. AK1A1wVNKrIgIRBY
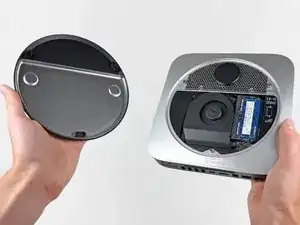
    • Neige den Mac Mini etwas, um die Abdeckung vom Gehäuse abzunehmen.

    • Entferne die Abdeckung und lege sie zur Seite.

  3. JhqtrsyiKfY64LhN
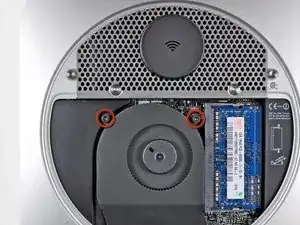
    • Der Lüfter ist mit zwei 11,3 mm T6 Torx Schrauben in der Nähe der Antennenplatine am Logic Board befestigt. Drehe sie heraus.

    There are actually 3 T6 screws securing the fan. The third screw is out of the screenshot, just below the RAM.

    inferno10 -

    Nope, that third screw is actually just a post that the rubber grommet attached to the fan body slips over. Step 4 shows how the fan comes off of it. When you go to remove the fan, you simply remove the two screws closest to the antenna plate and then lift the fan off this post. The screw you are talking about is removed in Step 14 and does not need to be removed until this point.

    Andrew Bookholt -

    Successful install completed, but I had some trouble getting the fan reinstalled. When I removed the fan from the "Step 14" post, the rubber piece stayed on the post. When attempting to reinstall the fan, it was impossible to get the loop to go back over that rubber piece. So, I had to remove the post (again), and with the help of the spudger and some patience, worked it through. Then installed the fan using the 2 screws and the post. I think it may have saved some time and trouble if I just removed all 3 in the first place, leaving the post in the fan.

    meag -

    On mine I needed to remove the 26 mm T6 Torx standoff during this step rather than step 12

    philipashlock -

    on my mid-2011 mac mini, that 3rd T6 post/screw had to be removed to get the fan out. It goes right through a hole in the fan housing. No way the grommet is slipping over anything without wreaking major havoc.

    Derek Shaw -

    On my mid-2010 mac mini, also removed the 26 mm T6 Torx standoff during this step instead of step 12. Having completed the steps, it appears my hard drive is from mid 2011, so maybe the production line for mine had changed.

    jstraath -

  4. abhjpqhOsxFfJyTB
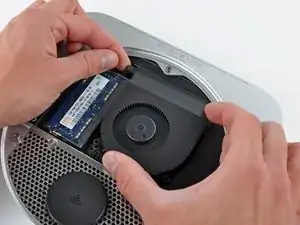
    • Hebe die Ausbuchtung am Lüfter, der dem RAM am nächsten ist, aus dem Abstandshalter am hinteren Gehäuse.

    Pulling on the ear didn't do anything, so I removed the whole screw at this step. The screw stayed fixed on the fan and I didn't have to remove it at the step where you remove the logic board screws.

    Probably I didn't want to use too much force .. but it worked

    Alexander Kogler -

    This is the approach I used. no way was the "ear" pulling over the head of the standoff without breaking something. The standoff simply unscrewed from whatever is under the logic board and stayed with the fan assembly. WAY safe

    Derek Shaw -

    Loosen the fan standoff from the motherboard using a T6 driver.

    bobcloninger -

    When I pulled the fan ear off the standoff the rubber grommet stayed on the standoff. That's fine, but it makes it difficult to put the fan ear back on during reassembly. So I just pulled the rubber grommet off the standoff and put it into the hole in the fan ear. Then I was able to push the fan ear onto the standoff with out trouble during reassembly.

    Dave Hein -

  5. 25C5Ye3RCQIpcttO
    • Hebe den Lüfter ein Stück weit aus dem Mini, um an seinen Stecker zu gelangen.

    • Ziehe die Lüfterkabel vorsichtig nach oben, um den Stecker des Lüfters aus seinem Sockel auf dem Logic Board zu ziehen.

    • Entferne den Lüfter.

    Be careful here, this is not a simple action. Pulling on the wires risks them coming out of the sockets of the connector that attaches to the pins on the board. I had to use an Xacto knife to push on the end of the connector to push it off the pins rather than pull.

    Brian -

    Actually, just sliding a spudger under the wires and edging upwards is the easiest way to disconnect this connector - and most others, too.

    Aleks Gekht -

Abschluss

Um dein Gerät wieder zusammenzusetzen, folge den Schritten in umgekehrter Reihenfolge.

Andrew Bookholt

578335 Reputation

2 Kommentare

How do you know the order of the wires when placing the 4 wires back onto the motherboard?

Communications Department -

The connector is a snap in / snap out or more properly lift out connector. The connector goes back in only one way with the 4 pins aimed towards the wifi icon. To get it out you GENTLY lift the wires. I used my fingernail under the wires as they went from the fan into the connector.
Mike Stark -