Einleitung
Nur grundständige Anleitung.
-
-
Entferne folgende drei Torx Schrauben:
-
Eine 5,0 mm T8 oder 2 mm Inbus
-
Eine 16,2 mm T6 Schraube
-
Eine 26 mm T6 Abstandsschraube
-
-
-
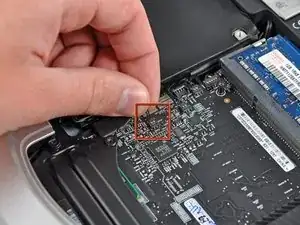
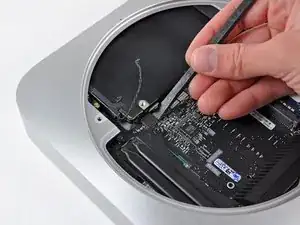
Ziehe die Drähte für die Festplatte und die Thermosensoren hoch, um die Stecker aus ihren Sockeln auf dem Logic Board zu lösen.
-
-
-
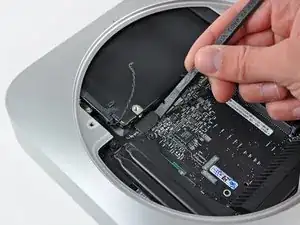
Löse die Stecker von Festplatte und optischem Laufwerk mit dem flachen Ende des Spudgers aus ihren Sockeln auf dem Logic Board.
-
-
-
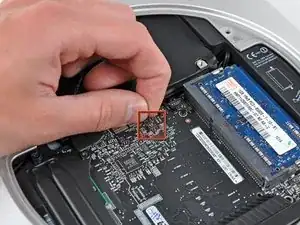
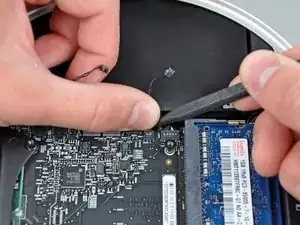
Um den Thermosensor am optischen Laufwerk zu lösen, musst du das Kabel zwischen Daumen und Spudger einklemmen, dann den Spudger nach oben ziehen. Dadurch hebt sich der Stecker aus seinem Sockel auf dem Logic Board.
-
-
-
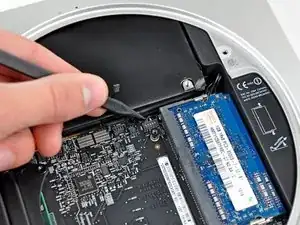
Hebe den Verbinder des Infrarotsensors mit der Spudgerspitze aus seinem Sockel auf dem Logic Board.
-
-
-
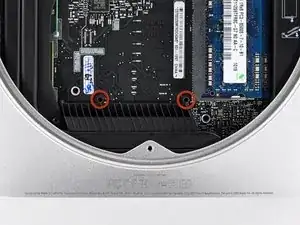
Stecke das Mac Mini Logic Board Removal Tool in die zwei mit Rot gekennzeichneten Löcher. Vergewissere dich, dass die Stäbe das Gehäuse unter der Platine berühren, bevor du fortfährst.
-
Ziehe das Werkzeug vorsichtig in Richtung des I/O Boards. Dieses sollte nun zusammen mit der Platine langsam aus dem Gehäuse herausgeschoben werden.
-
Höre auf zu ziehen, wenn das I/O Board sichtbar vom Gehäuse getrennt ist. Entferne das Werkzeug.
-
-
-
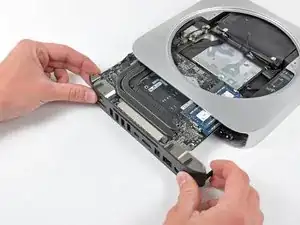
Drücke die beiden Plastikclips ganz links und rechts am I/O Board gleichzeitig nach innen und ziehe das I/O Board aus dem Gehäuse.
-
-
-
Ziehe die ganze I/O und Logic Board Einheit so weit aus dem Gehäuse, dass du an den Stromanschluss kommst.
-
Löse den Stromanschluss mit einer Pinzette vom Logic Board.
-
-
-
Schiebe vorsichtig die Einheit des Logic Boards aus dem Mini, achte dabei darauf, dass sich keine Kabel verfangen.
-
Arbeite die Schritte in umgekehrter Reihenfolge ab, um dein Gerät wieder zusammenzubauen.
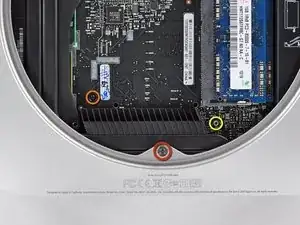
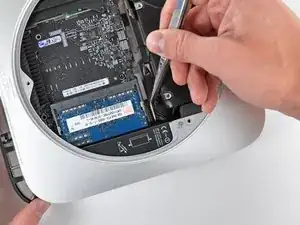

In my case, the yellow circled standoff already came out with the previously removed fan.
Sven Harmstorf -
My standoff screw was really tight and my T6 stripped the screw. :( But, because it's effectively just used as a post to stabilise the fan, I ended up using some surgical clamps, grabbing the standoff where the rubber grommet sits, and gently twisted the screw loose. No major damage because that part of the screw isn't really used! Just be careful and gently twist (patience is KEY) to loosen.
alc217 -
The weak design of the long standoff screw (not enough material around the star-patterned socket head) has probably caused damage of the internal head during production of the Mac Mini!
The standoff screw was in my case extremely tightened and the T6 Torx screw driver could not be used anymore (due to damage of the socket head after applying too much torque during the original assembly).
I needed to use a High Leverage Combination Plier in vertical position to loosen the screw without damage to other parts. I tried to keep the rotation axis of the screw at the centre of the flat nose of the plier. Minor scratches to the screw can not be avoided in this way.
Marc -