Einleitung
nur Voraussetzung
Werkzeuge
-
-
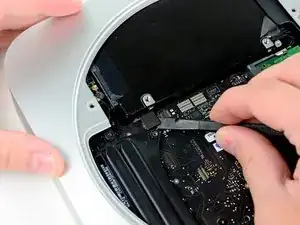
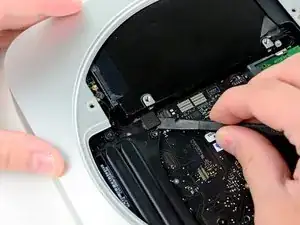
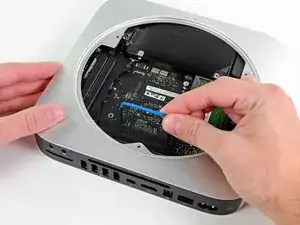
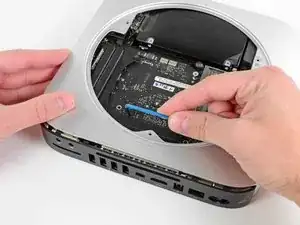
Mit dem flachen Ende eines Spudgers kannst du den den Stecker der Festplatte aus seinem Anschluss auf der Hauptplatine lösen.
-
-
-
Mit der Spitze des Spudgers kannst du den Stecker des Infrarotsensors aus seinem Anschluss auf dem Logic Board lösen.
-
Dieser Stecker ist sehr empfindlich, hebe ihn sehr vorsichtig und gleichmäßig heraus.
-
-
-
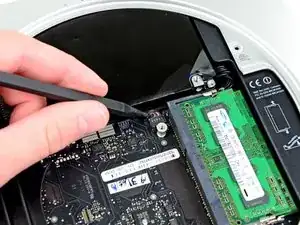
Entferne folgende drei Torx Schrauben:
-
Eine 5,0 mm T8 oder 2,0 mm Hex Schraube (beide Schraubendreher gehen)
-
Eine 16,2 mm Torx T6 Schraube
-
Eine 26 mm Torx T6 Abstandsschraube
-
-
-
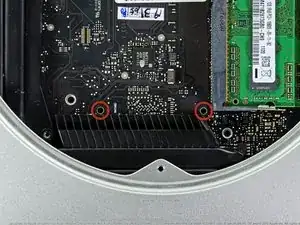
Setze das Mac Mini Logic Board Removal Tool in die beiden rot markierten Öffnungen ein. Beachte, dass dass es das Gehäuses unterhalb der Platine berührt bevor du weitermachst.
-
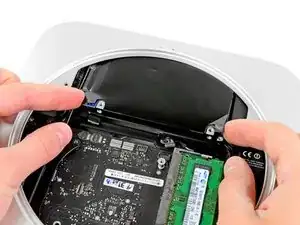
Ziehe das Tool vorsichtig in Richtung der I/O Platine. Die Hauptplatine und die I/O Einheit sollten etwas aus dem äusseren Gehäuse herausrutschen.
-
Ziehe das Mac Mini Logic Board Removal Tool wieder heraus.
-
-
-
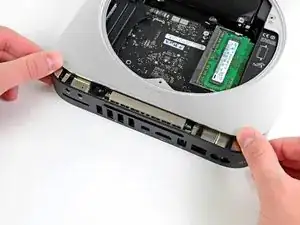
Drücke gleichzeitig die beiden Klammern ganz links und rechts an der I/O Einheit zur Mitte des I/O Boards hin und ziehe das I/O Board aus dem Gehäuse.
-
Ziehe das Logic Board nur so weit aus dem Gehäuse, bis die Kante des I/O Boards etwa 1,3 cm von der Kante des Aluminiumgehäuses entfernt ist.
-



I have a late 2012 Mac mini, but it must be an earlier version than this late 2012 Mac mini in this description, because removing the hard drive is much more complicated than described here. Please see this YouTube video if you have trouble removing your hard drive with these directions. https://www.youtube.com/watch?v=cvmuQIZP... There is a longer process you've got to go through. It can be done, it just takes much longer. (3-4 hours for me)
sandyfacebook -
That link is dead. Here is the updated link:https://www.youtube.com/watch?v=rq4PGlPu...
The original link can be recalled from here:
https://web.archive.org/web/202107212304...
maccentric -
At this point I could remove the hard drive by gently pulling it. There is no need to remove the motherboard!
Zitoune7 -
Same here. I just place two of my torx head screwdrive tips in the holes on the drive and levered it out. Really easy and, well, created my own 12 step program. ;)
Les Manthe -
+1: Don't remove the motherboard, and don't buy the tool to do it. When it's time to slide out the logic board, just push gently on the inside of the metal air guide fins on the intake. This will "eject the motherboard out the necessary 1/2 inch. Be mindful of the length of wires going from under the RAM out to the front of the case, as you don't want to pull hard or disconnect these..
scootz -
I decided that there was a greater risk of breaking something by not removing the logic board than by removing it. The old hard drive comes out easily enough, but the new one would just not quite go in for me. Lining the screws on the outside of the new hard drive with the rubber grommets is so much easier with the logic board out. I used masking tape with pencil marks on the case and on the drive in order to line up the screws and the grommets with the case right side up. IMHO, by the time the antenna is off, removing the logic board is relatively easy.
Robert Meppelink -
Yes, this step is enough to remove the hard disk. No need to open the chassis.
David -
mic is not working for me
what i do for this problem
https://uniqsofts.com/blogs/vidmate-for-...
imoforpc imoforpc -
Stop at this step and gently pull off the drive.
To align the new drive’s screws turn the Mac Mini in the air and just let the new drive lay on the case while pushing it to make the screws align with the holes.
ernipiggy -
Yes, if you have come this far just pull the drive out because removing the bluetooth connector and the motherboard is troublesome.
If you just pull the drive out at this point the only difficulty is when you try to put it back in because gravity is working against you: the drive has to hang in its slots about 1 cm above the top casing, which is on your table. The trick is to flip the mini up onto its front edge and after a couple of tries the buttons on the HD will engage their sockets.
rsjrsj -
If your mini has 2 drives installed, you will not be able to slide the top drive out as it won’t clear the RAM slot due to the other drive underneath. You will need to scootch the logic board out a bit to get the drive out, and then back in. If only Apple had made these things .25” longer it would have been so much easier.
maccentric -
Can someone write the better version of step 12? I already see that steps 10-11 and 13-16 aren’t necessary as long as step 12 is done differently…Thank you!
gina757575 -
+1 on not removing the motherboard. I used a playing card as a ramp for the new drive, resting one short end of the card on the rim that the drive eventually will rest on and "just" pushed the drive in its place(took a few tries to get the card in the right place at first). I also didnt completely remove either the fan or the antenna plate. I just moved them to the side and taped them in place with masking tape
Mymac4ever -