Einleitung

Install an Airport Extreme card internally.

  1. sLBEp1SWeQaGvAGF
    sLBEp1SWeQaGvAGF
    qiWAxhbPbXwslECg
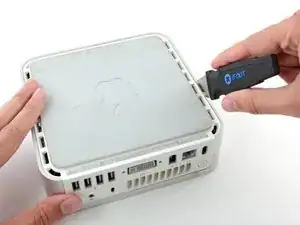
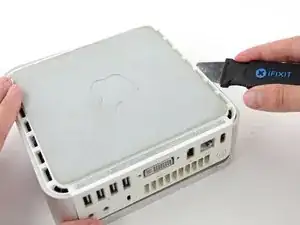
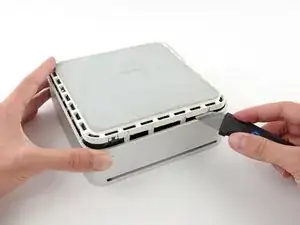
    • Power down your Mac mini, disconnect all of the cables, and flip it over.

    • Insert the Jimmy into the crack between the aluminum top housing and the plastic lower housing.

    • The Jimmy should reach a stop about 3/8" down.

    A spackle knife makes these steps go much faster.

    jouniseppanen -

    A double sided letter opener or a thin non-serrated butter knife will suffice.

    To prenent cosmetic blemishes, place a matchbook cover or similar thin cardboard on the outer perimeter under the “jimmy”.

    Mike -

  2. kah5J3ZqepQRAYLs
    kah5J3ZqepQRAYLs
    TjNLADvgUc3u65EC
    E1GivJlcjLIm1AjR
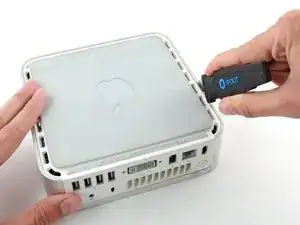
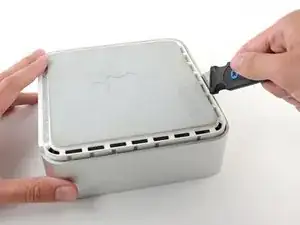
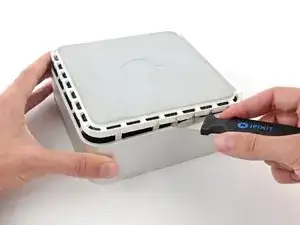
    • Gently bend the Jimmy outwards to pry the crack open a little larger and lift the lower housing up a small amount.

    • There are several plastic clips on the lower housing that fit into a channel in the aluminum top housing. Your goal is to use the Jimmy to push these clips inward enough to free them from the channel, while gently pulling up on the lower housing.

    Patience is your best friend.

    Do not insert “jimmy in too far. Marking a line from tip upwards on the tool will prevent too far insertion, possibly breaking tabs or damaging internal components.

    To prevent the cover closing back up, small strips of matchbook cover (os equivalent) can be inserted about half inch hold prevent closure.

    Mike -

  3. IkyV51XbYAOx1scN
    IkyV51XbYAOx1scN
    yEIBOXiZXylOkfa3
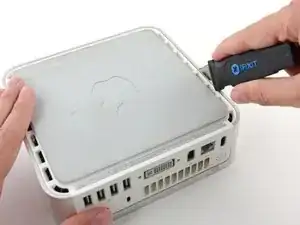
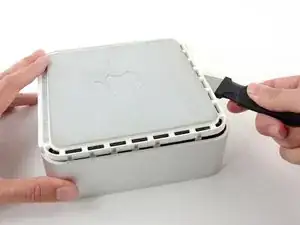
    • Once you have the first side free, rotate the Mac mini and start prying up on the front edge.

    • Use the same prying motion to both bend the clips inward and lift the lower housing up out of the top housing.

  4. ALLVbaEmIiRDx3ye
    ALLVbaEmIiRDx3ye
    tIQp3aqsF2IIZtPb
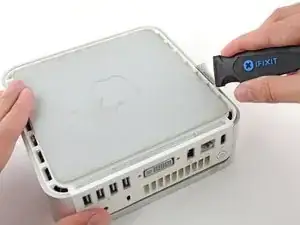
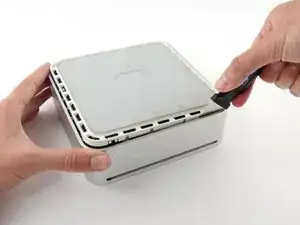
    • You may need to move the Jimmy along the edge to pry up all of the clips. Be patient and do a little bit at a time.

  5. Tjq4XQhQltwaf41J
    Tjq4XQhQltwaf41J
    cN1LgUGSLjcbAtOp
    • Keep working around the perimeter, freeing the clips along the final edge.

  6. mkOHVknKjJGtqOlZ
    mkOHVknKjJGtqOlZ
    aHVZOjTkBWLtHRns
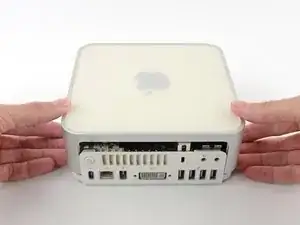
    • Flip the Mac mini back over and lift the top housing off of the lower housing.

    Before reassembly, make sure no wires are sticking out.

    Line up top cover carefully. Gently press down on top cover until top and bottom fully seated.

    CAUTION! DO NOT PRESS TOO HARD ON THE COVER TO PREVENT CRACKING THE PLASTIC TOP.

    GO EASY.

    Mike -

  7. 6oZVICuWQggAhRdp
    • If your mini does not have Airport installed, then skip this step.

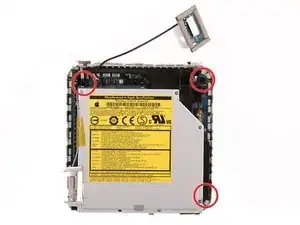
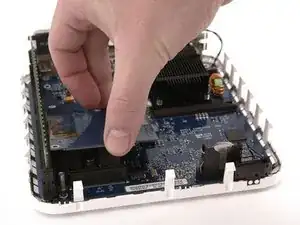
    • Grasp the Airport antenna board and lift it off of the two plastic posts holding it in place. You may need to push back the black plastic tab jutting through the lower left corner of the board.

  8. CoOKwGRdUd5MEGtO
    • Remove the yellow tape securing the power button cable to the black plastic framework.

  9. 1F6eifA21kEKYVjf
    • Remove the three black Phillips screws securing the plastic framework to the logic board and lower case.

  10. NvHeM2xrlGenMmQF
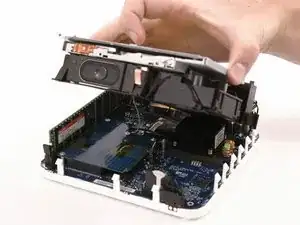
    • Grasp the optical drive and mass storage unit in one hand and lift up enough so that you can see beneath it.

    I just put in a 1G RAM chip that just came in the mail from iFixit. And though I followed every step this step (removing the HD, cooling fan, and drive unit) was not needed. I put the chip in, put everything back in place then removed and replaced the RAM with no problems. So it would seem that for a/my PowerPC Mac Mini (I have a 1.33 Ghz processor) it was not a needed step.

    mbob518 -

    BTW, it took about 15 - 20 min even with my experimentation.

    Zitat von mbob518:

    I just put in a 1G RAM chip that just came in the mail from iFixit. And though I followed every step this step (removing the HD, cooling fan, and drive unit) was not needed. I put the chip in, put everything back in place then removed and replaced the RAM with no problems. So it would seem that for a/my PowerPC Mac Mini (I have a 1.33 Ghz processor) it was not a needed step.

    mbob518 -

  11. hkSBDf1XYvmyuNQw
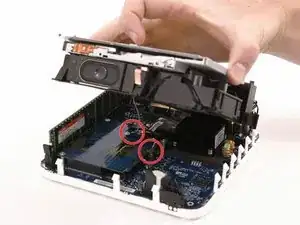
    • If your mini has neither an Airport card nor a Bluetooth board, you can simply lift the optical drive up and away. Otherwise, you need to disconnect the Airport and/or Bluetooth antenna cables first.

    • With your free hand, pull the Bluetooth cable up from Bluetooth board and unplug the Airport antenna cable from the right of the Airport card. Caution: both of these connections are very small. When re-assembling unit after repair, you may want to remove the two screws holding the airport card to the assembly and lift the card up and out to re-attach the cables.

    havin a hard time with step 9. i don't really see how I'm supposed to remove the Wi-Fi/Bluetooth cables from the Airport card. They seem to be soldered in! is there a twisting motion involved? I just don't wanna mess it up more than i already did with my putty knife haha!

    chris -

    Same problem here on this one. There seems to be no way to get them off and I can't seem to unscrew this thing. I think this otherwise great guide should be more precise about how to get the antenna cables out of the way :-(

    sebastian.patting -

    Antenna cables just pop off - straight up.

    Must be perfectly aligned when reconnecting as well before you re-seat them.

    Small needle nose pliers may be useful or a spudger or flat jewelers screwdriver to pry up on the cable as close to the connector as possible.

    rockpiano54 -

  12. QFEWJUaWyXtplAMw
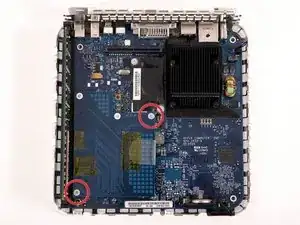
    • Remove the two silver Phillips screws from the corners of the wireless interface board.

  13. FxoIorHPswIciK6r
    • Grasp the board at the front and back, and lift up on the front until the board pulls free of its connector.

  14. frcB5oF5HsZG2yJW
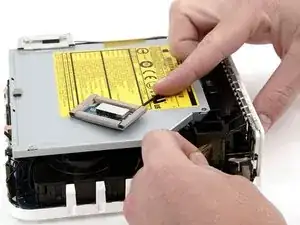
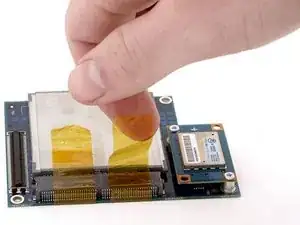
    • Remove the yellow tape securing the Airport card to the wireless interface board.

  15. uXR1KUeKPWawCZQY
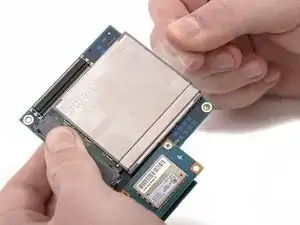
    • Grasp the wireless interface board with one hand and the clear plastic tab on the Airport card with the other hand, and pull the Airport card from its connector.

Abschluss

To reassemble your device, follow these instructions in reverse order.
iRobot

Mitglied seit: 25/09/09

0 Reputation

0 Kommentare