Einleitung

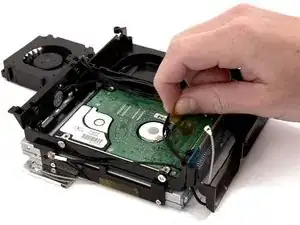
Diese Anleitung zeigt, wie die Festplatte ausgetauscht oder aufgerüstet werden kann.

  1. sLBEp1SWeQaGvAGF
    sLBEp1SWeQaGvAGF
    qiWAxhbPbXwslECg
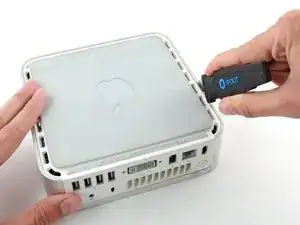
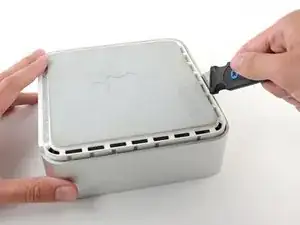
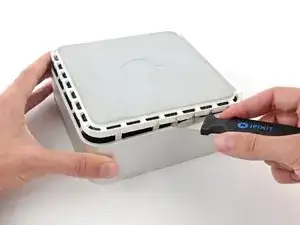
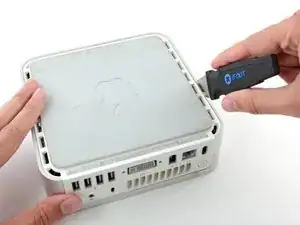
    • Schalte deinen Mac Mini aus, trenne alle Kabel und drehe ihn um.

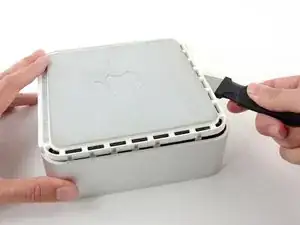
    • Führe den Jimmy in den Spalt zwischen dem oberen Aluminiumgehäuse und dem unteren Kunststoffgehäuse ein.

    • Der Jimmy sollte nach ungefähr 9,5 mm stoppen.

    A spackle knife makes these steps go much faster.

    jouniseppanen -

    A double sided letter opener or a thin non-serrated butter knife will suffice.

    To prenent cosmetic blemishes, place a matchbook cover or similar thin cardboard on the outer perimeter under the “jimmy”.

    Mike -

  2. kah5J3ZqepQRAYLs
    kah5J3ZqepQRAYLs
    TjNLADvgUc3u65EC
    E1GivJlcjLIm1AjR
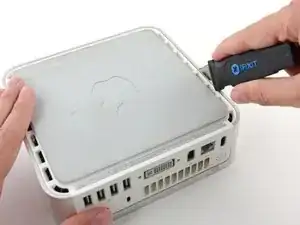
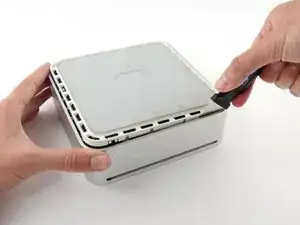
    • Biege den Jimmy vorsichtig nach außen, um den Spalt ein wenig weiterzu öffnen, und hebe das untere Gehäuse ein wenig an.

    • Am unteren Gehäuse befinden sich mehrere Kunststoffclips, die in eine Nut am oberen Aluminiumgehäuse passen. Dein Ziel ist es, sie mit dem Jimmy so weit nach innen zu drücken, dass sie sich aus der Nut lösen, während du vorsichtig das untere Gehäuse abziehst.

    Patience is your best friend.

    Do not insert “jimmy in too far. Marking a line from tip upwards on the tool will prevent too far insertion, possibly breaking tabs or damaging internal components.

    To prevent the cover closing back up, small strips of matchbook cover (os equivalent) can be inserted about half inch hold prevent closure.

    Mike -

  3. IkyV51XbYAOx1scN
    IkyV51XbYAOx1scN
    yEIBOXiZXylOkfa3
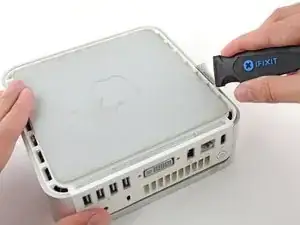
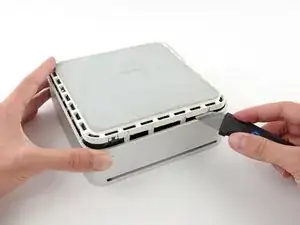
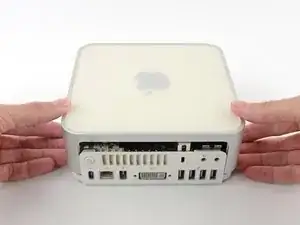
    • Wenn du die erste Seite gelöst hast, drehe den Mac Mini und beginne, an der Vorderkante zu hebeln.

    • Biege mit der gleichen Hebelbewegung die Clips nach innen und hebe das untere Gehäuse aus dem oberen Gehäuse heraus.

  4. ALLVbaEmIiRDx3ye
    ALLVbaEmIiRDx3ye
    tIQp3aqsF2IIZtPb
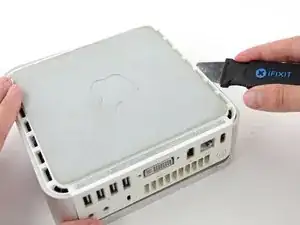
    • Möglicherweise musst du den Jimmy an der Kante entlang bewegen, um alle Clips zu lPosen. Sei geduldig und arbeite dich schrittweise vor.

  5. Tjq4XQhQltwaf41J
    Tjq4XQhQltwaf41J
    cN1LgUGSLjcbAtOp
    • Arbeite dich um das Gerät herum, um die Clips an der letzten Seite zu lösen.

  6. mkOHVknKjJGtqOlZ
    mkOHVknKjJGtqOlZ
    aHVZOjTkBWLtHRns
    • Drehe den Mac Mini wieder auf die Vorderseite und hebe das obere Gehäuse vom unterem Gehäuse ab.

    Before reassembly, make sure no wires are sticking out.

    Line up top cover carefully. Gently press down on top cover until top and bottom fully seated.

    CAUTION! DO NOT PRESS TOO HARD ON THE COVER TO PREVENT CRACKING THE PLASTIC TOP.

    GO EASY.

    Mike -

  7. 6oZVICuWQggAhRdp
    • Wenn auf deinem Mini kein Airport installiert ist, überspringe diesen Schritt.

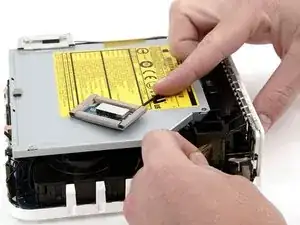
    • Greife die AirPort-Antennenplatine und hebe sie von den beiden Kunststoffstiften ab, mit denen sie befestigt ist. Möglicherweise musst du die schwarze Kunststofflasche, die durch die untere linke Ecke der Platine ragt, zurückschieben.

  8. CoOKwGRdUd5MEGtO
    • Entferne das gelbe Klebeband, mit dem das Netzschalterkabel am schwarzen Kunststoffrahmen befestigt ist.

  9. 1F6eifA21kEKYVjf
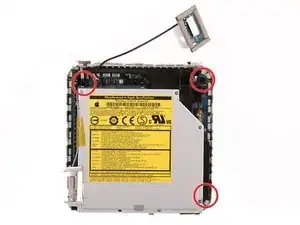
    • Entferne die drei schwarzen Kreuzschlitzschrauben, mit denen der Kunststoffrahmen am Logic Board und am unteren Gehäuse befestigt ist.

  10. NvHeM2xrlGenMmQF
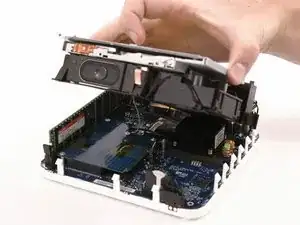
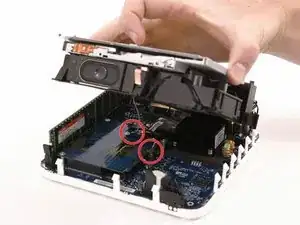
    • Fasse das optische Laufwerk und die Festplatte mit einer Hand und hebe sie so weit an, dass du darunterschauen kannst.

    I just put in a 1G RAM chip that just came in the mail from iFixit. And though I followed every step this step (removing the HD, cooling fan, and drive unit) was not needed. I put the chip in, put everything back in place then removed and replaced the RAM with no problems. So it would seem that for a/my PowerPC Mac Mini (I have a 1.33 Ghz processor) it was not a needed step.

    mbob518 -

    BTW, it took about 15 - 20 min even with my experimentation.

    Zitat von mbob518:

    I just put in a 1G RAM chip that just came in the mail from iFixit. And though I followed every step this step (removing the HD, cooling fan, and drive unit) was not needed. I put the chip in, put everything back in place then removed and replaced the RAM with no problems. So it would seem that for a/my PowerPC Mac Mini (I have a 1.33 Ghz processor) it was not a needed step.

    mbob518 -

  11. hkSBDf1XYvmyuNQw
    • Wenn dein Mini weder über eine Airport-Karte noch über ein Bluetooth-Board verfügt, kannst du das optische Laufwerk einfach nach oben heben.

    • Andernfalls musst du zuerst das AirPort- und/oder Bluetooth-Antennenkabel abtrennen.

    • Ziehe mit der freien Hand das Bluetooth-Kabel von der Bluetooth-Platine nach oben und ziehe das Airport-Antennenkabel rechts von der Airport-Karte ab. Achtung: diese beiden Anschlüsse sind sehr klein.

    • Beim Zusammenbau musst du erst die beiden Schrauben entfernen, mit denen die AirPort-Karte an der Baugruppe befestigt ist, und die Karte anheben und herausnehmen, um die Kabel wieder anzuschließen.

    havin a hard time with step 9. i don't really see how I'm supposed to remove the Wi-Fi/Bluetooth cables from the Airport card. They seem to be soldered in! is there a twisting motion involved? I just don't wanna mess it up more than i already did with my putty knife haha!

    chris -

    Same problem here on this one. There seems to be no way to get them off and I can't seem to unscrew this thing. I think this otherwise great guide should be more precise about how to get the antenna cables out of the way :-(

    sebastian.patting -

    Antenna cables just pop off - straight up.

    Must be perfectly aligned when reconnecting as well before you re-seat them.

    Small needle nose pliers may be useful or a spudger or flat jewelers screwdriver to pry up on the cable as close to the connector as possible.

    rockpiano54 -

  12. RU46jZjXJKIiOyPA
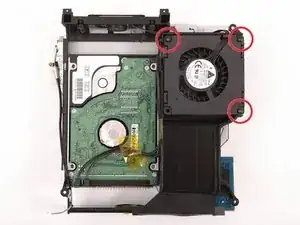
    • Drehe die drei langen, schwarzen Kreuzschlitzschrauben in den Ecken des Lüfters heraus. Diese Schrauben sitzen sehr fest, du wirst ziemlich viel Kraft benötigen.

    • In der unteren linken Ecke gibt es keine Schraube.

  13. uwpat6KJFOPcocNL
    • Hebe den Lüfter aus dem Computer.

  14. BTc4leFSJHclPAEj
    • Ziehe das gelbe Klebeband ab, mit dem die Kabel vom Lüfter und vom Lautsprecher auf der Unterseite der Festplatte befestigt sind.

  15. JYQi1CniKt5BOLif
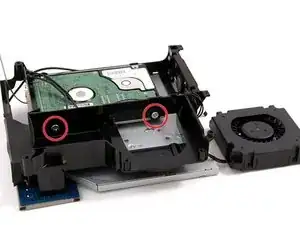
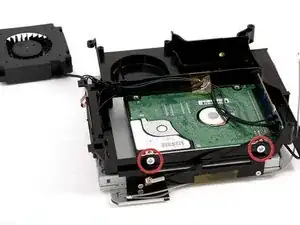
    • Entferne die beiden Kreuzschlitzschrauben #1, mit denen die rechte Seite des Laufwerks am Kunststoffrahmen befestigt ist. Um an die untere rechte Schraube zu gelangen, musst du den Schraubendreher etwas schräg nach unten halten. Drücke fest und gleichmäßig auf die Schrauben, drehe sie langsam heraus, damit ihre Köpfe nicht rundgedreht werden.

    If one has a thin screwdriver, there is a hole in the plastic to keep the screwdriver straight when removing the lower right screw. That hole is closed with a piece of yellow tape to keep the airflow, so after replacing the drive, one needs to use a piece of scotch tape to cover the hole again.

    robek -

  16. Zbrp256TXub1VHFt
    • Entferne mit dem gleichen Schraubendreher die beiden Schrauben, mit denen die linke Seite der Festplatte am Kunststoffrahmen befestigt ist, drehe auch hier fest und gleichmäßig.

  17. FfJgQOEUlHPIYWDk
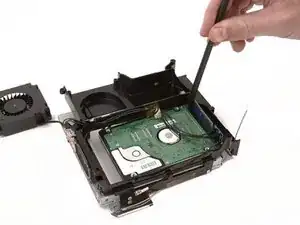
    • Heble die Festplatte mit dem Spudger von der Interface-Platine weg. Klemme die Klinge des Spudgers zwischen die Anschlussplatine und der ganz rechts liegenden Seite der Festplatte hinein. Wackle dann etwas vor und zurück, bis sie etwa 2 mm herausgekommen ist. Wiederhole dann das Ganze an der anderen Seite. Gehe hin und her, bis sie draußen ist.

    • Achte beim Zusammenbau darauf, dass die oberen Stifte nicht in untere Lochreihe hineingreifen.

  18. aVLxwkIVHIUH3FV6
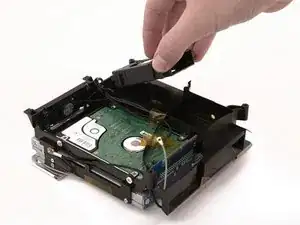
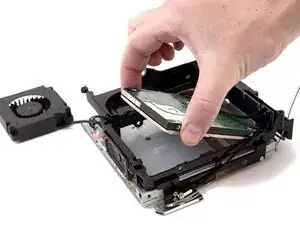
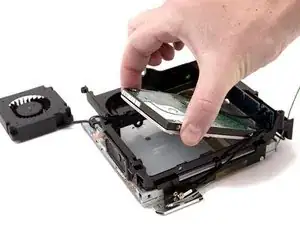
    • Hebe die Festplatte aus der Baugruppe heraus.

Abschluss

Um dein Gerät wieder zusammenzubauen, folge den Schritten in umgekehrter Reihenfolge.

iRobot

Mitglied seit: 25/09/09

0 Reputation

8 Kommentare

Pulled the 40GB drive from my Mac Mini G4 and replaced it with a solid state drive (mSATA to PATA enclosure with a 120GB mSATA drive). Since my Mac Mini runs MorphOS instead of OS X, it’s been absolutely screaming; MorphOS booted in 10 seconds on the HDD, and now it’s “blink and you’ll miss it” fast on the SSD! :)

LambdaCalculus -

I dropped the three screws on the floor and can’t find them. What size are these screws so I can buy new ones?

Al Hartman -

I made those changes with an PATA to SATA adapter but my SSD isn’t recognized, do you have a solution or a specific accessory?

Another problem I have is in C704 capacitor (closely to the processor backward from DVI port) that is broken...Do you know what are the main characteristics of it to change it? Thanks…
fordeverblue -

@fordeverblue Check the jumper settings on the drive. The optical drive and the hard drive share the same channel, so one has to be set to primary and the other to secondary (“master” and “slave”). “Cable Select” won’t work AFAIK. A lot of Apple combo drives have no jumpers and are always primary, so the HDD has to be secondary. Some PATA to IDE adapters have no jumpers or have jumpers without documentation, so some trial and error may be in order.

glaurung -

Hi, thanks for your advice. I was thinking that the HDD was the primary but if you say that the Combo Drive is I will try to put the Jumper as Secondary.

fordeverblue -

Which PATA to SATA adapter did you guys use successfully for an SSD replacement? (specific links please) I mistakenly bought a 40-Pin IDE to SATA Converter (the StarTech one), which worked great for replacing HDs to SSDs in two G3 iMacs, but obviously this won’t fit this config. Not only is the pinout wrong (NOW I know the difference between IDE and PATA) but the adapter won’t even fit into the drive enclosure. Thanks all. Looking to complete my plan to supercharge this 1.25 Ghz Mac Mini with the SSD as well as 1 gig of RAM.

Alex Lee -

I always make my own IDE drives from an 1.8" mSATA SSD and a mSATA/IDE case. Has always worked great in everything from the G3 Pismo on up.

https://www.ebay.com/itm/151519954907

https://www.ebay.com/itm/185391110542

rockpiano54 -