Einleitung

Die PRAM Batterie sorgt dafür, dass das Datum, die Uhrzeit und andere Einstellungen gespeichert bleiben, wenn das Gerät ausgeschaltet ist. Diese Anleitung zeigt, wie die CR2023 3V Lithium Knopfzelle ausgetauscht werden kann.

  1. sLBEp1SWeQaGvAGF
    sLBEp1SWeQaGvAGF
    qiWAxhbPbXwslECg
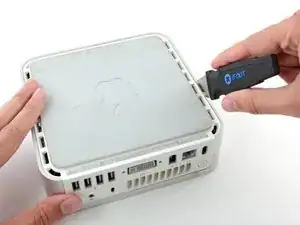
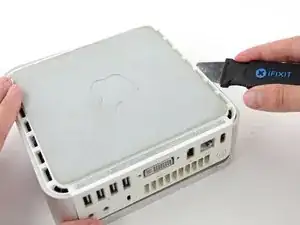
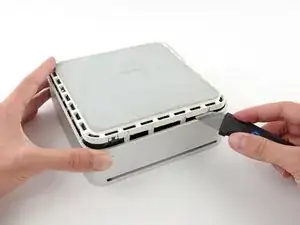
    • Schalte deinen Mac Mini aus, trenne alle Kabel und drehe ihn um.

    • Führe den Jimmy in den Spalt zwischen dem oberen Aluminiumgehäuse und dem unteren Kunststoffgehäuse ein.

    • Der Jimmy sollte nach ungefähr 9,5 mm stoppen.

    A spackle knife makes these steps go much faster.

    jouniseppanen -

    A double sided letter opener or a thin non-serrated butter knife will suffice.

    To prenent cosmetic blemishes, place a matchbook cover or similar thin cardboard on the outer perimeter under the “jimmy”.

    Mike -

  2. kah5J3ZqepQRAYLs
    kah5J3ZqepQRAYLs
    TjNLADvgUc3u65EC
    E1GivJlcjLIm1AjR
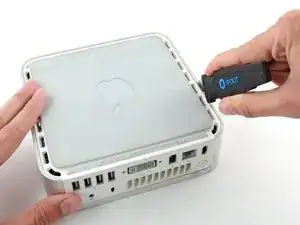
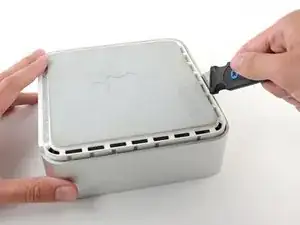
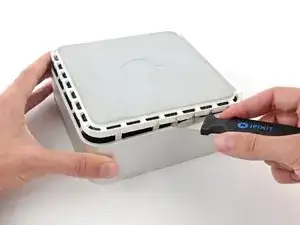
    • Biege den Jimmy vorsichtig nach außen, um den Spalt ein wenig weiterzu öffnen, und hebe das untere Gehäuse ein wenig an.

    • Am unteren Gehäuse befinden sich mehrere Kunststoffclips, die in eine Nut am oberen Aluminiumgehäuse passen. Dein Ziel ist es, sie mit dem Jimmy so weit nach innen zu drücken, dass sie sich aus der Nut lösen, während du vorsichtig das untere Gehäuse abziehst.

    Patience is your best friend.

    Do not insert “jimmy in too far. Marking a line from tip upwards on the tool will prevent too far insertion, possibly breaking tabs or damaging internal components.

    To prevent the cover closing back up, small strips of matchbook cover (os equivalent) can be inserted about half inch hold prevent closure.

    Mike -

  3. IkyV51XbYAOx1scN
    IkyV51XbYAOx1scN
    yEIBOXiZXylOkfa3
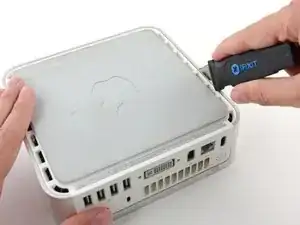
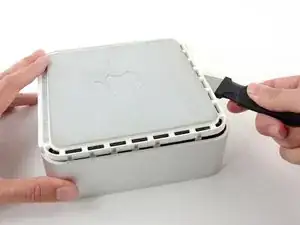
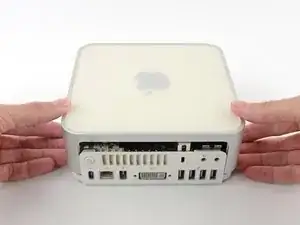
    • Wenn du die erste Seite gelöst hast, drehe den Mac Mini und beginne, an der Vorderkante zu hebeln.

    • Biege mit der gleichen Hebelbewegung die Clips nach innen und hebe das untere Gehäuse aus dem oberen Gehäuse heraus.

  4. ALLVbaEmIiRDx3ye
    ALLVbaEmIiRDx3ye
    tIQp3aqsF2IIZtPb
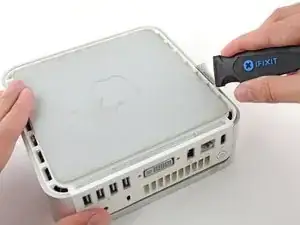
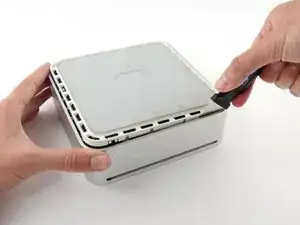
    • Möglicherweise musst du den Jimmy an der Kante entlang bewegen, um alle Clips zu lPosen. Sei geduldig und arbeite dich schrittweise vor.

  5. Tjq4XQhQltwaf41J
    Tjq4XQhQltwaf41J
    cN1LgUGSLjcbAtOp
    • Arbeite dich um das Gerät herum, um die Clips an der letzten Seite zu lösen.

  6. mkOHVknKjJGtqOlZ
    mkOHVknKjJGtqOlZ
    aHVZOjTkBWLtHRns
    • Drehe den Mac Mini wieder auf die Vorderseite und hebe das obere Gehäuse vom unterem Gehäuse ab.

    Before reassembly, make sure no wires are sticking out.

    Line up top cover carefully. Gently press down on top cover until top and bottom fully seated.

    CAUTION! DO NOT PRESS TOO HARD ON THE COVER TO PREVENT CRACKING THE PLASTIC TOP.

    GO EASY.

    Mike -

  7. 6oZVICuWQggAhRdp
    • Wenn auf deinem Mini kein Airport installiert ist, überspringe diesen Schritt.

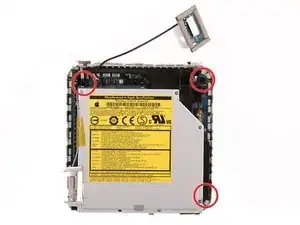
    • Greife die AirPort-Antennenplatine und hebe sie von den beiden Kunststoffstiften ab, mit denen sie befestigt ist. Möglicherweise musst du die schwarze Kunststofflasche, die durch die untere linke Ecke der Platine ragt, zurückschieben.

  8. CoOKwGRdUd5MEGtO
    • Entferne das gelbe Klebeband, mit dem das Netzschalterkabel am schwarzen Kunststoffrahmen befestigt ist.

  9. 1F6eifA21kEKYVjf
    • Entferne die drei schwarzen Kreuzschlitzschrauben, mit denen der Kunststoffrahmen am Logic Board und am unteren Gehäuse befestigt ist.

  10. NvHeM2xrlGenMmQF
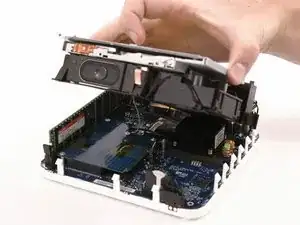
    • Fasse das optische Laufwerk und die Festplatte mit einer Hand und hebe sie so weit an, dass du darunterschauen kannst.

    I just put in a 1G RAM chip that just came in the mail from iFixit. And though I followed every step this step (removing the HD, cooling fan, and drive unit) was not needed. I put the chip in, put everything back in place then removed and replaced the RAM with no problems. So it would seem that for a/my PowerPC Mac Mini (I have a 1.33 Ghz processor) it was not a needed step.

    mbob518 -

    BTW, it took about 15 - 20 min even with my experimentation.

    Zitat von mbob518:

    I just put in a 1G RAM chip that just came in the mail from iFixit. And though I followed every step this step (removing the HD, cooling fan, and drive unit) was not needed. I put the chip in, put everything back in place then removed and replaced the RAM with no problems. So it would seem that for a/my PowerPC Mac Mini (I have a 1.33 Ghz processor) it was not a needed step.

    mbob518 -

  11. hkSBDf1XYvmyuNQw
    • Wenn dein Mini weder über eine Airport-Karte noch über ein Bluetooth-Board verfügt, kannst du das optische Laufwerk einfach nach oben heben.

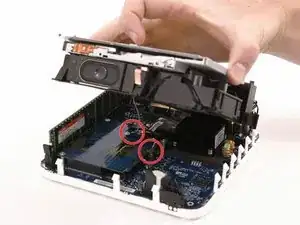
    • Andernfalls musst du zuerst das AirPort- und/oder Bluetooth-Antennenkabel abtrennen.

    • Ziehe mit der freien Hand das Bluetooth-Kabel von der Bluetooth-Platine nach oben und ziehe das Airport-Antennenkabel rechts von der Airport-Karte ab. Achtung: diese beiden Anschlüsse sind sehr klein.

    • Beim Zusammenbau musst du erst die beiden Schrauben entfernen, mit denen die AirPort-Karte an der Baugruppe befestigt ist, und die Karte anheben und herausnehmen, um die Kabel wieder anzuschließen.

    havin a hard time with step 9. i don't really see how I'm supposed to remove the Wi-Fi/Bluetooth cables from the Airport card. They seem to be soldered in! is there a twisting motion involved? I just don't wanna mess it up more than i already did with my putty knife haha!

    chris -

    Same problem here on this one. There seems to be no way to get them off and I can't seem to unscrew this thing. I think this otherwise great guide should be more precise about how to get the antenna cables out of the way :-(

    sebastian.patting -

    Antenna cables just pop off - straight up.

    Must be perfectly aligned when reconnecting as well before you re-seat them.

    Small needle nose pliers may be useful or a spudger or flat jewelers screwdriver to pry up on the cable as close to the connector as possible.

    rockpiano54 -

  12. DaMLXcmDRZ1h61Ac
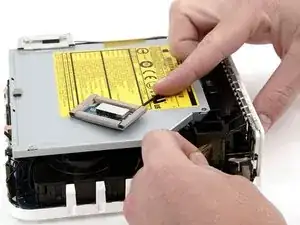
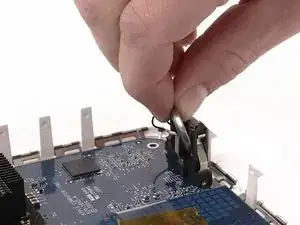
    • Drücke die PRAM Batterie erst hinein, ziehe sie dann heraus. Du musst sie nur soweit hineindrücken, bis sie gelöst werden kann.

    • Achte beim Einbau darauf, dass die Seite mit der Aufschrift am Rand zum schwarzen Kunststoffhalter hin zeigt. Achte auch darauf, dass die Metallkontakte Verbindung zur Batterie haben, eventuell musst du sie etwas nachbiegen.

Abschluss

Um dein Gerät wieder zusammenzubauen, folge den Schritten in umgekehrter Reihenfolge.
iRobot

Mitglied seit: 25/09/09

0 Reputation

0 Kommentare