Werkzeuge
Ersatzteile
-
-
Schalte deinen Mac Mini aus, trenne alle Kabel und drehe ihn um.
-
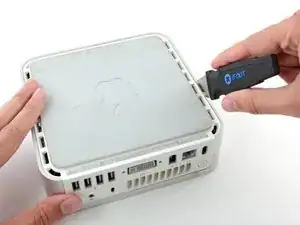
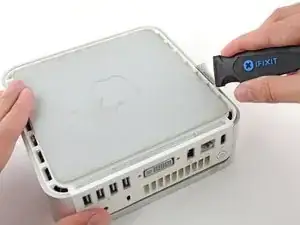
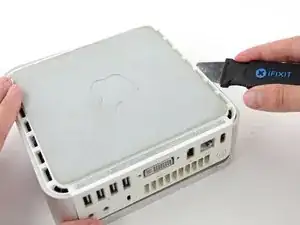
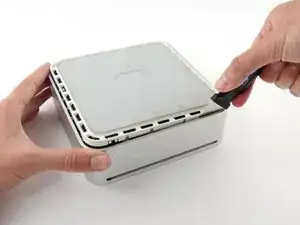
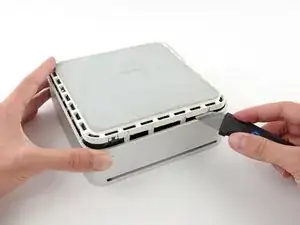
Führe den Jimmy in den Spalt zwischen dem oberen Aluminiumgehäuse und dem unteren Kunststoffgehäuse ein.
-
Der Jimmy sollte nach ungefähr 9,5 mm stoppen.
-
-
-
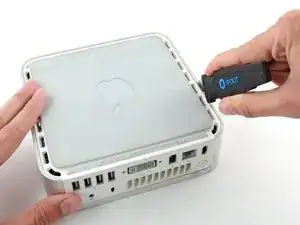
Biege den Jimmy vorsichtig nach außen, um den Spalt ein wenig weiterzu öffnen, und hebe das untere Gehäuse ein wenig an.
-
-
-
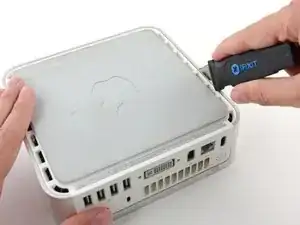
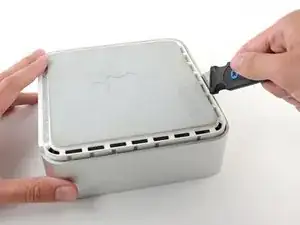
Wenn du die erste Seite gelöst hast, drehe den Mac Mini und beginne, an der Vorderkante zu hebeln.
-
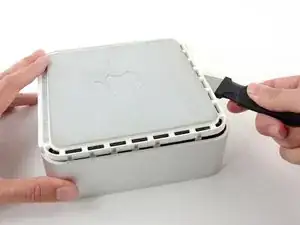
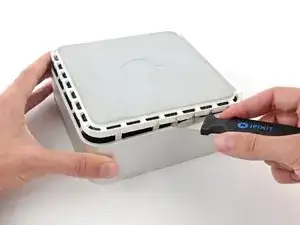
Biege mit der gleichen Hebelbewegung die Clips nach innen und hebe das untere Gehäuse aus dem oberen Gehäuse heraus.
-
-
-
Möglicherweise musst du den Jimmy an der Kante entlang bewegen, um alle Clips zu lPosen. Sei geduldig und arbeite dich schrittweise vor.
-
-
-
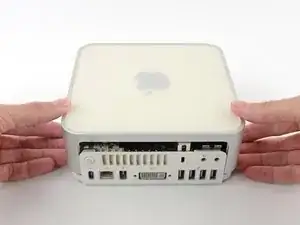
Drehe den Mac Mini wieder auf die Vorderseite und hebe das obere Gehäuse vom unterem Gehäuse ab.
-
-
-
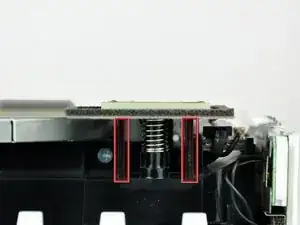
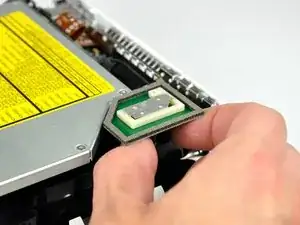
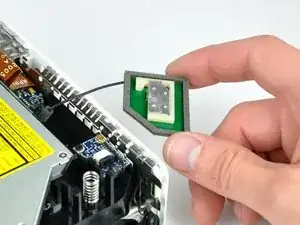
Drücke die beiden Stifte zusammen, und hebe die AirPort-Antenne von ihrem Befestigungsstift ab.
-
-
-
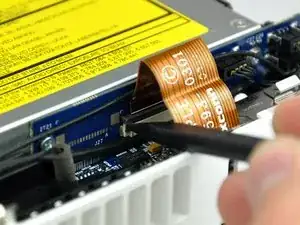
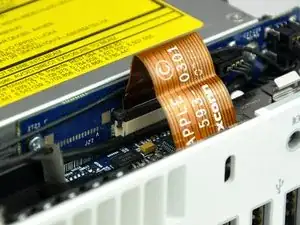
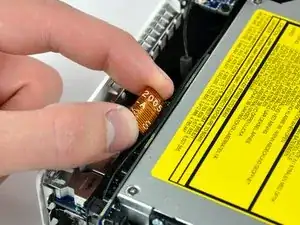
Hebe den Sicherungsbügel am ZIF-Anschluss auf der linken Seite mit der Spudgerspitze ein wenig hoch.
-
-
-
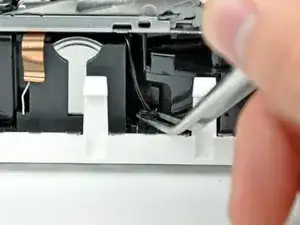
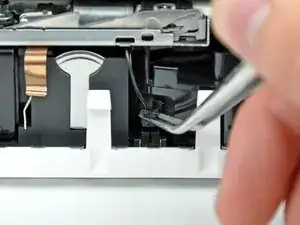
Hebe den Stecker am Kabel des Thermosensors der Festplatte mit einer Pinzette aus seinem Anschluss auf dem Logic Board heraus.
-
-
-
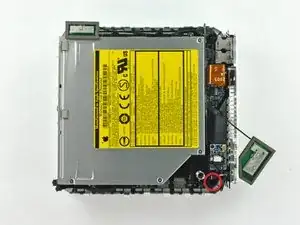
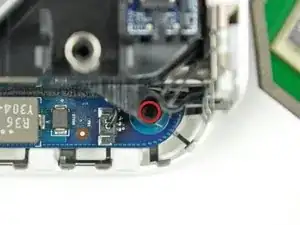
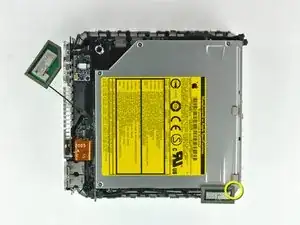
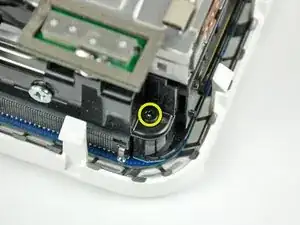
Eine der Kreuzschlitzschrauben liegt vertieft in der Nähe der Einschalttaste. Drehe sie heraus.
-
-
-
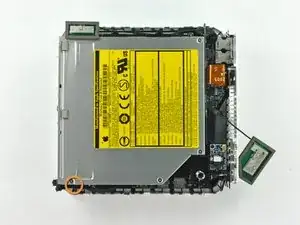
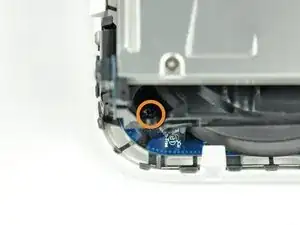
Eine weitere Kreuzschlitzschraube, die den Rahmen am Gehäuseunterteil befestigt, sitzt vertieft in der Nähe der Statusanzeige. Drehe sie heraus.
-
-
-
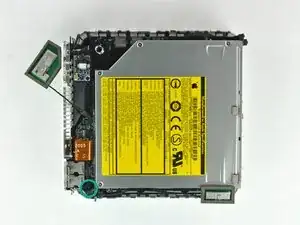
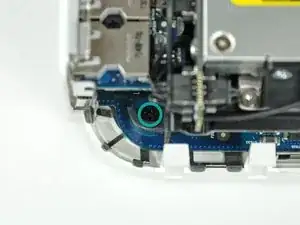
Entferne die Kreuzschlitzschraube, mit der der innere Rahmen in der Nähe der Audioanschlüsse am Untergehäuse befestigt ist.
-
-
-
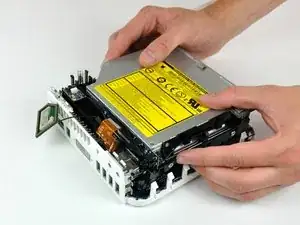
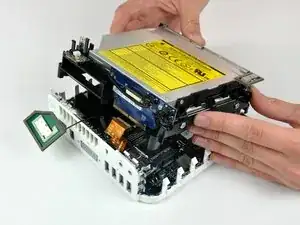
Hebe den inneren Rahmen behutsam vom Gehäuseunterteil ab, beachte, dass sich die AirPort-Antenne und andere Kabel verfangen könnten.
-
-
-
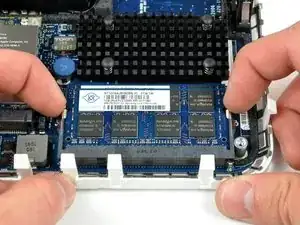
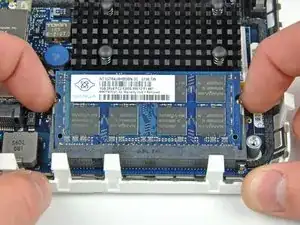
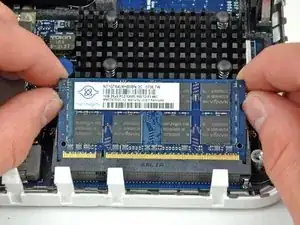
Drücke die beiden Laschen an den Seiten des RAM-Riegels gleichzeitig nach außen. Diese Laschen halten den Riegel fest, wenn sie nach außen gedrückt werden, "springt" der Riegel heraus.
-
Um das Gerät wieder zusammen zu bauen, folge den Schritten in umgekehrter Reihenfolge.
18 Kommentare
As a quick warning for noobs (that'd be me before I attempted this repair :P ), you need a matching pair of RAM (two chips the same size and spec). Otherwise, the computer won't boot up. ^_^
There were 2x 1GB chips in my 2007 mini. I bought 1x 2GB chip, because I read somewhere that model only would allow 3GB. After replacing a 1GB chip with the new 2GB chip, the system is only showing 1GB RAM installed. Is this what you’re talking about? If I buy another 2GB chip, will it work? PC2-5300 2 GB RAM Chip
Jeff Box -
That is not always true. Often, perhaps…60/40, ish? My 2007 mac mini 2,1 is running one 1gb stick and one 2gb stick, a 500gb Kingston SSD and a salvaged superdrive from a MBP. I am tempted to try a core 2 quad or Xeon in it. For no particular reason than to see if it runs. anyone tried that one? I also had a 2008 mac pro 3,1 running four 2gb and four 4gb of under spec ram without issues.
In the 25 years i’ve been hanging out in server rooms, the client side of the working guidelines for ram matching has become less strict., but still, I believe, the ability to mix is in the manufacturing process. there’s no way but experience to be able to confirm that different makes, speed or size will function together. Unless of course stated in manufacturers documentation. The quality of the individual components will decide.
It will either work or it wont.
If you don’t have ram laying about, then your 100% right, buy matching pairs. otherwise, try it 'till it fires!
I successfully run 3GB in my A1176 Minis. When I put the 2GB chip in the bottom slot with the 1GB chip in the top slot, the machine would not boot and the power LED would blink continuously. When I put the 1GB chip in the bottom slot with the 2GB chip in the top slot, the machine works perfectly and sees all 3GB of RAM. (I don’t know if this is a rule or not, this is strictly my anecdotal experience.) I have *not* experienced installing 3GB and having the Mini run and only report 1GB. If you do that, I’d recommend checking to assure that the 2GB stick is seated properly.
I’ve also used 4GB without any trouble in A1176 Minis, but this model can only address a maximum of 3GB RAM. I have run performance comparisons between one equipped with 4GB and equipped with 3GB RAM and they measured identically. If you’re upgrading an A1176 from 2GB (equipped with a pair of 1GB chips) to 3GB, you can save a few dollars by just buying a single PC2-5300 2GB stick.
Mark B -
Thanks a lot, 1Gb -> 4Gb is done !
This was easier than it looked, the only thing I had trouble with was getting the cover off (tried to use a flexible palette knife, bad idea) and getting the little sensor plug back in (it's SO tiny.) Oh, and one screw I had trouble getting back into the hidden recessed hole because my screwdriver isn't magnetized.
Speaking of which, size of screwdriver matters, I bought a set with a size 0 and size 000, but no 00, neither worked. Fortunately I had one of those cheap eyeglass repair kits, and the Phillips screwdriver worked perfectly.
Alexa -
The covers are the Worst….then and Now!!!



A spackle knife makes these steps go much faster.
jouniseppanen -
A double sided letter opener or a thin non-serrated butter knife will suffice.
To prenent cosmetic blemishes, place a matchbook cover or similar thin cardboard on the outer perimeter under the “jimmy”.
Mike -