Einleitung

Diese Anleitung zeigt, wie die USB-C-Platine im MacBook Air von Ende 2018 getauscht werden kann.

  1. 4a1VSQBgdQXAZah2
    • Bevor du anfängst, solltest du die Auto Boot Funktion stilllegen. Auto Boot schaltet deinen Mac beim Aufklappen ein und kann während des Öffnungsvorgangs versehentlich ausgelöst werden. Benutze diese Anleitung oder folgende verkürzten nachfolgenden Anweisungen um Autoboot auszuschalten.

    • Wenn dein MacBook unter BigSur v11.1 oder einer späteren Version läuft, lässt sich AutoBoot möglicherweise nicht deaktivieren. Arbeite zuerst normal weiter, trenne aber den Akku sofort ab, wenn du ins Innere des Gerätes hinein gekommen bist.

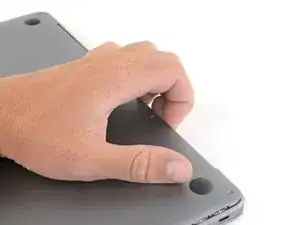
    • Schalte dein MacBook Air vollständig aus und ziehe den Stecker aus der Steckdose, bevor du anfängst. Schließe das Display und drehe den Laptop um.

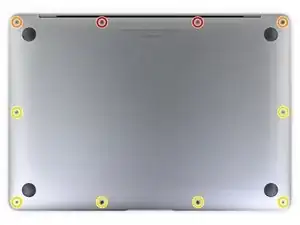
    • Entferne mit einem P5-Pentalobe-Schraubenzieher folgende Schrauben:

    • Zwei 7,9 mm Schrauben

    • Zwei 7,1 mm Schrauben

    • Sechs 2,6 mm Schrauben

    If the first thing you do is disconnect the battery, is it really an issue if you don’t (or can’t) disable auto-boot?

    maccentric -

    I agree, why disable Auto-Boot when the lid is closed and the battery is disconnected immediately? – I've never had an issue since 2016 when the feature was introduced.

    stevebsiegel -

    On my machine, the longest two screws were in the corners, while the other two long screws were in the middle. Perhaps previous service in the past had them replaced into the wrong place? In any case, the longest screws do seem to fit in either place. I guess 0.8mm is not very much of a difference. Seems like poor design if they could have used one size of screw.

    johann beda -

  2. 4Kra6VLGEa3eGmd6
    • Zwänge deine Finger zwischen das Display und das Gehäuseunterteil und ziehe nach oben, so dass sich das Gehäuseunterteil vom Air ablöst.

    • Entferne das Gehäuseunterteil.

    Das geht etwas schwer, da das Unterteil mittig noch von 2 Druckverschlüssen gehalten wird.

    facebook -

  3. xVJrmDjjKX3L1VEp
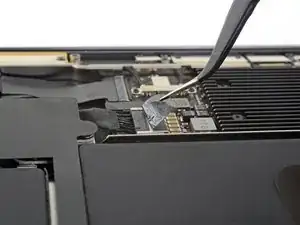
    • Ziehe den Aufkleber soweit vom Akkustecker zurück, dass der darunterliegende Stecker sichtbar wird.

  4. NZT3TL4hoGyeLE6L
    NZT3TL4hoGyeLE6L
    XZ2jGZmJoO1c5OHn
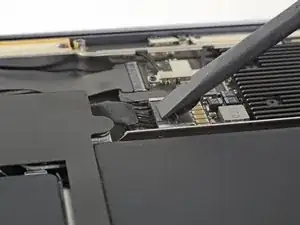
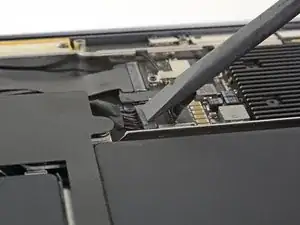
    • Schiebe den Akkustecker mit einem Spudger parallel zum Logic Board aus seinem Anschluss auf dem Logic Board heraus.

    Before the battery can be fully disconnected, the battery disconnect button needs to be held down. There is a gold button just above the battery socket, along with a small LED much like the 12” machines. Once this has been held down and the LED has switched off it is safe to remove the battery.

    Aaron Dalziel -

    This seems like an important step?

    maccentric -

    Also, seems like this should be done after the battery is disconnected, not before? Otherwise, wouldn’t the battery re-charge it?

    maccentric -

    What if the white LED dosent light up after pressing the yellow button again?

    Iron05 -

    I just performed this repair on my late 2018 mac air. I did click the gold button but saw no LED illuminated or otherwise. Question- after reassembly does the button get pressed again to connect the battery? Please clarify if this button is to be pressed and if it needs pressing again after the repair.

    All said - I pressed again after the battery connector clicked, assembled the back and all worked perfectly. The original issue was one dead port (no charge, no communication). The battery charge lightening bold icon was acting funny too. Genuis bar guy in Naperville said it was likely a logic board too. But it was not. The port was apparently confusing the logic board with regards to the charge function. Thanks Adam for saving me $440 and sending my computer back to Apple. I am 71 yrs young - who says an old dog can’t learn new tricks with good training!!

    William Lane -

    I didn't see Aaron's comment before completing the battery replacement. Afterwards, the computer would not turn on despite multiple SMC reset procedures. Upon double-checking the comments I see the importance of pressing the gold button. I pressed the gold button before disconnecting the new battery, then pressed it again after reconnecting for good measure. Computer booted!

    It would be good of iFixit to add this important step as most people probably don't open up every single comment on (seemingly) simple steps.

    Corey Matsumoto -

    Seconding Corey's comment. If paid more attention to the comment section, I would have avoided 15-30 minutes of panic. (BTW I did not notice any LED, but the golden button was easy to find).

    Lorenzo Sorbo -

  5. mFkWuHRWX4lCYrIR
    mFkWuHRWX4lCYrIR
    OYUKQpI44b2Mtta2
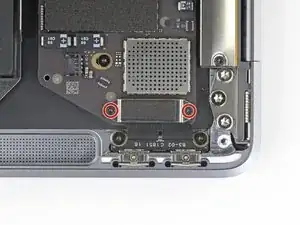
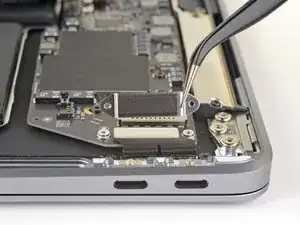
    • Entferne die beiden 1,4 mm Torx T3 Schrauben, mit denen die Halterung des USB-C-Anschlusses befestigt ist.

    • Entferne die Halterung des USB-C-Anschlusses.

    Is there a part number for this screw and do you have this in stock

    Gurmeet Sahotay -

  6. nWJOMgBddrWXcvKu
    nWJOMgBddrWXcvKu
    LVuNUVDiwo6mFUrN
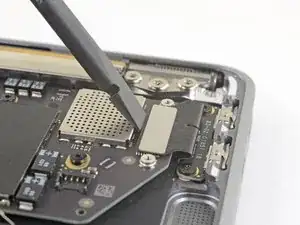
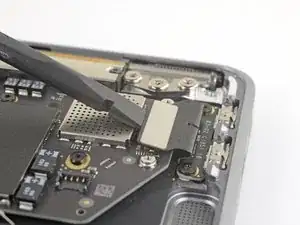
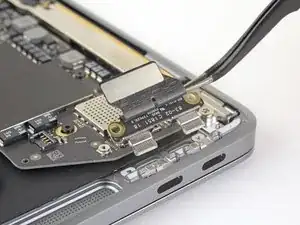
    • Heble den USB-C-Kabelstecker mit dem flachen Ende des Spudgers hoch und löse ihn aus seinem Anschluss auf dem Logic Board.

  7. nWSrOmgwCth1eriO
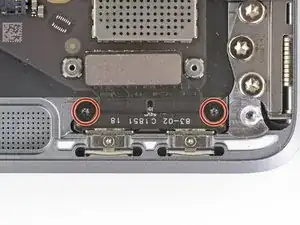
    • Entferne die beiden 2,9 mm Torx T4 Schrauben, mit denen die USB-C-Platine befestigt ist.

  8. LuKXqmpTdPCMFUIq
    • Entferne die USB-C-Platine.

Abschluss

Vergleiche dein Ersatzteil mit dem Originalteil — möglicherweise musst du fehlende Bauteile übertragen oder Schutzfolien vom Neuteil abziehen, bevor du es einbauen kannst.

Um dein Gerät wieder zusammenbauen, folge den Schritten in umgekehrter Reihenfolge.

Entsorge deinen Elektromüll fachgerecht.

Hat die Reparatur doch nicht den richtigen Erfolg gebracht? Frage in unserem Antworten-Forum nach Hilfe.

Adam O'Camb

Mitglied seit: 11/04/15

178852 Reputation

Ein Kommentar

would the steps be the same for late 2016 13 inchs? i don't see a guide for that. also why this so much easier than 2015 guide which is 37 steps lol

Xiaolu Zhu -