Einleitung

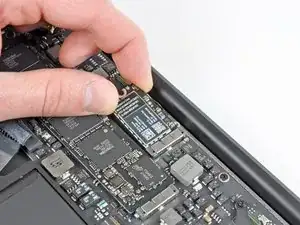
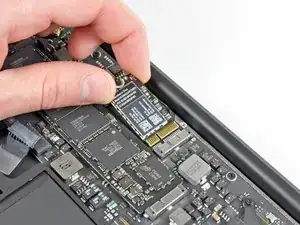
Hier wird der Austausch deiner AirPort/Bluetooth Karte gezeigt.

  1. 3bTejPotVlS4MkaI
    • Bevor du weitermachst, schalte das Gerät aus, schließe den Deckel und lege den Computer mit der Unterseite nach oben auf eine weiche ebene Oberfläche.

    • Drehe folgende zehn Schrauben heraus:

    • Zwei 9 mm 5-Point Pentalobe Schrauben

    • Acht 2,6 mm 5-Point Pentalobe Schrauben

    • Den speziellen Schraubendreher, um die zehn 5-Point Pentalobe Schrauben herauszudrehen, findest du hier.

  2. WwI3rtRnhTEHj54C
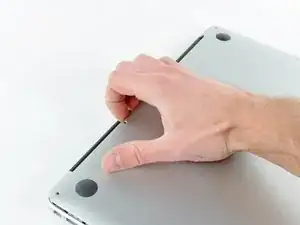
    • Zwänge deine Finger zwischen Display und Gehäuseunterteil und ziehe es nach oben, so dass sich das Gehäuseunterteil vom Air löst.

    • Entferne das Gehäuseunterteil und lege es beiseite.

  3. CtyAZgC3dvRCcjK1
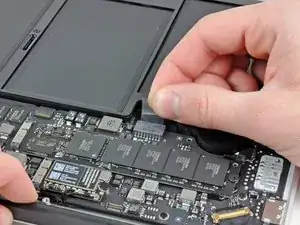
    • Wir empfehlen als Vorsichtsmaßnahme, dass du den Akkustecker vom Logic Board löst, um elektrische Entladungen zu vermeiden. Dieser Schritt ist optional und nicht unbedingt nötig.

    • Fasse die durchsichtige Zuglasche aus Plastik, welche am Akkustecker angebracht ist, und ziehe sie in Richtung der Vorderkante des Air. So wird der Akku vom Logic Board getrennt.

    • Ziehe den Stecker beim Ablösen nicht nach oben.

  4. RIVAS24aIcHQ4RiZ
    RIVAS24aIcHQ4RiZ
    hAogQwCTCM6GrsJu
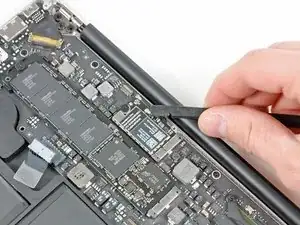
    • Löse beide Antennenstecker mit dem flachen Ende des Spudgers aus ihren Anschlüssen auf der AirPort/Bluetooth Karte.

  5. WXJ3NWkGkyRtHvNp
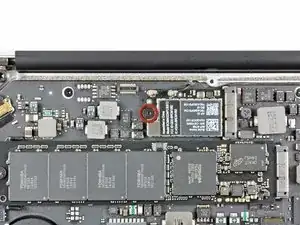
    • Entferne die einzelne 2,9 mm Torx T5 Schraube, welche die AirPort/Bluetooth Karte am Logic Board befestigt.

  6. kCaifioBmlPQCMCZ
    kCaifioBmlPQCMCZ
    KjSY6a4FBF1J21EJ
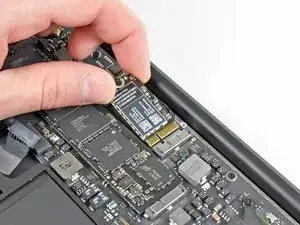
    • Hebe das freie Ende der AirPort/Bluetooth Karte etwas an und ziehe sie aus ihrem Anschluss auf dem Logic Board.

    • Entferne die AirPort/Bluetooth Karte aus dem Air.

Abschluss

Um dein Gerät wieder zusammenzusetzen, folge den Schritten in umgekehrter Reihenfolge.

Andrew Bookholt

578335 Reputation

6 Kommentare

Which UFL plug is the WIFI one? the one closer to the screw or the other one?

-Majh0l@hush.com

uxa1 -

Dear:

I bought a new A1369 AirPort/Bluetooth Board.When I installing it, I accidentally broken the cable that you were prying at step 4, What can I do?

THx!

Alex -

Which antenna connector is The wi-fi one? The one closest to the screw or the one furthest away?

Joel S -
I would like AC WiFi and Bluetooth 4 support by upgrading the internal card. Can you install upgrade WiFi/Bluetooth cards into this slot?

David Jones -

This guide is helpful but doesn’t include the most important part, which is re-connecting the antennas. I’ve done this exact replacement in my mid-2010 13” MBA, and you will need antenna extenders (MHF4 female to male) to make it work. Other discussions on this suggest breaking off the antenna cable bracket near the hinge to get extra length, but that still won’t work. You need extensions. I found mine on eBay US, despite living in Canada - they didn’t appear on my local site for whatever reason.

.

Also, be VERY careful when disconnecting the MHF4 connectors from the card (step 4). They’re rated for 30 disconnects max (I had to do a lot of research to find the right connector) and I managed to break one. I essentially had to tape the socket together once I got the extensions in the mail - just buy them from the beginning so you don’t mess around with trying to lengthen to cord like I did. That’s what caused all my issues.

.

The exact item I bought was “2pcs MHF4 Male to MHF4 Cable Antenna Extension Female.”

peter -

changed to a BCM94360CS2 WiFi Bluetooth Airport Wireless Card which is a bit longer than the original one. Did put a bit of foam at the end to isolate from main board, fixing with screw not needed but the MHF4 extension is a must have as the antenna connectors are now even more relocated from the original ones. OCLP patched / installed Monterey and all features work perfect - even Universal control.

Lutz R Frank -