Einleitung

Hier wird der Austausch des I/O Board Datenkabels gezeigt.

  1. XxSVygoKg3BQZUeK
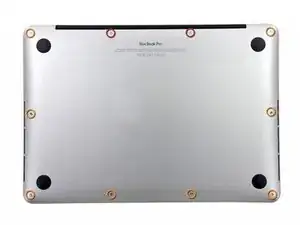
    • Entferne die folgenden zehn Schrauben, mit denen das untere Gehäuse am oberen Gehäuse befestigt ist:

    • Zwei 2,3 mm P5 Pentalobe Schrauben

    • Acht 3,0 mm P5 Pentalobe Schrauben

    • Halte während der ganzen Reparatur deine Schrauben gut geordnet und achte darauf, dass sie genau an ihren alten Platz zurück kommen, sonst könnte dein Gerät beschädigt werden.

    If don’t have one of those neat project mats, then you can use small pieces of flattened blu-tack to hold the screws. If you arrange them in the shape of your mac book cover, and put the screws down methodically, you can get a one-to-one mapping of the screws to the correct screw holes.

    Toby Thurston -

    Or you can use an ice tray where you put the screws and the parts in separate bays in the same order as they come in the instructions.

    timofej.se -

    This is great! I used a small magnetic white board, and wrote on it to identify the parts as I went. This whole process, from the fast shipment to the great instructions to the complete, high quality, tool kit has been great. I’m typing this comment on my resurrected laptop. Thank you! Sue

    Susan Greer -

  2. TZjAGsfhlId3q36t
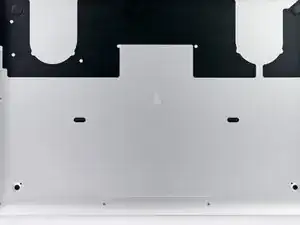
    • Versuche mit den Fingern zwischen das obere und das untere Gehäuse zu kommen.

    • Ziehe das untere Gehäuse behutsam vom Oberen weg.

    • Entferne das untere Gehäuse und lege es zur Seite.

  3. q3ulIPMQTbiPuDUF
    q3ulIPMQTbiPuDUF
    muPIBpQokGnUUXJP
    SLwb4KCgFZKfLR2B
    • Das untere Gehäuse ist in der Mitte durch zwei Plastikklammern mit dem oberen Gehäuse verbunden.

    • Drücke beim Wiederzusammenbau das untere Gehäuse in der Mitte leicht an, damit die beiden Plastikklammern wieder einrasten.

  4. oh6QmDClHy3Es55f
    • Entferne die Plastikabdeckung über der Platine des Akkuanschlusses.

  5. AvPUsRLbmXLZWSlb
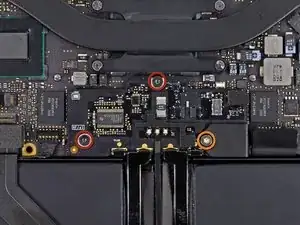
    • Entferne die folgenden Schrauben, mit denen die Platine des Akkuanschlusses am Logic Board befestigt ist:

    • Zwei 2,8 mm T6 Torx Schrauben

    • Eine 7,0 mm T6 Torx Paß-Schulterschraube

  6. eYeaxKQXRIv43WNX
    eYeaxKQXRIv43WNX
    INge1d6OYG2XdrMr
    • Mit einer Pinzette kannst du die Plastikabdeckung rechts an der Platine des Akkuanschlusses entfernen.

    Is adhered to screw beneath, so lift firmly and slowly.

    Andrew -

    when doing this with metal tweezers as instructed in the video, it was difficult to get off and apparently while i was trying to do it, the tweezers went too far under and i believe made contact with the screw underneath? there was a zzz noise, an orange flicker and a little stream of smoke that came out. i freaked out and put everything back together to see if the laptop even still worked, it turned on and everything but died right away (i drained it before doing the repair anyway, so i was surprised it turned on at all).

    i finished the battery repair and did several other things while in there. i have charged it all the way as recommended and will use it later on to see how everything is, im hoping that it’s a okay, but could someone explain to me what happened and the possible consequences?

    Kait D -

  7. 3h3p5bF5gSsxU3H1
    • Entferne die 6,4 mm T6 Torx Breitkopfschraube, mit der die Platine des Akkuanschlusses am Logic Board befestigt ist.

  8. KnflDJ6YcW61sb3S
    KnflDJ6YcW61sb3S
    Y3LPyukbnPaH2Qua
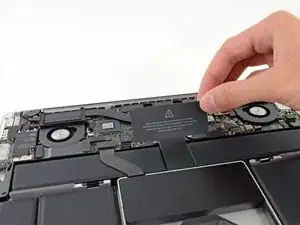
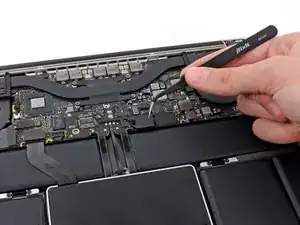
    • Ziehe die Platine des Akkuanschlusses vorsichtig vom Logic Board ab.

    • Es empfiehlt sich, die Batteriekabel nur leicht zu biegen, um die Platine über dem Logic Board und aus dem Weg zu halten.

    • Du solltest die Platine nicht vollständig umklappen oder gar die Kabel falten, denn dies könnte den Akku beschädigen.

  9. wBB3HYE4h4RPE1gv
    wBB3HYE4h4RPE1gv
    oUwSuUJp4RWM4RSK
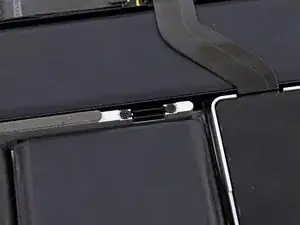
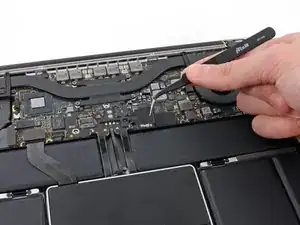
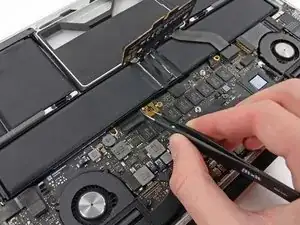
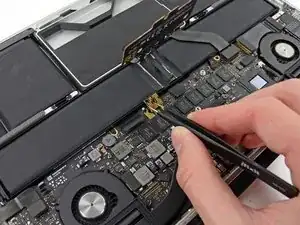
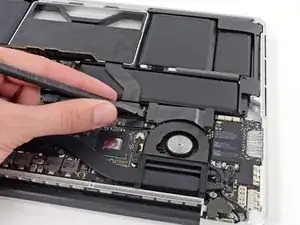
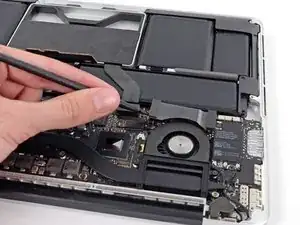
    • Schnapp dir den Interposer mit einer Pinzette.

    • Ein Interposer ist eine Schnittstelle, die eine elektrische Verbindung mit einer anderen verbindet. Bei dieser Reparatur ist es die Platine, die den Akku mit dem Logic Board verbindet.

    • Hebe den Interposer aus dem Logic Board heraus und entferne ihn.

    • Durch das Entfernen der Platine kannst du sicher gehen, dass der Akku während der Reparatur nicht mehr angeschlossen ist und so auch verhindern, dass der Computer versehentlich angeschaltet wird. Es ist auch deshalb eine gute Idee, die Platine herauszunehmen, weil sie sonst aus Versehen herausfallen könnte.

    How can I remove interposer I m not able to remove it

    Raunak -

    you must lift it absolutely vertically, or it fouls against the locator pin in the corner- you can easily get the impression that it won’t come over the end of this pin- almost like it’s rivetted in. it isn’t. get a good grip on it with the tweezers in the centre hole & one of the sides, & lift it STRAIGHT up.

    duncan rmi -

    I would recommend to use plastic tweezers in order to reduce risk of damage.

    Martin Sippel -

    wat is the model this SSD

    thierry.wilow -

  10. OZelarOBjAVaVFfX
    OZelarOBjAVaVFfX
    AqIx1EApvUJZuqXt
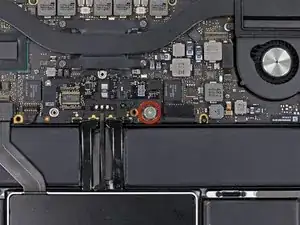
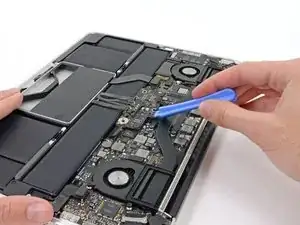
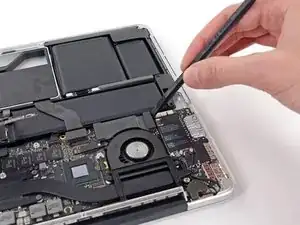
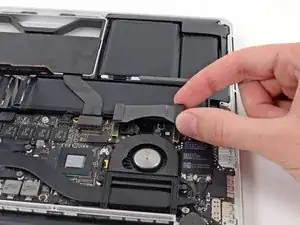
    • Mit dem flachen Ende eines Spudgers kannst du die rechte Seite des Anschlusses vom EA Board Datenkabel lösen.

    • Wenn du den Anschluss aus dem Stecker hebelst, achte bitte darauf, dass du den Hebel auch wirklich am Anschluss ansetzt und nicht am Stecker selbst. Wenn du den Stecker abhebeln würdest, könnte das zu irreversiblen Schäden am EA Board führen.

    I keep my fingernails fairly long, very handy for many computer repair jobs. This gives me 10 spudgers over which I have very fine muscular control. It is far easier to pop some of these tiny delicate MacBook parts loose with my nails.

    Ben Myers -

    Skip this step. For an easier, lower-risk repair, go straight to step 15 and just fold the speaker out of the way.

    .A. -

  11. QKxcNUeAhrixRuPH
    QKxcNUeAhrixRuPH
    fCYXnPX1iQDHNIaE
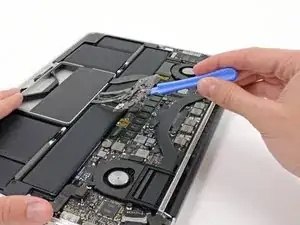
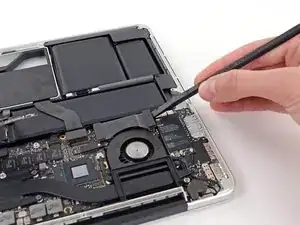
    • Führe das flache Ende des Spudgers unter die linke Seite des EA Board Datenkabelanschlusses.

    • Drehe den Spudger vorsichtig hin und her, um den Anschluss des EA Board Datenkabels aus dem Stecker auf dem Logic Board zu lösen.

    I also skipped this step as this data cable is not compromising the exchange of battery and less interaction with connectors is less risk of damage..

    Diesen Schritt habe ich ebenfalls weggelassen, da das Datenkabel den Austausch der Batterie nicht behindert und weniger Manipulationen an Steckverbindern bedeutet ein geringeres Risiko für Beschädigungen

    Martin Sippel -

  12. dWiQlHIlEeHEg2fO
    • Hebe das EA Board Datenkabel ab und entferne es vom MacBook Pro.

    This step is useless. Could be skipped

    Pierre S. -

Abschluss

Um dein Gerät wieder zusammenzusetzen, folge den Schritten in umgekehrter Reihenfolge.

Sam Goldheart

Mitglied seit: 19/10/12

457712 Reputation

0 Kommentare