Einleitung

Diese Anleitung ist eine private interne Anleitung, die als grundständige Anleitung genutzt wird.

  1. H5WoEX35nCJxJoVc
    H5WoEX35nCJxJoVc
    2h2sAVKwuSa6RdtP
    GOTxbmD6vWqqpGd3
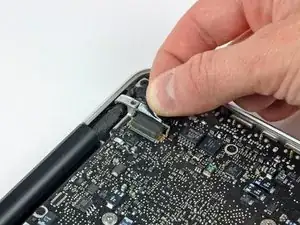
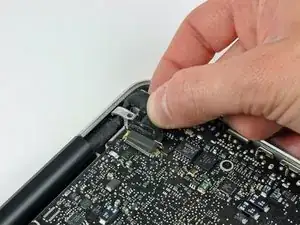
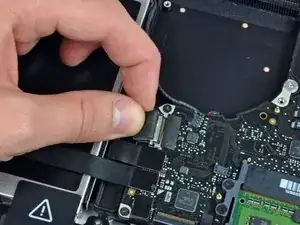
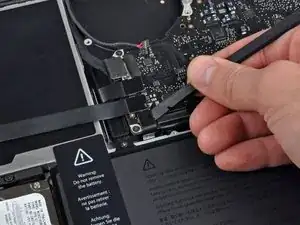
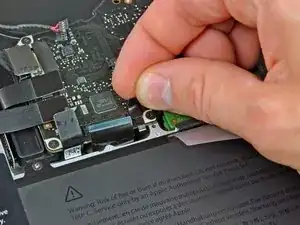
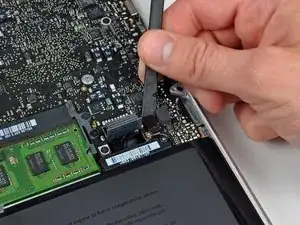
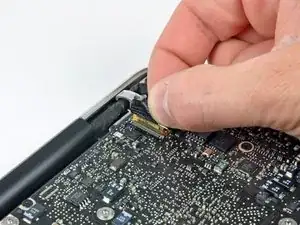
    • Fasse die Plastiklasche an, die am Sicherungsbügel des Displaydatenkabels befestigt ist, und drehe sie zur Seite des Computers mit der Gleichstromversorgung (DC-In) hin.

    • Ziehe den Stecker am Displaydatenkabel gerade aus seinem Sockel heraus in Richtung der Gleichstromversorgung (DC-In) des Computers.

  2. gQSfcvhCduWgFmTM
    gQSfcvhCduWgFmTM
    SepnYJ2fJKAXxapY
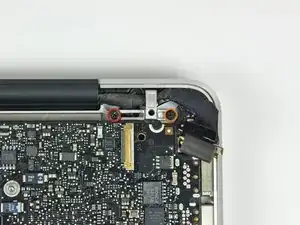
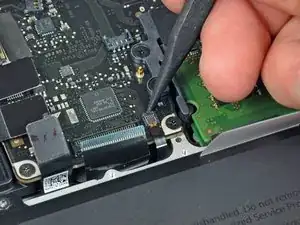
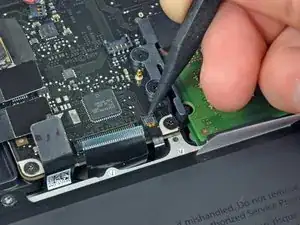
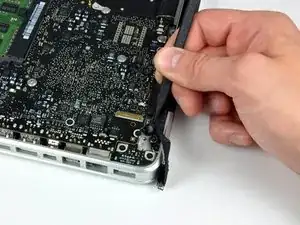
    • Entferne die folgenden beiden Kreuzschlitzschrauben, welche die Halterung des Displaydatenkabels am oberen Gehäuse befestigen:

    • Eine 7 mm Schraube

    • Eine 5 mm Schraube

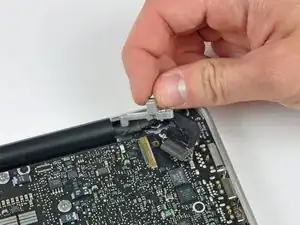
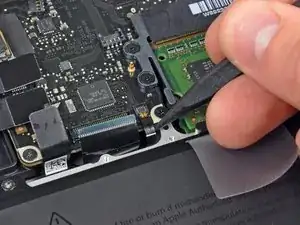
    • Hebe die Halterung des Displaydatenkabels aus dem oberen Gehäuse.

    Mine are Torx and got an extra clamp for the cable, just above the left screw

    Martin -

    If you only want to replace the DC-in board, stop here and GOTO 17 (and DO NOT 4 and 6).

    When the Logic board is loose, lift it up on the Harddrive end and shift slightly towards the HD, so that the USB connectors at the outside come free from under the case rim and the board can be lifted up a bit. Then there´s enough room to move the DC in board, pull the cable out with a pair of tweezers, wriggle it out from under the microphone cable and wriggle the new connector in. It can be pushed into the socket with tweezers or a small screwdriver. This worked perfect for me.

    Be careful not to bend the logic board, but otherwise I think there´s much less risk of messing anything up with all the connectors and bits and pieces that need to be loosened and fastened.

    Mike -

  3. 5S2ufCCUjVZjRSVR
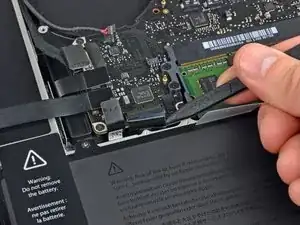
    • Hebele mit dem flachen Ende des Spudgers den Stecker von Subwoofer und rechtem Lautsprecher vom Logic Board hoch.

  4. U6VC4QVXgkmSKuKW
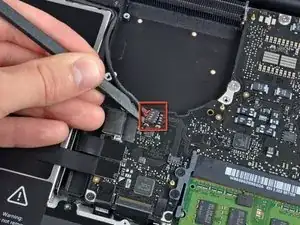
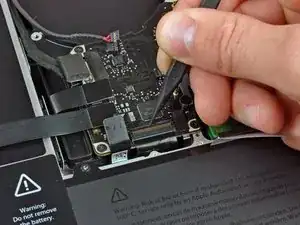
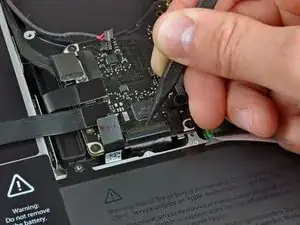
    • In diesem Schritt wird das Kamerakabel gelöst. Bei den meisten Geräten ist ein kleiner selbstklebender Halter am Logic Board angebracht, damit der Stecker festhält. Bevor du das Kabel entfernen kannst, muss der Halter aus dem Weg sein.

    • Ziehe den Stecker am Kamerakabel in Richtung des optischen Laufwerks, um es vom Logic Board zu trennen.

    • Der Sockel ist aus Metall und kann leicht verbogen werden. Richte den Stecker genau am Sockel aus, bevor du ihn wieder einsteckst.

    There is a small piece just below this connector which is just an adhesive block to keep the connector from coming out. It is easiest to peel it up first with a fingernail or spudger then remove the cable. Likewise reinsert the cable before reapplying the adhesive safety stop.

    Justin Jett -

    I couldn't reconnect this cable correctly, so my camera is not working anymore.

    It doesn't matter to me, I didn't used the camera that often...

    But the Ambient Light Sensor uses the camera to control keyboard lighting, so I wasn't able to see my keyboard in the dark anymore... :(

    If you have the same problem, after a couple of google hits I've found this app: https://www.macupdate.com/app/mac/22151/...

    Problem solved! YAY!

    PS: be careful because WIFI passes through this cable as well!!!!

    simbass -

    Look at the photo intently. The connector is inserting not in parallel, but at a slight angle. The bottom corner of the connector is slightly ahead. It is important! Singular metod to insert it.

    Vladimir -

  5. mpLOpCIkoW2xCqif
    mpLOpCIkoW2xCqif
    W2C43m61pZ6Dyqcb
    eo6LQDikRDMpITI5
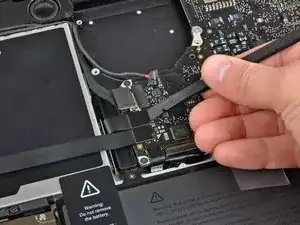
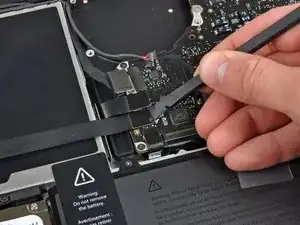
    • Hebele die Stecker am Kabel vom optischen Laufwerk, der Festplatte und des Trackpads mit dem flachen Ende des Spudgers vom Logic Board hoch.

  6. 4Sf1wHms3aaL4MXg
    4Sf1wHms3aaL4MXg
    AE14gLXhNbiplKt4
    C1TOaQijIPD6LtQn
    • Klappe den Sicherungsbügel am ZIF Verbinder des Flachbandkabels zur Tastatur mit dem Fingernagel oder der Spudgerspitze hoch.

    • Schiebe das Flachbandkabel zur Tastatur mit dem Spudger aus seinem Sockel heraus.

    When reinserting the keyboard ribbon cable, make sure you push it in all the way (two plastic tools are helpful - one to push it down flat, the other to coax it all the way in). For 3 days after replacing a top case, my MacBook Pro 13" wouldn't start up. I thought the main logic board was fried too. However, reinserting the keyboard ribbon cable again, this time perhaps 1mm farther in, and it started up again! I did the same for the "keyboard backlight ribbon cable" (i.e. reinserted it just to make sure). Really not sure which completed the circuit so is would start, but I suspect the keyboard ribbon cable.

    amiller770 -

    Zitat von amiller770:

    When reinserting the keyboard ribbon cable, make sure you push it in all the way (two plastic tools are helpful - one to push it down flat, the other to coax it all the way in).

    I usually use a piece of sticky transparent office tape and stick it over the flat cable a bit further away from the mating part then pull on it. There is no better way to force the flat cable into a stiff connector without damaging the fragile cable.

    Leo Bodnar -

    As others have stated, if the keyboard ribbon cable isn't fully inserted the MBP will not power on. Leo Bodnar's recommendation to use a piece of transparent office tape did the trick for me. Many thanks Leo!

    Matthew Rankin -

    Inserting the ribbon cable for the keyboard was really difficult, but i was able to get it in using a piece of tape and pulling it up, just like the tape on the keyboard backlight.

    Kelly Legner -

    Using a piece of tape is sheer genius Kelly. My mom once said her definition of genius was an idea that, when you hear it, you say to yourself, “now why didn’t I think of that?” But you never would have thought of it. Brava (or bravo) Kelly!

    JonnyLine -

  7. ORKjULSYLhNuFQUi
    • Ziehe das kleine Stückchen schwarzes Klebeband vom Sockel des Flachbandkabels der Tastaturbeleuchtung ab.

  8. omJ1eHiMfXlFtGVO
    omJ1eHiMfXlFtGVO
    GGYWsYuMi5kZONiq
    TPaIFGAGOPyrUnkA
    • Klappe den Sicherungsbügel am ZIF Verbinder des Flachbandkabels der Tastaturbeleuchtung mit der Spudgerspitze hoch.

    • Schiebe das Flachbandkabel zur Tastaturbeleuchtung mit der Spudgerspitze aus seinem Sockel.

  9. cZ3jLTCybSZqjX1s
    • Hebele den Stecker am Kabel der Akkuanzeige mit dem flachen Ende des Spudgers vom Logic Board hoch.

  10. 1ttqGf15CrXqgESa
    • Hebele das Mikrofon mit der Spudgerspitze aus der Klebeverbindung zum oberen Gehäuse.

  11. hlvPHn5hLlwTnykQ
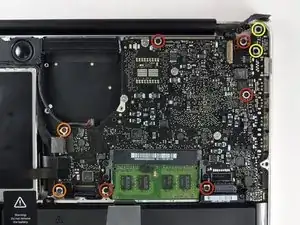
    • Entferne folgende Kreuzschlitzschrauben:

    • Fünf 3,1 mm Schrauben

    • Zwei 3,9 mm Schrauben

    • Zwei 7 mm Schrauben vom DC-In Board

  12. uqAscA6i2AwOjsxs
    uqAscA6i2AwOjsxs
    1FKTMO2VElhgwKAM
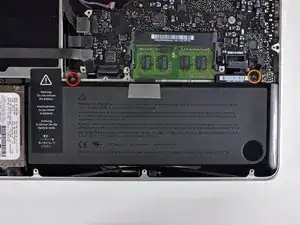
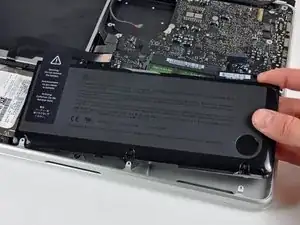
    • Entferne folgende Tri-point Schrauben, welche den Akku am oberen Gehäuse befestigen:

    • Eine 5,5 mm Schraube

    • Eine 13,5 mm Schraube

    • Hebe den Akku aus dem oberen Gehäuse.

  13. MWPHlxOjnkYSuqrw
    MWPHlxOjnkYSuqrw
    ZgwauAvagMTUNQWZ
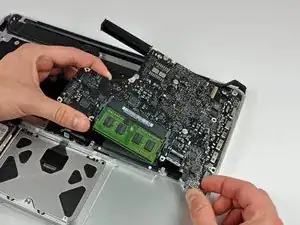
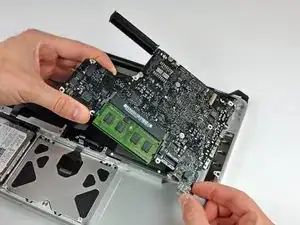
    • Hebe das Logic Board an der linken Kante hoch und ziehe weiter daran, bis die Anschlüsse an der Seite des oberen Gehäuses frei werden.

    • Ziehe das Logic Board von der Seite des oberen Gehäuses weg und entferne es. Achte dabei darauf, dass sich das DC-in Board nicht verfängt.

    • Sei vorsichtig und beschädige nicht den empfindlichen Stecker der Mikrofoneinheit.

    When putting the logic board back in place, it's easier to angle the mic down in it's place as you are placing the board in, rather than after the board is seated.

    amiller770 -

Abschluss

Um dein Gerät wieder zusammenzusetzen, folge den Schritten in umgekehrter Reihenfolge.
Walter Galan

685540 Reputation

0 Kommentare