Einleitung
Folge dieser Anleitung, um ein defektes Trackpad zu ersetzen.
Werkzeuge
Ersatzteile
-
-
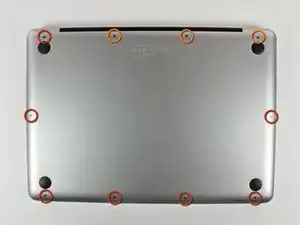
Entferne die folgenden 10 Kreuzschlitz-Schrauben, die die Gehäuse-Unterseite des MacBook Pro 13" Unibody befestigen:
-
Sieben 3 mm Schrauben.
-
Drei 13,5 mm Schrauben.
-
-
-
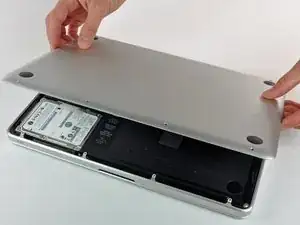
Hebe die Unterseite vorsichtig an und drücke sie Richtung Rückseite des Laptops, um die Halterungsclips zu lösen.
-
-
-
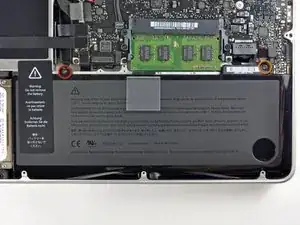
Entferne die folgenden zwei Tri-Point Schrauben, die den Akku an der Gehäuse-Oberseite befestigen:
-
Eine 5,5 mm Tri-Point Schraube.
-
Eine 13,5 mm Tri-Point Schraube.
-
-
-
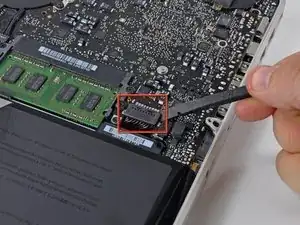
Löse mit der Kante eines Spudgers den Akkuanschluss nach oben, weg vom Sockel auf dem Logic Board.
-
-
-
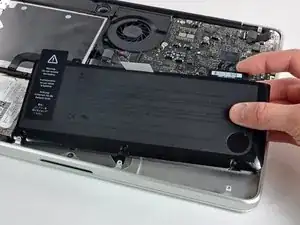
Hebe den Akku aus der Gehäuse-Oberseite.
-
Lade ihn auf 100% und lasse ihn mindestens zwei weitere Stunden am Ladegerät. Ziehe den Stecker und benutze dein MacBook normal, um den Akku zu entladen. Wenn die Ladeanzeige am Minimum ist, dann speichere ab und lasse den Laptop an, bis er von selbst ausgeht. Warte wenigstens 5 Stunden und lade dann ohne Unterbrechung auf 100% auf.
-
Wenn dir nach dem Einbau deines neuen Akkus etwas Ungewöhnliches auffällt oder Probleme auftreten, kann es sein, dass du den SMC deines MacBooks zurücksetzen musst.
-
-
-
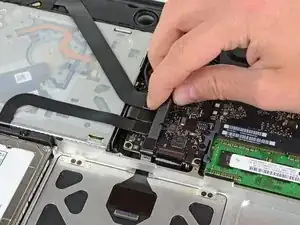
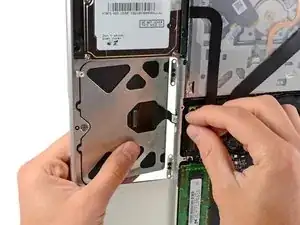
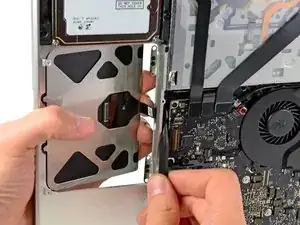
Hebe vorsichtig mit dem flachen Ende eines Spudgers den Anschluss des Trackpads vom Sockel auf dem Logic Board.
-
-
-
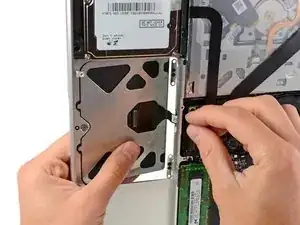
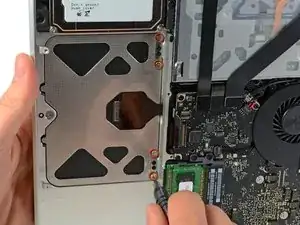
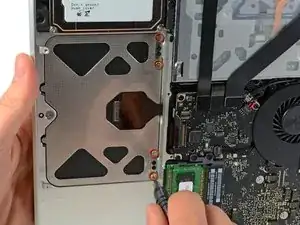
Halte das Trackpad an der Kante, die dem Logic Board am nächsten ist, mit einer Hand fest, und entferne die vier rot markierten 1,2 mm Kreuzschlitzschrauben.
-
-
-
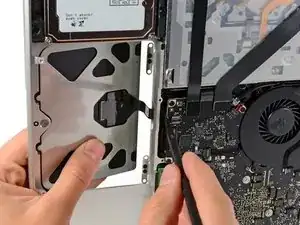
Wenn notwendig entferne vorsichtig die Ecke das Trackpads neben der Tastatur aus ihrer Vertiefung im Gehäuse-Oberteil, indem du sie von den Klammern des Oberteils wegdrückst.
-
Drücke vorsichtig den Anschluss und das Kabel des Trackpads nach unten durch den Schlitz im Gehäuse.
-
Es könnte nötig sein, den Anschluss des Trackpads mit einem Spudger an der Ecke des Logic Boards vorbeizuschieben.
-
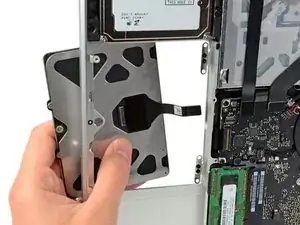
Wenn das Kabel komplett durch den Gehäuseschlitz gezogen wurde, ziehe das Trackpad weg vom Gehäuse-Oberteil und entferne es aus dem Laptop.
-
-
-
Um das Kabel vom alten Trackpad zu lösen, öffne erst den Verschluss des ZIF Verbinders. Dann erhitze das Kabel mit einem Fön oder einem iOpener, um den Kleber zu lösen und entferne dann vorsichtig das Kabel.
-
-
-
Befestige als nächstes das Trackpad mit den vier 1,2 mm Kreuzschlitz-Schrauben am inneren Rand des Touchpad.
-
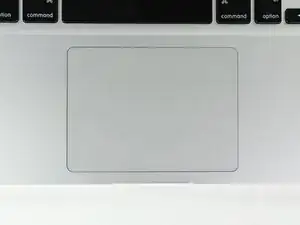
Prüfe die Ausrichtung des Trackpads im Gehäuse-Oberteil an der Seite der Tastatur. Wenn du das Touchpad perfekt im Oberteil ausgerichtet hast befestige die vier Kreuzschlitz-Schrauben wieder komplett.
-
Arbeite die Schritte in umgekehrter Reihenfolge ab, um dein Gerät wieder zusammenzubauen.
13 Kommentare
I replaced the trackpad and the new one had a strange behave: the arrow moves, the multi-touch works, but was not possible to click and when the arrow passes on the dock it doesn't react at all, then I plugged in an external mouse and the behave was the same (in few words it was impossible to use the computer).
Now I putted back the old trackpad and I work with the external mouse.
Did someone experienced something similar?
Did you solve in some way?
Thank you in advance.
Are you sure you pushed the cable in all the way
Hello,
I also had a similar problem. I was told to try to reset the SMC in this way:
1. Attach the MagSafe power cord
2. Power off the MacBook Pro
3. Press the L-Shift/Control/Option and Power button at the same time and hold.
4. Release them all at the same time
5. Then power on the MacBook Pro
but didn't work for me. Any other suggestion?
Anyone have trouble with the trackpad acting wonky after installation? Clicking well, but the right 1/3 side does not track properly. Cursor will start to go all over the place or stop. Also installed an Anker replacement battery as well, took off the foot pads as recommended. Just trying to figure out if it's software or hardware. (i.e. did I get a faulty replacement trackpad.).
Thanks!

Compare the short screws carefully before reinstalling them. The shouldered screws go in the holes on the front edge.
David Kilbridge -
Before I started removing any screws I took a piece of paper and drew the bottom of the laptop and put a piece of double-sided tape in the spot where each screw goes. That way when I took out the screws, I could put them on the tape so I knew exactly which screw went in which spot. I did the same thing for dismantling the inside on another sheet of paper, then a third sheet for the screen after getting the front glass off.
mastover -
I use a similar technique: I print out the iFixit manual for the job, and Scotch-tape down the screws/brackets/cables I remove at each step next to the component descriptions. That way, when I'm reassembling, the bits are taped right next to the photo of where they came from.
adlerpe -
That's exactly what I do for all my repairs! It's the best way to keep track of all of the parts ' original location and to make sure that you don't miss any parts during reassembly.
joyitsjennie -
Great idea and one I use often
Thomas Overstreet -
Excellent idea! Thanks for sharing it here.
Laura Sharkey -
I used a 00 that fit but the screws were very tight so I used a tiny paintbrush with some wd40 on it and put it around the edges of the screws. Worked like a charm
valentinedhdh -
I use a magnetic mat and place the screws in order on that :)
Cary B -