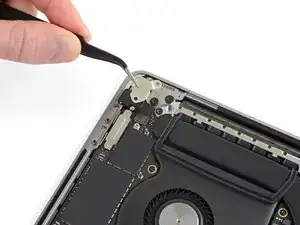
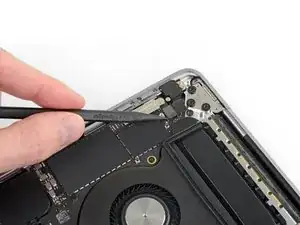
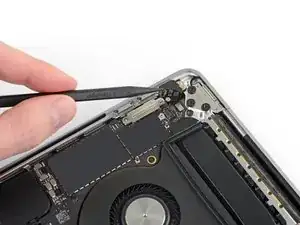
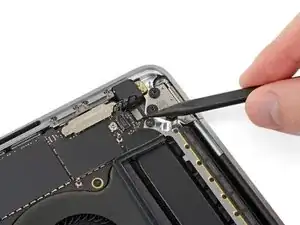
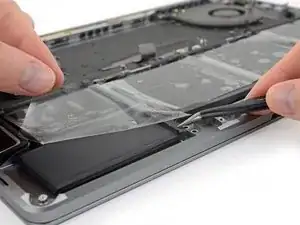
Einleitung

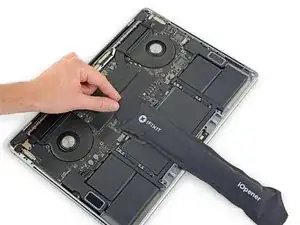
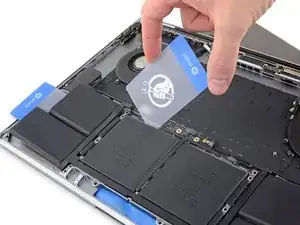
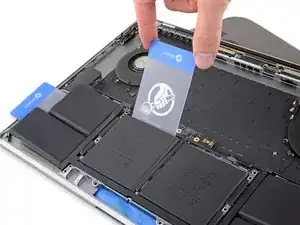
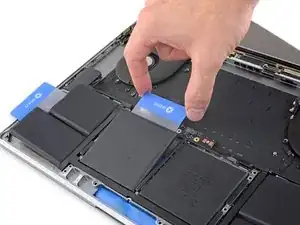
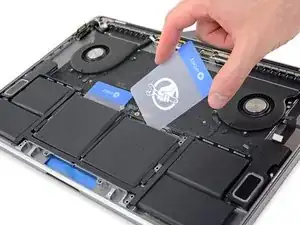
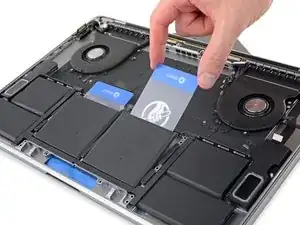
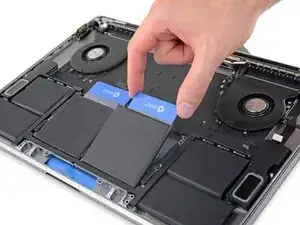
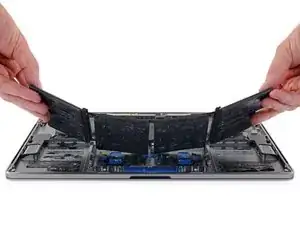
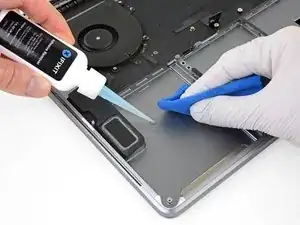
Anhand dieser Anleitung kannst du den fest im Gerät verklebten Akku aus deinem MacBook Pro entfernen. Dazu brauchst du ein iFixit Kit mit Klebstoff-Entferner. Das flüssige Lösungsmittel im Kit löst den Klebstoff auf, mit dem der Akku eingeklebt ist, so dass du ihn leichter entfernen kannst.

Der iFixit Klebstoff-Entferner ist brennbar – benutze ihn nur in gut gelüfteten Räumen, rauche nicht und arbeite nicht in der Nähe eines offenen Feuers.

Um die Gefahr von Beschädigungen zu minimieren, schalte dein MacBook zunächst an und entleereden Akku vollständig, bevor du mit diesem Prozess beginnst. Ein aufgeladener Lithium-Ionen-Akku kann sehr gefährlich sein, wenn er aus Versehen beschädigt wird. Wenn dein Akku aufgebläht oder geschwollen aussieht, musst du spezielle Vorsichtsmaßnahmen treffen.

Hinweis: Das Lösungsmittel kann bestimmte Plastikarten beschädigen. Befolge alle Anweisungen und sei vorsichtig beim Auftragen des Lösungsmittels.

  1. dLTjRC36EADiCFBK
    dLTjRC36EADiCFBK
    FZYKkYtpGq1QwBO2
    YAOsWGKtCtOGVFRy
    • Zuallererst musst du die automatische Startfunktion (Auto Boot) deines Macs deaktivieren. Auto Boot schaltet deinen Mac ein, wenn du ihn aufklappst, was versehentlich beim Auseinanderbau passieren kann. Benutze diese Anleitung oder befolge die anschließende Kurzversion zum Deaktivieren von Auto Boot. Dieser Befehl funktioniert eventuell nicht auf allen Macs.

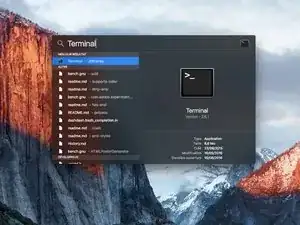
    • Schalte deinen Mac ein und starte Terminal.

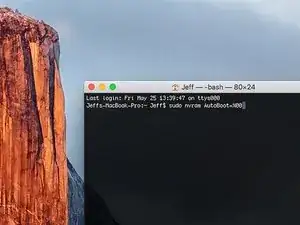
    • Kopiere den folgenden Befehl und füge ihn im Terminal ein (oder tippe ihn exakt so ein):

    • sudo nvram AutoBoot=%00

    • Drücke die Eingabetaste [return]. Wenn du dazu aufgefordert wirst, gib dein Administratorpasswort ein und drücke erneut [return]. Hinweis: die Return-Taste kann auch mit ⏎ oder "enter" gekennzeichnet sein.

    • Nun kannst du deinen Mac sicher herunterfahren und das untere Gehäuse öffnen, ohne dass er sich versehentlich einschaltet.

    • Nachdem deine Reparatur zu Ende ist und dein Gerät wieder erfolgreich zusammengebaut ist, musst du Auto Boot mit folgendem Befehl wieder aktivieren:

    • sudo nvram AutoBoot=%03

    Is this step necessary? I can’t perform this step as I am attempting to repair water damage and need to remove logic board & most likely replace the battery.

    Macrepair SF -

    @mac_medic You definitely don’t want the power coming on while the board is wet. In your case, I think powering on the machine to disable Auto Boot would do more damage than it prevents. I agree, skip this step and be prepared to disconnect the battery quickly if the laptop automatically powers on. Good luck!

    Jeff Suovanen -

    Thats right! You don't want power running while working on your logic board.

    Dan -

    This did not work when running High Sierra.

    Kyle B -

    Tried this on a 2018 MBP 13” Touchbar (there’s no iFixit guide for this model yet). Need to replace a broken screen.

    Luckily I managed to connect to an external screen (Cmd-Down Brightness to switch displays) and enter above command. Seems to work, but there’s another problem with this model - it powers up as soon as any key is pressed……. ffs <gnashes teeth>

    Cool_Breeze -

    I unscrew the battery first and wrap electrical tape over the logic board battery connector before attempting any repairs to the board. Haven’t had any problems yet and I’ve worked on about 10 of these models already. Also when you open the bottom case use a suction cup at the bottom and pull up then run a plastic spudger along the edges to disconnect the clips. Also only use a plastic spudger on the board. Saw a youtube video from a repair shop and he did not disconnect the power and used all metal tools during the entire process of removing the board. His last step was to disconnect the battery terminal.

    Brian -

    Is this step necessary if my mac can turn on? Battery fully dead(

    Nursat b -

    BEFORE YOU START: The included torx head stripped off before I was done (and you might need an additional T4) so stop now and go buy a good one. Also they fail to warn you above to get some blue threadlocker ahead of time.

    Jason Sherron -

    This command did not work for me and I read that sometime in later 2020 Apple stopped this command from working…any ideas on a work around?

    Patrick Machacek -

    Not able to do that with damaged screen

    richardjgreen -

    If you have a damaged screen you can still use a converter from thunderbolt (USB 3) to HDMI and plug your Macbook Pro to your TV as monitor display. Just make sure to chose the right Source (HDMI IN) in your TV. I did it and to make it work I unplug and plug again in my Macbook and so I could disable the Auto boot

    Roberto Sanchez Bustos -

    Hi. This does not work on 2018 13” MacBook Pro with Touch Bar. I did exactly this to disable auto boot. But when I check by using nvram -p it says: auto-boot true. Am I doing something incorrectly? I did everything step by step. Copied and pasted the sudo command, pressed enter and then entered my password. I have Big Sur 11.1 installed. Is there any other way since I need to replace the screen. Thank you. Adrian

    Adrian Vizik -

    Hi everyone. This is also a little pointless if you can’t see anything on the screen, and you don’t have a display adapter to USB C to display it. I agree with Brian about removing the back and disconnecting the battery cable before you even think about opening the lid of the MacBook. Applying the insulation tape is also a handy little tip that just makes sure there is no way to discharge from either the board or battery.

    Roberto Enrieu -

    running `nvram -p | grep 'AutoBoot'` in terminal verifies that it was accepted

    result: `AutoBoot %00`

    Marek Polák -

    Running Big Sur 11.6.7 on a 2019 16" MBP, it's "auto-boot". So it's: nvram -p | grep 'auto-boot' to display the current state, the default is true - and then to change it, sudo nvram auto-boot=false which turns it off.

    Ed Mechem -

    This step is completely unnecessary if you follow the guide to disconnect the battery properly. Just put some tape between the battery and logic board connection to prevent it from accidentally touching and therefore powering on the laptop.

    Grant Ormsby -

    It took me a few tries to make this command work, as I was able to copy and paste the command into Terminal, but could not type in my laptop’s password. I finally typed my password into a text document, copied it (command C), and then pasted it into Terminal and it worked.

    tommy404 -

    I didn’t do this. Mine never auto-booted before I replaced the battery. Now it does.

    hatuxka -

    BEFORE YOU DO ANYTHING - CHECK THE BATTERY!

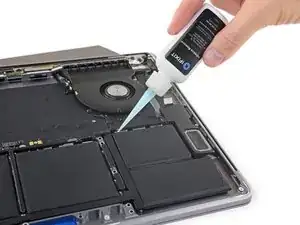
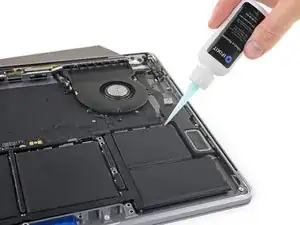
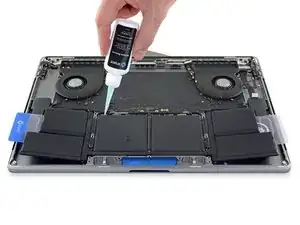
    I-fixit sent me a bad battery, which I didn’t realize until it was already install. They sent me a new one, but I wasted hours uninstalling and reinstalled.

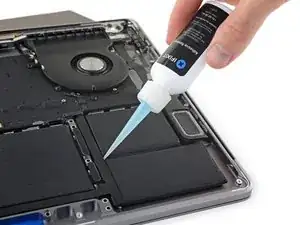
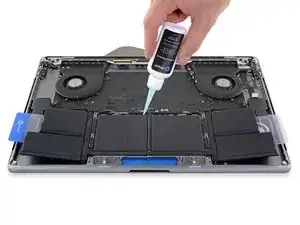
    Get a volt meter and measure the voltage on the output of the battery pack. If it reads 0 V, SEND IT BACK. It should read over 2 V.

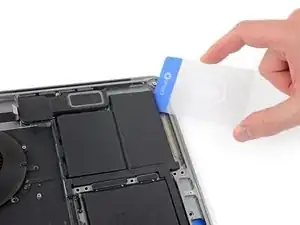
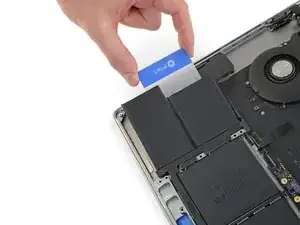
    bcardanha -

    When I did this from Terminal.app within Recovery Mode, the “sudo” was not recognized but I could invoke it without the sudo part. It seems to have been accepted when looking at “nvram -p”

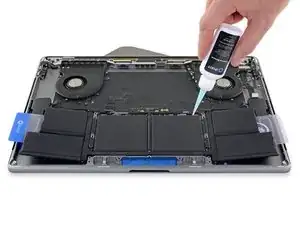
    johann beda -

    When in Recovery Mode, you already have superuser powers. So you don't need to prefix commands with the sudo command to invoke them with root privileges; you already have them. Do a pwd (print working directory) after opening Terminal in Recovery Mode, and you'll see that you're in the root user's directory.

    Ed Mechem -

    I received the battery kit for my 2018 MacBook Pro and as per the above comment from bcardanha - Oct 12, 2021, I checked the voltage on the pads marked + and - . It was zero volts so I panicked a bit.

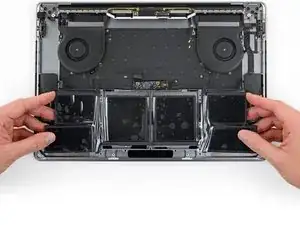
    I sent a message on the iFixiT Facebook page and I got no reply. I finally found the customer service email for Ifixit Europe and sent them an email voicing my concern as I was not keen to work for couple of hours just to discover that the battery is faulty. I had an almost instant reply on the email (kudos to them) and they adviced me to go ahead and install the new battery as the voltage measured when battery is not connected is not relevant.

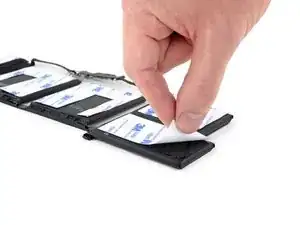
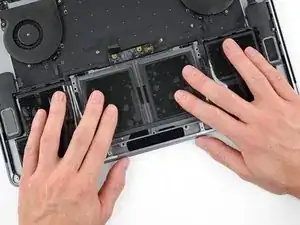
    I took a leap of faith and after two hours… the new battery showed 50% charge and everything seems to be working just fine. I am happy it worked.

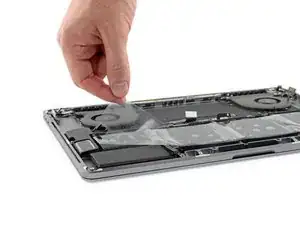
    Mircea Comanici -

    After removing the old battery and installing the new battery I powered up the MBP before screwing the bottom on. I discovered the my keyboard would not function. It took a few hours of investigation and frustration that I discovered the track pad power ribbon had become partially dislodged from the trackpad. I was able to see that this through the little machined slot where the battery sat. I had to remove the trackpad to reinsert the power ribbon back into the connector in the trackpad. after reassembling and reinstalling the battery etc the keyboard worked. Just food for thought if your run into the keyboard issue.

    Ed Mease -

    This should be the default. IMO I tell you to power on - not the lid.

    G Sena -

    Est ce que cela fonctionne sur un macbook pro 2017 sans touchbar ?

    maël muzelet -

    Bonjour Maël, oui, ce tutoriel concerne "les MacBook Pro 2016 (et plus récents) et les MacBook Retina 12" 2017 (et plus récents)"

    Claire Miesch -

    Excellent instructions. I was able to follow and install the new screen. I recommend that you get a good set of tools before you begin. I started with an inexpensive repair kit bought online. The Penta and torx bits failed. I bought an IFIXIT kit with quality bits and I was able to do everything I needed.

    Tom Markham -

    If you're not running an admin account the sudo command won't work (which honestly, you should not be running admin). Rather than logging in to your admin amount via the OS, in the terminal type "login [admin username]," then the password and you'll be able to do the sudo command as described above. Once you're complete, type "logout [admin username]" and you'll be good to go. Obviously replace [admin username] with whatever the account name for your admin user is.

    arichard2401 -

  2. 5iYIgSZgIU6hkP1B
    5iYIgSZgIU6hkP1B
    UVKOsGSvaL1OsSL3
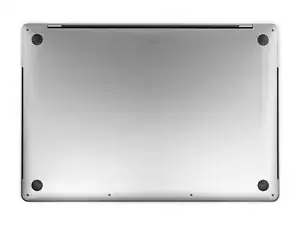
    • Schalte dein MacBook Pro vollständig aus und ziehe den Stecker aus der Steckdose, bevor du anfängst. Schließe das Display und drehe den Laptop um.

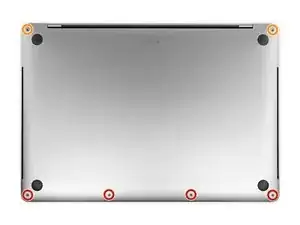
    • Entferne mit einem P5-Pentalobe-Schraubenzieher die sechs Schrauben, mit denen das untere Gehäuse befestigt ist:

    • Vier 4,7 mm Schrauben

    • Zwei 6,6 mm Schrauben

    • Du wirst sehen, dass die Schrauben in einem leichten Winkel herauskommen. Du musst sie dann später auch genau so wieder einsetzen.

    • Merke dir gut, wo welche Schraube war und vergewissere dich, dass du sie wieder genau dort eindrehst, wo du sie herausgedreht hast, um Schäden an deinem Gerät zu vermeiden.

    I miss a printable template to leave the screws and removed parts on it for future identification when reassembly, linked maybe with the location in the Macbook, or with the number of the step.

    Juan Ignacio Fernández García -

  3. ijkfCfPMSRX2ALo2
    ijkfCfPMSRX2ALo2
    5CkAq3GH4yfvDTM5
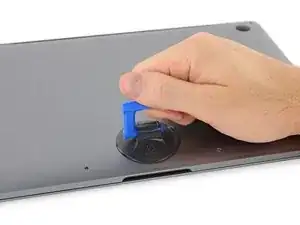
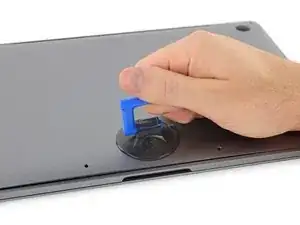
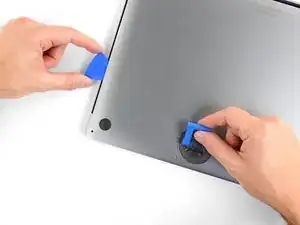
    • Drücke den Saugnapf in der Nähe der Vorderkante auf das untere Gehäuse zwischen den Schraubenlöchern.

    • Ziehe den Saugnapf gerade so weit nach oben, bis eine kleine Lücke unter dem unteren Gehäuse entsteht.

  4. 3tccyXXDSgVUfV5r
    3tccyXXDSgVUfV5r
    dGSZtjC2B25WfTqZ
    LkbLcUdZnPtyUlDZ
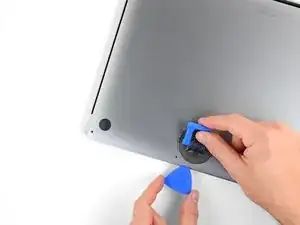
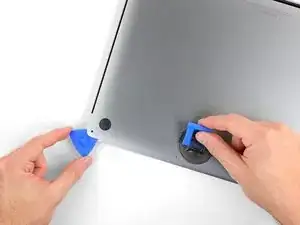
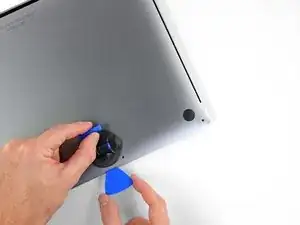
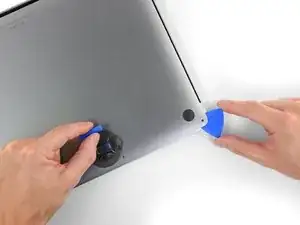
    • Schiebe die eine Ecke eines Plektrums in die entstandene Lücke.

    • Schiebe das Plektrum um die nächste Ecke und dann zur Hälfte über die Seite des MacBook Pro.

    • Dadurch wird der erste der verdeckten Clips freigegeben, mit denen das Gehäuse gesichert ist. Du solltest den Clip erfühlen und ihn klicken hören.

  5. HOVvMHuquXdBar2x
    HOVvMHuquXdBar2x
    oFJCHJDsnpdUHHUU
    ODWHnoCuXGXGKJla
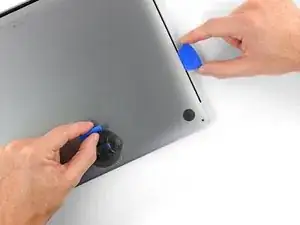
    • Wiederhole den vorherigen Schritt auf der anderen Seite und verwende das Plektrum, um den zweiten Clip zu lösen.

  6. cuTtNQlkiufuESrG
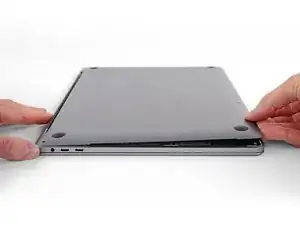
    • Hebe die Vorderkante des unteren Gehäuses (die dem Displayscharnier gegenüberliegende Seite) so weit an, dass du mit den Fingerspitzen darunter gleiten und es gut greifen kannst.

    • Zwei zusätzliche verdeckte Clips in der Mitte der Abdeckung können an dieser Stelle klicken und sich öffnen, sofern dies noch nicht geschehen ist.

    • Hebe nicht zu weit an und versuche noch nicht, das Gehäuse vollständig zu entfernen.

  7. rXaRTOtGXtFtIpF5
    rXaRTOtGXtFtIpF5
    AlvVmxKf6DlNLakh
    WJMFC2MdulDBxoXv
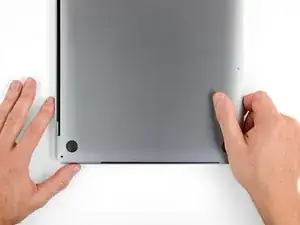
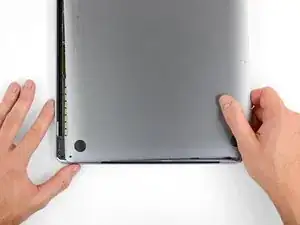
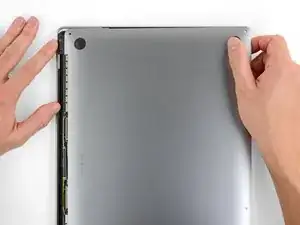
    • Ziehe das untere Gehäuse fest in Richtung der Vorderkante des MacBook (vom Scharnierbereich weg), um die letzten Clips zu lösen, mit denen das untere Gehäuse gesichert ist.

    • Ziehe zuerst an einer Ecke und dann an der anderen.

    • Zur Seite ziehen - nicht nach oben.

    • Das könnte ziemlich viel Kraftaufwand bedeuten.

    With the amount of force needed to carefully pull the back panel out, this caused the back panel to scratch the battery. I don't see or hear any expansion, but this still has me concerned.

    gladgura -

    this step must require a lot of force. I tried to pull it with the plastic hookie thing from the ifixit set by hooking it in one of the screw holes — the tip of the hookie thing broke.

    Oleksii Toldaiev -

    The amount of force required for removing the bottom cover is absolutely ridiculous. Almost feels like i'm about to push my MacBook towards the wall the second it comes off.

    Be careful, I ended up breaking 2 grounding pins on the motherboard last time I tried opening my computer up.

    techtalkf -

    PLEASE DON'T PULL!!!

    Instead just gently push with plastic pick from the other side (where vents outputs are) towards the center... Cover will very easily open that way.

    I hope iFixit will correct this step.

    Kamil Roman -

    Came here to share exactly this.

    Robert -

    That's definitely how this step should be done. Thanks!

    VovS -

  8. 1eexZLVG2E3kwXhw
    1eexZLVG2E3kwXhw
    Koax55WG2pDjZ1MC
    WUXJn5rl13iOX11X
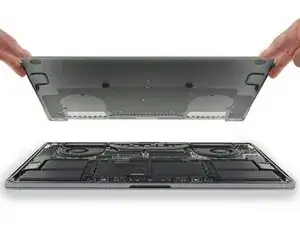
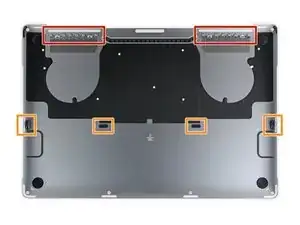
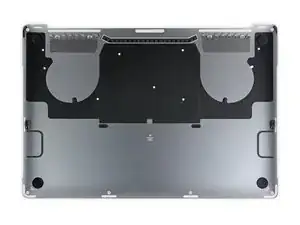
    • Entferne das untere Gehäuse.

    • So baust du das untere Gehäuse später wieder ein:

    • Lege es in Position und richtedie Clips in der Nähe des Displayscharniers aus. Drücke die Abdeckung nach unten und schiebe sie zum Scharnier. Es sollte nicht mehr rutschen, wenn die Clips einrasten.

    • Wenn die Clips vollständig eingerastet sind und das untere Gehäuse korrekt ausgerichtet ist, drücke fest auf das untere Gehäuse, um die vier verdeckten Clips darunter einzurasten. Du solltest fühlen und hören, wie sie einrasten.

    If I had it all to do over, again, I would blow out the dust with compressed air at this point. During the disassembly, I kept encountering little dust bunnies, and I was very worried that one would get caught in one of the connectors when I plugged everything back up (which wouldn’t get discovered until I put it all back together and tried out all of the components).

    Joe Emenaker -

  9. PTIZqDdpESIEg6iK
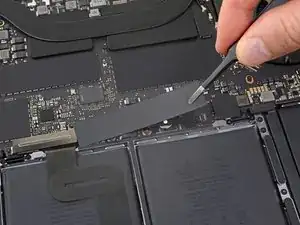
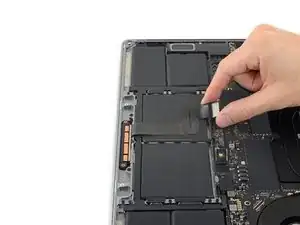
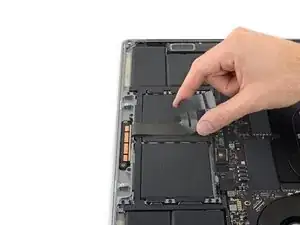
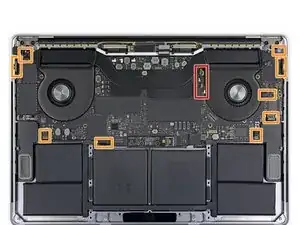
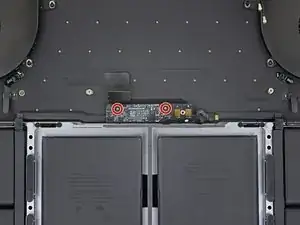
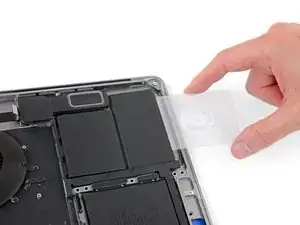
    • Ziehe den isolierenden Aufkleber auf der Akkuplatine an der der Akku nächstgelegenen Kante des Logic Board ab und entferne ihn.

    • Wenn sich die Abdeckung nicht leicht ablösen lässt, erwärme sie mit einem iOpener, einem Haartrockner oder einer Heißluftpistole, um den darunter befindlichen Klebstoff aufzuweichen, und versuche es erneut.

    • Wenn die Abdeckung beim Zusammenbau nicht sicher sitzt, drehe sie um 180 Grad. Sie muss richtig ausgerichtet sein, damit die darunterliegenden Klebepads die Schrauben vom Board berühren.

  10. MZhqvhivJc6ltuBI
    MZhqvhivJc6ltuBI
    a5jICxWI6SwpreQK
    ur1oBPkypLAwkAay
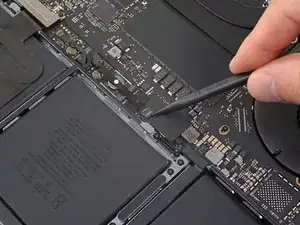
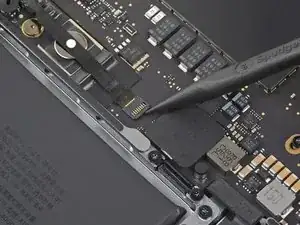
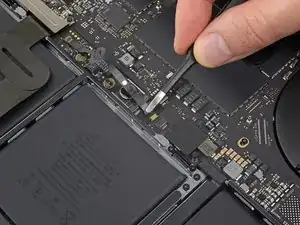
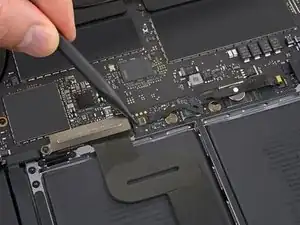
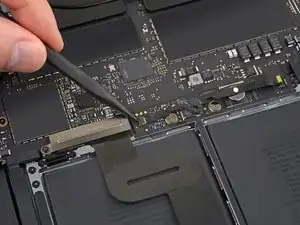
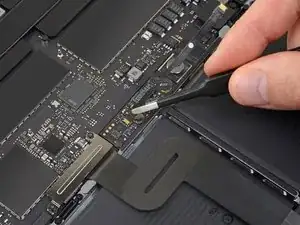
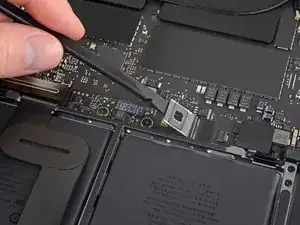
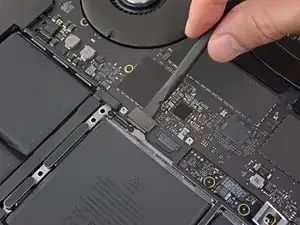
    • Ziehe das Klebeband vom Anschluss des Datenkabels der Akkuplatine ab.

    • Heble mit einem Spudger vorsichtig die Verriegelungsklappe am ZIF-Anschluss für das Datenkabel der Akkuplatine auf.

  11. SBuNWrrEsnEHWE5U
    SBuNWrrEsnEHWE5U
    WSVYglC4kJSVXbLA
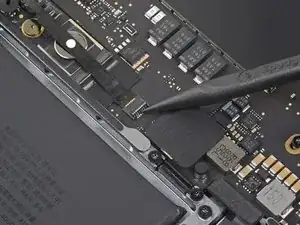
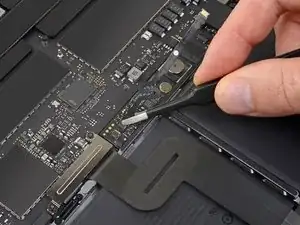
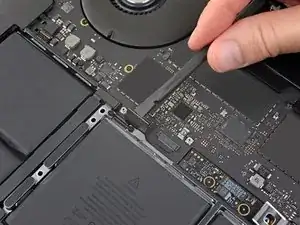
    • Trenne das Datenkabel der Akkuplatine, indem du es aus der Buchse auf dem Logic Board ziehst.

    • Schiebe parallel zum Logic Board in Richtung des Kabels.

  12. 3QMLTKDDDaOIEXZk
    3QMLTKDDDaOIEXZk
    QJeqYMjSJObGSxLc
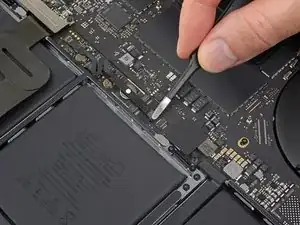
    • Heble die Verriegelungsklappe am Stecker am gegenüberliegenden Ende des Datenkabels der Akkuplatine auf und trenne sie.

  13. doyrMkF4Ol2fsUCf
    doyrMkF4Ol2fsUCf
    FlF4ZwiPrAxEkwSi
    • Schiebe das Datenkabel der Akkuplatine aus der Buchse auf der Akkuplatine und entferne es vollständig.

    • Achte darauf, dieses Kabel nicht verkehrt herum oder falschrum zu verlegen. Bei korrekter Installation sollte der weiße Aufkleber mit der Flüssigkeitsanzeige nach oben zeigen und direkt über der Verbindungsschraube des Akkus positioniert sein.

    Bonjour, super Tuto, petite question elle sert a quoi cette nappe , et quesqui se passe si elle est pas branché ?

    Jorgio -aigleBrun- -

  14. YCrvX4dDTLFRo2He
    YCrvX4dDTLFRo2He
    REFmgM15LSgj5I14
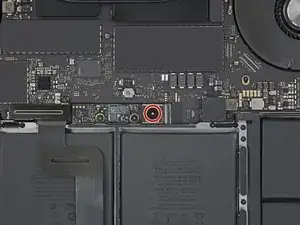
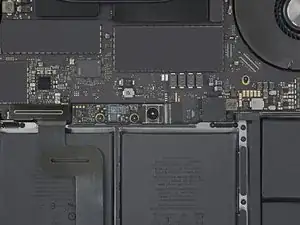
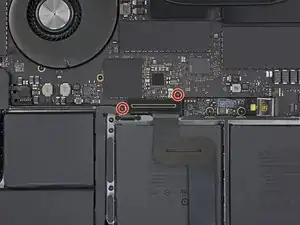
    • Entferne mit einem T5-Torx-Schraubendreher die 3,7-mm-Flachkopfschraube, mit der der Akkustecker befestigt ist.

  15. rmLuSU2NmsUdQIQp
    rmLuSU2NmsUdQIQp
    aMGREyB4myE324Ug
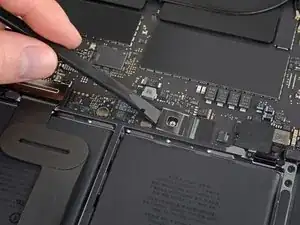
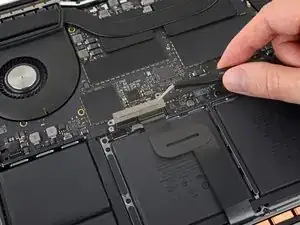
    • Verwende einen Spudger, um den Akkustecker anzuheben und den Akku abzuklemmen.

    • Hebe den Stecker hoch genug, um ihn während der Arbeit von der Buchse zu trennen. Wenn es versehentlich zu Kontakt kommt, kann dein MacBook Pro beschädigt werden.

    Put a little bit of insulating tape over the terminal to be safe.

    Brian Tibbels -

  16. sK4lqBHxryavnDid
    sK4lqBHxryavnDid
    oF22XSHRWEFwHmoR
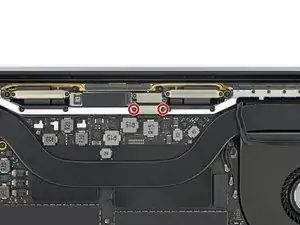
    • Entferne mit einem T3-Torx-Schraubendreher die beiden 1,9-mm-Schrauben, mit denen die Abdeckungshalterung für die Tastatur- und Trackpad-Kabelanschlüsse befestigt ist.

    • Entferne die Halterung.

  17. ncIQWCHpRGO1fSb2
    ncIQWCHpRGO1fSb2
    yKukLfBQSF5SR1va
    • Verwende einen Spudger, um das Trackpad-Kabel zu trennen, indem du den Stecker gerade vom Logic Board abhebelst.

  18. noPvQ2CLs1jptX2p
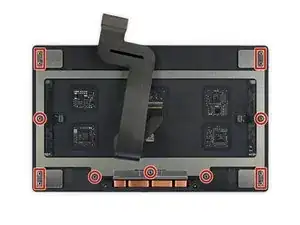
    • Erwärme das Trackpad-Flachbandkabel ein bisschen, um den Klebstoff, mit dem es am Akku befestigt ist, aufzuweichen.

    • Dazu kannst du einen iOpener, einen Fön oder eine Heißluftpistole verwenden. Achte aber darauf, den Akku nicht zu überhitzen. Das Kabel sollte warm sein, aber nicht zu heiß zum Anfassen.

  19. bRNYL1JeZ2MUeBe2
    bRNYL1JeZ2MUeBe2
    XJTjmkOpAHj1XPso
    irj3TcmYrfGAxaAU
    • Ziehe das Trackpad-Kabel vorsichtig vom Akku ab und schiebe es zur Seite.

    • Kabel nicht knicken oder reißen. Wenn du Probleme hast, versuche nicht, sie mit Gewalt zu lösen, sondern erwärme nochmal und versuche es dann erneut.

  20. JDrgfAWr1UO6RLKu
    JDrgfAWr1UO6RLKu
    tCIssjKYVvECMJsB
    • Entferne mit einem T5-Torx-Schraubendreher die 13 Schrauben, mit denen die Trackpad-Baugruppe befestigt ist:

    • Neun 5,8 mm Schrauben

    • Vier 4,9 mm Schrauben

    • Diese Schrauben sehen alle ähnlich aus - achte darauf, sie nicht zu verwechseln.

    • Wenn du beim Wiederzusammenbau ein bisschen blaues Schraubensicherungsmittel aufs Schraubengewinde gibst, kannst du verhindern, dass sich die Schrauben im Laufe der Zeit lösen.

    • Bringe die Schrauben zunächst locker an und überprüfe dann die Ausrichtung des Trackpads, bevor du sie festziehst.

    I dont have the “clicky” feedback from my trackpad anymore - please advise how to fix this

    Shadi Saif -

    (MacBook Pro 2019 15” 2 years old) There are 4 screws (2 on the left and 2 on the right, each pair held down by a black metal piece) next to the uppermost 5.8mm screws. What is the size/kind of screw are these? I’d like to purchase these missing items? Please help. A suspicious technician tried to scam me out of money. I asked for my computer back before they could charge me. I decided to do the repairs myself. When I received my laptop back and followed Ifixit instructions I found 2 screws missing and they replaced the original with an unrecognizable rusty screw on the farthest left screw hole, and the black metal pieces were missing as well.

    Alathia Kaye -

  21. dbGJfyNAFLmgI6OQ
    dbGJfyNAFLmgI6OQ
    d31aHAXyDOBZbn6q
    WVy1FAO3B2SbT1ie
    • Klappe das Display leicht auf, aber halte das MacBook immer noch verkehrt herum. Die Trackpad-Baugruppe sollte sich trennen und flach auf dem Display liegen.

    • Führe das Flachbandkabel des Trackpads vorsichtig durch den Schlitz im Gehäuse.

    do not turn the touchpad over, as there are 4+5 very thin spacers/washers, and you might lose them. only the next step warns you about this. dont be me!

    George Kiss -

  22. yIm1JNUtPSAhyjoc
    yIm1JNUtPSAhyjoc
    AqeMok2AxKKOdhLZ
    NHbfjLZpScjEKpF5
    • Achte beim Entfernen der Trackpad-Baugruppe darauf, dass du die neun kleinen Metallscheiben nicht verlierst, die auf den Schraubpfosten aufliegen. (Sie werden herausfliegen und sehr leicht verloren gehen.)

    • Entferne die Trackpad-Baugruppe.

  23. ZWY2wWJIA2sohYJR
    ZWY2wWJIA2sohYJR
    VOv2slGFGMLOQBFe
    • Verwende deinen Spudger, um die Tastatur zu trennen, indem du den Stecker gerade vom Logic Board abziehst.

  24. 2ACOrmEBuVLGGMxV
    2ACOrmEBuVLGGMxV
    ESJgAWhAIByUZn5u
    • Entferne mit einem T3-Torx-Schraubendreher die beiden 3,5-mm-Schrauben, mit denen die Abdeckung am Flexkabel des Display Boards befestigt ist.

    • Entferne die Abdeckung des Display Boards.

    I was able to complete this procedure successfully without removing the logic board. I don’t use any liquid adhesive remover. I employ A rubber type silicon rubber-semi stiff spatula used for putting icing on cakes. Use careful leveraged prying, sliding under battery to break the adhesive seal. Also careful application of heat with a heat gun being careful to not damage the speakers. I remove all logic board screws, disconnect all service cables including USB C caps on both sides. The goal is to be able to carefully ”lift” The lower edge of logic board most proximal to the battery enough to allow the ribbon cable to clear the “ridge” that is on rear edge of the battery compartment, Thus allowing you to pull the battery back horizontally towards The front edge laptop and out. I use popsicle sticks to keep the logic board lifted. Careful not to bend the board or break it! You need about 1/8” of clearance. 99% isopropyl alcohol libera dabbed on with a Q-tip to adhesive residue will clean it off.

    Macrepair SF -

    I had some issues using my T3 bit for most of these screws. Had to use a T4. Strange because I do not use either of those bits often, so I would assume they are still in good shape. Using a T3 felt like I was going to round out each of the screws. Wonder if anyone else experienced this same thing? I'm using the 'Pro Tech Toolkit' by iFixit.

    Michael Stein -

  25. h3LUEOUmG1Qa4FHB
    h3LUEOUmG1Qa4FHB
    jTMKbKYBPoyAAij6
    • Entferne mit einem T3-Torx-Schraubendreher die beiden 1,7-mm-Schrauben, mit denen die Halterung für den Kabelanschluss des Display Boards befestigt ist.

    • Entferne die Kabelanschlusshalterung des Display Boards.

    Help! I stripped the T3 Screw!! ?

    J S -

    I also did this

    jerryrobsonjr -

    Both of these screws also stripped for me. I’m not sure taking extra care would have helped: they stripped almost instantly and felt corroded. I basically continued by carefully manually turning out the right screw head using a regular, (slightly larger than T3) philips driver (and other small tools) until the head popped off the screw and one side of the bracket released. Then the bracket can be lifted and the other screw can be loosened using upward pressure. Upon replacement I basically used a small amount of high viscosity “gel” super glue (or epoxy) to reattach the right side of the bracket.

    capecodnative -

    Ok, I stripped it too. Feels like it isn't a t3 screw... Using the t3 bit from ifixit kit. Have a bite when turning clockwise but won't bite counter clockwise

    Chi Wang -

    Tried with another T3 bit (was using the T3 bit from ifix battery kit) and manage to remove one screw. The other one stripped too much but followed the recommendation from above comment about lifting the bracket

    Chi Wang -

    And now? It's definitely not T3. What the hell do I do now...

    Marina Llopis -

  26. hWNUVuXxYGkOQLuW
    hWNUVuXxYGkOQLuW
    3lW4x2iOsthCyeb2
    • Hebe das Flexkabel des Display Boards gerade aus der Buchse, um es vom Display Board zu trennen.

  27. NGFfbbntTcLfE6AN
    NGFfbbntTcLfE6AN
    TLBZSWgTQu1TCaxo
    • Entferne mit einem T3-Torx-Schraubendreher die vier 2,0-mm-Schrauben von den Scharnierabdeckungen (zwei Schrauben auf jeder Seite).

  28. WESQjibowRGIOB4y
    WESQjibowRGIOB4y
    VQnIDOppIXlPfvOS
    dIZRRRhATdIGluks
    • Entferne die beiden Scharnierabdeckungen.

  29. qxkZlsQjNTiqcykg
    qxkZlsQjNTiqcykg
    xxSD5pgXaB5CtOjl
    qEuLVDOGNShUMJU4
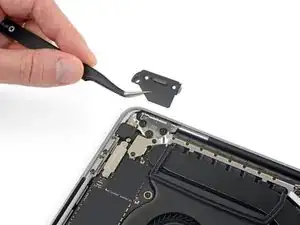
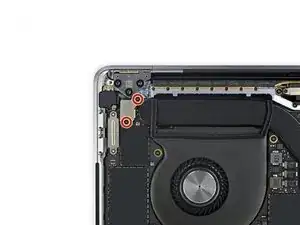
    • Entferne mit einem T3-Torx-Schraubendreher die beiden 2,4-mm-Schrauben, mit denen die Abdeckungshalterung für die Touch ID- und Kopfhörerkabelanschlüsse befestigt ist.

    • Entferne die Halterung.

    Here is a first! I did not notice this when disassembling but spent a bit of time validating I had reassembled things correctly. After 35 years of this stuff, you don’t see much new - just smaller. !

    —->The 2.4 mm screw closest to the hinge screws into the logic board screw circled in green T8 (larger head)at step 47.

    Try finding that screw in your bucket of spares!

    Brian Eustis -

  30. K5fPx6JlRJOUXRMt
    K5fPx6JlRJOUXRMt
    k4hHBkxVZcreXFY6
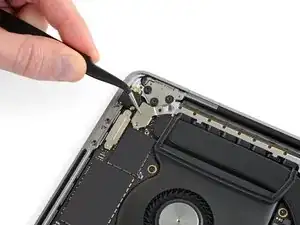
    • Trenne den Anschluss der Kopfhörerbuchse, indem du ihn gerade vom Logic Board abhebelst.

  31. LAcQL4JQvGZYGWGU
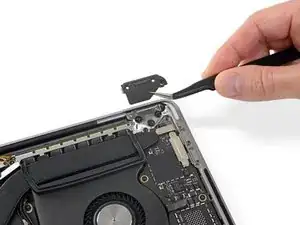
    LAcQL4JQvGZYGWGU
    GWgliFUh24bmRuLB
    • Trenne den Netzschalter und den Touch ID-Sensor, indem du den Anschluss gerade vom Logic Board abhebelst.

    This smaller connector cable of the touch ID sensor that sits underneath the power sensor connector is easy to overlook when replacing the logic board. It is small & short and can easily hide. Make sure you account for it when placing the LB in and before screwing it down.

    Macrepair SF -

  32. JxwuAZXOHeF3CfYO
    • Entferne mit einem T3-Torx-Schraubendreher die 1,3-mm-Schraube, mit der die Abdeckungshalterung für den Touch Bar-Digitizer-Anschluss befestigt ist.

  33. gjGOmxTJPlV5Pcoi
    gjGOmxTJPlV5Pcoi
    ajmGXYArtoeYfTZx
    BQ33qY5wqiop1X2p
    • Schiebe die Halterung mit deiner Pinzette in Richtung der Seitenkante des MacBook Pro, bis die geschlitzte Haltelasche auf dem Logic Board frei ist.

    • Entferne die Halterung.

  34. OLEyZERLrZmuCWOc
    OLEyZERLrZmuCWOc
    YtBrywD3Z46KJOeH
    • Trenne das Touch Bar-Digitizerkabel, indem du es gerade vom Logic Board abhebelst.

  35. Z4WLmC4Af1MgSPwC
    Z4WLmC4Af1MgSPwC
    TBEkxgCdmTZxTq3D
    • Entferne mit einem T3-Torx-Schraubendreher die beiden 1,9-mm-Schrauben, mit denen die Halterung für den Touch Bar-Displaykabelanschluss befestigt ist.

    • Entferne die Halterung.

  36. rdtc2HfFhemuFkP5
    rdtc2HfFhemuFkP5
    V1lJDfNAwoMJh5VT
    • Trenne das Kabel des Touch Bar-Displays, indem du den Stecker vom Logic Board gerade nach oben abziehst.

    Right above the connector, there might be a chip attached instead of an empty space as shown in the photos. The connector will be close to the part but they are separate, and the connector can be safely removed.

    yqy980210 -

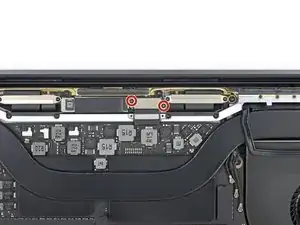
  37. Zg64coNjUyXMTLDc
    Zg64coNjUyXMTLDc
    sfFumwaPW4PM65rF
    • Nimm einen T3-Torx-Schraubendreher zur Hand und entferne:

    • die beiden 1,3-mm-Schrauben, mit denen die Thunderbolt-Flex-Kabelabdeckung links befestigt ist.

    • zwei weitere 1,3-mm-Schrauben von der Thunderbolt-Kabelabdeckung auf der rechten Seite.

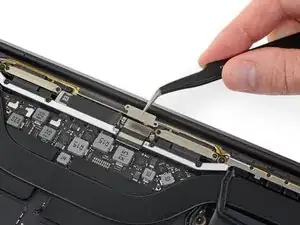
  38. 3knbjJPAymkOLNCS
    3knbjJPAymkOLNCS
    y3lqPE4HW5nqZoLc
    • Entferne die Halterungen der Abdeckungen von beiden Thunderbolt-Kabelbuchsen.

  39. exkgTpYLnlrp4ZZQ
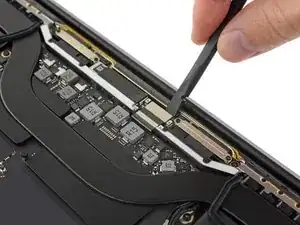
    exkgTpYLnlrp4ZZQ
    AjPJJxTGA5lLBtP5
    EMn4AYmTfpTaIJEl
    • Trenne das linke Thunderbolt-Flexkabel mit einem Spudger, indem du es gerade vom Logic Board abhebelst.

    • Heble von der Innenkante her, die dem Lüfter am nächsten ist.

    • Schiebe den Stecker des Flexkabels vorsichtig zur Seite, damit es beim Entfernen des Logic Boards nicht im Weg ist.

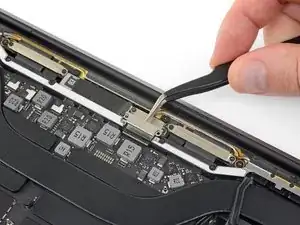
  40. LLsCNB1DthkUlIUN
    LLsCNB1DthkUlIUN
    pQTUTCUHTKgBFrqY
    JcyNSZmtHhshuhtq
    • Wiederhole diesen Vorgang, um den Stecker des Thunderbolt-Flexkabels auf der gegenüberliegenden Seite zu trennen.

    • Schiebe den Stecker des Flexkabels vorsichtig zur Seite, damit das Logic Board herausgenommen werden kann, ohne dass es hängenbleibt.

  41. JGtZy3HuTUAeBoS3
    JGtZy3HuTUAeBoS3
    dRMCKLupNlCc3a52
    RODaAEUfwKQAvROr
    • Trenne die beiden Lautsprecheranschlüsse, indem du das flache Ende Ihres Spudgers unter jedes Kabel in der Nähe des jeweiligen Anschlusses schiebst.

    • Vorsichtig drehen oder hebeln, um beide Lautsprecher zu trennen.

    Both had a dab of glue underneath. I used heat gun to loosen.

    Macrepair SF -

    On this step, it helped to use the tip of sharp tweezers to open the small metal tab of the connector to the side.

    Rodrigo Damazio Bovendorp -

    After disconnecting the speaker connector, does the speaker just come out, or is it glued or screwed in place? All I need is to Replace the Right Speaker with a New one. This guide gets me to this point but doesn’t address replacing the speaker. Would like to know if it’s more complicated than that before I get started… Thanks

    Would be nice to have a guide just for Speaker Replacement. Thanks

    Chad Gagnon -

    My right speaker doesn't work now because the cable and connector disconnected from the logic board. From one problem to another now... What should I do?

    Blake Johnson -

  42. rpggR1BSd2ivkpCK
    rpggR1BSd2ivkpCK
    Uvg1Erp6vCnduApZ
    • Ziehe eventuell vorhandenes Klebeband von der Mikrofonkabelbuchse ab.

    Wenn möglich das Klebeband nicht abziehen! Zwei Schritte weiter bist Du froh darum.

    Stephan Zenger -

  43. jjBThQOLxxBKWtSw
    jjBThQOLxxBKWtSw
    e2dCqFryAVygfQOT
    cZSamwZeQZBWJkFL
    • Öffne die Verriegelungsklappe am ZIF-Anschluss des Mikrofonkabels, indem du sie gerade vom Logic Board abhebelst.

  44. TBowkAlrNvEIkWWt
    TBowkAlrNvEIkWWt
    kbuC4BITFsryhKqX
    • Trenne das Mikrofon vom Stromnetz, indem du das Kabel Richtung Lüfter ziehst, bis es sich aus der Buchse löst.

    • Ziehe nach Möglichkeit am am Kabel befestigten Klebeband und nicht am Kabel selbst, um die Gefahr einer Beschädigung zu verringern.

  45. 3P3EHShbtOjwWNJh
    3P3EHShbtOjwWNJh
    VHL2DsARcfi1pSAC
    • Entferne mit einem T5-Torx-Schraubendreher die einzelne 2,9-mm-Schraube, mit der der Antennenkabelstrang befestigt ist.

  46. IxDlbVhlHngl4Cxd
    IxDlbVhlHngl4Cxd
    CKA1yXuOSnccWLUF
    mjRiQRjFyFmNqOS2
    • Trenne alle drei Antennenkabel, indem du sie gerade aus der Buchse ziehst.

    • Schiebe deine Pinzette oder das flache Ende deines Spudgers unter jedes Kabel, bis es sich in der Nähe der Buchse befindet, und drehe oder heble es dann vorsichtig nach oben, um es zu trennen.

    • Beim wieder Anschließen musst du bei jedem Kabel erst den Stecker direkt über der Buchse ausrichten und dann nach unten drücken, bis der Stecker einrastet.

  47. mdXPZEvBWOLGqRA2
    mdXPZEvBWOLGqRA2
    eMnIAYVCqpZXJAha
    • Entferne alle zehn Schrauben, mit denen die Logic Board Baugruppe befestigt ist:

    • Zwei 2,6 mm T3 Torx-Schrauben

    • Fünf 2,9 mm T5 Torx-Schrauben

    • Eine 3,7-mm-T5-Torx-Schraube

    • Eine 3,9 mm T8 Torx-Schraube

    • Eine 4,1 mm T8 Torx-Schraube

    • Beim Wiederzusammenbau die Schrauben erst einmal lose eindrehen und dann die Position des Logic Boards überprüfen und gegebenenfalls anpassen, bis alle Anschlüsse ausgerichtet sind. Dann erst die Schrauben fest anziehen.

  48. rCxHE2kgOHPDxy1D
    rCxHE2kgOHPDxy1D
    fkOuMFLayRPhvTCB
    CRooRPymdyPD4OUW
    • Ziehe die beiden Schwingungsdämpfungsstreifen aus Gummi von dem Kleber ab, mit dem sie an den Lüftern befestigt sind, entferne sie aber nicht.

    • Bei Bedarf kannst du einen iOpener, einen Fön oder eine Heißluftpistole verwenden, um den Kleber zu erwärmen und so aufzuweichen, dann wird es leichter, die Dämpfer abzutrennen.

    When replacing the battery, you can leave these, and just lift the logic board, enough so the battery slides out.

    nbeijer -

  49. HpH1yUNwHgwRUfvE
    HpH1yUNwHgwRUfvE
    KbBxQ5UMk2J23kAl
    • Die Baugruppe des Logic Boards sitzt sehr fest, wenn du sie entfernst kannst du dir das Leben leichter machen, indem du einen Spudger unter die linke Kante steckst und ihn leicht anhebst.

    • Es sollte keinen Widerstand geben, wenn du das Logic Board entfernst. Überprüfe alle Kabel sorgfältig und halte sie bei Bedarf zur Seite, damit sie nicht am Logic Board hängen bleiben.

    • Entferne das Logic Board, indem du es von der linken Seite her abhebst.

    To ease logic board removal (and especially later for reinstallation), I choose to gently bend each connector away from the logic board & use a little tape to hold them out of the way.

    Tech Medic -

    Is there new adhesive for fans? I’m into deep . 50/50 shot.. I get his back together ..😩

    Gerald Rappaport -

    For me, I didn’t have to remove the MOBO. To be honest i didn’t need to follow the steps that require you to remove certain plugs. It may help to remove the speakers and what not, but other than that you don’t have to remove the whole thing. Also this is from my experience. So don’t get mad at me if it doesn’t work. Goodluck!

    Neo -

  50. xWQpLjChkSyWJpL2
    xWQpLjChkSyWJpL2
    NPkZy33WDRtgefPW
    Aonio6YmPc6dyrSi
    • Beim Wiederzusammenbau gehst du folgendermaßen vor:

    • Stelle sicher, dass die Schwingungsdämpfer aus Gummi richtig ausgerichtet sind.

    • Führe den Antennenkabelstrang durch die Lücke zwischen dem Logic Board und dem Kühlkörper und stelle sicher, dass er richtig ausgerichtet ist, wenn du das Logic Board absenkst.

    • Vergewissere dich, dass beim Einsetzen keine Kabel unter dem Board eingeklemmt werden. Überprüfe jede markierte Stelle sorgfältig.

    Would be good to mention (at the end of instructions here) to pay special attention on reassembly that the Touch ID and power button cable does not slip under the logic board at the last moment7

    Wolf Naegeli -

  51. GCK5hsjgAVx5TNyh
    GCK5hsjgAVx5TNyh
    65YNp1D3G5kY4sSG
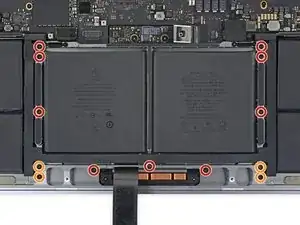
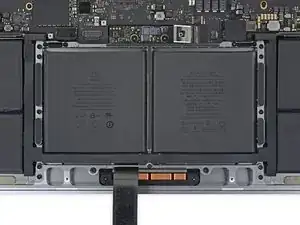
    • Entferne die beiden Schrauben, mit denen die Akkuplatine befestigt ist:

    • 2016er und 2017er Modelle: Benutze einen T5 Torx Schraubendreher, um die beiden 3,5 mm Schrauben zu entfernen.

    • 2018er und 2019er Modelle: Benutze einen P2 Pentalobe Schraubendreher, um die beiden 3,2 mm Schrauben zu entfernen.

    On my mid 2018 15.3” i9 MBP the battery board screws were PL1

    Brian Eustis -

    On my mid 2018 15.3 i9 MBP the keyboard cable is farther to the left (as shown at Step 23)! When reinstalling, make sure it is under the battery cable and its connector sticking up between the battery cable and the aluminum battery frame.

    Wolf Naegeli -

    So if I’ve understood correctly, almost all the above could have been skipped if apple just made these two screws accessible? Wow, just wow

    Nathan Skene -

    The screws are accessible, but the ribbon is under the board...

    Chi Wang -

    Dear Chi Wang, which cables do we remove once the logic board has been lifted? In step 49 and further I can only see the keyboard cable (which needs not getting removed) and the battery board cable doesn't look like it is under the board...

    Luca Ciminelli -

    P2 bit end broke unscrewing the second of these screws… Now I have a piece of the bit stuck in the screw head and a MacBook completely disassembled…

    one.dakine.howlie -

    I bought the battery + "kit" pack here and it doesn't include p2 screws. wow.... it seems like you own people don't even know what tools is needed for this? wow... just wow...

    CHIACHE LEE -

  52. UY14gncyKxEiGlNC
    UY14gncyKxEiGlNC
    uHfL4bGRkXeVs5Uw
    Tb6VpMY1JdJbFXgZ
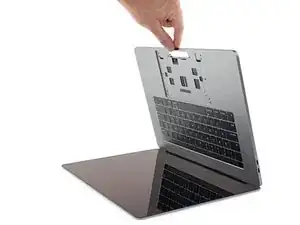
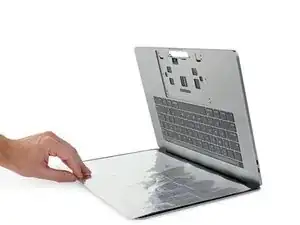
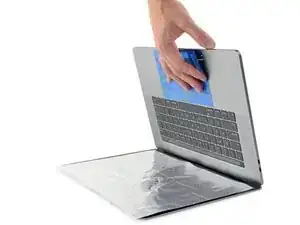
    • Der in deinem Kit enthaltene flüssige Klebstoffentferner kann die Antireflexionsbeschichtung auf dem Display deines MacBook Pro sowie die Tastaturtasten aus Kunststoff beschädigen.

    • Lege ein Stück Alufolie zwischen das Display und die Tastatur, um dein Display während der Reparatur zu schützen.

    • Benutze zusätzlich Malerklebeband, um den Bereich unter dem Trackpad so gut wie möglich abzukleben. Du kannst außerdem eine Schicht saugfähiges Küchenpapier direkt unter den Bereich des Trackpads legen, um überschüssigen Klebstoffentferner aufzunehmen.

    I didn’t have any solution and was hesitant to simply use an Isopropyl Alcohol solution of any concentration let along subject my electronics to liquid and aluminum foil, so I simply took a card (something between a metrocard and credit card… i used a rewards card) and brute forced the adhesive while dry (making sure to direct the bulk of the force laterally and not down into the screen below and mostly wiggle back and forth instead of straight on). About 10 minutes later with a sore hand it worked just fine and avoided steps 52-62. (You may want to try the string method detailed in step 62 if stubborn and after started with card.

    ajm0824 -

    The alu foil and the paint tape make it much safer, use them!

    Cristian Caprar -

    Also removing battery with adhesive remover is quite dangerous (I don't like the idea of liquids around my MacBook insides) so you can do it slowly a carefully with just some plastic cards (like in step 57) putting below the batteries (I used my old credit cards to do this).

    durmstrang -

  53. xobZnAAPFj45RGVI
    xobZnAAPFj45RGVI
    ycTDMYQfwLoJcc6s
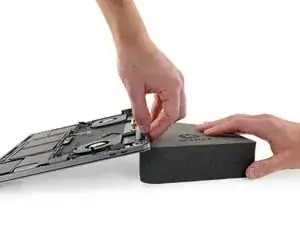
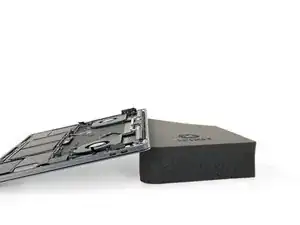
    • Um den Fluss des Klebstoffentferners zu kontrollieren, solltest du die hintere Kante (die Kante mit dem Scharnier) deines MacBook Pro auf einem Buch oder einem Schaumstoffblock ein paar Zentimeter erhöht abstützen.

  54. i2KsSyhjNcPOvA2V
    i2KsSyhjNcPOvA2V
    oIJQ2NPRHwvZricO
    • Dein MacBook Pro ist nun optimal vorbereitet, jetzt bist du an der Reihe.

    • Der iFixit Klebstoffentferner enthält Aceton, das die Haut und die Augen leicht reizen kann.

    • Trage bei der Verwendung des Klebstoffentferners eine Schutzbrille. (Im Kit ist eine Schutzbrille enthalten.)

    • Trage keine Kontaktlinsen ohne eine Schutzbrille.

    • In deinem Kit sind auch Schutzhandschuhe enthalten. Um deine Hände vor eventuellen Reizungen zu schützen, solltest du sie jetzt anziehen.

  55. ihEBeoRZL3uCupCf
    ihEBeoRZL3uCupCf
    WjQ4PXSmrif5aTs4
    DMnQYNMPfvQpWVva
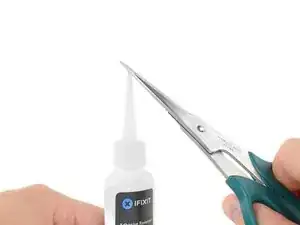
    • Ziehe den schwarzen Gummistopfen von dem Fläschchen mit Klebstoffentferner ab.

    • Drehe die Kappe der Flasche, um sie zu lösen oder zu entfernen, bevor du die Spitze des Applikators abschneidest.

    • Die Versiegelung der Flasche wird dadurch geöffnet und der Druck kann sich ausgleichen, bevor du die Applikatorspitze abschneidest. Wenn du diesen Schritt übergehst, dann kann die Flüssigkeit beim Abschneiden der Spitze unkontrolliert herausspritzen.

    • Schneide die verschlossene Applikatorspitze mit einer Schere ab.

    • Schneide die Spitze an der engen Stelle ab. Dadurch kannst du die Menge an Klebstoffentferner bei der Anwendung besser kontrollieren und kleinere Mengen auftragen.

    • Drehe die Abdeckkappe wieder auf und verschließe sie gut, bevor du fortfährst.

    Eignet sch auch Isopropyl-Alkohol 99,9%?

    Felix -

    The latest Adhesive Remover arrives already with a tiny hole at the tip and the bottle cap and tip is now black instead of clear.

    tomasponce -

  56. k2teBRrCOJD2U2aA
    k2teBRrCOJD2U2aA
    nlWRVsl2L6EPS1LG
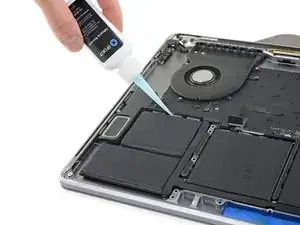
    • Träufle einige Tropfen des Klebstoffentferners gleichmäßig unter die beiden rechten Akkuzellen, beginne an dem Rand, der dem Lüfter am nächsten ist.

    • Du musst nicht sehr viel vom Klebstoffentferner verwenden. Das Fläschchen enthält mindestens die doppelte Menge, die du brauchst, um alle Akkuzellen zu entfernen.

    The bottle may (will!) squirt liquid. I used a bit of absorbant paper around the tip while turning the bottle upside down and putting the tip where it needs to go. Be especially careful not to drip liquid onto the speakers.

    For this type of work I always have a roll of thick toilet paper nearby: its leaves are smaller than those of kitchen paper.

    Robert Cailliau -

  57. UpGbyoAEBSoXxAGv
    UpGbyoAEBSoXxAGv
    QKj3VdVfrL3RrdJy
    • Träufle ein paar weitere Tropfen zwischen die beiden Akkuzellen auf der rechten Seite, so dass der Klebstoffentferner unter die untere Akkuzelle fließen kann.

    • Warte etwa 2 Minuten, bis der flüssige Klebstoffentferner unter die Akkuzelle eingedrungen ist und den Kleber aufgeweicht hat, bevor du mit dem nächsten Schritt fortfährst.

  58. ATMsLlhhZ4BdeVER
    ATMsLlhhZ4BdeVER
    4FegSwkbcRZYmWQV
    1oPnvJlpxZfhoTmy
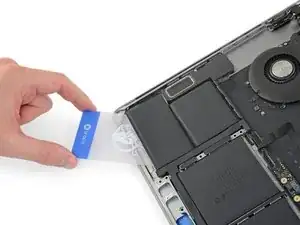
    • Nach ein paar Minuten kannst du die Ecke einer Plastikkarte unter den Akku schieben, fange dabei an der Unterkante der unteren ganz rechts liegenden Zelle an.

    • Dies sollte nicht sehr viel Kraft erfordern. Falls du Schwierigkeiten hast, verwende etwas mehr Klebstoffentferner und warte nochmals 2-3 Minuten, damit er einwirken kann.

    • Versuche, den Akku nicht zu verformen. Aus einem beschädigten oder perforierten Akku können gefährliche Chemikalien austreten und/oder er kann sich entzünden.

    • Bewege die Karte hin und her und schiebe sie ganz unter beide Akkuzellen.

    • Hebe die Zellen an, um sie ganz vom Kleber zu lösen, aber entferne sie noch nicht aus deinem MacBook Pro.

    • Lasse vorläufig eine Plastikkarte unter den Akkuzellen stecken, damit sich der Kleber nicht wieder verbinden kann, während du mit dem nächsten Schritt weitermachst.

    I had a great deal of difficulty loosening the batteries. The solvent seemed to have little effect on the adhesive strips. Despite efforts, I deformed the batteries trying to get them free.

    Kent Folsom -

    I also had a great deal of difficulty. I had to apply the adhesive remover 5 times before I could wiggle the card underneath the first battery sections. And it left the adhesive on the computer case; it did not remove the adhesive along with the battery sections.

    rileybk -

    Took me three applications of adhesive remover. Think it really is about wiggling though.

    Nathan Skene -

    It took me about 10 minutes or so to remove all battery modules. I used the adhesive remover as per the guide and also used the card with the corner doing most of the penetration instead of the blunt end. I also would gently wiggle the battery up and down while I applied more adhesive remover to allow it a better chance of getting underneath. BTW, my adhesive strips ran left to right and not back to front on the outer batteries, so I would think it would be more ideal to put the adhesive remover down the left and right sides of the outer batteries. The inner batteries (under trackpad) adhesive strips ran front to back. Keep this in mind when using the remover to loosen them up.

    Steven Wonder -

    Once one of the packs is loose, stick a leaf of toilet paper under it, so that it cannot stick to the body again, while you are working on the other packs.

    Robert Cailliau -

    One YouTuber uses a fairly short narrow and small thin-bladed and very essentially flexible cake spatula to push in under the battery lobes never sweeping sideways. No chemicals except for 99% propanol to remove the adhesive residue.

    hatuxka -

    See my comment in Step 63. Might save you time and trouble. Putty knife to remove batteries, then hot dryer to get black strips off followed by de-solv-it (or the Ifix-it remover) to get off the adhesive junk.

    Carl Schultz -

    I wanted to comment on what worked for me.

    I did put some of the remover on like they showed.

    I used the credit card plastic tool to kind of get underneath it.

    Then I used plastic putty knife and slowly and carefully pried the batteries off. I take no responsibility here for you, but it worked for me. Also I used 99% isopropoyl to clean the adhesive off.

    Also so you are probably reading this because it is hard, put the trackpad back like the other person said before you put the batteries in. I did that and it probably saved me time.

    Also as you reassemble, make you go look at every connector and there are a bunch and make sure those leads are all coming up through the logic board. I don't want to tell you I thought I was done 2x when I found a small cable at the end I missed. If you do end up in that case, you can remove some of the screws, and use the curved tweezers to kind of snake the cable up top. I know you aren't there yet, but as someone ahead of you, you'll remember this tip.

    Bryan Tanoue -

    The trick here was the use of a putty knife. As someone mentioned, the adhesive strips on mine also ran the direction of the width of the computer, not from the screen side down. Thus, putting the adhesive remover where the directions said only worked on the uppermost adhesive strip. The adhesive remover did nothing to help the process...

    Tim Lightfoot -

  59. ANpgWQLlMCZJdooY
    ANpgWQLlMCZJdooY
    RdWJHTyJxQIyNPDT
    Bo5c3ew5KFlTKsX6
    • Gehe zur linken Seite des MacBook Pro über und wiederhole die vorherigen Schritte, um zwei weitere Akkuzellen abzulösen.

    • Lasse auch hier vorläufig eine zweite Plastikkarte stecken.

  60. 2loqum3ZIObJWPoI
    2loqum3ZIObJWPoI
    cOF3XMpsVdv5Z61P
    TCC4O2sSq2mMnBlw
    • Träufle ein paar Tropfen Klebstoffentferner an der Oberkante der beiden mittleren Akkuzellen entlang.

    • Unter diesen beiden Akkuzellen befinden sich Öffnungen im Gehäuse, durch die der Klebstoffentferner hindurchsickern kann und dadurch nicht richtig einwirken kann.

    • Achte auf Lecks und träufle wenn nötig mehr Klebstoffentferner auf die Seitenkanten.

    Where are your gloves? :-)

    David Hampson -

  61. Is3uvfAOEapxintY
    Is3uvfAOEapxintY
    1bjyX4cBkMnYSJmC
    nHXJ1Z1bjJoaRnTR
    • Nach ein paar Minuten kannst du die erste Plastikkarte herausziehen und eine Ecke unter die Oberkante von einer der mittleren Akkuzellen schieben.

    • Bewege die Karte hin und her und schiebe sie unter die Akkuzelle, bis sich der gesamte Kleber löst.

    • Falls du Schwierigkeiten hast, erzwinge nichts und verforme den Akku nicht. Verwende mehr Klebstoffentferner und versuche es erneut. Eine alternative Methode findest du zwei Schritte weiter.

    Once you get the card edge under a cell, you can apply a couple of drops on top of the card and it will flow down to the working edge of the card. This will make moving the card back and forth a lot easier.

    Scott Shore -

    I'd consider looking at step 62 first.

    Benny Baggott -

  62. GEIOa6DuMtOJMaqH
    GEIOa6DuMtOJMaqH
    mCqpI56Ouca1AamL
    VAdTwN1LwRblcGZm
    • Ziehe die zweite Plastikkarte heraus und wiederhole den vorherigen Schritt bei der übrigen mittleren Akkuzelle.

  63. BfxXnAuAWofIXKiH
    • Wenn du Schwierigkeiten dabei hast, die Karte unter die Akkuzellen zu schieben, kannst du es auch mit einem Stück Zahnseide oder sehr dünnem Draht versuchen. Ziehe ihn mit einer Sägebewegung hin und her, um den Kleber zu durchtrennen.

    • Trage dicke Handschuhe oder wickle die Zahnseide ein paar Mal um den Griff eines Schraubendrehers, damit du deine Finger nicht verletzt.

    Wouldnt the wire damage the underside of the cells?

    Tom Jackson -

    Yes, but you should never re-use a glued-down battery after removing it like this. These batteries are not designed to be re-used, and can pose a fire risk even when removed carefully.

    Jeff Suovanen -

    I used dental floss + pastic card for the middle part. Avoided using the adhesive remover for the middle ones.

    Neil Robinson -

    I didn’t have to resort to this method, but if I did I would think some fishing line would be a good option. Put some candle wax on it if it starts to bind. I use this method to remove car dash phone holders that are siliconed down to the dash.

    Steven Wonder -

    I used this method, (while waiting for the iFixIt glue dissolver kit: was over a weekend; so too late). Works well with a strong, doubled (with slight, about 1 turn per cm, twist) 25SWG (0.5mm, 0.02inch) copper wire, wrapped around spare small screwdriver handles. Ensure that the angle of the wire is _very_ _flat_ while ‘sawing’ slowly; take your time, quite a lot of force is required to sheer through the spongy pads in places. I started with the 2 larger central cells to refine the technique.

    Shawn Marston -

  64. vlCsffdOoZSTCyJy
    vlCsffdOoZSTCyJy
    CLxYhfUgZDpSglEE
    • Hebe den Akku an und entferne ihn.

    • Bevor du einen neuen Akku einbaust, musst du erst alle Klebereste aus dem Gehäuse des MacBook Pro entfernen.

    • Größere Klebestreifen kannst du mit einer Pinzette oder deinen Fingern abziehen (trage dabei aber Handschuhe!).

    • Kleinere Klebereste kannst du mit einem Kunststoffwerkzeug abkratzen und dann den darunterliegenden Bereich mit Klebstoffentferner oder Isopropylalkohol reinigen. Wische immer nur in eine Richtung (und nicht hin und her) bis das Gehäuse sauber und gut für den neuen Akku vorbereitet ist.

    • Das kann eine Weile dauern, also übe dich in Geduld.

    Mine was very difficult to remove and clean. I spent forever trying to clean up the residue. However, I tried 70% isopropyl on two bays and the iFixit adhesive remover in the other two, and covered with food plastic wrap. Went to lunch and when I got back I used razor blade scraper (like used to remove stickers from glass), and it was pretty easily cleaned. Both chemicals worked just as well. Just soak and let the chemicals do the work.

    Philip Edelbrock -

    I didn’t use any solution to remove the battery and found that using the plastic tool to start an adhesive strip I was able to pull each one off by hand in one shot

    ajm0824 -

    I found the best way to do this was to put the hairdrier on the adhesive for a few seconds, then it just peeled off in one go. Wasted a lot of time trying to scratch them off before this.

    Nathan Skene -

    SECOND THIS ADVICE!! Use a hairdryer it will save you a lot of time and the old adhesive will come off much, much cleaner

    Judah Trimmer -

    Yes, hairdryer and use the plastic card to push/scrape one end so you can grab it with your fingers, then peel off the adhesive strip.

    Robert Such -

    It’s going to cost $25 to dispose of the battery some places.

    hatuxka -

    Used a putty knife and removed the batteries, then hair dryer and removed the remaining black strips. Used De-Solv-it (my usual computer anti-glue) to get the gooey glue off. Went well and clean. New batteries in and reassembled.

    Carl Schultz -

    By far the easiest way to remove the adhesive strips for me was to use tweezers. After removing the battery I had mostly large swaths of adhesive. first I used the tweezers, open, then laid it on an angle so the edge laid flat against the surface. Then scraped up side of the adhesive. I wedged up sufficient adhesive so that i could grab it angled (lengthwise not with the point) , Then i slowly pulled up the adhesive without a tear nearly every time, almost satisfying.

    Steven Sanborn -

  65. wfDnB1BoYR4GXaFw
    wfDnB1BoYR4GXaFw
    JgRKUHYSPtNgWdLd
    H2y2RgMyUmH1aSyF
    • Kontrolliere ganz genau den Sitz und die Ausrichtung deines neuen Akkus, bevor du ihn festklebst.

    • Achte bei früheren Modellen auf das Akku-Datenkabel und vergewissere dich, dass es nicht unter der Akkuplatine eingeklemmt wird.

    • Wenn bei deinem Akku bereits Klebestreifen auf der Unterseite vorinstalliert sind, drehe ihn um und löse die Schutzfolien vorsichtig ab, um den Kleber freizulegen. Wenn dein Akku ohne Klebestreifen geliefert wurde, klebe dünnes doppelseitiges Klebeband wie zum Beispiel Tesa 61395 an den Akku, damit er befestigt werden kann.

    • Richte den Akku sorgfältig aus und setze ihn an seinen Platz.

    • Drücke jede Akkuzelle 5-10 Sekunden lang im unteren Gehäuse fest.

    In this photo, the holes that are shown in Step 51, where it states, “2018-2019 models: Use a P2 Pentalobe driver to remove both 3.2 mm screws,” are in a different position, so that re-securing the battery board doesn’t seem possible.

    Sarr Sheffer -

    Step 51 shows the correct procedure for two different models; this step shows only one model, because the procedure here works for both. Order the correct replacement battery for your model, and you’ll have no problem.

    Jeff Suovanen -

    I strongly recommend re-installing the touchpad BEFORE installing the battery. Doing that and feeding the ribbon cable through the correct slot will ensure that you don’t block the path of the cable. I did not do this and had to cut some of the framing plastic away to give me just a bit more slack to be able to reconnect the cable.

    After you have the touchpad back in, do a “dry” fit of the battery to make sure you see how the battery should go in so you don’t affect the ribbon cable. Then you can peel off the adhesive protection strips to secure the battery.

    Les Hartzman -

    After reading this comment I went straight back to steps 19/20 and reversed them before installing the battery… will update if something is notable!

    Nathan Skene -

    Be careful here. When I went to peel up the liner on one of the batteries the adhesive strip came up with it. It should be smooth under the liner. If you start seeing ragged adhesive, stop peeling, push it back down, and try another corner.

    J D -

    The version i got had the individual adhesives stuck to what look like tempered plastic that covered the whole battery. Removing the main plastic took off all adhesives at the same time. Its usefull to have another set of hands at this stage.

    Neil Robinson -

    I had the same problem as others with the adhesive sticking harder to the plastic cover than to the batteries themselves. Another set of hands here would indeed be useful. This was actually the hardest step of the entire process as you cannot reposition the batteries once you set them down. Luckily it seems there is at least a little wiggle room in there. Make sure the power connection lines up with its screw holes as the number one priority.

    james -

    I took off the top side full cover of plastic before sticking which meant all the individual cells were flopping about - leave it on until after sticking it down (as per the next step!).

    Jonathan B -

    Unsticking the packs is messy and dangerous since they may tear if too much force is applied, especially if swollen.

    But do they need to be glued in?

    The batteries should not move: in time that would damage the connections. Measuring carefully, the space between the unibody and its lower case is 8.2mm. The thinnest packs are 7.0mm: there is some room.

    Instead of taking the protective sheets off the glue patches, I put bits of double-sided tape on top. The batteries are now easier to remove, but they cannot slide around.

    However, after turning the machine upside up, they are in fact “hanging” from the “ceiling”! My office tape solution works, but the thinner packs might in time unstick and fall down.

    It may be advisable to use the strong glue anyway, or else put some thermally conductive silicone sponge between them and the lower case.

    The batteries are under the palms of your hands: they don’t get warm, leaving the protective sheets on should not have any effect. The unibody case there is 0.8mm thick.

    Robert Cailliau -

    Position the battery first with the back covers on it, to feel how it would fit in place (the battery logic board position is a good reference, and the relative distance to the two speakers). Only when you get a good feeling of the position, remove the adhesive covers and put it in place. SLOWLY, there are not many chances to pull it up again if you do it wrong!!

    Cristian Caprar -

    I pressed on the batteries for 5-10 seconds but they did not stay stuck after a few days.

    tomasponce -

  66. LSFuZL3LRVBUC6QU
    LSFuZL3LRVBUC6QU
    ZvkQ1OJktxWFfJuM
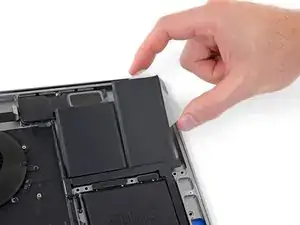
    • Wenn dein Akku richtig ausgerichtet und einbaut ist, kannst du die durchsichtige Schutzfolie auf der Oberseite abziehen.

    • Achte darauf, dass beim Ablösen der Schutzfolie nicht versehentlich auch irgendwelche der schwarzen Akkukomponenten-Abdeckungen abgezogen werden. Benutze, falls nötig, eine Pinzette, um sie festzuhalten, wenn du die Schutzfolie abziehst.

    • Kalibriere deinen neu eingebauten Akku: Lade ihn auf 100% auf und lasse ihn mind. 2 weitere Stunden am Ladegerät. Ziehe den Stecker und benutze dein Gerät normal, um den Akku zu entladen. Wenn die Ladeanzeige am Minimum ist, dann speichere deine Arbeit ab und lasse den Laptop an, bis er von selbst ausgeht. Warte mind. 5 Stunden und lade dann auf 100% auf.

    • Wenn dir nach dem Einbau deines neuen Akkus etwas Ungewöhnliches auffällt oder Probleme auftreten, kann es sein, dass du den SMC deines MacBooks zurücksetzen musst.

    In order to not remove everything, I reduce the procedure in following only steps 1 to 18 (until trackpad cable is pushed away).

    Then I removed the “low “ screws of step 46 in order to losen the fixation of “bottom” of the motherboard, as there is no room to remove the battery board and its ribbons).

    Then I removed the two screws of the step 50 (battery board). To take off the glued battery, I used twine or thread (e.g. as shown here: https://www.youtube.com/watch?v=fupkPz55...) but not acetone nor diluant.

    Then I lifted very carefully the bottom of the motherboard both to push away the battery board and its ribbons and to reinsert the new battery board and ribbons.

    Then I proceed backward to remount (step 50, step 46 then step 18 to 1).

    Note: my “old” battery was so inflated that the two screws of the lower case near the trackpad were difficult to remove (sometimes, this leads to a malfunctioning…

    Thank to Jeff for this overall procedure which helps me a lot.

    jompo -

    Did they change the step numbers? You mention step 46 and 50, but now it looks like these are steps 47 and 51.

    strells -

    Hi Strells, in the english or french version, it seems that it is always step 50 (two screws for battery) and 46 (“lower” screws for motherboard).

    jompo -

    As Jompo Discovered, I also concur: LB removal not necessary. “removed the “low “ screws of step 46 in order to losen the fixation of “bottom” of the motherboard, as there is no room to remove the battery board and its ribbons)”

    Be careful, I removed all screws from LB & disconnected speakers as well. .

    Macrepair SF -

    @jompo Can you share your revised steps? I have to do this battery change ASAP.

    roopesh -

    wow, this was awesome. thanks whoever wrote it. very well described.

    Astrit Mulla -

    I did the same a @jumbo . So, I’d be happy to rewrite this into a much shorter and less hazard format as @jumbo suggests which works perfectly and has many fewer steps and less risk of injury to the trackpad, motherboard and connected components. I did this in about an hour on my MacBook Pro late 2016.

    Marc Marchioli -

    Did you ever rewrite this @marcemarc ? I have to do this ASAP and would love to cut out as many steps as possible.

    roopesh -

    I didn’t rewrite it but basically stopped at step 19, and could get the batteries out without solvents or crazy efforts. Heat, slow working with a good spudger and they pop out.

    One thing really important was I found my battery data connector on the motherboard had a loose connection. I had tried three different batteries and it wat the data cable connect on the motherboard. So, that was touch to figure out but it did solve the problem. Bottom line, be careful when disconnecting or manipulating the battery data cable latch.

    Marc Marchioli -

    Plastic liner is not releasing from the battery cells. If I hold the foam pad in place the plastic sheet rips the foam.

    Lee Gwaltney -

    Newer batteries have foam protection that needs to be removed. The blue tape between the foam and the battery peels off from the battery. https://i.imgur.com/NDwhyVO.jpg

    hishamalbeik -

    Missing one critical helpful notation and photo on the reassembly part - a checklist of all the cables and connectors that need to be checked to make sure they are not caught under the motherboard. I missed the keyboard cable and it cost me half an hour. I checked off all the ones I could remember to make sure they were clear, but just missed that one. A photo with circles and a checklist would be a big help to make sure everything is clear. Otherwise, everything was very well done.

    J Wade Caldwell Jr -

    That’s in Step 49. Easy to miss, but it’s there! I feel your pain though, I’ve made that same mistake.

    Jeff Suovanen -

    I think that was the same cable I missed… at the bottom by the battery connector. I mentioned it to ifixit to add a checklist as well…. Who is responsible for editing this guide? Do you know?

    robert -

    That happened to me, as well. I agree that the list is implied in the instructions (working in reverse during re-assembly), but I also missed the two small cables on the upper left (headphone and touch-id cables). I had almost everything re-assembled by the time I realized my mistake and had to pull everything back apart again to fix the issue. I think that was just me being eager to finish, thinking the hard part was done. (But kudos to the authors for these instructions - my laptop battery is now working great, and everything is functional!!!)

    dot1000 -

    I did the same thing as @jompo did. Works perfectly fine. Thank you jompo, thanks to the author and thank you ifixit team.

    artoo -

    OK well, followed the instructions to the word, & pleased to say my problem has now been resolved. So very many thanks for the fix kit & cracking easy to follow instructions. The MacBookPro lives to fight another day.

    rayholliman -

    in knapp 3h habe ich den Akku gewechselt gehabt, passt auf die Unterlegscheiben vom Trackpad auf… die gehen schnell verloren und das Tastaturkabel vergisst man auch mal ganz schnell. Der Guide ist eine super Hilfe gewesen und ohne den hätte ich sicher das MBP noch nicht mal aufbekommen.

    swordper -

    Only 67,000 easy steps!

    Billy HW -

    that’s what I thought :D But as others mentioned it can be reduced to a nice amount of steps. but anyway: I think producers should make their products waaaay easier to restore those parts like accumulator, ram, HD or even processor cores.. long live the good old desktop pc with motherboards as big and heavy as macbook airs from nowadays ;)

    julia.kadauke -

    Great instructions I finally got my mac book back alive! I am noticing that the battery settings do not show that it is charging even though it is plugged in…tried resetting the SMC still nothing indicating it is charging…I have no idea if it is calibrating correctly. Has been plugged in for about 2 hours but only indicates a 30% charge

    Judah Trimmer -

    This guide worked very well for me. Triple-checked all the connectors when reassembling. I was able to get everything inside the machine cleaned up very well including the fans and the fan ports. Very well done!

    Randy Allen -

    Got through and it worked perfectly! Then I realized the up arrow key was no longer working :(

    Ended up sending it to Apple for a free keyboard replacement since it’s the notorious butterfly keyboard problem.

    Hopefully it will come back with the same battery and they won’t mind I replaced it.

    Bob Donovan -

    Very good guide, I didn’t remove the whole mother board tho (A1707) but this is not my first time replacing a battery of macbook.

    I used alcohol 96% to get the glue off the battery and a old card.

    The way to do it if you don’t want to take apart the whole laptop is to follow this guide to step 23 and unscrew the mother board screws then start to take out the battery and slide the cable while holding up the motherboard.

    Frederick aa -

    I FixIt 😎

    Ho acquistato il kit completo per il mio mbp 15" touchbar 2018.

    Ho seguito la guida fino al punto 18, poi il 46 Ed il 50.

    Non ho usato il solvente adesivo per staccare la vecchia batteria ma mi sono aiutato con la scheda in plastica e con un filo di rame sottile che facevo passare sotto le batterie, una alla volta. Mi sono anche aiutato con un phon per far ammorbidire il nastro adesivo originale sotto le batterie.

    L’unica accortezza sta nello stare attenti quando si toglie e poi si inserisce la scheda della batteria sotto la scheda madre. Io ci son riuscito senza problemi.

    Ora il mbp è in carica: sto seguendo i consigli di ifixit per la calibrazione della batteria.

    Comunque una guida perfetta, in ogni minimo dettaglio. Se avete pazienza, dimestichezza, seguitela ed avrete una batteria nuova in circa 1,5h di lavoro.

    Mimmo Villani -

    Uh oh I did this and now the machine won’t turn on. When I open the lid it shows the battery level for a second then it disappears. No amount of key presses seems to work. Any ideas here? I assume I messed up the keyboard or some other connection?

    Elijah Delventhal -

    Ah I fixed it. Double check step 31, that was my issue. The connector for the power button is right below another one.

    Elijah Delventhal -

    Same. Thanks .

    Pat Splat -

    For sure we need every step so its clear. One misstep and its game over. Shouldnt there be a note or step to work backwards after battery is installed?

    Steven Sanborn -

Abschluss

Befolge die Schritte in umgekehrter Reihenfolge, um dein Gerät wieder zusammenzubauen.

Entsorge eventuell anfallenden Elektroschrott fachgerecht.

Die Reparatur verlief nicht wie geplant? In unserem Antworten Forum kannst du um Hilfe bitten.

Jeff Suovanen

Mitglied seit: 06/08/13

407169 Reputation

33 Kommentare

Is this the same procedure for the 2017 MacBook pro 15” ?

Andy Hannen -

Hi the Guide was very good.

Unfortunately In Austrailia i could not get the adhesive dissolver .

I was force to do it with plastic cards (Kunststoffkarten) and some plastic spludgers.

this worked well enough but also didn’t need to remove the logic board or speakers or anything else.

using some goooff (https://www.google.com/url?sa=t&rct=j&q=...) on a paper town was easy clean up.

reassembly was very easy and the whole process took a bit over a hour.

Note i have worked in electronic industry for a long time so possibly more experienced

monty thompson -

Hi!

where can i buy battery?

blondey -
Great guide! I made it!

astroyura -
Hi!

Can I use the device without battery? How to do it right? Please give an answer

Johan -
Hi did you able to use the device without battery?

Sunjun -
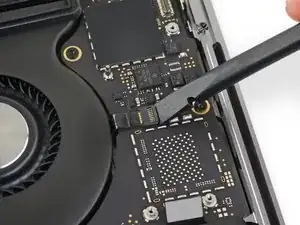
Yes absolutely :) I have just removed the swollen battery from my MacBook pro 15 inches 2018 and running it on ac adapter now!

Sunjun -
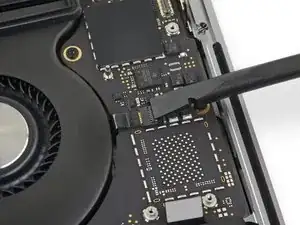
Yes, you can. I am using my Macbook pro 15” 2018 without the battery. However, the processor clock speed is capped to 1.9GHz

Sunjun -

Hi! Thank you a lot for your work. Unfortunately, a camera doesn't work after a replaced battery. sudo killall VDCAssistant didn’t help. What else can I do?

Tim Bright -

I was able to use dental floss to “saw” through much of the adhesive without needing the adhesive solvent. Assertive prying and patience did the rest. It was a little gut-wrenching when I put it all back together and it wouldn’t power on. I even plugged it into the wall power, and it still wouldn’t come on. After about 20-30 seconds, a green battery indicator popped up on the screen, followed by the Apple boot logo. Whew! Great guide!

Joe Emenaker -

When will the battery be available?

Vyachesla Vik -

Schade, dass nirgends die Batterie für ein Macbook Pro 2018 zu finden ist. Für einen Tipp wäre ich dankbar.

Michael Jasaraj -

does macbook pro 15" 2018 support macbook pro 15" 2017's battery?

Sunjun -

These instructions were fantastic. I was able to with ease replace the battery on my Macbook pro. I did buy the adhesive removal kit and the necessary screw drivers from ifixit where were absolutely necessary. Just be patient and don’t rush things and make sure to read all the instructions and understand them before doing anything.

Aleks P -

Excellent guide!

Johan Kellerman -

I successfully replaced the battery in my 2018 15” MBP. This guide is fantastic! Some feedback:

1. Step 13 - The battery data cable is the most delicate part to remove. Be *very* careful. I removed it just fine but putting it back was tricky. I got it in but accidentally tore off part of the tab used to tug on when removing it. Luckily, this didn’t compromise the cable and things seem fine.

2. Step 22 - The 9 small metal washers in the trackpad assembly are ridiculously easy to lose. I was very careful, yet they fell out unnoticed on me twice. Luckily I found them each time - some stuck to the display, one in the hinge area, one floating around the trackpad, and one slight bent, having been caught between the trackpad assembly and case on reassembly. I was able to get the trackpad reinstalled with all washers on my third attempt.

3. When I first booted my MBP with the new battery, macOS (Big Sure) didn’t recognize the new battery. I had no Battery preference pane. A reboot fixed it up - luckily!

russell -

Great guide. took me 2 hours plus without using an adhesive remover.

Thompson -

Fantastic guide! Thanks guys!

Some notes:

Don’t be stingy on the solvent. It needs A LOT MORE than two literal drops to melt the tape. Keep it going until you have 1/4 empty bottle. More makes ease.

While reattatching the lid, keep it lifted. The magnetic clips in the middle lock way too early.

When reconnecting the touchpad double check the allignment or you might end up with a missaligned pad that really !#^&@! you off (and reopen the back lid to correct ;)

When sticking the new battery, start pealing the protectors from the center out, no need to make it in one go and it will go smoother that way.

dourou -

Great step by step instructions. Took me about 90 minutes to remove, clean, install new battery and re-assemble. My company just wanted to purchase another $3,000 laptop, but between disruption to work and cost, this was an amazing investment of time. I have now used your guides to fix iPhones, our 2 iMacs and now a 15” Pro. Keep up the amazing work iFixit!! Cheers!

Howard Cribbs -

Thank you so much for the detailed procedure. If anybody finds it helpful, nail polish remover works wonders at removing glue.

Pía Zurita -

Hi,

replacement of the battery went great but since then I got a crackling right speaker. What could be the reason?

David Adelmann -

maybe when u open the case you accidentally hit the speaker with the bottom case and the membrane speaker ripped, it was happened to me too.

Fernando Yannice -

Great Guide!

The replacement of the battery went smooth, but even after over an hour of charging, the MBP still does not turn on.

No signs of life. Any troubleshooting tips?

(these machines are funny because there is no indicator light to show if it’s even charging)

Michael Bowen -

yes same with me, until now, did the macbook turn on ?

Fernando Yannice -

I got through the entire installation of my replacement battery for my 2018 MacBook Pro and when I inserted the battery data cable into the battery terminal on the circuitboard that is attached to the battery, the terminal came off. I did not do this forcefully it was very gentle. It’s extremely frustrating having gone through this whole process that took three hours to have this happen on the last step.

jerryrobsonjr -

Great kit and instructions. The vast majority of the time for me was getting the battery adhesive removed, particularly from the center batteries - the floss was a very useful tip. Took me about 2 hours, never done a repair like this before so I was a bit worried due to the difficult rating but it was quite straightforward.

garethejones -

I also did it.

Thanks a lot for such level of detail in this tutorial. It has been perfectly followed without any issue.

Juan Ignacio Fernández García -

"Without any issue" : vale decír que desinstallar la vieja y reinstallar la nueva bateria fueron ambos exitosos ?

Gracias.

Éric Le Boulengé -

They actually made battery replacement even more tedious and annoying. Bring back screws!

Great guide, meticulous and complete.

MotorMac -

I also think they should bring back screws. It was much easier on the Mid 2012 15" MBPs!

Calvin -

im so happy this worked for me, it was a big time commitment and a bit daunting , in the end success! thankyou for a well laid out guide.

Steven Sanborn -