Einleitung

Tausche die Festplatte aus und erhalte mehr Speicherplatz!

  1. YkoEfqbWbrNPgNSB
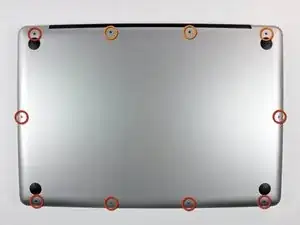
    • Entferne die folgenden zehn Schrauben, mit denen das Gehäuseunterteil am Gehäuseoberteil befestigt ist:

    • Sieben 3 mm Kreuzschlitzschrauben

    • Drei 13,5 mm Kreuzschlitzschrauben

  2. KmDGlwcxPu6ph3sm
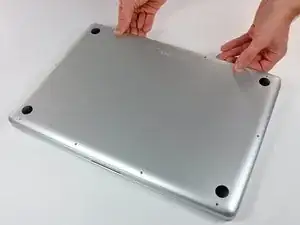
    • Hebe das Gehäuseunterteil mit beiden Händen in der Nähe der Lüftungsöffnung an, damit sich die beiden Clips lösen, mit denen die beiden Gehäuseteile verbunden sind.

    • Entferne das Gehäuseunterteil und lege es zur Seite.

  3. LHeE6iVx3STyDO3D
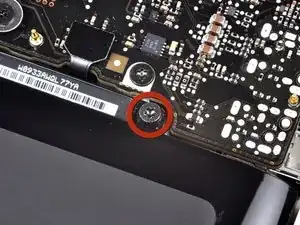
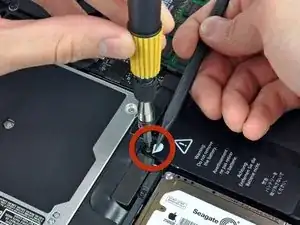
    • Der Akku ist mit drei Pentalobe Schrauben am oberen Gehäuse befestigt. Sie können mit diesem Spezialschraubendreher entfernt werden.

    • Falls du keinen Pentalobe-Schraubendreher hast, kannst du zur Not auch einen 1,5 mm Schlitzschraubendreher benutzen. Achte darauf, dass der Schraubendreherkopf genau in den Schlitz zwischen zwei der fünf "Punkte" passt, bevor du versuchst, die Schraube zu lösen, da sonst der Schraubenkopf beschädigt werden kann.

    • Falls der Schraubendreherkopf zu lose sitzt, nimm ein größeres Bit und feile es so ab, dass es genau passt, bevor du weitermachst.

    • Wenn du nur die Festplatte ersetzen willst, musst du nicht unbedingt den Schritten 3-7 folgen, um den Akku auszubauen. Allerdings ist es empfehlenswert, vor Reparaturen oder Wartungen immer alle Stromquellen von Elektrogeräten abzutrennen.

    It really depends on how thick the 1.5 mm flathead screwdriver is. I tried a low-cost tool and almost destroyed the screw. So be carefull

    Paul -

    Unfortunately, when I added a second hard drive via these instructions, all went well but Bluetooth is now MIA. Can anyone help?

    Peter Payne -

    I agree...

    I have bought a used MacBook Pro, when problems arise, opening Corps was trying to turn the screw, but with poor quality could not turn a screwdriver, only to ruin the screw. Try to buy ifixit Screwdriver set. Good luck to all and thank you ifixit team for such assistance as ifixit.com. Thank you.

    remjok -

  4. xGAhgZZyYYcDTHGa
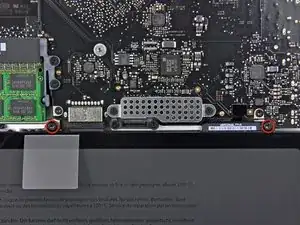
    • Entferne die zwei freiliegenden Pentalobe Schrauben an der Oberkante des Akkus.

    The screws holding my battery were all worn out since an earlier removal. So instead of ruining them even more I put some saran wrap on the tip of my pentalobe driver and gently unscrewed them.

    magnus -

    I have a problem with these screw. They a completly warn and I need some new ones to fix the new Battery.

    Does anyone know which thread it is and which length?

    alexanderleith -

  5. Cu1rp51DpHW16GLl
    • Biege die Ausbuchtung am Aufkleber "Warning: Do not remove the battery" mit der Spudgerspitze hoch, um die Pentalobe Schraube darunter zu entfernen.

  6. QphNb6fJqTBD2cYF
    QphNb6fJqTBD2cYF
    cdkwbvUvHl3QeCJg
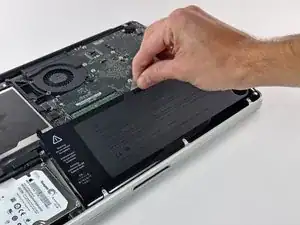
    • Hebe den Akku an seiner Plastiklasche hoch und schiebe ihn von der langen Kante des oberen Gehäuses weg.

    • Versuche noch nicht, den Akku ganz zu entfernen.

  7. BQ1JtoRMPS3hs3VU
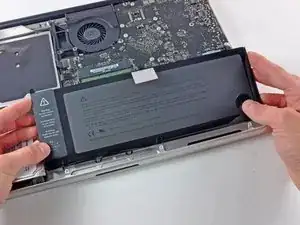
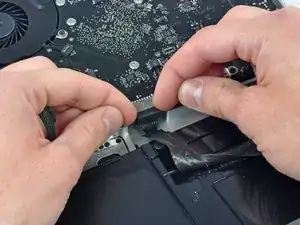
    • Kippe den Akku soweit nach hinten, dass du an den Akkukabelstecker herankommst.

    • Ziehe den Akkukabelstecker aus seinem Anschluss auf dem Logic Board und entferne den Akku aus dem oberen Gehäuse.

    • Wenn du einen neuen Akku einbaust, solltest du ihn gleich nach dem Einbau kalibrieren.

  8. i6RbaPgdvgYfiqIM
    i6RbaPgdvgYfiqIM
    PIFZXlvxZn4jNMlr
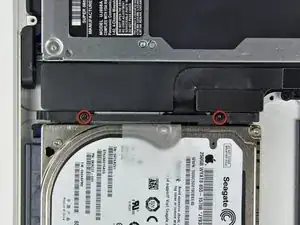
    • Entferne die beiden Kreuzschlitzschrauben, mit denen die Festplattenhalterung am oberen Gehäuse befestigt ist.

    • Diese Schrauben bleiben in der Halterung hängen.

    • Hebe die Halterung aus dem oberen Gehäuse heraus.

  9. ZRiWkDhEOHhb12CQ
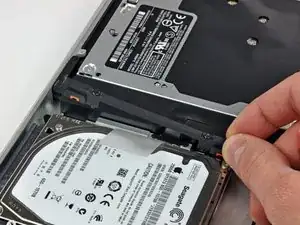
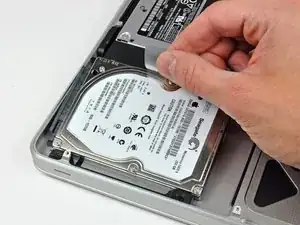
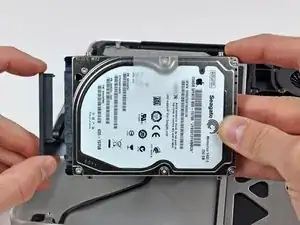
    • Hebe die Festplatte an ihrer Zuglasche hoch und ziege sie aus dem Rahmen heraus. Achte dabei auf das Kabel, mit dem sie noch mit dem Computer verbunden sind.

  10. 4DHpJYBUMB6MxFVJ
    4DHpJYBUMB6MxFVJ
    Q2QUK3dCpM2t3WP6
    • Ziehe das Festplattenkabel gerade von der Festplatte ab und entferne es.

  11. QsSrUM45W5eoPbOU
    QsSrUM45W5eoPbOU
    FrJnyWuMPlJh61lp
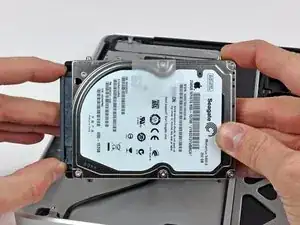
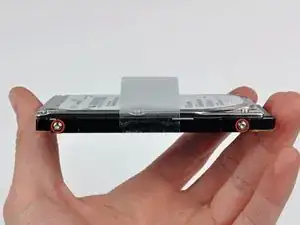
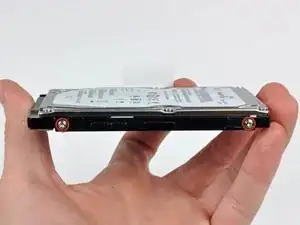
    • Entferne die beiden Torx T6 Schrauben auf jeder Seite der Festplatte ( also insgesamt vierSchrauben).

    • Wenn du die Festplatte austauschst, musst du diese vier Schrauben auf das Ersatzteil übertragen.

    • Wenn du eine neue Festplatte einbaust, hilft dir unsere OS X Installationsanleitung dabei, sie zum Laufen zu bringen.

Abschluss

Um dein Gerät wieder zusammenbauen, folge den Schritten in umgekehrter Reihenfolge.

Walter Galan

685540 Reputation

6 Kommentare

The guide states you must remove the battery in order to replace the hard drive. This is incorrect- it is merely a safety precaution. If you do not have the specific pentalobe screwdriver, DO NOT ATTEMPT THIS. I just replaced a hard-drive in one of these macs, that someone had already stripped the screw head. The screws are tapered too, so no getting it out once stripped.

The battery does not interfere with this repair, so simply remove the two screws on the hard-drive bracket (step 8), replace the drive then put the mac back together.

[deleted] -

Does replacing hard drive remove Moutan Lion OSX I did download update and don't have disk. Also how to transfer files to new larger GB hard drive

Brando -

If you have problems when installing Mavericks after the battery has been removed maybe your Mac has the wrong date and time.

In Mavericks installscreen, start the terminal, type "date" and enter...if the wrong date is displayed type:

date {month}{day}{hour}{minute}{year}

Every bracket should be replaced with a two-digit number. For example, March 18th 2013 12:50 would become the following command:

date 0318125013 + enter

Peter H -
Actually I could just lift the battery connector without removing the battery at all. Worked out fine for me.

hanshans -

Thanks for the guide. I honestly feel like I got a new Mac. I installed one of iFixit's hybrid 1TB SSD (SSD with backing HD). My Mac was unusable and painful to use it was so slow. Now it's like brand new.

Removing the battery connector was hard to do with finger force alone, I had to entice it with a flat head screw driver. Getting the full iFixIt toolkit gives you all of the tools except the spudger which really could be improvised with something else.

jmeredith -

As always, an excellent description and exact visualization of the work steps - Thank you!

Alexander Mac -