Einleitung
Anhand dieser Anleitung kannst du den eingeklebten Akku mithilfe eines iFixit Akku Kits sicher aus deinem MacBook Pro entfernen. Der Klebstoff-Entferner in deinem Kit löst den Kleber, der den Akku fixiert, und ermöglicht es dir so, ihn mühelos zu entfernen.
Hinweis: In dieser Anleitung werden die Lautsprecher, das Logic Board und weitere Bauteile ausgebaut, bevor der Akku herausgenommen wird. Dadurch werden diese Bauteile vor Beschädigungen durch den Klebstoffentferner geschützt. Wenn du nur einen milden Klebstoffentferner, wie etwa Isopropylakohol zum Ablösen des Akkus verwendest, kannst du die Bauteile auch drin lassen und die Schritte 6-45 überspringen.
Apple rief die Akkus für dieses Modell im Juni 2019 zurück, bevor du den Akku selbst austauschst solltest du überprüfen, ob dein Gerät für einen kostenlosen Austausch in Frage kommt.
Der iFixit Klebstoffentferner ist leicht entzündlich. Führe diesen Austausch in einem gut belüfteten Bereich durch. Du solltest währenddessen nicht rauchen oder in der Nähe einer offenen Flamme arbeiten.
Bevor du anfängst, solltest du zu deiner Sicherheit dein MacBook einschalten und den Akku im Betrieb vollständig entladen. Ein aufgeladener Lithium-Ionen-Akku kann bei einem versehentlichen Durchstich ein gefährliches und unkontrollierbares Feuer verursachen. Bei der Reparatur sollte das MacBook selbstverständlich ausgeschaltet und vom Netzteil getrennt sein.
Hinweis: Das Lösungsmittel, das zum Lösen des Akkuklebers verwendet wird, kann deine Lautsprecher beschädigen, wenn es mit deren Kunststoffgehäusen in Berührung kommt. In dieser Anleitung werden deswegen zunächst die Lautsprecher entfernt, bevor mit dem Akku weitergemacht wird. Zum Ausbau der Lautsprecher müssen noch weitere Bauteile, inklusive des Logic Boards, entfernt werden.
Falls dein Akku aufgebläht ist, musst du entsprechende Vorsichtsmaßnahmen treffen.
Werkzeuge
Ersatzteile
-
-
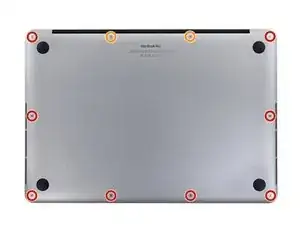
Entferne die folgenden P5 Pentalobe Schrauben, mit denen das untere Gehäuseteil am MacBook Pro befestigt ist:
-
Acht 3,1 mm
-
Zwei 2,3 mm
-
-
-
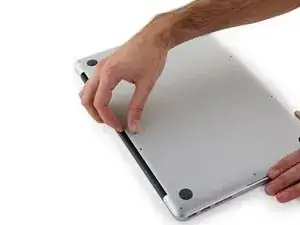
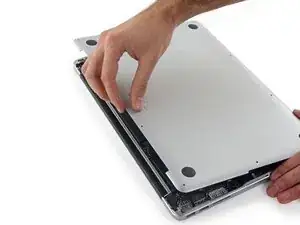
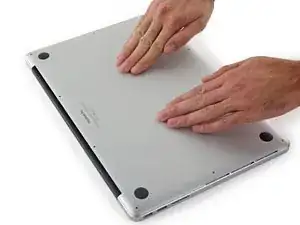
Von der Kante, die dem Scharnier am nächsten liegt, hebst du das untere Gehäuseteil vom MacBook Pro weg.
-
-
-
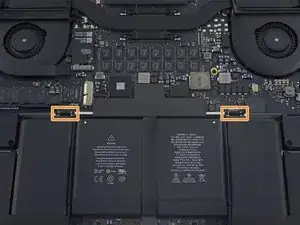
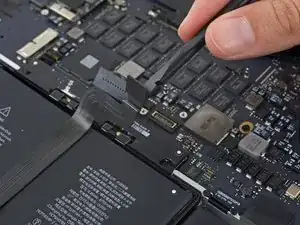
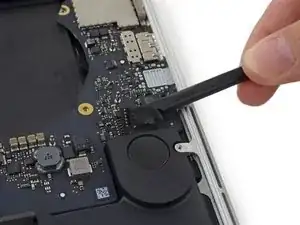
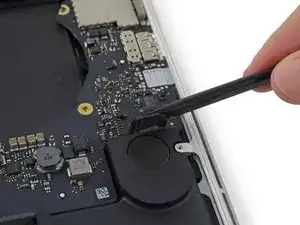
Hebe vorsichtig jede Seite des Akkusteckers an, um ihn aus seinem Anschluss auf dem Logic Board herauszuziehen.
-
Biege den Stecker in Richtung Akku zurück, und stelle sicher, dass der Akkustecker nicht versehentlich mit dem Logic Board in Berührung kommt.
-
-
-
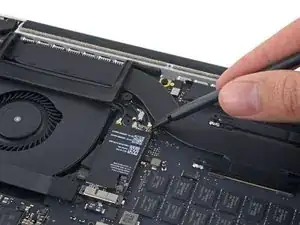
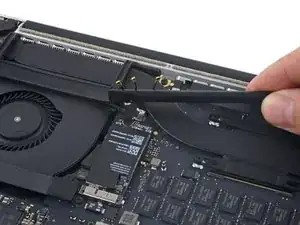
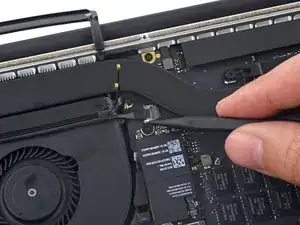
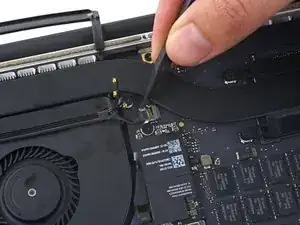
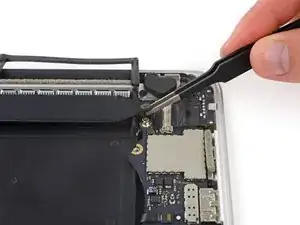
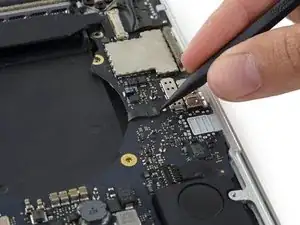
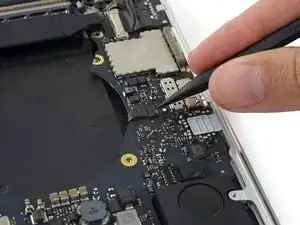
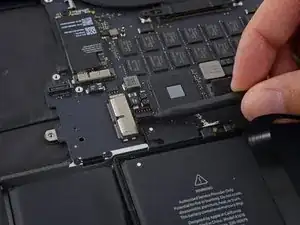
Nutze einen Spudger um die drei AirPort-Antennenkabelstecker nach oben aus ihren Buchsen auf dem AirPort Board zu hebeln und biege sie nach oben und aus dem Weg.
-
-
-
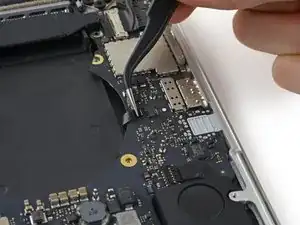
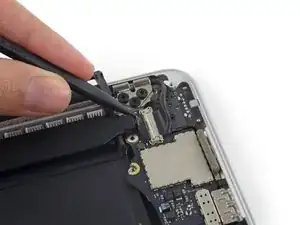
Verwende die Spitze eines Spudgers, um den Stecker des Kamerakabels aus seinem Anschluss auf dem Logic Board zu schieben.
-
-
-
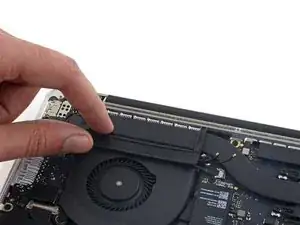
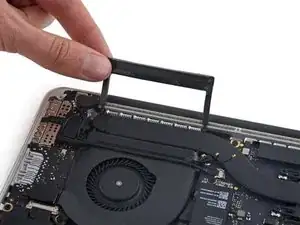
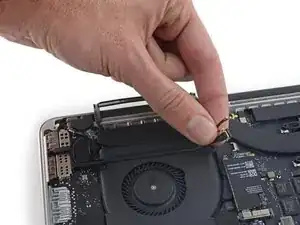
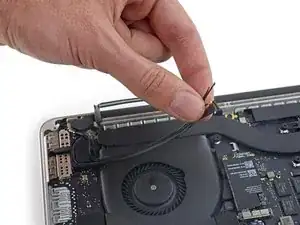
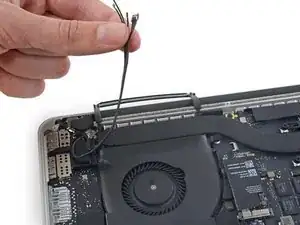
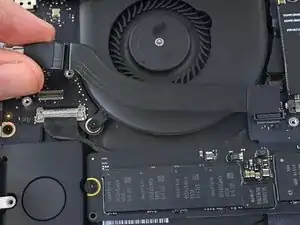
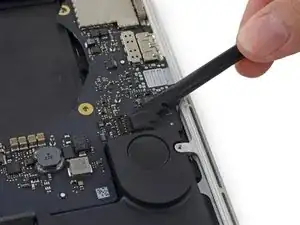
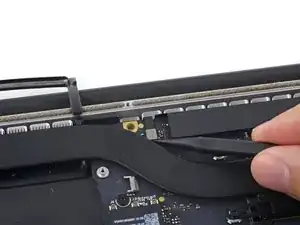
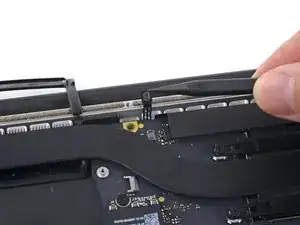
Ziehe die AirPort-/Kamera-Kabel mit den Fingern nach oben vom Lüfter ab.
-
Fädle die Kabel vorsichtig aus ihrer Kunststoffführung.
-
-
-
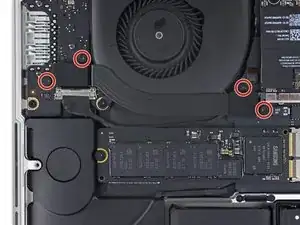
Entferne die vier 2,2 mm T5 Torx Schrauben, welche die Steckerabdeckungen des I/O Board Kabels befestigen.
-
-
-
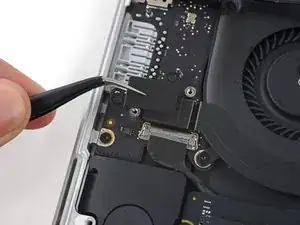
Entferne die Steckerabdeckung links.
-
Verwende das flache Ende eines Spudgers, um das linke Ende des I/O-Board-Kabels von der Buchse auf dem Logic Board nach oben zu ziehen.
-
-
-
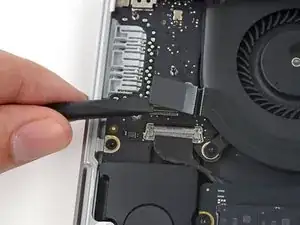
Entferne die rechte Steckerabdeckung.
-
Verwende das flache Ende eines Spudgers, um das rechte Ende des I/O Board Kabels von seinem Anschluss auf dem Logic Board zu hebeln.
-
-
-
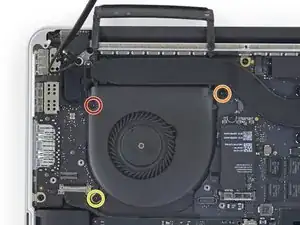
Entferne die folgenden drei Torx T5 Schrauben, welche den rechten Lüfter am Logic Board befestigen:
-
Eine 5,0 mm Schraube mit einem 2,0 mm langen Bund
-
Eine 4,0 mm Schraube mit breitem Kopf
-
Eine 4,4 mm Schraube
-
-
-
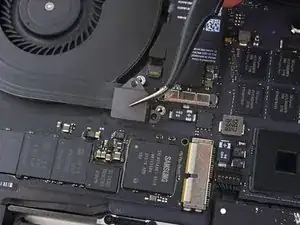
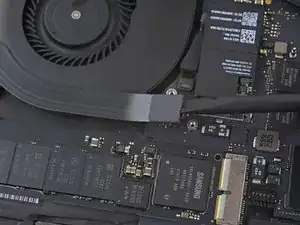
Verwende die Spitze eines Spudgers, um die Halteklappe am ZIF-Anschluss des rechten Lüfter-Flachbandkabels nach oben zu klappen.
-
-
-
Hebe den Lüfter an und schiebe ihn vorsichtig nach hinten, um das Lüfterkabel aus dem Anschluss zu ziehen.
-
Entferne den Lüfter.
-
-
-
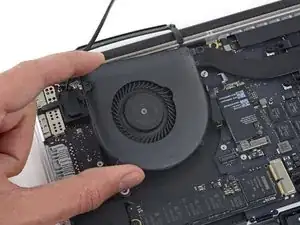
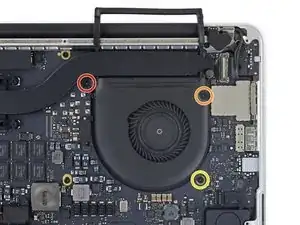
Entferne die folgenden drei Schrauben, welche den rechten Lüfter am Logic Board befestigen:
-
Eine 3,6 mm T5 Torx Schraube mit Breitkopf
-
Eine 5,0 mm T5 Torx Schraube mit einem 2,0 mm langen Bund
-
Eine 4,4 mm T5 Torx Schraube
-
-
-
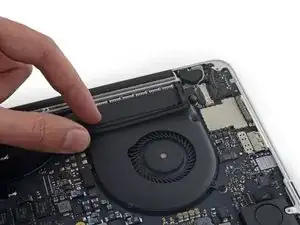
Verwende die Spitze eines Spudgers, um die Halteklappe am ZIF-Anschluss des linken Lüfter-Flachbandkabels nach oben zu klappen.
-
-
-
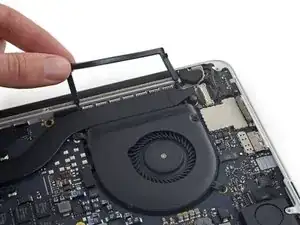
Hebe den Lüfter an und schiebe ihn vorsichtig nach hinten, um das Lüfterkabel aus dem Anschluss zu ziehen.
-
Entferne den Lüfter.
-
-
-
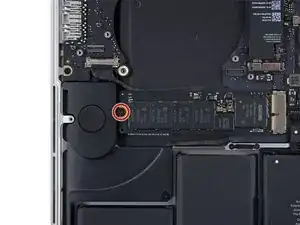
Entferne die einzelne 2,9 mm T5 Torx Schraube, mit der die SSD am Logic Board befestigt ist.
-
-
-
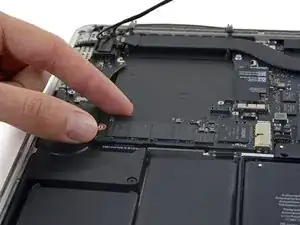
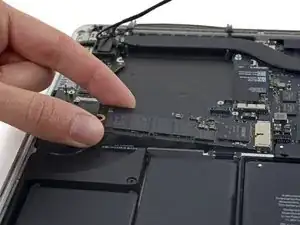
Hebe das Ende der SSD so weit an, dass es über dem direkt dahinter liegenden Lautsprecher ist.
-
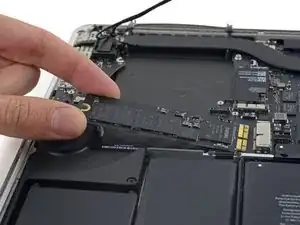
Ziehe die SSD gerade aus ihrer Buchse auf dem Logic Board heraus.
-
-
-
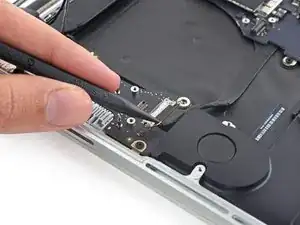
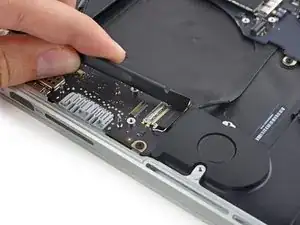
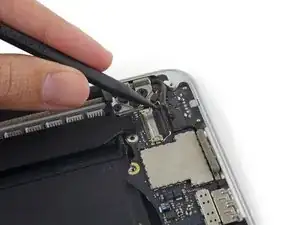
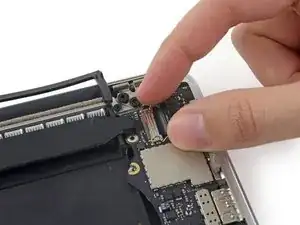
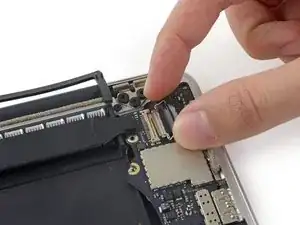
Verwende die Spitze eines Spudgers, um den Verriegelungsmechanismus des I/O-Board-Steckers nach oben zu klappen.
-
Drehe den Spudger um und schiebe das I/O-Kabel mit dem flachen Ende aus dem Stecker heraus.
-
-
-
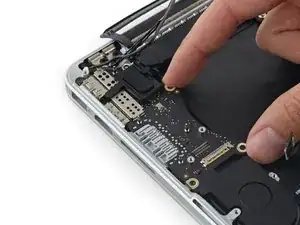
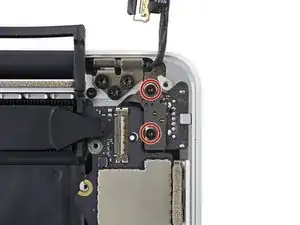
Hebe die Innenkante des I/O-Boards leicht an und ziehe sie zur Mitte des MacBook, also von der Seite des Gehäuses weg.
-
Entferne das I/O Board.
-
-
-
Entferne die beiden 2,2 mm T5 Torx Schrauben, welche die Abdeckung des Touchpad-Kabelsteckers am Logic Board befestigen.
-
Entferne die Abdeckung.
-
-
-
Verwende das flache Ende eines Spudgers, um den Stecker des Touchpadkabels von seiner Buchse auf dem Logic Board zu trennen.
-
-
-
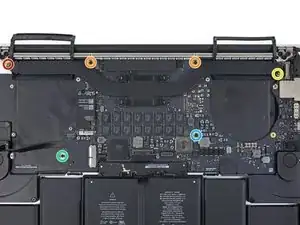
Entferne die folgenden sechs Schrauben, mit denen die Logic Board Einheit am oberen Gehäuse befestigt ist:
-
Eine 3,8 mm T5 Torx Schraube
-
Zwei 5,7 mm T5 Torx Schrauben
-
Eine 5,6 mm T5 Torx Schraube (diese ist silberfarben und hat einen höheren Kopf als die anderen)
-
Eine 2,6 mm T5 Torx Schraube
-
Eine 3,2 mm T5 Torx Schraube
-
-
-
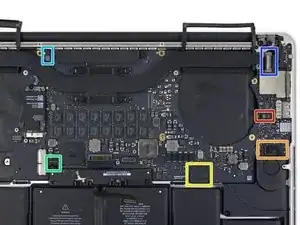
In den folgenden Schritten wird detailliert beschrieben, wie du diese sechs Anschlüsse trennst. Lies dir unbedingt jeden Schritt durch, da diese Anschlüsse verschiedene Bauformen haben und deshalb auch auf unterschiedliche Weise zu trennen sind.
-
Mikrofonkabel
-
Kabel des linken Lüfters
-
Tastaturdatenkabel
-
Kabel des rechten Lüfters
-
Tastaturhintergrundbeleuchtungskabel
-
Displaydatenkabel
-
-
-
Klappe mit der Spitze eines Spudgers die Halteklappe an der ZIF-Buchse des Mikrofon-Flachbandkabels nach oben.
-
Ziehe das Mikrofon-Flachbandkabel parallel zum Logic Board aus der Buchse.
-
-
-
Verwende das flache Ende eines Spudgers, um den linken Lautsprecheranschluss aus seiner Buchse auf dem Logic Board herauszuziehen.
-
Falte das Kabel vorsichtig nach oben vom Logic Board weg und aus dem Weg.
-
-
-
Mit der Spitze eines Spudgers kannst du jetzt die Halteklappe an der ZIF-Buchse des Tastaturdatenkabels hochklappen.
-
Ziehe das Tastaturdatenkabel aus seiner ZIF-Buchse heraus. Achte darauf, dass du parallel zum Logic Board ziehst und nicht gerade nach oben.
-
-
-
Verwende das flache Ende eines Spudgers, um den linken Lautsprecheranschluss aus seinem Anschluss auf dem Logic Board herauszuziehen.
-
Falte das Kabel vorsichtig nach oben vom Logic Board weg und aus dem Weg.
-
-
-
Benutze die Spitze eines Spudgers, um den Anschluss für die Hintergrundbeleuchtung der Tastatur von der Buchse auf dem Logic Board nach oben zu ziehen.
-
-
-
Verwende die Spitze eines Spudgers, um den Verschluss des Displaydatenkabels nach oben zu klappen und ihn in Richtung MagSafe 2-Powerport zu drehen.
-
-
-
Ziehe das Displaydatenkabel gerade aus der Buchse auf dem Logic Board heraus.
-
Biege das Displaydatenkabel vorsichtig zum Displayscharnier hin, um die Schrauben auf dem MagSafe 2 Board freizulegen.
-
-
-
Hebe die ganze Logic Board Einheit an und ziehe sie von der Wand des oberen Gehäuses weg.
-
-
-
Entferne die folgenden Schrauben, mit denen der linke Lautsprecher am oberen Gehäuse befestigt ist:
-
2,7 mm T5 Torxschraube
-
6,9 mm T5 Torxschraube (mit einer 4,5 mm Schulter)
-
5,6 mm T5 Torxschraube
-
-
-
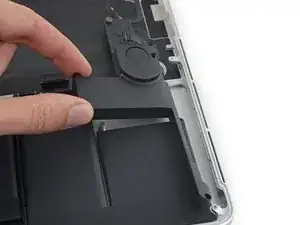
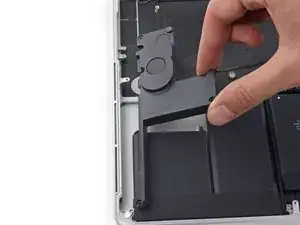
Entferne den linken Lautsprecher, indem du ihn leicht von der Seite des oberen Gehäuses weg und unter der Aluminiumlasche herausziehst, die ihn im Gehäuse hält.
-
-
-
Entferne die folgenden Schrauben, mit denen der rechte Lautsprecher am oberen Gehäuse befestigt ist:
-
2,7 mm T5 Torxschraube
-
6,9 mm T5 Torxschraube (mit einer 4,5 mm Schulter)
-
5,6 mm T5 Torxschraube
-
-
-
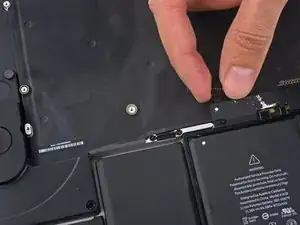
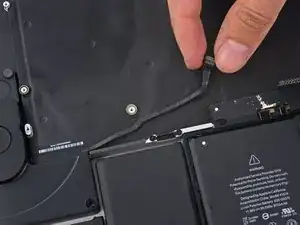
Ziehe das rechte Lautsprecherkabel deshalb vorsichtig ab, um es vom oberen Gehäuse zu lösen.
-
-
-
Entferne den rechten Lautsprecher, indem du ihn leicht von der Seite des oberen Gehäuses weg und unter der Aluminiumlasche herausziehst, die ihn im Gehäuse hält.
-
-
-
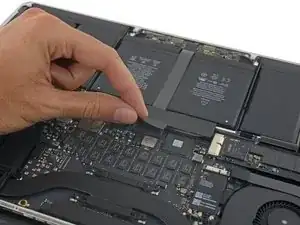
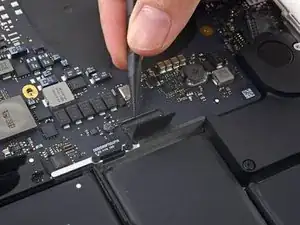
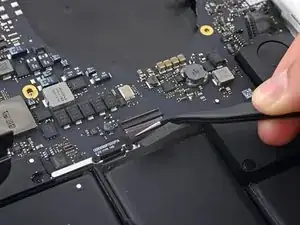
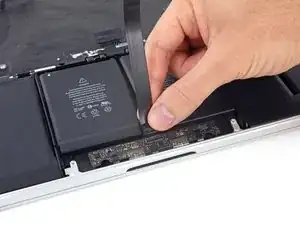
Löse das Klebeband auf dem Verbinder des Trackpad-Flachbandkabels in der Nähe der Vorderkante des MacBook Pro.
-
-
-
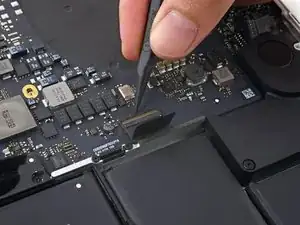
Benutze die Spitze eines Spudgers, um den schwarzen Verriegelungsbügel auf dem ZIF Verbinder des Trackpad-Flachbandkabels nach oben zu klappen.
-
-
-
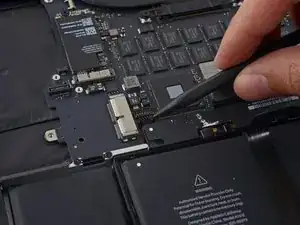
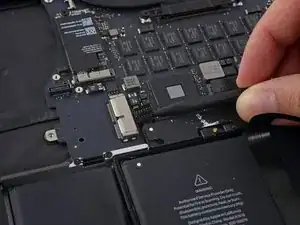
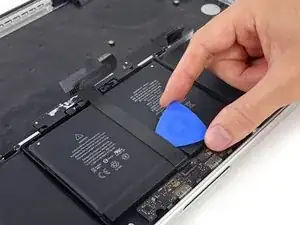
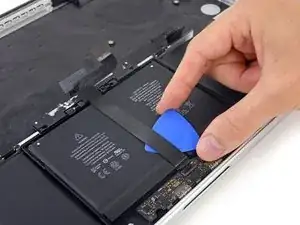
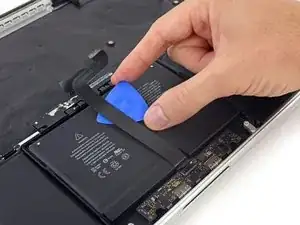
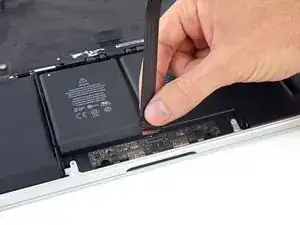
Setze ein Opening Pick (Plektrum) zwischen das Trackpad-Flachbandkabel und den Akku ein.
-
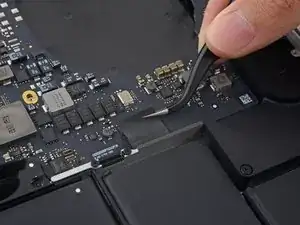
Schiebe das Plektrum vorsichtig unter dem gesamten Flachbandkabel entlang, um es vom Kleber zu lösen, mit dem es am Akku befestigt ist.
-
-
-
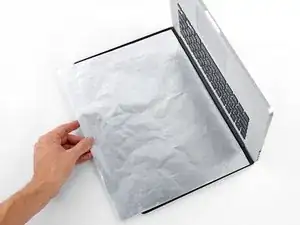
Lege eine Aluminiumfolie zwischen Display und Tastatur, um dein Display zu schützen. Die Folie sollte während des gesamten Arbeitsprozesses dort bleiben.
-
-
-
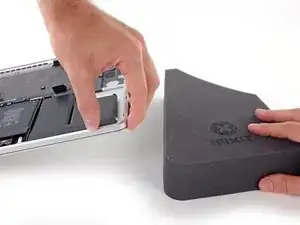
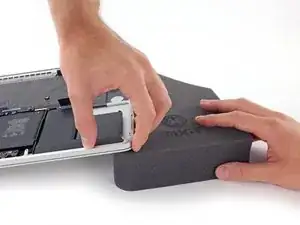
Die Vorderkante des MacBook Pro sollte zu dir zeigen. Hebe die rechte Seite an und schiebe einen stabilen Schaumstoffblock oder ein Buch unter, so dass das MacBook Pro leicht schräg steht.
-
-
-
Dein MacBook Pro ist jetzt gut vorbereitet, nun wird es Zeit, auch dich selbst vorzubereiten.
-
Wenn du mit dem Klebstoffentferner arbeitest und ihn aufbringst, solltest du immer deine Augen schützen. (Eine Schutzbrille ist in deinem Kit enthalten).
-
Insbesondere, wenn du Kontaktlinsen trägst, musst du zusätzlich die Schutzbrille aufsetzen.
-
In deinem Kit sind auch Schutzhandschuhe enthalten. Wenn deine Haut empfindlich ist, solltest du die Handschuhe jetzt anziehen.
-
-
-
Ziehe den schwarzen Gummistopfen von dem Fläschchen mit Klebstoffentferner ab.
-
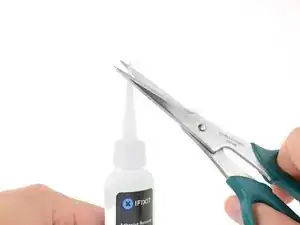
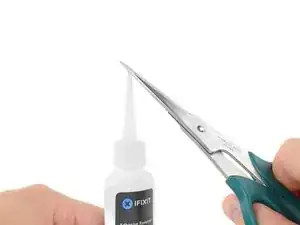
Schneide die verschlossene Applikatorspitze mit einer Schere ab.
-
-
-
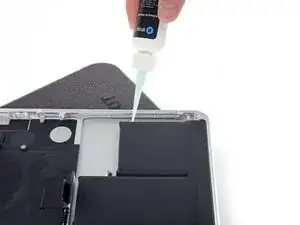
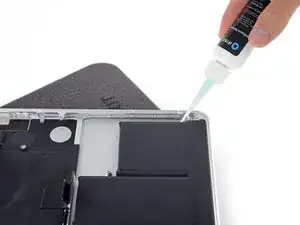
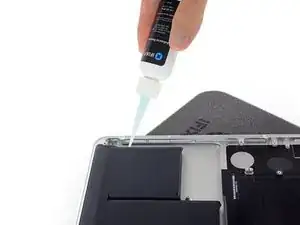
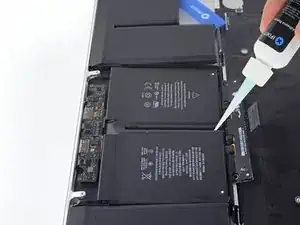
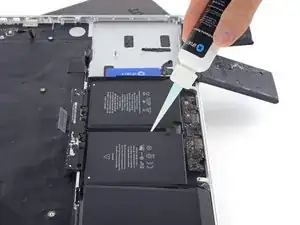
Gib einige Tropfen des Klebstoffentferners gleichmäßig am erhöhten Rand entlang auf die am weitesten rechts liegenden Akkuzelle.
-
Warte 2-3 Minuten, bis der flüssige Klebstoffentferner unter die Akkuzelle eingedrungen ist, bevor du mit dem nächsten Schritt fortfährst.
-
-
-
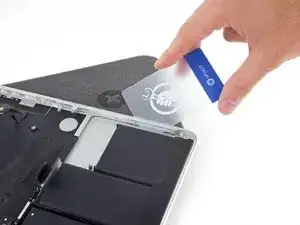
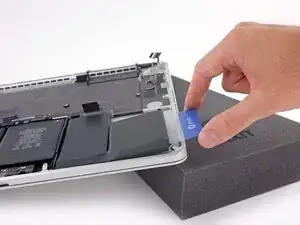
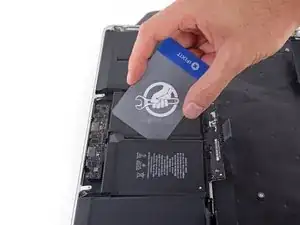
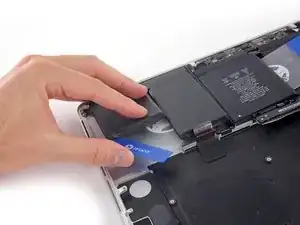
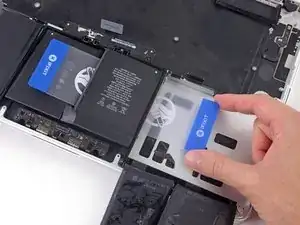
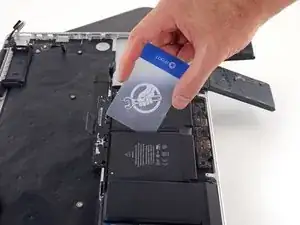
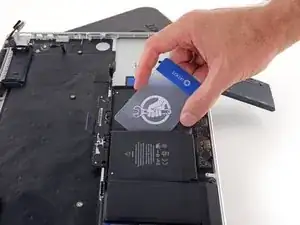
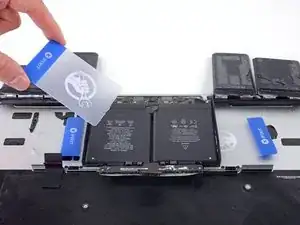
Setze die Ecke einer Plastikkarte unter dem äußeren Rand der Akkuzelle an.
-
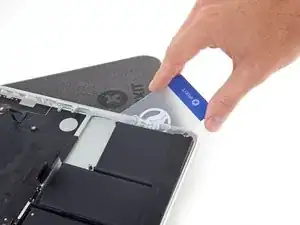
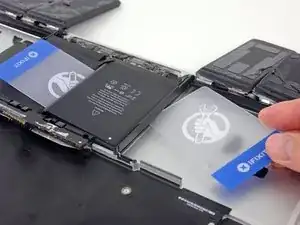
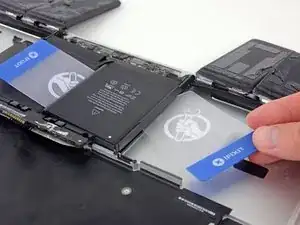
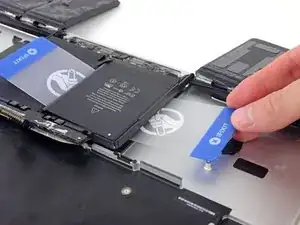
Führe die Karte weiter unter die Akkuzelle, um sie vom Kleber zu lösen, mit dem sie in das obere Gehäuse des MacBook Pro eingeklebt ist.
-
-
-
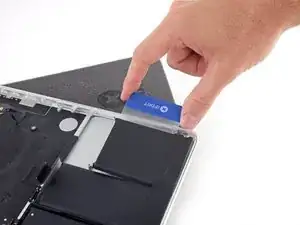
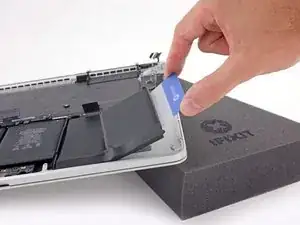
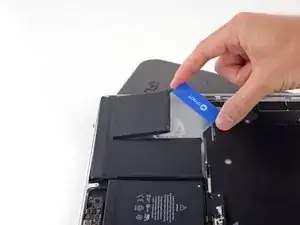
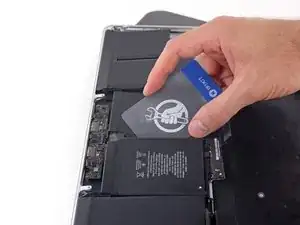
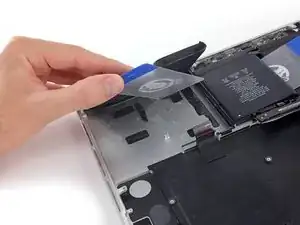
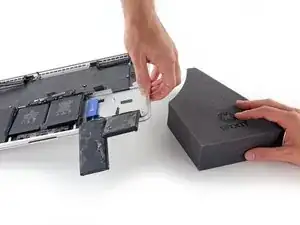
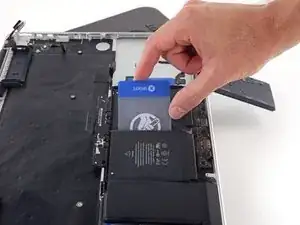
Hebe die Akkuzelle an, um sie vom oberen Gehäuse des MacBook Pro zu lösen, aber versuche noch nicht, sie ganz zu entfernen.
-
Lasse die Plastikkarte unter der Akkuzelle, damit sie nicht wieder festklebt, während du weitermachst.
-
-
-
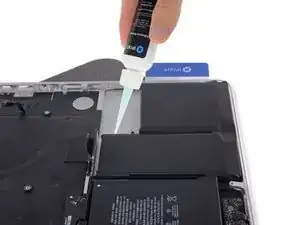
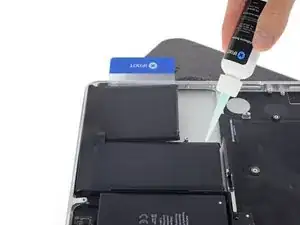
Gib einige Tropfen des Klebstoffentferners gleichmäßig am erhöhten Rand entlang auf die nächste Akkuzelle.
-
Warte 2-3 Minuten, bis der flüssige Klebstoffentferner unter die Akkuzelle eingedrungen ist, bevor du mit dem nächsten Schritt fortfährst.
-
-
-
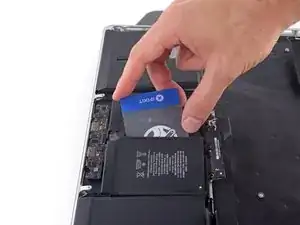
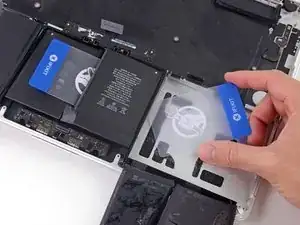
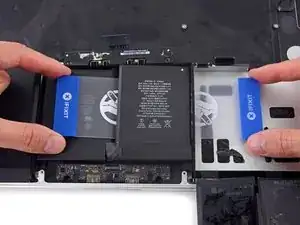
Schiebe eine Ecke deiner Plastikkarte unter die zweite Akkuzelle.
-
Drücke die Karte weiter unter die zweite Akkuzelle und schiebe sie hin und her, damit sich der darunterliegende Kleber löst.
-
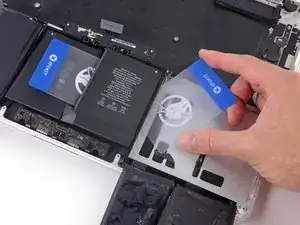
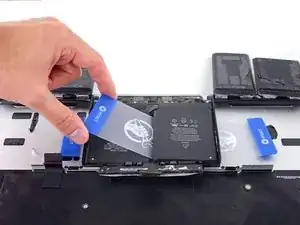
Lasse die Plastikkarte unter beiden Akkuzellen (oder klappe sie um), damit sie nicht wieder ankleben, wenn du weitermachst.
-
-
-
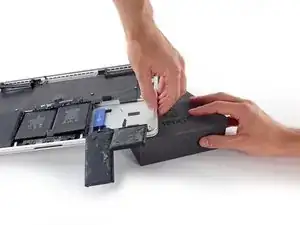
Es ist Zeit, die Seiten zu wechseln. Entferne dein Buch oder deinen Schaumstoffblock und lege ihn unter die gegenüberliegende Seite deines MacBook Pro.
-
-
-
Wiederhole den Vorgang aus den vorherigen Schritten, um die beiden Akkuzellen auf dieser Seite abzulösen:
-
Trage den Klebstoff-Entferner auf die erhöhte Kante der äußeren Akkuzelle auf und warte 2-3 Minuten, bis er einwirkt.
-
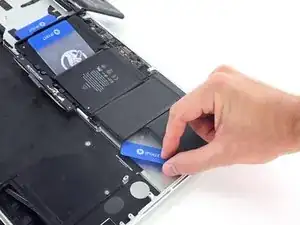
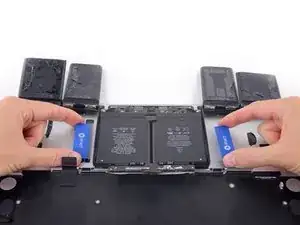
Drücke eine Ecke einer Plastikkarte unter die Akkuzelle und schiebe die Karte vollständig unter die Akkuzelle, um diese vom Kleber zu lösen.
-
Mache dasselbe bei der benachbarten Zelle.
-
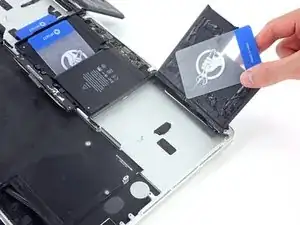
Lasse deine Plastikkarte an Ort und Stelle oder klappe die Akkuzellen um, damit sie bei den folgenden Schritten nicht wieder anhaften.
-
-
-
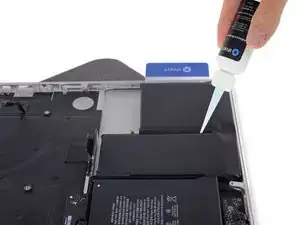
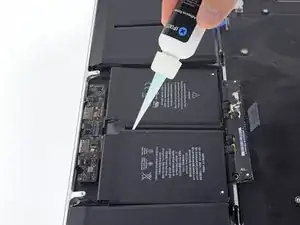
Während die linke Kante deines MacBook Pro noch immer erhöht ist, gib ein paar Tropfen des Klebstoffentferners in die Ritze zwischen den beiden mittleren Akkuzellen.
-
Warte 2-3 Minuten, damit der Klebstoff-Entferner einwirken kann, bevor du weitermachst.
-
-
-
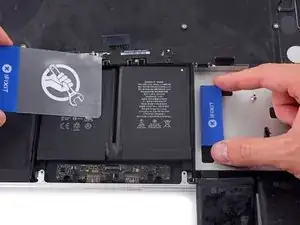
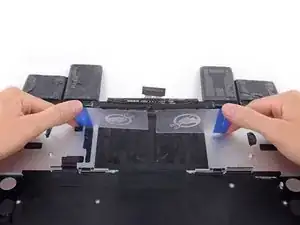
Schiebe die Ecke einer Plastikkarte zwischen die beiden mittleren Akkuzellen und unter die erhöhte Kante der rechten mittleren Akkuzelle.
-
Schiebe die Karte weiter unter die Akkuzelle, um den Kleber, mit dem sie befestigt ist, zu durchtrennen.
-
Versuche noch nicht, diese Akkuzelle vollständig zu abzulösen. Lasse die Plastikkarte an Ort und Stelle, um zu vermeiden, dass die Akkuzelle wieder anhaftet.
-
-
-
Klappe die zwei gelösten rechten Akkuzellen über die Vorderkante des MacBook Pro, falls du dies noch noch gemacht hast. So kannst du die Außenkante der mittleren Zelle erreichen.
-
-
-
Schiebe die Ecke einer Plastikkarte unterhalb des Kunststoffrahmens des Akkus und unter die Kante der unteren mittleren Akkuzelle, die noch festgeklebt ist.
-
Schiebe die Karte ganz unter der Akkuzelle und lasse sie dort, damit die Akkuzelle nicht wieder anhaftet.
-
-
-
Entferne die erste Plastikkarte, die du unter die rechte mittlere Akkuzelle geschoben hast.
-
Schiebe die andere Karte etwas tiefer hinein und lass sie dort, um zu vermeiden, dass die Akkuzelle wieder anhaftet, während du weiterarbeitest.
-
-
-
Entferne dein Buch oder deinen Schaumstoffblock.
-
Hebe die rechte Seite des MacBook Pro an und stütze sie wieder ab. Die Vorderkante des MacBook Pro zeigt zu dir.
-
-
-
Gib ein paar Tropfen des Klebstoffentferners zwischen die beiden mittleren Akkuzellen, damit er unter die übrige Akkuzelle fließen kann.
-
Warte 2-3 Minuten, damit der Klebstoff-Entferner einwirken kann.
-
-
-
Schiebe eine Ecke einer Plastikkarte unter die erhöhte Kante der letzten Akkuzelle.
-
Drücke die Karte weiter unter die Akkuzelle, um den Kleber, mit dem sie befestigt ist, zu durchtrennen.
-
Versuche noch nicht, diese Akkuzelle ganz zu entfernen. Lasse deine Plastikkarte and Ort und Stelle, um zu vermeiden, dass die Akkuzelle wieder anhaftet.
-
-
-
Falls es nich schon gemacht ist, hebe die zwei äußeren Akkuzellen an und klappe sie um, damit du die Außenkante der letzten Akkuzelle erreichen kannst.
-
-
-
Wiederhole den Vorgang, den du bei der mittleren rechten Akkuzelle angewendet hast, um den Kleber der mittleren linken Akkuzelle zu lösen:
-
Drücke eine Ecke der Plastikkarte unterhalb des Kunststoffrahmen des Akkus und unter die noch geklebten Kante der letzten Akkuzelle.
-
Schiebe die Karte unter der ganzen Akkuzelle durch, und lasse sie an Ort und Stelle, um zu vermeiden, dass die Akkuzelle wieder anhaftet.
-
-
-
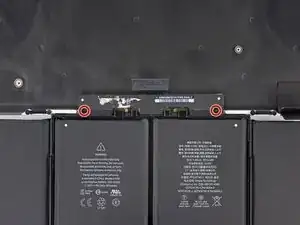
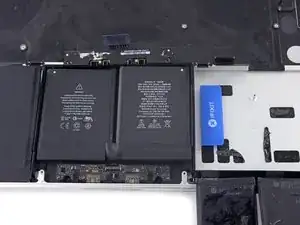
Es befindet sich jeweils eine Karte unter den beiden mittleren Akkuzellen. Drehe beide Karten leicht und hebe sie an, um die Akkuzellen zusammen mit dem Kunststoffrahmen und dem Akkuboard vollständig vom MacBook Pro abzulösen.
-
-
-
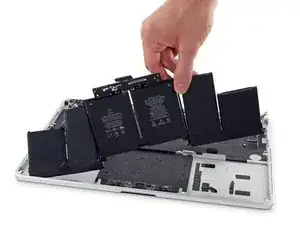
Hebe den Akku nun als Ganzes aus dem oberen Gehäuse heraus und entferne ihn.
-
Mit etwas Glück kannst du jeden einzelnen Klebestreifen langsam mit den Fingern abziehen.
-
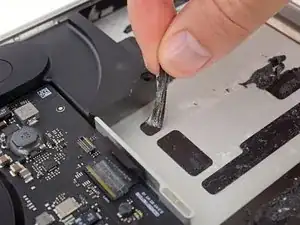
Falls das nicht klappt, träufle etwas Klebstoffentferner auf jeden Klebestreifen und lasse ihn 2-3 Minuten einwirken. Dann kannst du die Klebestreifen mit einem Plektron oder einem anderen geeigneten Werkzeug aus deinem Kit abkratzen. Das ist etwas langwierig, hier hilft dir nur Geduld.
-
Wische den restlichen Klebstoffentferner ab und lass dein MacBook Pro ein paar Minuten an der Luft trocknen.
-
Kalibriere den neu eingebauten Akku: Lade ihn auf 100% und lasse ihn mindestens zwei weitere Stunden am Ladegerät. Ziehe den Stecker und benutze dein MacBook normal, um den Akku zu entladen. Wenn die Ladeanzeige am Minimum ist, dann speichere ab und lasse den Laptop an, bis er von selbst ausgeht. Warte wenigstens 5 Stunden und lade dann auf 100% auf.
-
Arbeite die Schritte in umgekehrter Reihenfolge ab, um dein Gerät wieder zusammenzubauen.
192 Kommentare
Do I need to remove all these things just to replace the battery or can I just remove the connectors above the battery than the battery?
Tony -
I just went through this process yesterday, and today wondered why I needed to take all that crap out, because I don’t remember anything blocking the battery removal, that would require removing the speakers, logic board, etc. I think it’s because of the acetone adhesive solvent. It’s powerful stuff that can easily damage the system. Maybe, if you are able to get the battery out without the solvent, you can skip all the other stuff. I will say, however, that in my system, it seemed like the adhesive is real solid. It felt like I was pressing the card up against aluminum studs in the frame, until the solvent loosened it up. If you try to remove the battery without the solvent, be very careful not to use excessive force and warp your frame.
See the post I just added, it seems that this is all to be able to remove one of the speaker cables, which I don’t think in necessary. I really don’t like messing with delicate connectors and ribbon cables that I don’t have to.
I have done this job before. I remember that it was easy - did it on the kitchen bar.
In hindsight, I didn't have to take out all the crap. I must have used a different guide. Son of a gun, wasted time. I easily got the battery out without "adhesive remover". Hilarious if "adhesive remover" is acetone, a chemical availabe just about anywhere. Note to self, iFixit needs to be second opinioned. I think this guide is written to make it seem like you need a lot of special tools to do this job. Not true - just a few drivers, usually provided with any battery.
I made it within 1 hour doing Steps 1-5, then Steps 46-50.
I removed battery heating the aluminium frame in the location of battery pack on the opposite side of the frame with NTE HG-300D Mini Heat Gun, and then gently peeling this battery pack with plastic spudger. You may need to reheat the area several times.
For 2 central battery elements you can't heat aluminium frame because they are below touchpad, so I peeled batteries a little bit with spudger, heated the underneath gently, and then peeled it again. Also dental floss could help cutting the glue underneath the battery.
Thanks for your fast approach, worked fine for me as well! I did not use any glue dissolver at all.
Same for me, about an hour. I didn’t use a heat gun, just finagled the tip of the adhesive dissolver around the edges and otherwise followed the directions using the plastic cards. That dissolver is great stuff, worked twice as fast as the instructions.
Thanks for posting your short version. I did mine in about an hour with dental floss and the plastic cards. No heat. No solvent.
So glad I read the comments before going down the path of insanity.
I followed your comment to skip most of the steps and just remove the keyboard cable and the batteries. The replacement of batteries revived my water damaged MacBook Pro which stucked in boot loop.
In the beginning I tried to avoid “finagled“ situation thus only dripped a drop or 2 of dissolver each time. I also use a thin tip to induct the dissolver into the gap. But it’s very hard to do the flossing work and very slow. For the last 2 central pieces I had to drip 10 or more drops for each line of tapes which eventually helped me to remove them.
For someone who can’t order ifixit dissolver, I got my “Arctic Thermal Material Remover” from canadacomputers.com. It may not be perfect but helps. I didn’t use heat gun.
Great article, thanks!
Yan -
Did the same yesterday; took me closer to 4-5 hours as I was being “exceedingly careful”, as it was my wife’s laptop and she’d been hit with a “perfect storm”: battery died and backup was corrupt (backups.db reported a size of 0, and Migration Assistant hung while trying to look for it). o_O Otherwise, everything worked well, laptop is operational again, and my wife’s files have been backed up, migrated to another laptop, and the backed up again - so she currently has 4x copies of all her files. \o/
Zathras -
I’d recommend to do steps 26 and 27 and remove both ends of the touch pad cable!
If you are careful and tilt the whole Powerbook a bit downwards the solvent doesn’t pose any risk as it will run away from the speakers tec..
Did it nearly the same way (without heating). I also loosened the two accessible screws of the two speakers and bent them up a bit to avoid contact with the spreading dissolver and to better slide the plastic cards under the batteries. You just have to make sure that nothing splashes onto the other components when you tilt the dissolver bottle. If you are anxious, you can also protect them with a non-conductive, acetone-resistant cover.
Martin -
After reading through all of the steps, and seeing this comment, I opted to try this approach. Now, my laptop is getting quite old, so I suspect the adhesive has lost some of its original vigor. I did not need to use heat, dental floss, or the adhesive remover and was able to follow the instructions using the plastic cards to remove the battery without any damage to the laptop.
I followed the same steps and used fishing line to "rip" the glue between the battery and case. Found a video that showed it on youtube. It worked great!
Had to have a friend hold the computer in place for one "battery block" to "cut" it, but other than that, it was quite easy. :)
>>I made it within 1 hour doing Steps 1-5, then Steps 46-50.
I also used that method - I very carefully used the minimum amount of solvent to incrementally loosen the battery for removal.
I was concerned about using heat since the old battery was pretty badly swollen - I used the solvent instead.
CCC -
Just finished this repair, I also did not remove all the components. I have never used a heat gun before, but I had a hair dryer lying around and that did the trick. I used the hair dryer even on the middle two cells and it seemed to come loose with the plastic card tools just fine.
These batteries appear to be actual Apple batteries. How did iFixit remove them from the case? If iFixit didn't, were they able to get replacement batteries directly from Apple (since the adhesive is already installed)?
plink53 -
No idea, but check About This Mac… > System Report > Power; on the one I just replaced, Manufacturer reads “ifixit”.
Zathras -
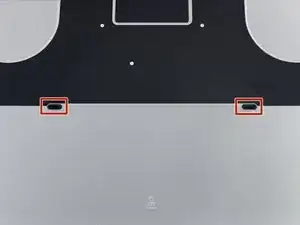
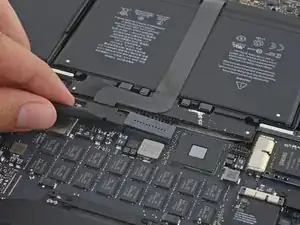
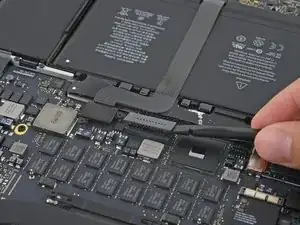
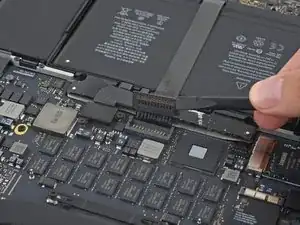
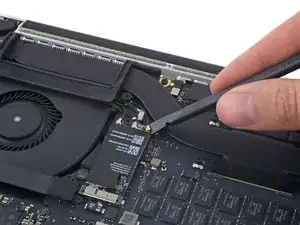
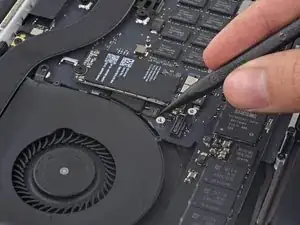
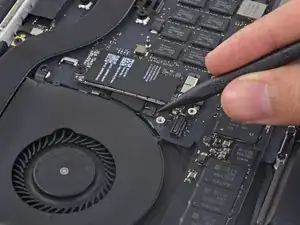
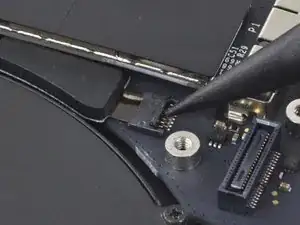
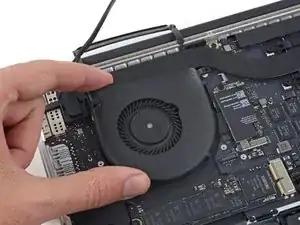

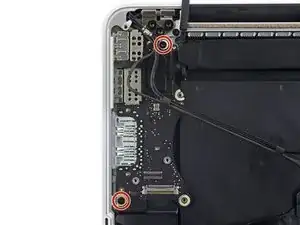
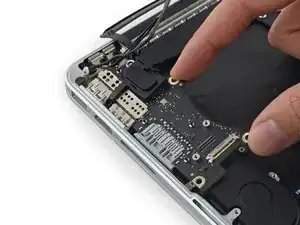
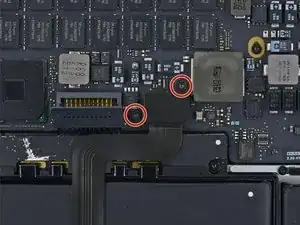
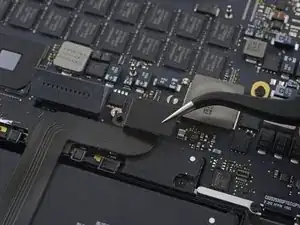

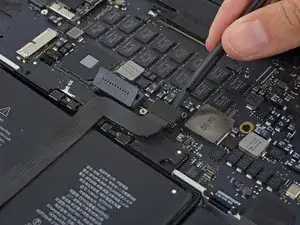



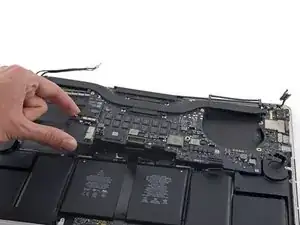
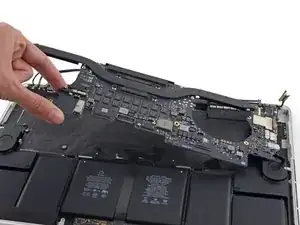
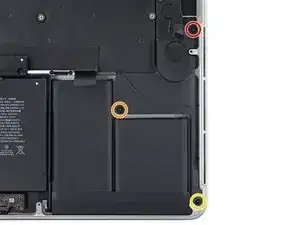
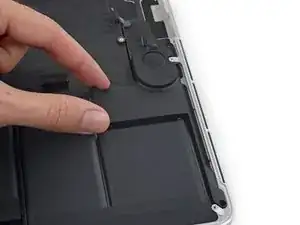


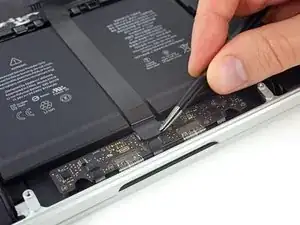
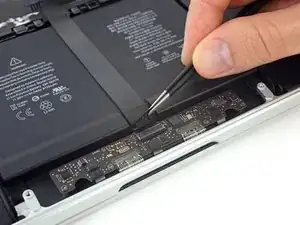
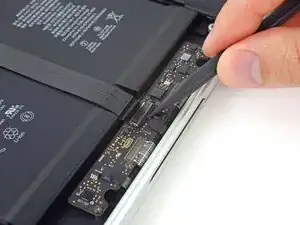
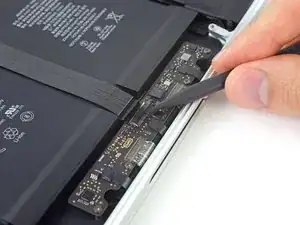





The number of screws listed here is wrong on my model. I had four of the smaller size.
anonymous 1286 -
Just to add to my comment above (I can't edit it because it's anonymous), my MacBook Pro is a mid-2015 15in model 2.8GHz (A1398; EMC2881). For the bottom case it uses six 3.1mm screws, and four 2.3mm screws at the clutch/hinge side of the MacBook Pro. I tried using a 3.1mm screw at the clutch/hinge end, as described in the main article, and they don't fit. It has to be four 2.3mm screws.
anonymous 1286 -
The instructions below have you basically taking ALL of the guts out of case. I’ve been doing my own apple repairs since before ifixit was a thing and this one is a handful. My battery was swelling and I wanted to remove it before it burst or bent the case so I took it out without having a replacement and it occurs to me that aside from using the solvent (liquid) to remove the adhesive, you could probably do this only taking the trackpad ribbon out. I have mine reassembled now and will research the best battery to buy but I think installation will take about 5 minutes. See if you can slip a plastic gift card under the battery and wag/saw the adhesive out without the solvent before you go through all of this. It might work. Note, don’t bend or put too much stress on the battery and certainly don’t puncture it…
br1ansk -
Battery Recall for 15-inch MacBook Pro Retina mid-2015. Check Apple’s site for recalls, and put in your serial number. They replaced my swelling battery for free, regardless of warranty.
Steve -
As we are only replacing the battery, you can safely skip steps 6-26 and 28-48, no need to disassemble the computer to pull out the battery. Use nail polisher remover I was able to pull a super bloated battery out, without disassembling my MacBook.
John Sikking -
I qualified for the recall. These bloated batteries are dangerous! DO NOT, UNDER ANY CIRCUMSTANCES, PUNCTURE THE BATTERIES!
Thanks for the heads-up on the recall.
Datajockeys -
I’m having a problem trying to get the screws off. I have a set of pentalobe screwdriver set. I found one screwdriver that fits perfectly on one set of screws, but I am unable to unscrew it. I tried using some force pushing the screwdriver into the screw, but nothing happens. Any suggestions?
henry_k_wong -
All the screws on mine are the same length for some reason.
ccfman2004 -
I would recommend the first step is: Run the battery down to ZERO before doing any next step. This reduces risk to you, people nearby, to the MBP and greatly reduces the risk of fire. Step 2 should be: Double-check that the battery is at zero.
I like others listed below and on YouTube, disagree with these full tear down 70+ steps being the only focus. I get that I have to be careful not to get the acetone solvent near the speakers. I skipped 25+ steps by: tilting the MBP away from the speakers and using very little acetone solvent. More pressure with the plastic cards and only a few drops of solvent. While giving the full set of instructions is fine it should be very clear that you can (at the user’s own risk) do this.
Kenneth Schleede -
As above—I consider full disassembly to be far riskier to fragile cables and connectors than the risk for solvent spillage. I did steps 1-5 and 46-74. No issues. I HIGHLY recommend the iFixit magnetic Project Mat. It’s a white marker board surface gridded into squares and invaluable for labeling part sizes/steps in disassembly.
philtrit -
As above too. I benefitted from the advice. From step 51 onwards, I found a easier way using tip from China battery seller. Use a 2” width plastic scraper/plastic paint scraper to poke under the battery. Use moderate strength to poke and avoid rough handling of the battery so as not to puncture it. There is no need to pry the battery to avoid stressing it, just use a firm poking action under the battery and the double sided tape adhesive will yield. After 5 min of such poking, the entire battery pack can be removed without the hassle of pouring the adhesive remover from step 51 onwards. Get a scraper with a stronger handle so that it is more comfortable to poke.
https://www.aliexpress.com/item/32889670...
Emma Pn -
Heads up as you go…we (husband/wife team) had a notebook that when screws/covers were removed, we marked the step # and actually taped the screws into the notebook noted by the step number. This was very helpful on reassembly and we knew we would be using the exact screw into the original screw hole.
Ann Brainard -
After replacing the batteries myself, I wouldn’t even consider doing it again. Not that it’s difficult to do—that’s not the issue. The issue is aftermarket batteries. I’ve been using notebooks for well over 30 years, and never had satisfaction with aftermarket batteries.
Modern lithium batteries are an amazing technological feat, but a dangerous one. So even putting aside that I’ve never found any aftermarket batteries with quality anywhere near original, I learned “cheap” aftermarket lithium batteries are downright dangerous.
After doing research into what’s involved with manufacturing lithium batteries, I know there are so many corners to cut, you’ll end up with junk regardless of what you pay.
A week after replacing my batteries with those from iFixit, they showed clear signs of failure. Thank goodness iFixit refunded my money.
After having Apple replace my batteries, everything is back to like-new. For my $199, I got not only excellent batteries, but a new keyboard and trackpad as well. That’s it’s done!!!
AnnoniMoose -
I found an Apple Support link that said MBP battery replacement was $199, but the 2 Apple Stores near my house would not provide any appointments. Instead, I scheduled an appointment with and “Apple Authorized Service Provider” & that repair center quoted about $750 to replace the battery.
I refused, went home, & opened a chat with Apple Support.
After a lengthy & painful chat session where the Apple tech didn’t want to provide a battery replacement quote (he feared other issues with the MBPr), he finally gave me an Apple price of just under $650 to replace the battery.
Did you go into an Apple store, or mail it in? I’m struggling to reconcile a price of $199 to get a battery + keyboard + trackpad against what I was just quoted 2 weeks ago. The new track pad & keyboard might have been due to repair tech error. i.e. they trashed those repairing your batter & had to toss them in.
Bartt.Shelton@gmail.com -
I took mine in after being quoted for a $199 replacement of battery and keyboard, only to have the repair refused as they found a "water sensor" triggered and now I'm left with my AUD$5,000 laptop with messed up keys. Shame on me for not getting this repaired during COVID while under warranty. This is the first time I've truly been disappointed in Apple, but suppose it was bound to happen someday. I was quoted US$ 1479 to replace the battery and keyboard and the sensor (likely the logic board is replaced as well) if I were to send it in to the US repair center. Any chance these sensors can be triggered by humidity?
C0RT -
I 1000% recommend watching this video and performing the battery replacement without all these steps from this guide and without using the acetone solvent. https://www.youtube.com/watch?v=ImonCWcc... (15" inch Retina MacBook Pro A1398 Mid 2015 Disassembly Battery Replacement Repair)
The video is narrated well and the guy goes slow and zooms in where appropriate. Instead of removing all components, he simply removes the track pad cable, battery cable, and unscrews two of the speaker screws on each side. From there, you can lift up the speaker arms where the video guy uses a thin pry tool to push through the sticky tape. No solvent is needed except for residual sticky stuff leftover.
Instead of the thin pry tool, I just used the plastic cards that came with this ifixit kit. It takes a little force and wiggle/jiggle so take your time using the corner of the card to start.
This method makes a difficult 2-3hr job into a much easier 1hr job.
Spencer -
+1 for this approach! I watched the video that Spencer mentioned. It took me a little over an hour, and it was stress-free. https://youtu.be/ImonCWcc1xk
Chris Wicklas -
Another +1 - I followed the video pretty exactly (after having already gone through steps 1-5 here). I'm not sure it's necessary to clean off the adhesive residue as thoroughly as he demonstrates in the video, but the instructions were clear and the end results were good - trackpad still working fine and new battery already charged to 50%.
Jeff Zinn -
Glad I read these comments before plunging into the iFixit instructions.
+1 for skipping the iFixit instructions and using the youtube video linked by Spencer.
I followed the instructions and had my battery replacement done succesfully.
Instead of the metal spatula like thing he used - I used the plastic ifixit credit card things that came with my battery kit.
It took about 15 minutes of wiggling under the battery to free it from the adhesive but it wasn't too bad.
I did remove the residual adhesive as he indicated with isopropyl alcohol - but after finishing my installation I realized it was completely unnecessary. You can install the new battery over the residual gunk and skip that step.
picardo -
Yes! This YouTube tutorial works great and it was really easy to replace the battery. I needed about 75 minutes.
Perform steps 1-5,
Then skip to step 41.
In 41 + 43 do not unscrew the red marked screws.
In 42 an 45 just lift the speakers, do not remove them.
Skip 44
Up from 53, I did not use the glue remover, the plastic cards were enough.
In step 63 watch out to start from the middle. This prevents you from peeling up the lower „platform“.
Great job :-)
weekendiac -