Einleitung

  1. Y3OUbSVhCIcL2qCe
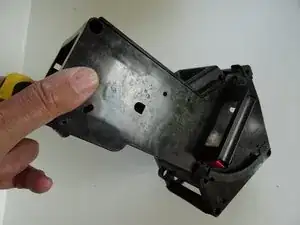
    • Nimm die Brühgruppe aus der Maschine heraus.

  2. GMgdwEsIoffwyIZv
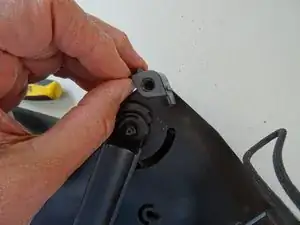
    • Klipse die Schutzkappe über der Schraube an einer Ecke ab. Die Kappe hilft, die Brühgruppe besser zu verankern.

    • Hinweis: bei der älteren Version der Brühgruppe gibt es diese Kappe nicht.

  3. NGQQejhYhugVLElM
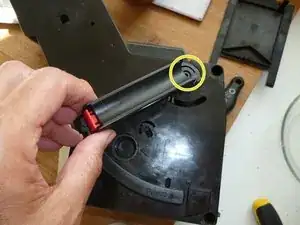
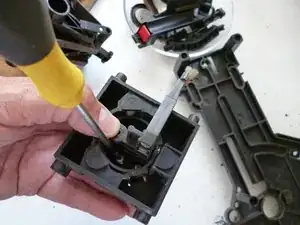
    • Drehe die schwarze Torx T10 Schraube am Öffnungshebel heraus.

    • Löse den Hebel mit etwas Kraft aus seiner Führung am roten Entriegelungsknopf.

    • Drehe den Hebel etwa 90° gegen den Uhrzeigersinn, dann lässt er sich herausheben.

  4. PPhXvJlJJZdFTTJs
    PPhXvJlJJZdFTTJs
    mqQQv6nmkjGIWPVC
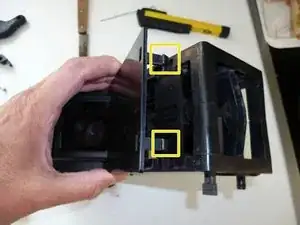
    • Klipse die Schutzplatte oben ab und hebe sie heraus.

  5. 3x1qqwgSF4HA5g2r
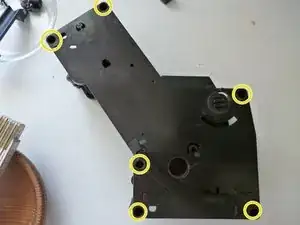
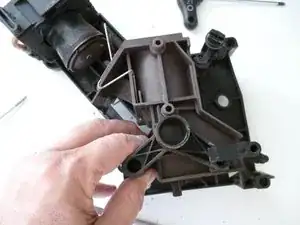
    • Die Brühgruppe wird von sechs tiefliegenden Torx T15 Schrauben zusammengehalten. Drehe sie heraus.

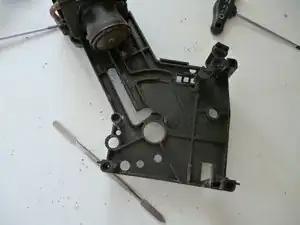
    • Nimm die obere Hälfte ab.

  6. lpIXktn3aIwiPUa5
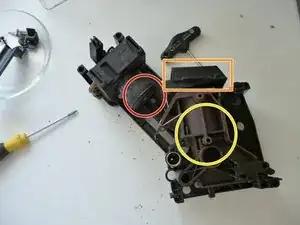
    • Die Brühgruppe liegt offen vor dir. Du erkennst:

    • Den oberen Kolben mit dem Dichtring

    • Den Einfülltrichter

    • Den unteren Kolben

  7. fv3wAbWtWMDKbM2G
    fv3wAbWtWMDKbM2G
    gQAiRfGoInR66bc2
    VojfdXTOIRNBM2JK
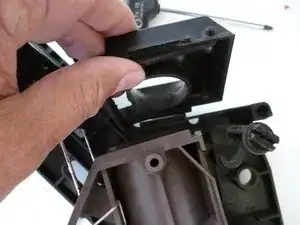
    • Entnimm den Einfülltrichter.

    • Drehe den unteren Kolben etwas nach links, hebe ihn dann heraus.

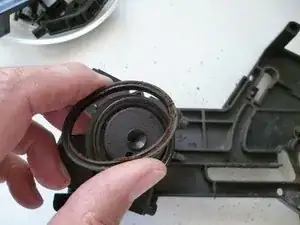
    • Hebe den oberen Kolben heraus. Er ist noch mit einem Schlauch am Kaffeeauslauf verbunden. Außerdem befindet sich der Niederhalter der Brüheinheit darüber.

    • Dieser Niederhalter reißt manchmal, dann läuft Kaffee aus der Brühgruppe heraus und nicht in die Tasse. Untersuche ihn auf Risse. Zum Reparieren gibt es dafür Reparatursets.

    Anyone seen the repairkit somewhere?

    Hugo van der Kooij -

    we have taken the piston out to replace the gasket, and noticed that 2 of the 3 return springs within the housing surrounding the piston are broken and offset. can we buy these springs as spare parts anywhere? many thanks

    Hannah -

    Until now I didn't find these springs as spare parts. You already have the brewing unit, so I would buy a used one (e.g. from ebay ) and take the parts from it. The brewing unit could be from an older Melitta, Bosch, Siemens or Nivona.

    VauWeh -

  8. UZQCUmNNtkpK5e5q
    UZQCUmNNtkpK5e5q
    Cq2jeBBDjFRt6TuR
    jFZAv3tAoOZrA3Fr
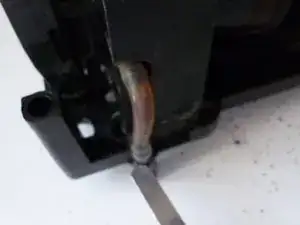
    • Löse den Schlauch zwischen oberem Kolben und Kaffeeauslauf.

    • Entferne den oberen Kolben.

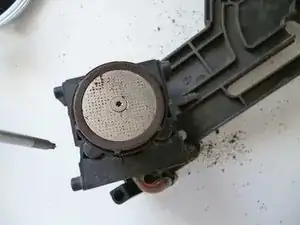
    • Schraube die Torx T20 Schraube aus dem Sieb des oberen Kolbens heraus.

    • Entnimm Dichtungshalter und Dichtung.

    • Tausche die Dichtungen am oberen Kolben, am Kaffeeauslauf und an der Wasserzufuhr aus.

    • Die Lippe der Kolbendichtung muss zum Druck hin zeigen, also nach unten.

    • Reinige alle Teile gut. Gib ein bisschen lebensmittelechtes Silikon auf die Dichtflächen.

    I have no coffee/water coming tru the outlet of the upper piston, i can see water runs into the piston chamber but nothing goes tru. I have changed the drain valve without luck - Any clue of what my problem could be?

    Christian -

    Check for a tiny crack in the downholder .

    VauWeh -

    Just checked the downholder, it looks fin also without cracks.

    next step?

    Christian -

    Well, are you sure that the issue is really with the brewing unit? I would ask someone if they could borrow a brewing unit for testing. As many machines are produced by the same factory and are equally designed (Eugster in Portugal) brewing units from Nivona, Bosch and Melitta will also fit.

    VauWeh -

  9. xDOXH2MyAfnVvvMX
    • Das Cremaventil befindet sich im Inneren des oberen Kolbens. Es ist mit zwei Torx T10 Schrauben befestigt.

    • Drehe die beiden Schrauben heraus. Hebe das Ventil ab. Prüfe und reinige es.

    • Hinweis: am unteren Kolbenschaft befindet sich auch noch eine Dichtung, die allerdings etwas schwieriger zu ersetzen ist.

    • Fette alle gleitenden Teile leicht mit lebensmittelechtem Silikon und baue alles wieder zusammen. Prüfe auf Leichtgängigkeit.

    Nice article, I’ve renewed the lip seal in the brewing unit but I still don’t get even a drop of coffee in the cup, it all goes in the drip tray.

    I have dismantled the brewing unit complete and suspect the lower piston seal to be the problem as it doesn’t provide any “resistance” or tight fit.

    You say; “replacing is difficult”, but no instructions. Could you please provide a link?

    Many thanks in advance.

    Kim Conrad Jorgensen -

    You can buy the O-ring here. There is a cover glued over it. You have to break it out and reattach it later with a special food-safe adhesive. It's tricky and often doesn't work. I avoid this repair and try to get a used brew chamber. Are you sure the downholder and its seal is ok?

    VauWeh -

    And: Did you have a look to the drainage valve?

    VauWeh -

    Hi,

    Thanks for the instructions.

    There was a round spring that fell of when I dismantle, do you know where this should be?

    I think it is the gray circle in step 6 picture, down to the left (8th o´clock) from the yellow circle?

    Claes K. -

    Yes, there is a helix spring. Just put it in.

    VauWeh -

Abschluss

Arbeite die Schritte in umgekehrter Reihenfolge ab, um dein Gerät wieder zusammenzubauen.
VauWeh

Mitglied seit: 19/10/15

168076 Reputation

0 Kommentare