Einleitung
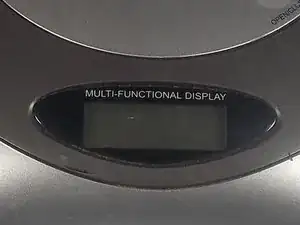
Without a working LCD display, the user will be unable to read the various information the device needs to display.
Werkzeuge
-
-
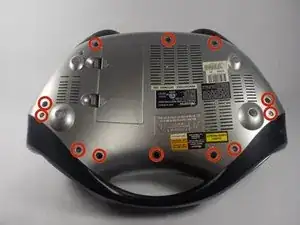
Begin by turning the boombox over so that the bottom is facing up.
-
Your boombox will have a total of 12 Phillips screws on the bottom. The location of the screws needed to remove the bottom panel are circled in red in the image to the left.
-
Remove the 12 screws with a Phillips head screwdriver on the bottom panel.
-
-
-
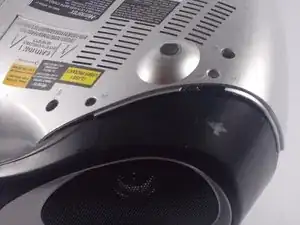
With all 12 screws removed, it is possible to detach the plastic bottom cover from the top half of the boombox.
-
Push the bottom shell back slightly before pulling it up. The plastic bottom will lift up directly but there is a lip that fits under the black handle that must first be exposed, as seen in the image on the left.
-
-
-
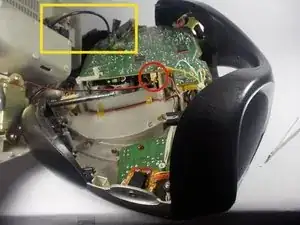
The boombox should now be in two separate pieces, connected only by two wires.
-
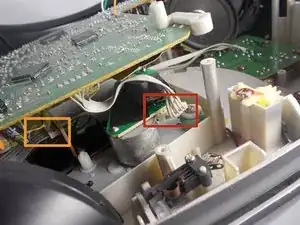
Disconnect the red and black wires by gently grasping its white plastic end and pulling it out of its socket (circled in red on the image to the left).
-
Additionally, the black wire highlighted in the square yellow box in the image to the left is taped onto the main board. This tape may be safely removed to give the wire more slack when separating the two halves of the boombox.
-
-
-
There are a lot of connections hidden underneath the Main board.
-
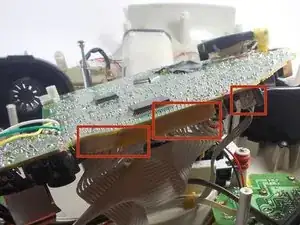
This white clip, circled in red, is the first one that needs to be removed.
-
The small ribbon cable, circled in orange, is the next cable that needs to be removed.
-
-
-
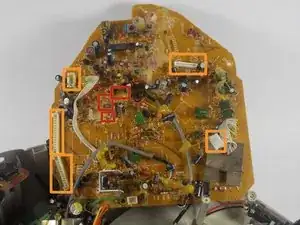
There are few more connections left to remove from the board. These spots are marked in red.
-
The orange squares are cables that should have already been removed.
-
-
-
After those last few cables, the main board should be entirely disconnected from the top half of the boombox.
-
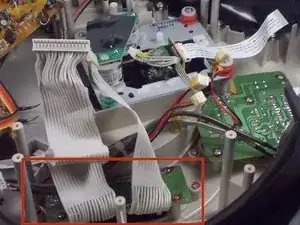
Underneath the main board should look something like this.
-
The location of the LCD, the focus of the next few steps, is circled in yellow.
-
-
-
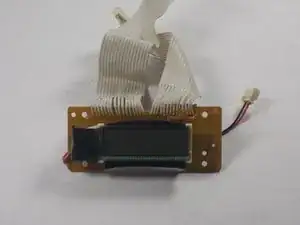
Move the cables away from the back of the small LCD board.
-
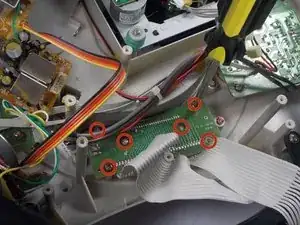
There should be six screws holding it in place.
-
To reassemble your device, follow these instructions in reverse order.
