
Einleitung
Der Ausbau des Aschenbechers ist ganz einfach, die Art und Weise jedoch nicht sofort offensichtlich. Diese Anleitung zeigt dir, wie es geht, und wie man die Rückplatte des Aschenbechers entfernt, falls du Zugang zu tiefer dahinter liegenden Bereichen brauchst.
Werkzeuge
-
-
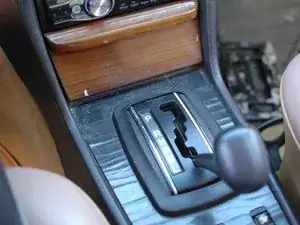
Drücke den Bügel in der Mitte des Aschenbechers herunter, um den Öffnungsmechanismus zu entriegeln.
-
-
-
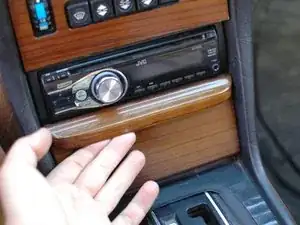
Mit heruntergedrücktem Bügel lässt sich der Aschenbecher weit öffnen und nach vorne aus der Öffnung herausziehen.
-
-
-
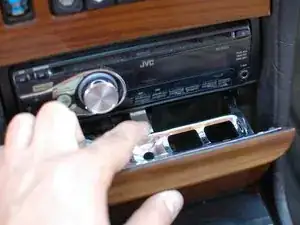
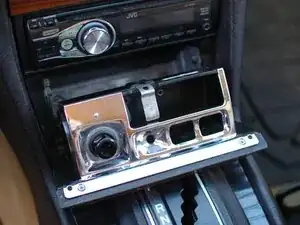
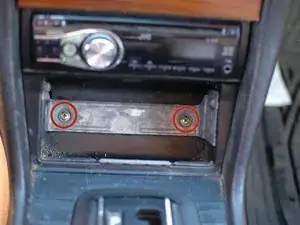
Falls du die gesamte Einheit inklusive der Halterung, in der sich der Aschenbecher befindet, ausbauen willst, kannst du mit dem Entfernen der zwei Schrauben beginnen, mit der sie an der Mittelkonsole befestigt ist.
-
Zum Wiedereinbau folgt den Schritten einfach in umgekehrter Reihenfolge.

4 Kommentare
What would be the purpose of removing ashtray ?
It provides access to the portion of the center console behind the ash tray. There is wiring back there. It can also help with the removal of the shift gate panel.
Removal of ashtray is also necessary to access the lamp which illuminates the cavity. After taking ashtray out, remove two Philips (+) screws, then separate metal cover from plastic housing. Next to the lighter housing is light socket. It holds a 12 volt, 2 watt, T2 bayonet base, #1272 lamp. Push, then twist lamp to remove. Clean copper terminal at side of socket as well as moving contact on side of ashtray housing. This lamp is same type as used for automatic shift indicator. This is one of the most overlooked lamps in a W123 chassis. Tip: while metal cover is removed, clean and scrub ashtray, it is much easier to access this way.
analogcd -
Hello Nicolas, How about removing the radio, is there a latch to be released from the ash tray compartment?
chirolob -