Einleitung

Follow this guide to remove or replace a malfunctioning SD card reader in a Microsoft Surface Book.

The Realtek RTS5314 SD card reader, located near the two USB ports, is easy to remove and replace. Make sure that you have a place to hold onto the tiny screws as you remove them.

  1. YQijRHmOEEJWEYCf
    YQijRHmOEEJWEYCf
    DNNKobOnjW5qqyhT
    1rnE1dpBFvc1JLHB
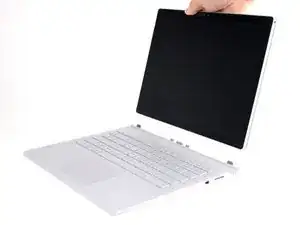
    • In order for the keyboard to be detached with the Detach buttons, both batteries must be charged above 10 percent. If your device doesn't power on and you can't use the Detach buttons, skip to the next step.

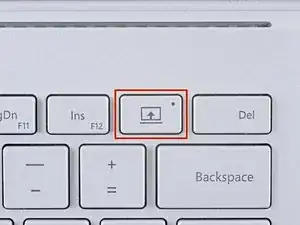
    • Press and hold the Detach button on the keyboard.

    • Once pressed, the Detach button it will light up red. After a second, it’ll turn green and you’ll hear an audible clicking sound.

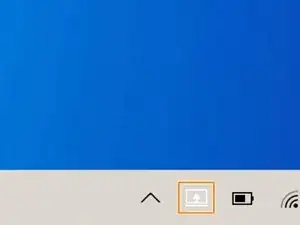
    • Alternatively, click the Detach icon on the right-hand side of the Windows 10 taskbar.

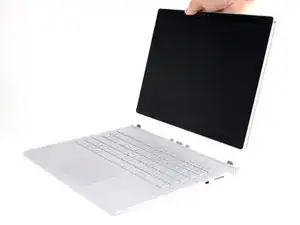
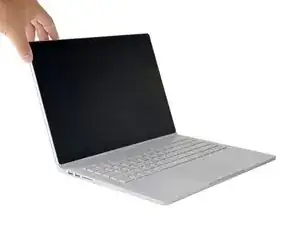
    • Remove the display.

  2. RfPbTUJXAiWqYfLy
    RfPbTUJXAiWqYfLy
    fEfVXUMqdeZbx21W
    • The next six steps show how to detach the display manually if you’re unable to power on the Surface Book.

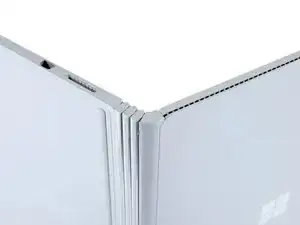
    • Flip open the display as far as it will go.

    • Lift the device up and place it on its side, with the display facing away from you and the SurfaceConnect port facing up.

  3. vNBlVAuMHAOnYPSW
    vNBlVAuMHAOnYPSW
    H4H5iPsqoYgY64sT
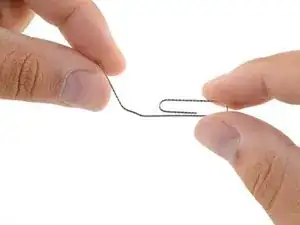
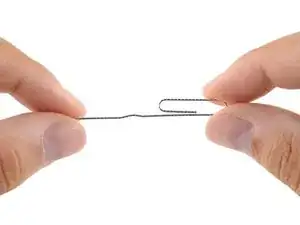
    • Straighten out one section of a paper clip.

  4. ZAv1uDZJd4Q4FOYx
    ZAv1uDZJd4Q4FOYx
    wTrKwFSqvPIGVV3g
    IdTAkJDUgV4M6XqK
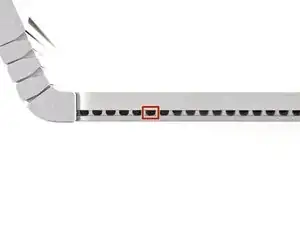
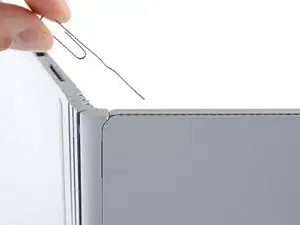
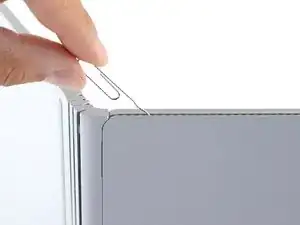
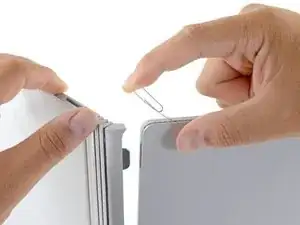
    • The Surface Book has an internal lever arm mechanism that can be manually actuated through an access hole in the vents on side of the display.

    • Insert the straight end of the paper clip at a 45 degree angle into the sixth hole from the left.

  5. 156LqyqlPUsQik46
    156LqyqlPUsQik46
    MrkLED6mbHdSYLIT
    4vTfLVRWXYPMADdI
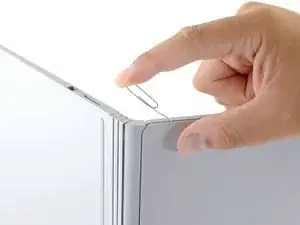
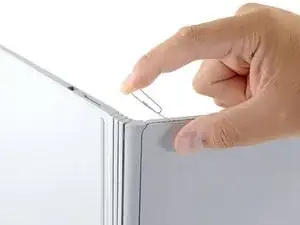
    • Firmly push the paper clip into the hole.

    • This may take a considerable amount of force.

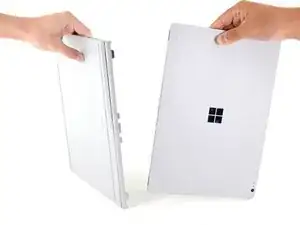
    • Once the internal lever arm is fully depressed, you can disconnect the display.

    • Pull the base away from the display to detach it.

    • If you are unable to detach the display from the base on this side, release pressure on the paper clip and try again.

    You should feel slight resistance when pressing against the internal lever arm. If you don’t feel the resistance after about half an inch, back out and try again. Be careful not to push the paper clip too far, as it can scratch the screen bezel from the inside, leaving a visible mark.

    Alexander V Trofimuk -

  6. AJTEvvLRBxhRyoYH
    AJTEvvLRBxhRyoYH
    ZnoijRymljxaC11W
    A1DDRDlESMk4pShY
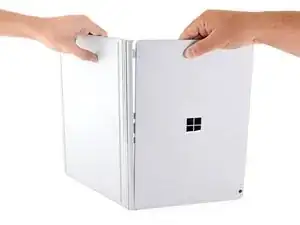
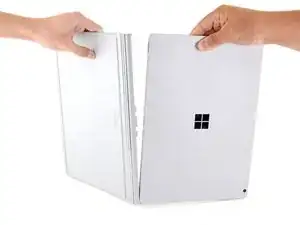
    • The magnetic connections are prone to snap back into place, so hold the two halves apart.

    • With one side detached, pull firmly to pivot the display out to disconnect the second side.

    • If the magnetic connection feels extra strong and the display won't detach on the second side, keep the detached side separated with a spudger, pen, or pencil, and repeat the paper clip process on the other side of the display.

  7. CtfG4BjJlMXSVKMf
    • Remove the display.

    • Completely power down your Surface Book before opening it up for any repairs.

  8. 4yMF5QmF1iK3Imce
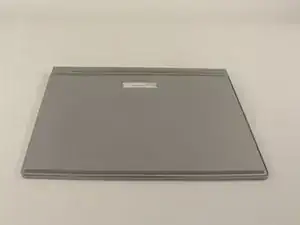
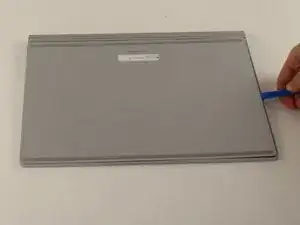
    • Flip the keyboard over so you can see the back panel.

    In this photo, there is a clear crevice around the edge of the panel and the keyboard. On my Surface Book, there is no such crevice. The panel is flush up to the keyboard with a gap that looks to be maybe 0.2mm max. There is no way to fit a tool into the crevice to lift off the panel. Any tips?

    Darren Reynolds -

  9. MmePANLn3kxmbknI
    MmePANLn3kxmbknI
    RJiuwiYNGjvwbBtX
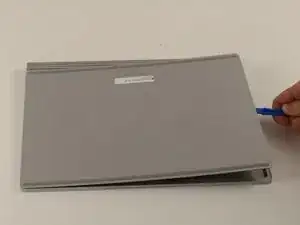
    • Insert the plastic opening tool in the crevice between the panel and the keyboard.

    • Apply some pressure and lift up so that the back panel is pried away from the keyboard.

    • The panel is glued down on the inside so this may require some force to lift away the panel.

    • Continue to lift until the panel is completely separated from the keyboard.

    • The panel is still attached to the keyboard by a ribbon cable so only lift the panel a few inches.

  10. 15q32v5UktOlYHOe
    • Lift the panel away with the ribbon cable still attached and set aside the panel so that you can work on other components.

  11. ZppHWfC1vjtBep26
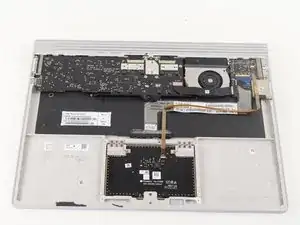
    • Orient your keyboard with the internals facing up and the USB ports on the right.

  12. BjCxfTthU4TiWq4P
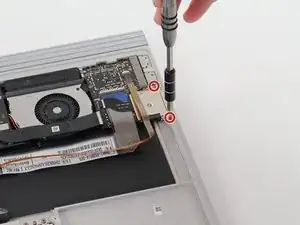
    • Use the T3 screwdriver to remove the two 4 mm screws on the right side of the SD Card Reader.

  13. LeTYVcnhKPL55XJK
    LeTYVcnhKPL55XJK
    jvAD6Vg35elB3lZT
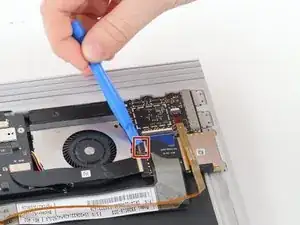
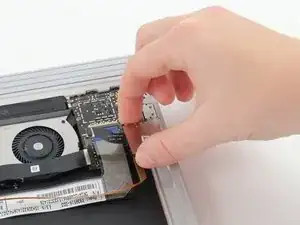
    • Remove the black ribbon cable tab on the SD card reader from the chip with a plastic opening tool. Place the tool underneath the tab and pry it off.

    • Removing this tab can be a little difficult. Be sure that you have a good angle and do not get discouraged if removing the tab takes you multiple tries.

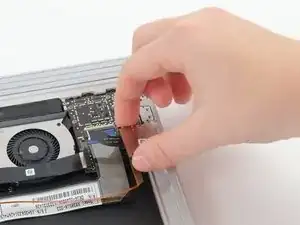
    • Lift the SD card reader away from the keyboard to replace it.

Abschluss

Compare your new replacement part to the original part—you may need to transfer remaining components or remove adhesive backings from the new part before installing.

To reassemble your device, follow the above steps in reverse order.

Take your e-waste to an R2 or e-Stewards certified recycler.

Repair didn’t go as planned? Check out our Answers community for troubleshooting help.

Natalie Weisenburger

Mitglied seit: 06/10/16

581 Reputation

Ein Kommentar

Awesome guide! Do you know where to find a replacement module?
Trent Fowler -