Einleitung

Diese Anleitung zeigt dir, wie du das Display am Microsoft Surface Pro 4 austauschen kannst.

Leider kann es leicht passieren, dass das nicht verstärkte und empfindliche Displaypanel während der Reparatur bricht. Achte darauf, dass du gut erwärmst und sei sehr vorsichtig, wenn du denn Kleber auftrennst. Ziehe eine Schutzbrille auf, damit keine Splitter dein Auge verletzen können.

  1. WoCPSQN2O1Weo4fV
    WoCPSQN2O1Weo4fV
    YhxCWPoYmyNya6eK
    PbLnLd3TDLyvNgVi
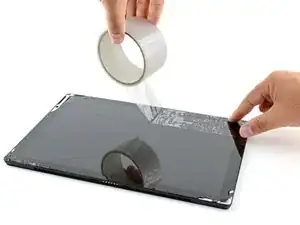
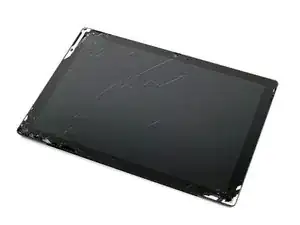
    • Wenn das Displayglas zerbrochen ist, dann überklebe das Glas mit Klebeband, damit die Scherben zusammenbleiben, und du dich nicht so leicht verletzen kannst.

    • Überklebe das Display komplett mit überlappenden durchsichtigen Klebestreifen.

    • Dadurch bleiben die Scherben zusammen, auch wenn du am Display hebelst und es hochhebst.

    • Befolge die Anleitung so genau wie möglich. Wenn das Glas zerbrochen ist, kann es natürlich trotzdem vorkommen, dass es während der Reparatur weiter splittert. Dann musst du die Splitter mit einem Metallwerkzeuge behutsam herausholen.

    • Trage während der Reparatur eine Schutzbrille und beschädige das LCD nicht.

  2. E23jAc4iYqnVjEXC
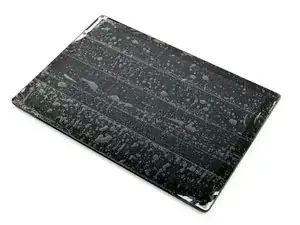
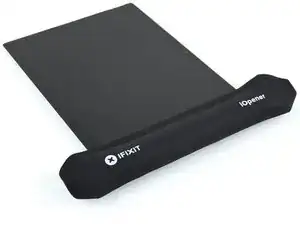
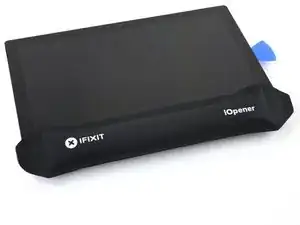
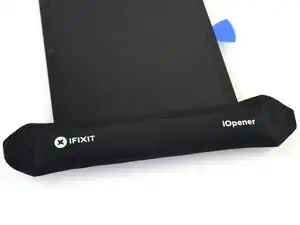
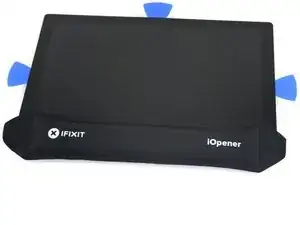
    • Erwärme einen iOpener und lege ihn zwei Minuten lang auf die rechte Kante des Displays.

    • Möglicherweise musst du den iOpener mehrfach neu erhitzen und auflegen, bis das Tablet warm genug ist. Folge den Anweisungen für den iOpener, um ein Überhitzen zu vermeiden.

    • Du kannst auch einen Fön oder eine Heißluftpistole benutzen.

    • Achte darauf, das Surface nicht zu überhitzen. Das Display und der interne Akku sind beide sehr hitzeempfindlich und können leicht beschädigt werden.

    • Benutze keine Heizplatte, wenn das Display mit Paketband überklebt ist.

    I have done dozens of Surface Pro tablet repairs; if your screen is cracked or chipped AT ALL, you WILL make it worse. Plan on replacing it. Even if it's not cracked or chipped, the likely hood of removing this screen without damage (LCD separation or heat marks in the corners) is very low. Ive tried everything from hot plates to heat mats and the iOpener and nothing is reliable enough. I found that using my Warner heat gun set at 800*c and working on half an edge at a time with a LOT of 91% alcohol in a drip bottle along the edge, along with a very thin guitar pick (not the ones sold here, they are too thick) is the trick to loosening the glue. Work on the side and bottom first. The top is going to be the hardest as the adhesive will stick to the wifi/bluetooth antenna and you WILL tear them (Ive had to replace a fair amount of them). There's a delicate trick to doing it, but it's too hard to describe. If you've never done this repair before, I do not recommend it; find a professional.

    Gregg Stanley -

  3. W4DhXQ3IMCNeSJmA
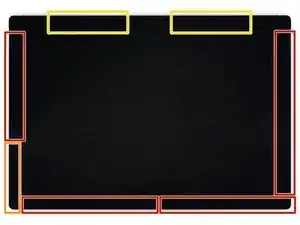
    • Sieh dir genau das Layout der Klebestreifen am Display an:

    • In diesen Bereichen befinden sich nur Klebestreifen, die problemlos durchgeschnitten werden können.

    • Displayplatine und Flachbandkabel befinden sich hier nahe an der Kante. Schneide vorsichtig und setze dein Plektrum nicht tiefer als 3 mm ein.

    • Unter diesem Teil des Displays befinden sich empfindliche Antennenkabel. Folge der Prozedur in Schritt 13 ganz genau, um sie nicht zu beschädigen. Hier ist der Kleber am dicksten.

  4. bCIYSWtb6Pl3OhYS
    bCIYSWtb6Pl3OhYS
    YIxRJGSQRRrKhthD
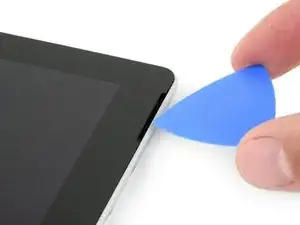
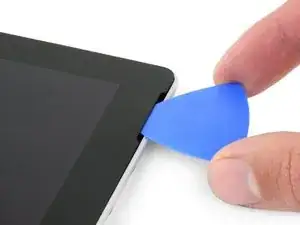
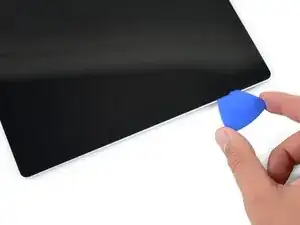
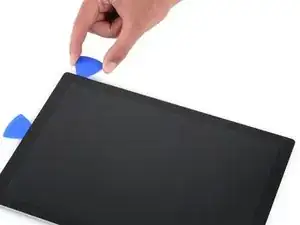
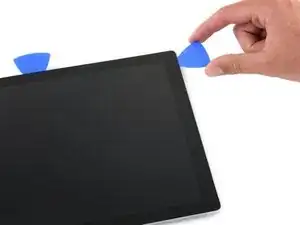
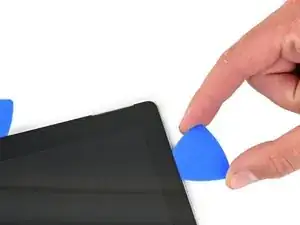
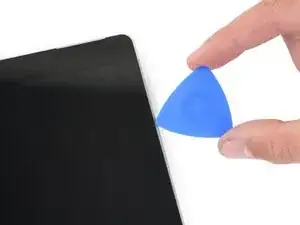
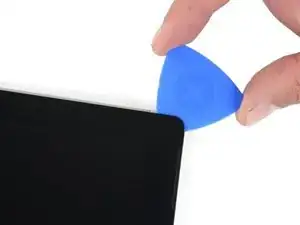
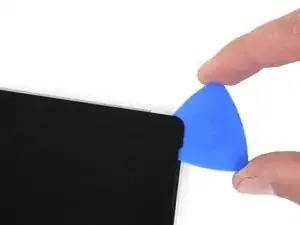
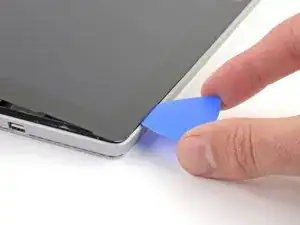
    • Setze ein Plektrum in die Öffnung für den oberen rechten Lautsprecher im Display und schiebe es zwischen Glas und Lautsprechergitter.

    • Setze das Plektrum nicht tiefer als 12 mm ein, da du sonst das LCD beschädigen könntest.

  5. YFYgRQwE6pQx1u65
    YFYgRQwE6pQx1u65
    RIfr4rCJhVG11GYP
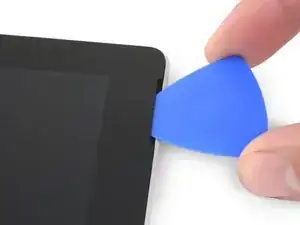
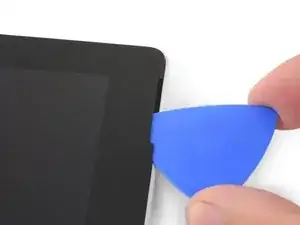
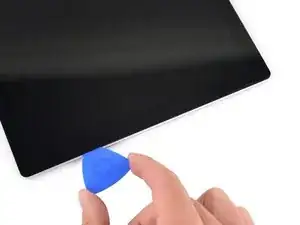
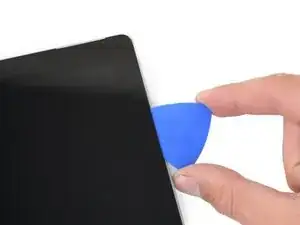
    • Drehe das Plektrum in Richtung der Unterkante des Surface, um es unter die untere Kante der Lautsprecheröffnung zu schieben.

  6. Pkpt6F2SZJAsbsW4
    Pkpt6F2SZJAsbsW4
    eSWTkj1Jb6iXNVBr
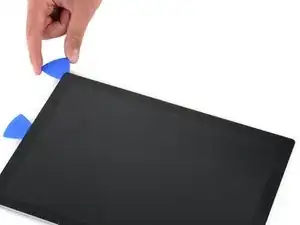
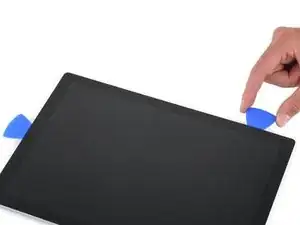
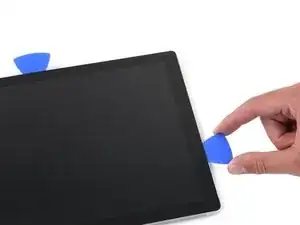
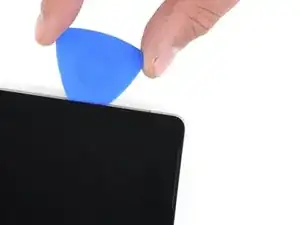
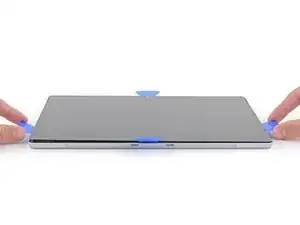
    • Schiebe das Plektrum an der rechten Kante des Surface nach unten und durchtrenne so den Kleber unter dem Display.

    • Wenn du während der gesamten folgenden Prozedur irgendeinen größeren Widerstand beim Durchschieben des Plektrums spürst, halte an und erwärme den Bereich, an dem du arbeitest, erneut. Wenn du zuviel Druck mit dem Plektrum ausübst, kann das Glas brechen.

    • Lasse das Plektrum in der rechten Kante stecken, damit sich der Kleber nicht wieder verbinden kann.

  7. PfdgoRrmJEeZVdPh
    • Erwärme den iOpener erneut und lege ihn zwei Minuten lang auf die Unterkante des Surface Displays.

    • Du kannst auch einen Haartrockner, ein Heißluftgebläse oder eine Heizplatte benutzen.

    • Überhitze das Surface nicht. Das Display und der interne Akku sind beide sehr wärmeempfindlich.

    • Benutze keine Heizplatte, wenn das Display mit Paketband überklebt ist.

  8. 2BnTjmKGDcGAESO4
    2BnTjmKGDcGAESO4
    AtBLbExBEv2ZF55n
    eNbIeIIutCK6neIi
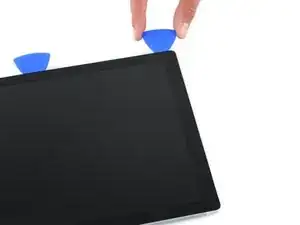
    • Setze ein neues Plektrum in die untere rechte Ecke ein und schiebe es um die Ecke herum zur Unterkante.

    • Setze das Plektrum nicht tiefer als 6 mm um die untere rechte Ecke ein, da du sonst das LCD beschädigen könntest.

    • Schiebe das Plektrum an der Unterkante des Surface entlang und durchtrenne so den Kleber.

    • Setze das Plektrum entlang der Unterkante nicht tiefer als 12 mm ein.

    • Lasse dieses Plektrum in der Unterkante stecken, damit sich der Kleber nicht wieder verbinden kann.

    Yep. I scratched the corner of the LCD with the pick. Take the warning seriously folks! It’s really easy to do.

    Laurence Mayer -

  9. 5bmkZqYyrDUNFRAf
    • Erwärme erneut deinen iOpener und lege ihn zwei Minuten lang auf die linke Kante des Surface Displays.

    • Möglicherweise musst du den iOpener mehrfach neu erhitzen und auflegen, bis das Tablet warm genug ist. Folge den Anweisungen für den iOpener, um ein Überhitzen zu vermeiden.

    • Du kannst auch einen Fön, eine Heißluftpistole oder eine Heizplatte benutzen.

    • Achte darauf, das Surface nicht zu überhitzen. Das Display und der interne Akku sind beide sehr hitzeempfindlich und können leicht beschädigt werden.

    • Benutze keine Heizplatte, wenn das Display mit Paketband überklebt ist.

  10. qXBF4NgGhXV3ZDWA
    qXBF4NgGhXV3ZDWA
    VlvIFnT2rHTUVtMR
    G1LhDAF2X3GYbCfC
    • Setze ein neues Plektrum in die untere linke Ecke ein und schiebe es um die Ecke herum zur linken Kante.

    • Sei bei den unteren 65 mm auf der linken Seite sehr vorsichtig. Setze dein Plektrum hier nicht tiefer als 3 mm ein. Unter diesem Teil der Einfassung befinden sich die Displaykabel, die leicht beschädigt werden können.

    • Wenn du an dem Bereich mit den Displaykabeln durch bist, setze dein Plektrum nicht tiefer 12 mm ein.

    • Schiebe das Plektrum an der linken Kante des Surface entlang, um den Displaykleber zu durchtrennen.

    • Lasse dieses Plektrum in der linken Kante stecken, damit sich der Kleber nicht wieder verbinden kann.

  11. XjBG61gZwMjRdcGQ
    • Erwärme erneut deinen iOpener und lege ihn zwei Minuten lang auf die Oberkante des Surface Displays.

    • Der Kleber ist an dieser Kante am dicksten, und möglicherweise musst du den iOpener mehrfach erhitzen und auflegen, um das Tablet warm genug zu bekommen. Folge den Anweisungen zum iOpener, um ein Überhitzen zu vermeiden.

    • Du kannst auch einen Fön, eine Heißluftpistole oder eine Heizplatte benutzen.

    • Achte darauf, das Surface nicht zu überhitzen. Das Display und der interne Akku sind beide sehr hitzeempfindlich und können leicht beschädigt werden.

    • Benutze keine Heizplatte, wenn das Display mit Paketband überklebt ist.

  12. 6Agki4nggdcGYZjU
    6Agki4nggdcGYZjU
    WONR5jgYDVvcRJiv
    mLtO2XMLFtaFrkbQ
    • Fahre mit dem Plektrum um die linke Ecke und schiebe es an der Oberkante des Surface entlang. Halte 70 mm von der linken Kante entfernt an.

    • Die nächsten 15 cm der Oberkante des Gehäuses sind von der linken und der rechten Antenne bedeckt, die sich zwischen dem Gehäuse und der Einfassung befinden. Folge den nächsten Schritten sehr genau, um zu vermeiden, dass die Antennen beschädigt werden.

  13. 6BkQtImdYs5mBIhF
    6BkQtImdYs5mBIhF
    VUDAA3nOa3UhBUVM
    tY214jWTHZMoUGr5
    • Unter der Oberkante des Displays befinden sich empfindliche Antennenkabel. Folge der Prozedur sehr sorgfältig, um Schäden zu vermeiden.

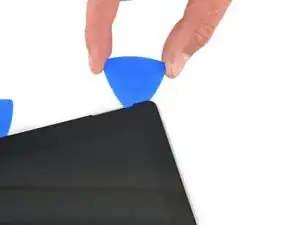
    • Setze die Spitze eines Plektrums unter das Display, und zwar da, wo du mit dem Schneiden aufgehört hattest. Setze das Plektrum nicht tiefer als die Kante der Einfassung ein.

    • Drehe das Plektrum vorsichtig nach rechts, und drücke die lange Kante des Plektrums in den Displaykleber unter der Einfassung und durchtrenne so den Kleber. Schiebe das Plektrum nicht an der Kante des Surface entlang.

    • Wiederhole diese Vorgehensweise (Spitze einsetzen und nach rechst rollen) an der Oberkante des Surface, bis das Plektrum 64 mm von der rechten Kante des Surface entfernt ist.

  14. VKWbOYKJNxQiqyXe
    VKWbOYKJNxQiqyXe
    o2m2EUFUOPmAiD6U
    qAHGLpOyBTbKAQHc
    • Wenn du den Kleber über den Antennen durchtrennt hast (22 cm von der linken Kante entfernt), schiebe das Plektrum die restliche Oberkante entlang und um die obere rechte Ecke herum, um den restlichen Kleber zu durchtrennen.

  15. gD3dMjejJfe5kNRB
    gD3dMjejJfe5kNRB
    ZklMqr3PrNNgIeEY
    iQyUtJeJxXxHWScp
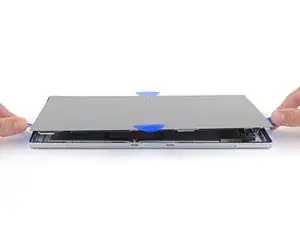
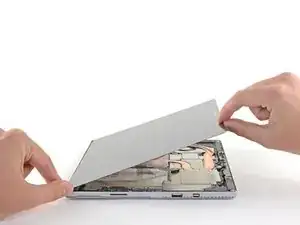
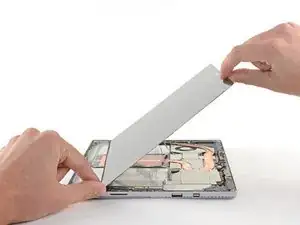
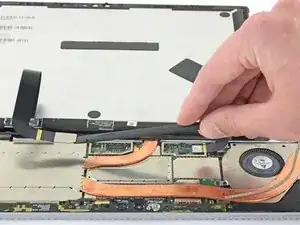
    • Hebe die Displayeinheit sehr langsam vom Gehäuse des Surface ab. Wenn du irgendeinen Widerstand spürst, halte an und kontrolliere, ob der gesamte Kleber durchtrennt ist.

    • Entferne das Display noch nicht, es ist immer noch über zwei Kabel mit der Hauptplatine verbunden.

    • Benutze ein Plektrum, um etwaigen Kleber zu durchtrennen.

  16. EFwEonxsaxjottkK
    EFwEonxsaxjottkK
    siEZYJuRCZfGvI16
    v6SWjtDoImE3P1AU
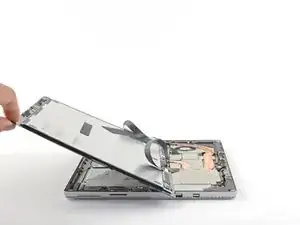
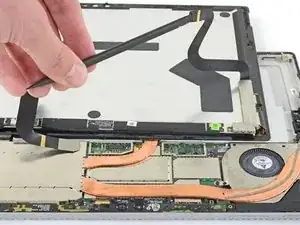
    • Hebe die Oberkante der Displayeinheit vom Gehäuse weg und schiebe gleichzeitig die Unterkante des Displays näher an die Displaystecker auf der Hauptplatine heran.

    • Lege das Display mit den Steckern nach oben behutsam auf dem Gehäuse ab. Vermeide es, die Displaykabel zu knicken.

  17. clMkXLtkmJqAZPr4
    clMkXLtkmJqAZPr4
    IPInIDnPUe1TTyMh
    1vwZbiXq6GrXSr5T
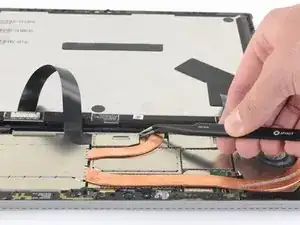
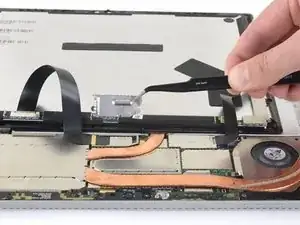
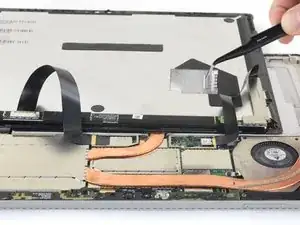
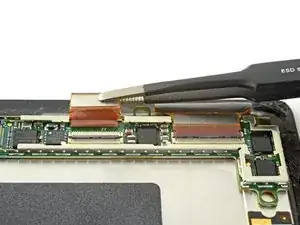
    • Entferne alle EMI-Abschirmungen in dieser Reparatur mit Hilfe folgender Methode:

    • Setze eine Spitze einer abgewinkelten Pinzette in die Lücken zwischen den "Zähnen" ein und heble die EMI-Abschirmung nach oben.

    • Wiederhole dieses Verfahren an verschiedenen Stellen rundum an der Abschirmung, bis sie sich abgelöst hat.

    • Achte darauf, dass sich die Abschirmung nicht zu stark verbiegt, du brauchst sie ja beim Zusammenbau wieder.

    • Glätte die Abschirmung beim Zusammenbau so gut es geht und schiebe die "Zähne" in die Rille um die Hauptplatine ein. Drücke die Abschirmung rundum nach unten fest.

    • Achte darauf, dass alle "Zähne" passend in der Metallrille sitzen und nicht unter die EMI-Abschirmung gebogen sind.

  18. gblN5PYc2UwFJoZG
    gblN5PYc2UwFJoZG
    DMbyhfbtNIk4CWWW
    5b6A3SCQugoldxNQ
    • Entferne die beiden EMI-Abschirmungen auf den Displaysteckern mit einer Pinzette.

  19. KDiBHEtWwLVOJJZs
    KDiBHEtWwLVOJJZs
    iadrTh4P2bSDLO5S
    GqPnDohHmsDVSqpa
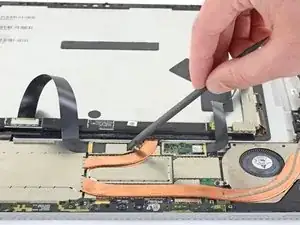
    • Heble jedes der Displaykabel mit dem flachen Ende des Spudgers nach oben und trenne es von der Hauptplatine ab.

  20. DuuSpwOIFyGOHmcZ
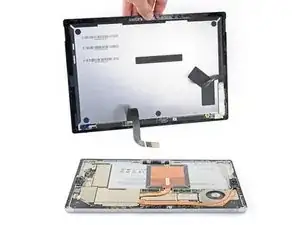
    • Entferne das Display vom Surface.

    • Halte beim Zusammenbau an dieser Stelle an und ersetze die Displayklebestreifen mit Hilfe dieser Anleitung.

  21. kEmwgDqF2dCAnVJk
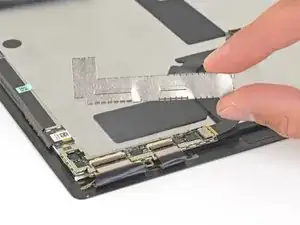
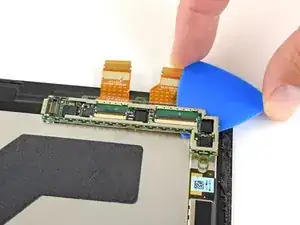
    • Heble eine Kante der EMI-Abschirmung über der Displayplatine mit einem Plektrum hoch.

    • Versuche, die Abschirmung nach Möglichkeit nicht zu verbiegen, du wirst sie beim Zusammenbau wieder einsetzen müssen.

  22. EVEQw3UGJG5fsf4f
    • Hebe die EMI-Abschirmung von der Displayplatine ab und entferne sie.

  23. VtHLvfthTTLCAEZe
    VtHLvfthTTLCAEZe
    hWUkwNKBBqcSPiSO
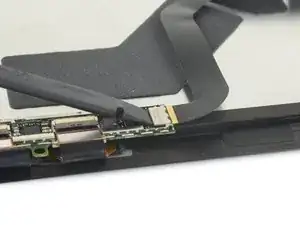
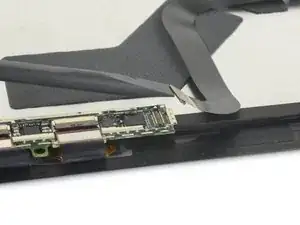
    • Heble das Display-Verbindungskabel mit dem flachen Ende eines Spudgers gerade hoch und aus seinem Anschluss auf der Platine heraus.

  24. MGGjvHxHRkAIHfCS
    MGGjvHxHRkAIHfCS
    o4HDnpOXGtLqAwUW
    DNaIVEUAWeYmhIYg
    • Heble ein Ende der EMI-Abschirmung über dem zweiten Displaykabel mit einem Opening Tool hoch.

    • Versuche, die Abschirmung nach Möglichkeit nicht zu verbiegen, du wirst sie beim Zusammenbau wieder einsetzen müssen.

    • Entferne die EMI-Abschirmung.

  25. 5UsMAEGrABbtL24l
    5UsMAEGrABbtL24l
    aatTiVgF2lrIQyp6
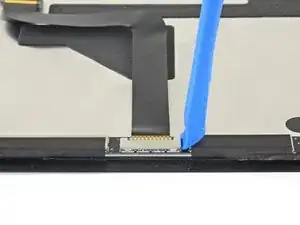
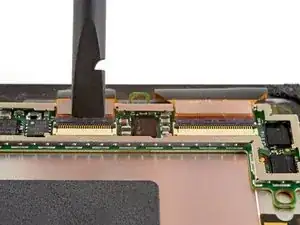
    • Benutze die Spitze eines Spudgers, um den Touchscreen-Stecker gerade nach oben und aus seinem Anschluss auf dem Display zu hebeln.

  26. OaNgkBgmfliCGwEM
    OaNgkBgmfliCGwEM
    RpCLpPZDExfwYhsW
    EbZNZOpx5RAGDdpU
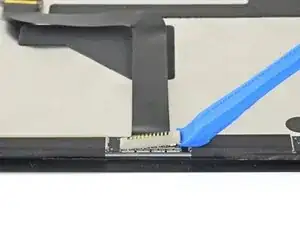
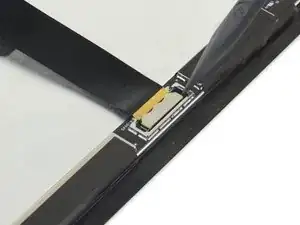
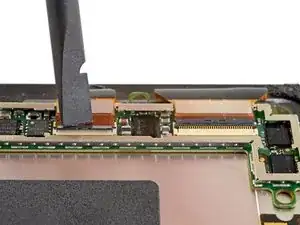
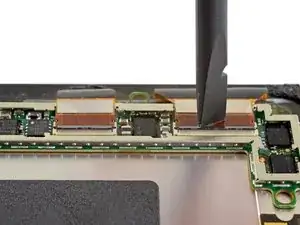
    • Klappe die kleinen Verriegelungsbügel an den Displaykabel-ZIF-Verbindern mit einem Spudger hoch.

  27. bYNHAFZafSj5Kdhe
    bYNHAFZafSj5Kdhe
    XFmPQLZjb6OSZymc
    NJBUEchVq1GfhqCv
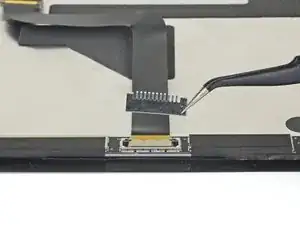
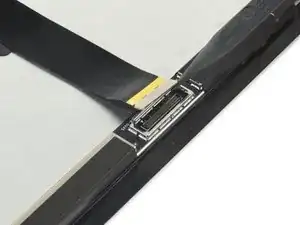
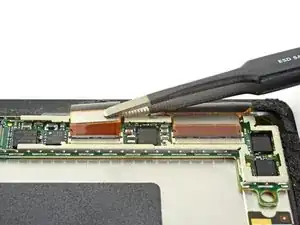
    • Schiebe die Displaykabel mit einer Pinzette gerade aus ihren Anschlüssen auf der Displayplatine heraus.

  28. UxJFYQABHhQgcREe
    UxJFYQABHhQgcREe
    nsPP3cCXMyGnJLp3
    lQMGnyWOQPCHZnoN
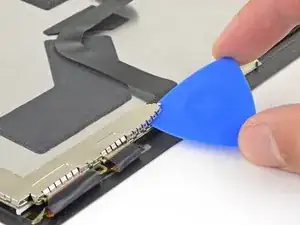
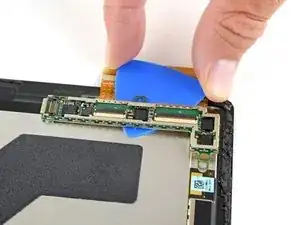
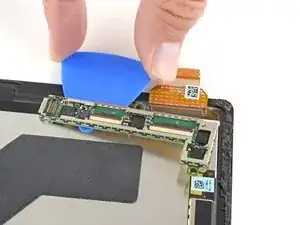
    • Schiebe ein Plektrum unter die Displayplatine, um den Kleber zu lösen, mit dem sie auf der Rückseite des Display befestigt ist.

    • Wenn der Kleber hartnäckig ist, kann es hilfreich sein, die Displayplatine mithilfe eines iOpeners, eines Föns oder eines Heißluftgebläses zu erwärmen. Achte darauf, das Display nicht zu überhitzen.

  29. vywYERPVb5EMGlmY
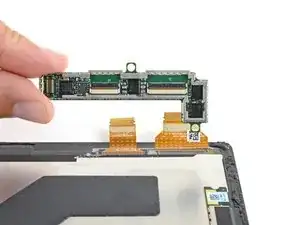
    • Entferne die Displayplatine.

    • Entferne beim Zusammenbau den Kleber unter der Displayplatine mit einem fusselfreien Tuch oder einem Kaffeefilter und Isopropylalkohol (mindestens 90%ig). Befestige dann einen vorgestanzten Klebestreifen am neuen Display.

  30. bPUjpRRLIjoJpgIT
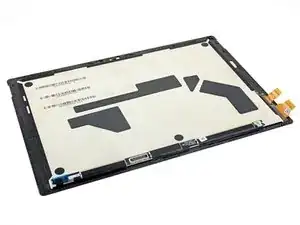
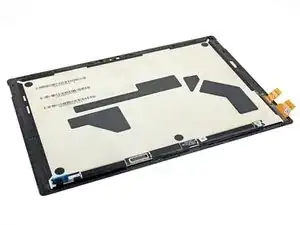
    • Übrig bleibt nur der Bildschirm.

    Handig om te weten is dat er voor de Surface Pro 4 twee verschillende schermen zijn...een Samsung en een LG. Dus voordat je een scherm aanschaft moet je eerst weten welke er in je Surface Pro 4 zit.

    Eric B -

Abschluss

Um dein Gerät wieder zusammenzubauen, folge den Schritten dieser Anleitung in umgekehrter Reihenfolge.

Entsorge deinen Elektromüll fachgerecht.

Lief die Reparatur nicht wie geplant? Versuche es mit einigen grundlegenden Lösungsvorschlägen. Ansonsten findest du in unserem Forum Hilfe bei der Fehlersuche.

Sam Omiotek

Mitglied seit: 25/02/19

59342 Reputation

58 Kommentare

Thank you for your guide.

I've removed the cracked screen from my Surface Pro 4 and hope to replace it with a new screen I bought on eBay. Unfortunately, the new screen doesn't seem to have the NTrig board attached to it.

Is it possible to remove that little board from the old screen? If so, how?

alex -

I'm also interested on this. as I can't find a screen seller that includes the NTrig board. Did you manage to do it, Alex?

Óscar Espeso Gil -

Yes you can heat up the board and remove it and move it over to the new screen. However my problem is that now I have a vertical dead spot about 2 inches wide from the "J" key to the "L" key up and down the screen. I can't find any damage to the cables or boards... I have replaced the screen twice now and nothing.

Jordan Mershon -

Same problem as the guy above, moved the n-trig board over, touch is unresponsive in certain spots, anyone find a solution to this?

Raul Garcia -

I'll be moving the board over as well, I am told to make sure the cables are completely connected, Check and Re-Check. This seemed to have fixed most problems with the touch being unresponsive in some area's.

jayroca23 -

hi guys, i have the same issue with the touchscreen after replacement. have you find a solution? I checked a couple of times but touch screen doesn't work. Instead if I use the pen, there are some dead spot.

Gabriele Corda -

What adhesive did you use to re-attach the screen?

alex -

Ok, So all fine in theory, but unless you broke your screen, like I did, it is IMPOSSIBLE to remove the screen without breaking it. Even with a full I Fix It toolbox and an I opener it took me 90 mins to get the screen off. The central parts come away quite easily but separated from the edges, but the glue tape is so strong it left sharp glass around the edge where the tape is.

This screen is less than 1/10th of a mm thick in places, you've got no chance of getting it off.

Jon Pertwee -

You need to heat it a lot. I used heat gun at 280°C and applied heat to the edges and kept it moving around the edges for 15 min. Then the edge was too hot to touch (around 120-150°C) and then it was easy to remove the screen. Be careful for the top antenna’s mine were stuck to the display instead of the bar below and I needed a new antenna.

Henri -

I i got mine apart by heating the edges, and then applying some painters tape loosly from the back cover to the front of the screen to prevent it fom dropping and then blowing air from my air compressor through the back panel air vents. Screen popped right away from the warm adhesive and the painters tape kept it from breaking any cables or the glass, took about 5 minutes.
Hunter Rench -

On the plusside, at least I can now upgrade the hard disk.. Yay.. 1TB here I come!!

Jon Pertwee -

I am unable to find a replacement glass anywhere? How did you guys find it on ebay?

Shubham Sharma -

Amazon is the only place I have found a screen....

Jordan Mershon -

What adhesive should i use to replace the screen?

Nick Skwarek -

Some of this might do the trick for you gentleman. https://www.amazon.com/NIUTOP-Double-Adh...

jayroca23 -

Tesa 4965, Tesa 61395 or Hi-bond VHB tape.

David Fear -

I seem to have missed the step where you explained what you sacrificed to which god in order to get the screen off in fewer than 500 pieces.
mad_bimmy -

should i save my files to an external drive before replacing the screen?

heyyy jaaaaaayyyyy -

You should always backup your data for any repairs you may do.

Evan Miles -

note that you need to be very careful when prying the top left side of the display off: it's very easy to damage the wifi antenna!

Ned Danieley -

more so in top middle across 6", I replaced mine with aluminum tape and it worked really well

Ken Lebofsky -

Does anyone have a link to buy the actual replacement screen for Surface pro 4. The replacement screen in this video. Thank you in advance

Charles Myles -

At the top of the unit there is some very thin copper ribbon that tore when removing the adhesive, what is it? I need to replace it.

Ken Lebofsky -

It's the wifi/bluetooth antenna. You can not buy this part anywhere. I recreated the antenna using aluminum tape and I think the wifi is better than before!!

Ken Lebofsky -

The Surface Pro 4 antennas are now widely available on Amazon and Ebay.

David S. -

Anyone have the issue of the screen being offset after reattaching? Anyone know which one of the connectors controls this?

Tess morgan -

I am not quite sure what you mean by offset but what this sounds like is that the N Trig board is not quite in the right position. The N Trig board is the L shaped board that you need to take from the old screen and stick it on the new screen. If you look at the opened tablet, on the bottom left area, as you look at the inside of the tablet, there is an L shaped space. The N Trig board must fit properly into this space or the screen will be skew or even stand proud. There is enough space for the N Trig board but not much space. If possible try lifting the screen again and repositioning the N Trig board. If that is not possible or may cause more damage than its worth you may have to live with the screen being offset. As a good ‘lesson learnt’ for this it is to position the new screen with all the bits connected in place before actually sticking it down so that you can make sure it sits correctly. That said I am not implying that you did not do that. ;o)

Paul Ingarfield -

This guide made it seem roughly 10 times easier to do than it turned out to be. Sunk ~$200 into fixing the screen on a $500 computer, and broke the screen when reinstalling it, and spent easily a couple hours frustratedly picking broken glass off the edges when taking off the old screen. I’m not blaming you for me being bad at computer repair, but maybe consider raising the difficulty?

Mark Blakeley -

Ouch, sorry to hear that. I haven’t worked on the Surface Pro much, but usually the challenge is to avoid breaking the screen when taking it off, as opposed to installing it. I agree with you about the difficulty level and bumped it up accordingly—there is nothing easy about working on a Surface Pro. Better luck on your next repair…

Jeff Suovanen -

All Right: where to buy screen - phoneremedies.com, comes with tools. If, like I did, you tear a ribbon cable, can find replacement at ipartexperts.com
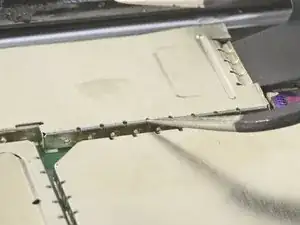
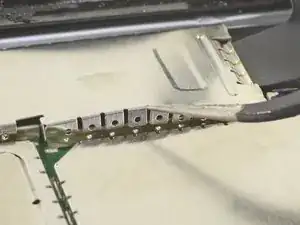
My glass was shattered, so the big center part came out easily, too easily, before I knew it I’d torn a ribbon cable. I’m using a heating pad to warm the adhesive around the edges. This is a long monotonous process. Take extra care in the middle third section at the top. There is delicate antenna in this area. Moving the NTrig board will be the next joy. If anyone is wondering, no this isn’t easy…not for the faint of heart. Prying off the little aluminium cable pin covers is also nerve racking. You will bend them, but they can be bent back.
john brewer -

I think there should be a part for putting it back together, it’s not always as simple as ‘just do it in reverse’ for instance, what is the best adhesive to use and how much should you use? Those parts are not listed either. Maybe a new display bought from Ifixit has adhesive already applied but what if you are using a used display?

Glen D -

This should be entitled ‘Display Removal’ not ‘Display Replacement’. There is literally nothing here addressing the replacement part.

Glen D -

No mention of the antenae???? assembly at the top of the screen, that you can cut right through with a pick (near the camera and N-trig assemblies),

This is a really lame procedure that ends up giving false confidence to people you should just remove it if you can’t put all the important details on here

Glen D -

There are little round gaskets around at least 3 of the sensors/cameras on the sensor array area, and there are 3 antennae glued between the screen and the case on either side of the camera. THIS IS PRETTY IMPORTANT INFORMATION TO LEAVE OUT OF what is essentially a ‘teardown’ instruction posing as ‘replacement’ instructions. I really expected more form this web site, and anyone reading this should peruse youtube and watch MULTIPLE videos because a great deal of those don’t show these things either. The iOpener is for $@$*,you need a heat gun set to just below 200 F and once you get a pick in, heat in front of it, detach it while it’s easy, heat again, etc, and the top edge is much thicker and contains all the sensors. this has a lot of glue almost the whole thickness of the bezel. I haven’t found a way to separate without snagging one of the antennae but on the next try I will use more heat and go even slower. I would love to post a photo showing the exact position but see no way to…

Glen D -

Glen, this is a user-submitted guide. Your comments are fair, but rather than just criticizing, I would suggest using iFixit the way it’s meant to be used—as a wiki—and submit your own improvements to the guide. We generally allow any user to submit a repair guide, even if it’s imperfect, in the hopes that folks will use it and improve on it over time. Looking through the guide I can see some of your complaints are addressed in the comments, so I will go through and copy some of that info over to the steps where it’s a little more visible. Thanks for your feedback.

Jeff Suovanen -

I’m researching reasons my touch screen doesn’t work. I found this site, after I removed the old screen. I wished it was before my attempt, I would have had more insight into the process. But, I think I did okay, considering. The new screen is connected to the cables and I tested it, before the final “glue down”. However, the touch screen does not work and I’ve tried to re-seat the cables from the Ntrig assembly to the new screen many, many times and still, nothing. Is it possible the screen I purchased from an Amazon supplier can be defective? Has anyone had an issue with a defective screen? I’m considering purchasing another screen from a different supplier and try the connections, again, to rule this out. But, If you guys think it’s me and not the screen, I’ll gladly listen to any suggestions. Thanks, in advance, for any comments.

Linda Lewis

linleelew -

I t can be two different things:

1) You have a bad screen

2) You damaged the N-Trig Board or it was damaged when the screen was originally damaged which can happen. Unless you try a combination both both you may not know. It you are doing these Surface Pro 4 repairs in bulk, it is a good idea to keep both those parts in stock.

Abdullah -

after replacing my display the screen would not turn on. i confirmed the surface still worked by pluging in an external monitor. the device would respond to touch but it would not display anything on the new monitor

Joseph Allen -

Awesome repair guide.

Have removed the screen only to find it is not a Pro 4 screen on the Pro 4. A little confused but having done research on the LCD connector it is saying it is the LG screen not the Samsung one! I did not realise there were two different screens for this model until this point.

The removed screen is the same as the Pro 5 (2017) screen. But it came off the Pro 4…….

The LCD connector on the Pro 4 screen is shorter than the connector for the Pro 5 (2017). So a Pro 4 screen can not be connected to this Pro 4.

So my question is this. Can the Pro 5 screen be fitted to this Pro 4 safely ?

JO HILL -

Would a 1796 screen work as replacement for a Microsoft Surface Pro 4 1724? Would that solve the flickering problem?

Bernardo -

i have the same question… did you fix it?

carritoschocones -

So my problem is that the touch doenst work in all parts (right 2cm of screen wont work) and also the pen stopped working. But the display is in ggood shape and it didnt shatter. My question is: IF (which after reading this doesnt seem too likely) i manage to get the display off without breaking it can changing the N-trig board help? Like does it have all the touchscreen/pen components or could it also be a display problem?

Viktor Steinbrecher -

Hi iFixit

I want to ask about surface pro screen part. I have customer surface pro 4 screen flickering and want to replace the LED Screen. Someone said, surface pro 4 screen only last about 1 year before it will start flickering again and he suggested using Surface pro 5 screen, since they are the same.

Is this true? What about camera holes? Are the placed exactly to fit both surface pro 4 and 5?

Cin Lung Chen -

my surface pro4 screen not work after the replacement ..even the old broken one ,stop work and not show any signal…but when i connect my surface to an HomeLED. Through cable ,work perfectly .i change the flat cable also but still not work .

Waseem -

Thank you for the guide, this in combination with the battery replacement was tied for the most finicky, difficult part replacement I’ve ever had to do for a client in the (admittedly short) 1.5 years I’ve been in IT. Well written and quality graphics.

SparkWorx -

If the screen is already broken and you’re not worried about breaking it more is this repair really that hard seems like it’s really similar to an iPad digitizer/lcd replacement which really isn’t that difficult

Brendan Brasseur -

needs help please so im pretty sure i bought the wrong type of screen seeing that the connector at the bottom of the screen doesnt snap in that flex is bit thinner than the connectore at the bottom my problem is i dont know how to tell if i have a v1 and need a v1 or if i have a v2 and need a v2 screen and dont tell me to count the pins cause they small and this is my first time so be gentle

Christian Rogers -

Hi. Is there anyway to know whether my surface has 25 pin 1.0 samsung display or 32 pin 2.0 lg display without opening the surface?

I have Surface Pro 4 i7 Processor, 16 GB RAM, 1 TB SSD model and it’s touch is not working.

Someone please help me to order the right display for my model.

Thanks in anticipation!

Majrul Ansari -

Hi,

I have the LG 32-pin version of the display, and I noticed the flex cable between display and motherboard has 32 pin on the display side and 25 on the motherboard side. I assume the samsung version has 25 pins on each side, does this mean seven of the pins on the LG display is redundant? I don’t know if a diagram for what each pin is for exists, so I can’t verify if this is indeed the case.

Dawith Lim -

Hi. This guide is great and I was able to remove my screen flawlessly. For those who want to know which screen they have:

Go to device manager (Just search Device Manager in the search box)

Under Monitors, right click on the “Surface Display” and go to properties.

Switch to the “Details” tab, and from the drop down menu choose “Hardware IDs”.

For the Samsung display, it should be: “MONITOR\SDC3853”.

I don’t know what is the ID for LG displays, but a quick Search for this device ID shows that it’s Samsung, and the screen from iFixit was fully compatible.

Hope this helps.

Soheil Sadeghi -

The monitor type can be determined by using AIDA64 through the following path: Display Devices —> Monitor. Then you will see the manufacturer, model type, and manufacture date.

显示器类型只可以通过AIDA64来确定。在AIDA64中依次选择:显示设备—>显示器。这样就能看到制造商、型号和制造日期等信息。

天日可人 -

I have a Surface Pro 4 purchased in December 2015. Its screen flickers and shakes when the machine is hot.

2015年12月买的Surface Pro 4。机器一热,屏幕就抖。

I ordered a Surface Pro 4 (1724 v1.0) Screen (Samsung Display) and some tools on iFixit website. I received the package on Jan 10, 2022. The tools worked fine. I have replaced the old screen with the new one following the guide on this page.

我在iFixit网站订购了SP4 (1724 v1.0)的屏幕(三星的屏幕)以及拆机工具。2022年1月1日收到货。拆机工具很好用。照着本页教程,旧屏顺利拆下,新屏成功换上。

However, the next day (Jan 11, 2022), when I was testing my new screen by repeatedly playing videos, the screen started to shake again within less than one hour. The only good news is that my old screen shakes entirely while the new screen only shakes at the lower part (about 1/5 of the screen).

然而,次日(2022年1月11日),当我使用连续播放视频的方法来测试新屏幕时,新屏幕的画面不到一小时就又开始抖起来了。唯一的好消息就是,旧屏幕是整个画面全部抖动,而新屏幕只有画面下方约五分之一的面积抖动。

天日可人 -

How fragile are the two flexes of the screen?

I made a replacement of the battery and now the screen wont work. I can see a subtle backlight when powering on, bit i get no image and no touch response.

The tablet is working fine because i connected it to an external monitor and i found no problems.

Is it possible the flexes were damaged? On visual close inspection they seem fine to me, but i don't know.

Nahuel -

I have a Surface Pro 4 tablet with a glass UAG screen protector that I want to replace the battery. I've removed the display on another Surface Pro 4 using a heating pad so I'm familiar with the process.

For the Surface with a screen protector, I planned on use several iOpeners to heat the edges to soften the adhesive.

Has anyone successfully performed this replacement on a Surface with a glass screen protector?

David S. -

hi, i changed battery and when i turned on the tablet, half touchscreen was not working. The glass is intact and I did everything with great precision.

Now i would like to change display to fix the touchscreen problem. But which model should i buy? I got a model but it has a shorter connector and the flat cannot be inserted. Can you help? thank you

alessio pasquini -

Hey Guys, I removed the screen, however jammed into the adhesive I see there is some kind of antenna. that tore in two. Impossible for the antenna not to tear.

Any recommendations of how to fit it?

Right-to-repair please MICROSOFT

albert Einstein -

γνωρίζει κάποιος να μου πει πως αποφεύγεις την θερμοκρασία πάνω στην νέα οθόνη, αφού εφαρμοστεί στο ταμπλέτ. το συγκεκριμένο μοντέλο έχω δει ότι έχει πρόβλημα με την θερμοκρασία

Ευάγγελος Ηλιάσκος -

schön wäre wen beistehen würde das des display nciht nach deutschland versendet wird vielen dank für ne std verschwendete zeit.....

Singrun -