Einleitung
This guide covers the assembly of the Mitsubishi 6G72 DOHC V6 engine (naturally aspirated or twin-turbo). This engine was used in the 1991-1999 Mitsubishi 3000GT/GTO and 1991-1996 Dodge Stealth.
Note: The 6G72 SOHC variant is significantly different in construction despite having the same engine code and is not covered by this guide.
The factory procedure and specifications will be used to assemble the cylinder block, crankshaft, connecting rods, pistons, cylinder heads, valvetrain, and camshafts into what is known as a "long block". If you are using aftermarket or upgraded internal components, please consult your local machine shop or engine builder for the correct assembly specifications for those components.
Werkzeuge
Ersatzteile
-
-
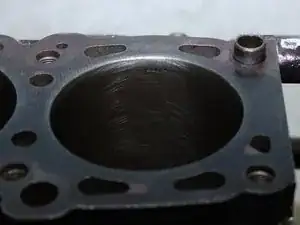
Use a cylinder hone and drill to prepare the cylinder walls. First clean the walls, then lubricate with diesel fuel or engine oil before honing.
-
Vary the drill speed and up/down motions to achieve a 30 degree cross hatch pattern on the walls.
-
-
-
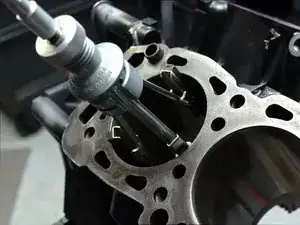
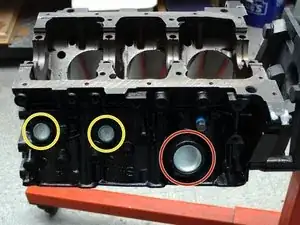
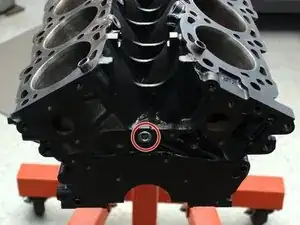
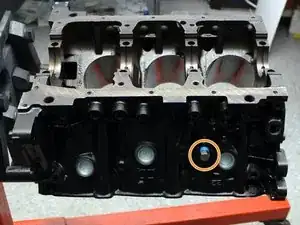
Install the following expansion plugs using a socket and hammer:
-
One 41.5mm plug (right side)
-
Two 35mm plugs (rear)
-
Five 25mm plugs (left and right sides)
-
-
-
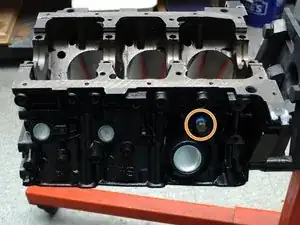
Install the two threaded hex plugs (front and rear) using an 8mm hex wrench.
-
Install the two threaded coolant plugs (left and right side) using a 14mm wrench.
-
-
-
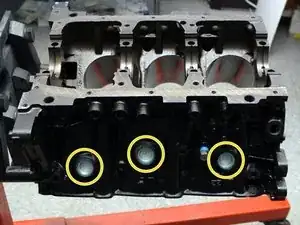
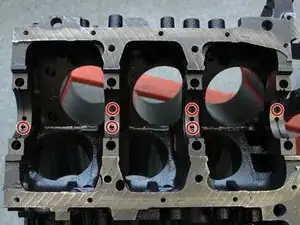
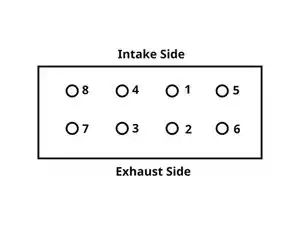
Install the six oil squirters into the angled holes in the main bearing journals using a punch and hammer.
-
-
-
Carefully install the crankshaft into the block.
-
Add a small length of Plastigauge to each bearing journal.
-
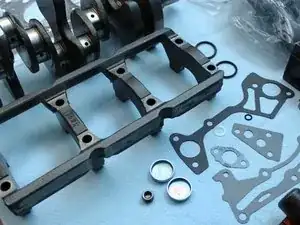
Carefully set the girdle onto the crankshaft. Line it up perfectly with the bearing journals on the block.
-
-
-
Apply engine oil to the main bolt threads and underside of the head.
-
Install the main bolts. Evenly tighten until snug using a socket wrench and 17mm socket.
-
Tap the girdle with a soft-faced hammer while continuing to snug the main bolts until the girdle is fully seated.
-
-
-
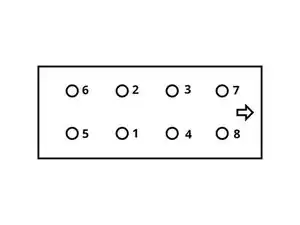
Install the main cap bolts and tighten them by hand.
-
Use a torque wrench and a 17mm socket to tighten the main bolts to the specified torque:
-
-
-
Loosen the main bolts and carefully remove the girdle.
-
Measure the width of the Plastigauge to determine the bearing clearance of each journal.
-
-
-
Remove the crankshaft.
-
Apply assembly lube to the smooth side of the thrust washers.
-
Stick the thrust washers onto the sides of the #3 journal on both the block and girdle.
-
Apply assembly lube or engine oil to the main bearings and thrust washers.
-
-
-
Spin the crankshaft one complete rotation. It should spin smoothly throughout.
-
Attach a dial indicator to the nose of the crankshaft to measure end play.
-
Use a large flathead screwdriver to carefully move the crankshaft side to side. Zero the indicator at one extreme, then take a measurement at the other extreme.
-
-
-
Install the four girdle side stays.
-
One stay is shaped differently and goes in the front-right position.
-
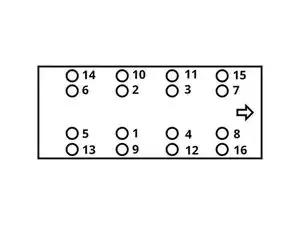
Install the eight side stay bolts. Apply engine oil to the threads and underneath the bolt head.
-
Use a 14mm wrench to snug all bolts.
-
Use a torque wrench and 14mm socket to tighten the girdle-side bolts, followed by the block-side bolts.
-
-
-
Install the head gaskets on the cylinder block.
-
Install heads onto block, being careful the head gasket stays in position.
-
Install head bolts and hand tighten.
-