Einleitung

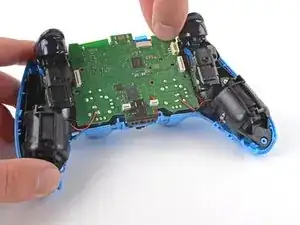
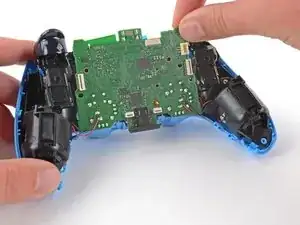
Follow this guide to separate the motherboard from the midframe in a Sony DualSense controller.

This is a prerequisite-only guide! This guide is part of another procedure and isn't meant to be used alone.

  1. guhDdaTLO4Lx2TSt
    guhDdaTLO4Lx2TSt
    lRfON2tMHbYtvv3T
    • Disconnect and power down your controller before you begin.

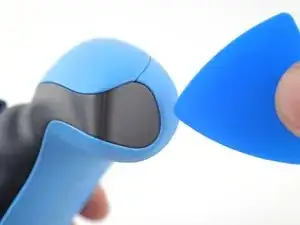
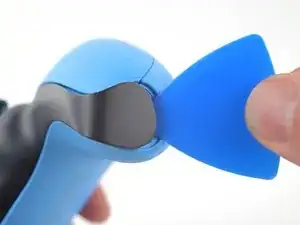
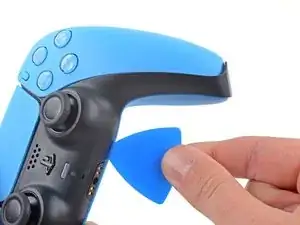
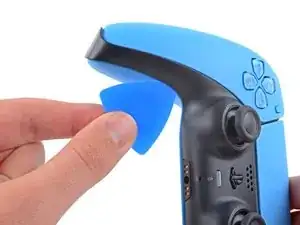
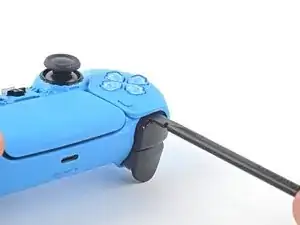
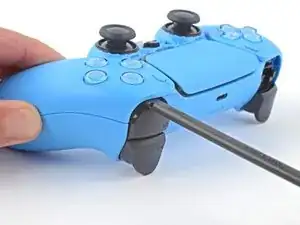
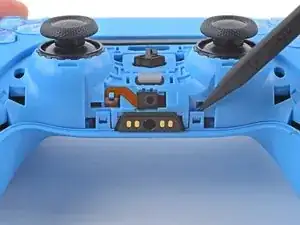
    • Insert an opening pick underneath the middle trim at the bottom-right corner of the controller to release the clips securing it to the case.

  2. KH36rgc41xkkIxEt
    KH36rgc41xkkIxEt
    UHgHxxDZK6uAadgL
    YCZY4rdKhkAMTZ62
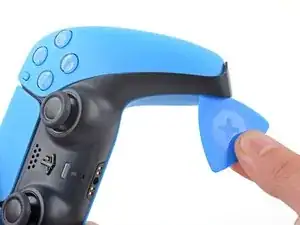
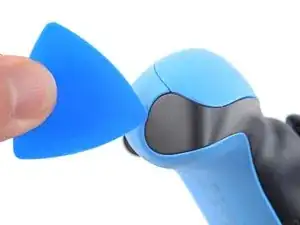
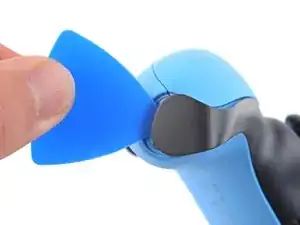
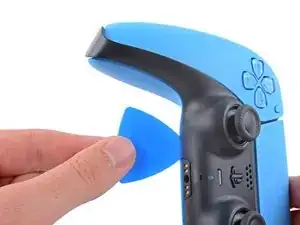
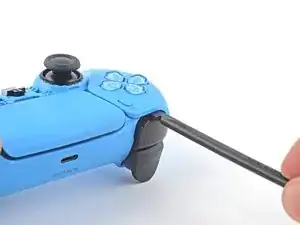
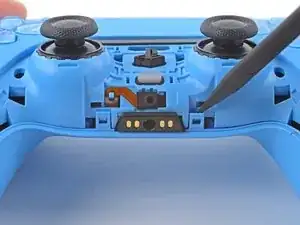
    • Slide the opening pick along the lower-right edge of the middle trim to release the clips securing it to the case.

  3. POGlGjVFG32wJM2y
    POGlGjVFG32wJM2y
    PwStjKyYwXi1TP5q
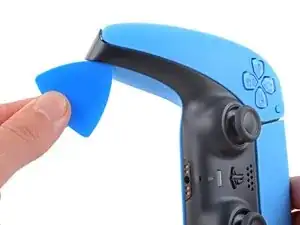
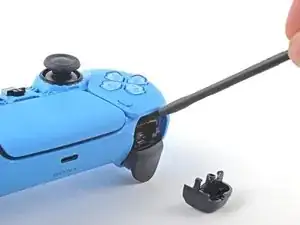
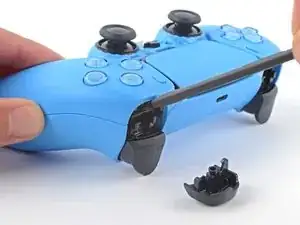
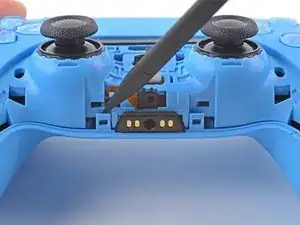
    • Insert an opening pick underneath the middle trim at the bottom-left corner of the controller to release the clips securing it to the case.

  4. pXLCWFnCEuauqlKC
    pXLCWFnCEuauqlKC
    qdiJcNkOKbKphjJd
    gkLGOOWGftSaTGuV
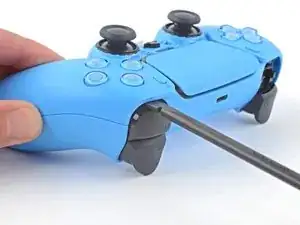
    • Slide the opening pick along the lower-left edge of the middle trim to release the clips securing it to the case.

  5. AB2xCYOXsbgPYry2
    AB2xCYOXsbgPYry2
    3Khr4r3J6arnKYaV
    CgyN41nIJb3FiQSj
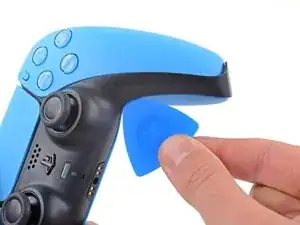
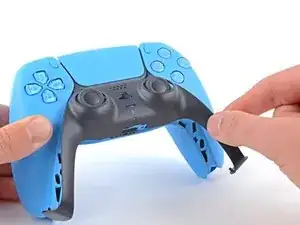
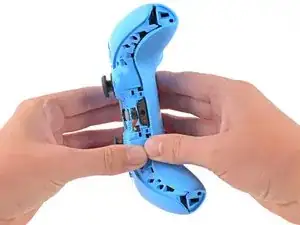
    • Use your fingers to lift up the bottom edge of the middle trim to release the remaining clips.

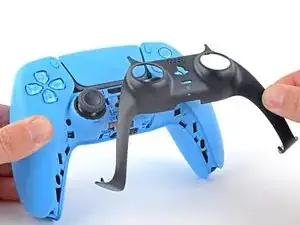
    • Lift the middle trim over the joysticks to remove it.

    • During reassembly, position the middle trim into place and press along all edges to engage the clips securing it to the controller.

  6. UTnysFXrcZOXyN6b
    UTnysFXrcZOXyN6b
    gCEpcBW2RIqwfE3g
    UfskjjRq6Xc5sN2T
    • Insert the flat end of your spudger into the gap above the L1 button.

    • Cover the button with your thumb to prevent it from ejecting across the room.

    • Pry the spudger upward to remove the L1 button.

  7. DOGoFB2gdmebKksg
    DOGoFB2gdmebKksg
    a2OZYntXvJ5jEqwl
    XZM6oSOTggRpulT6
    • Insert the flat end of your spudger into the gap above the R1 button.

    • Cover the button with your thumb to prevent it from ejecting across the room.

    • Pry the spudger upward to remove the R1 button.

  8. NZyynHfafAxnDJyk
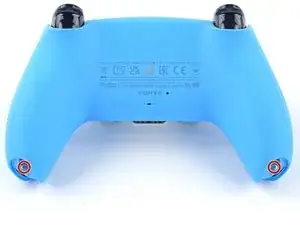
    • Use a Phillips screwdriver to remove the two 6.5 mm screws securing the bottom corners of the lower case.

  9. smAEGEk5WFdOafDe
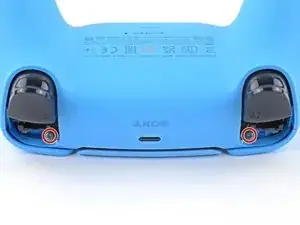
    • Use a Phillips screwdriver to remove the two 6.5 mm screws behind the L1 and R1 buttons.

  10. KlxNTlBTTfFMuoPL
    KlxNTlBTTfFMuoPL
    euRWr4gYHKkFKvkN
    YGhW3IgpAKVBmarb
    • Use the pointed edge of a spudger to unclip the two clips on either side of the headset jack.

  11. xjWsqFGNDLDLMbkS
    xjWsqFGNDLDLMbkS
    R43JFU2tjntM3GOJ
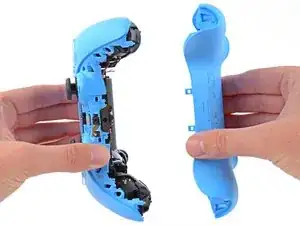
    • Use your hands to carefully pull the rear case off of the controller.

    • During reassembly, make sure the red and black vibration motor wires are not pinched between the front and rear case.

    You can´t just grab both ends and expect it to open flawlessly, first you gotta travel the spudger around the seam at the outer edges of the controller, there are multiples clips in that area, there a couple really hard to get out at the outer edges of the R1 and L1 buttons, for those you need to insert the spudger bending outwards the bottom piece of the controller (a fairly amount, like 1.5mm) and while bending outwards use the same inserted spudger to lever them apart carefully, the plastic will bend quite a bit so be very careful with the motion of the spudger.

    Yet again, that was my personal experience opening it up, try first as the guide says, if you feel the upper and bottom pieces glued around the R1 and L1, then try this.

    Carlos Santana -

  12. MUHdthfOoyldBVFr
    MUHdthfOoyldBVFr
    BQpL6myW2JRojkMo
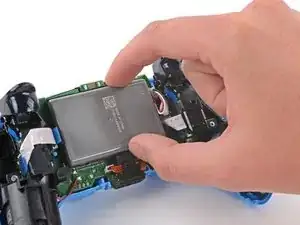
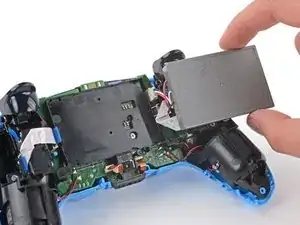
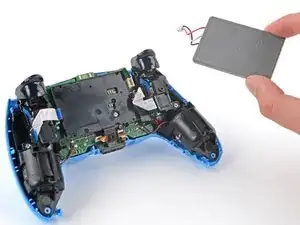
    • Lift the battery out of its bracket and reposition it to the right for better access to the battery connector.

    • Don't strain the battery cables.

  13. WfRwBl31EDPRpSGo
    WfRwBl31EDPRpSGo
    NxOiZWbvbAOk6Q64
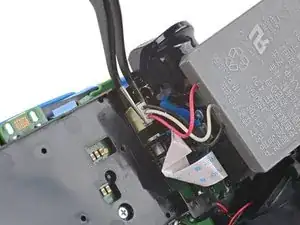
    • Use a pair of tweezers or your fingers to disconnect the battery from the motherboard.

    • Don't pull on the wires to disconnect the battery.

  14. DLcICSfOGofUvx6a
    • Remove the battery.

  15. SauAEOZxj4FCS6NM
    SauAEOZxj4FCS6NM
    KDoPLAYcFsP5ueyb
    • Use the pointed end of your spudger to remove the lower microphone from its bracket next to the battery.

    • During reassembly, make sure the end of the microphone's ribbon cable is slotted into the bracket.

  16. v4nWXxvIlhysHlLy
    v4nWXxvIlhysHlLy
    43K5VZLmUlUGTBXM
    • Grab the lower microphone ribbon cable pull tab with your fingers or a pair of tweezers and disconnect it from the motherboard.

  17. TYxs5oRu2B5aAtxp
    • Use a Phillips screwdriver to remove the 6.5 mm screw securing the battery bracket.

  18. xlXMna1BPmWLfKCA
    xlXMna1BPmWLfKCA
    TaW3YP1JZthaEuCN
    • Lift the battery bracket off of the motherboard.

  19. hlS5jSTJlyd21Dux
    hlS5jSTJlyd21Dux
    1u6l2dySSGgK1fPi
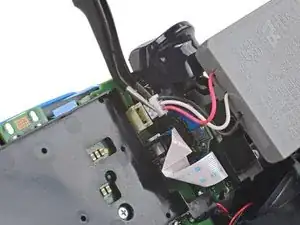
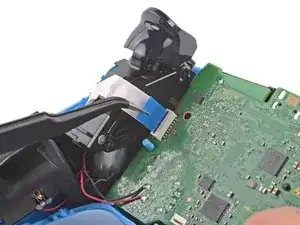
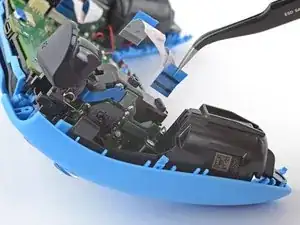
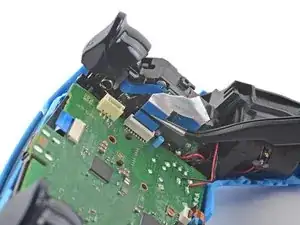
    • Grip the right trigger assembly cable with a pair of tweezers or your fingers and disconnect it from the motherboard.

    • Use the pull tab to disconnect the cable. Don't pull on the cable itself.

    • Don't completely remove the ribbon cable yet.

  20. HNXlyG2tTg3BpVBA
    HNXlyG2tTg3BpVBA
    HLH5oEnH5vWTCfY6
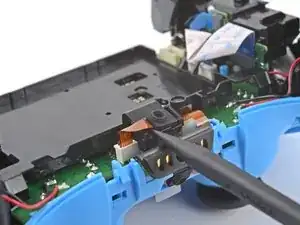
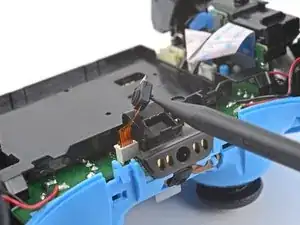
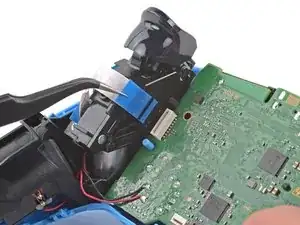
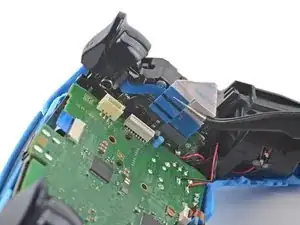
    • Grip the right trigger assembly cable with a pair of tweezers or your fingers, and disconnect it from the trigger assembly.

    • Use the pull tab to disconnect the cable. Don't pull on the cable itself.

    • Remove the ribbon cable.

  21. HDWPjnXLgdqSMQor
    HDWPjnXLgdqSMQor
    laXRqreMTfEVUj4y
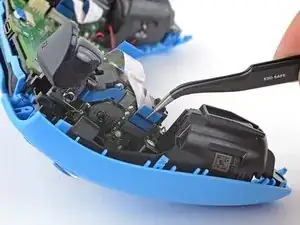
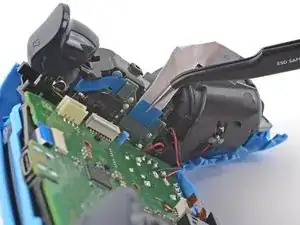
    • Grip the left trigger assembly cable with a pair of tweezers or your fingers to disconnect it from the motherboard.

    • Use the pull tab to disconnect the cable. Don't pull on the cable itself.

    • Don't completely remove the ribbon cable yet.

  22. ybMtetJ23SIypkFk
    ybMtetJ23SIypkFk
    UPBCTR4HNO6g4Aym
    • Grip the left trigger assembly cable with a pair of tweezers or your fingers to disconnect it from the trigger assembly.

    • Use the pull tab to disconnect the cable. Don't pull on the cable itself.

    • Remove the ribbon cable.

  23. aHgoOpyh14SgWJML
    aHgoOpyh14SgWJML
    Co4QFEZsSk5HmTSN
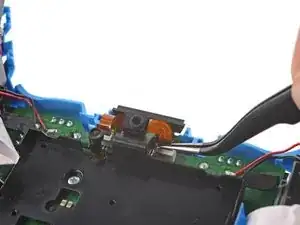
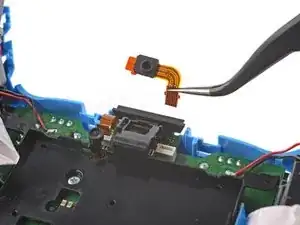
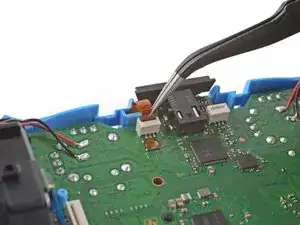
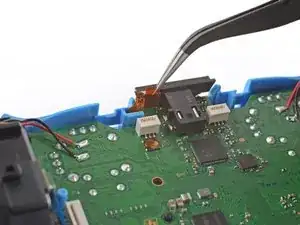
    • Use a pair of tweezers or your fingers to disconnect the upper microphone from the motherboard.

    • Use the pull tab to disconnect the cable. Don't pull on the cable itself.

  24. 6yoTmH3DGDjJN1T5
    6yoTmH3DGDjJN1T5
    YWwUpnVcRcpnoIm2
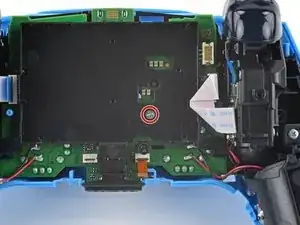
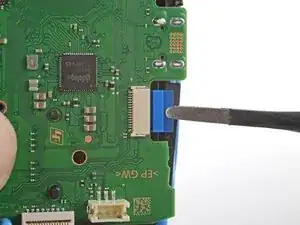
    • Use a pair of tweezers or your fingers to disconnect the touchpad cable from the motherboard.

    • Use the pull tab to disconnect the cable. Don't pull on the cable itself.

  25. IB3IHd151RUPhUqV
    IB3IHd151RUPhUqV
    TccAbvZvIpLAERIJ
    2xHcMnrLJn3PS5fu
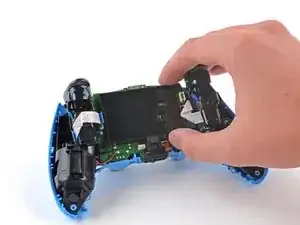
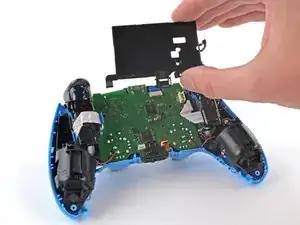
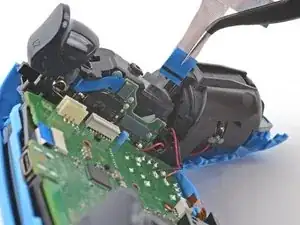
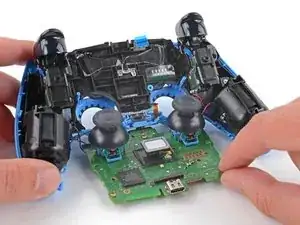
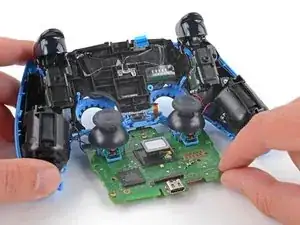
    • Carefully guide the joysticks through the front case and lift the motherboard out.

    • Don't strain the four soldered wires tethering the motherboard to the vibration motors.

Abschluss

To reassemble your device, follow these instructions in reverse order.
Sam Omiotek

Mitglied seit: 25/02/19

59342 Reputation

0 Kommentare