Einleitung

  1. cWZbypK6XXxttFjv
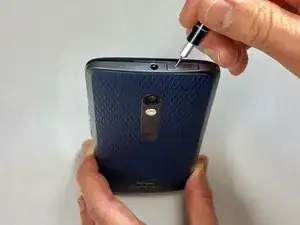
    • Insert a small pointed object into the hole on the sim card tray to eject the tray from the phone.

  2. HrRvDk3dO2oEYKBS
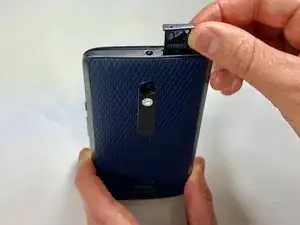
    • Pull the sim card tray up out of the phone

  3. fb2JXVgvKIVLEtdv
    fb2JXVgvKIVLEtdv
    Am3q12MVpMiDfEeE
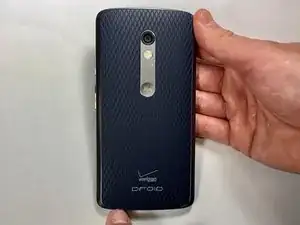
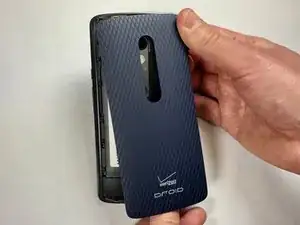
    • Wedge your thumb into the indent located on the bottom left corner of the back cover and pull up to remove the back cover.

  4. RZmYbt4Sgoo55gBw
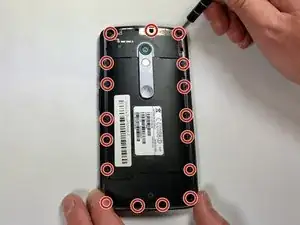
    • Remove the seventeen 3.2mm Torx T4 screws from the mid-frame.

    • These may be T3 screws. If you are having trouble unscrewing these, stop and try a T3 bit.

    These are actually T3 screws

    Kody Jordan -

    Wish I had noticed this BEFORE stripping all my screw heads… ugh!

    Alissa Carter -

    These are definitely T3 screws.

    Trey Crossan -

  5. Sg6vCOm3vPNOjOWP
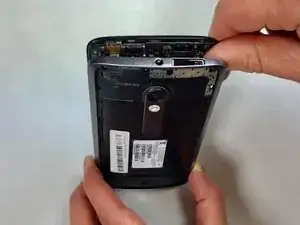
    • Pull the mid-frame off of the phone.

    • Keep track of the on/off and volume buttons when you take the phone apart because they are likely to fall out when the halves are separated.

  6. Ky1HvRJKdDpnb6WL
    Ky1HvRJKdDpnb6WL
    FBeAreNRaD45gSeE
    GMEt4Bi1QJPgqevp
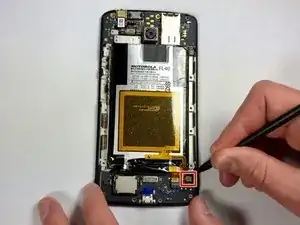
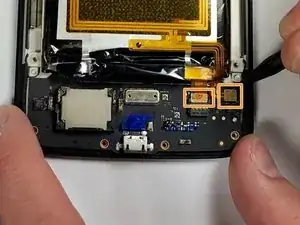
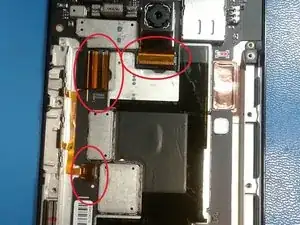
    • Remove the static tape covering the two connectors.

    • Use a spudger to disconnect the battery cables from the motherboard.

    • If battery has adhesive, use heat gun for one to two minutes to loosen it. Be careful of the points outlined in red when prying it up. Use guitar picks or a spudger to gently lift the battery and separate the adhesive.

    Just out of curiosity, does anyone know the purpose for the two very strong magnets?

    Rongwey -

  7. pL5XsRQNu3JiOb4s
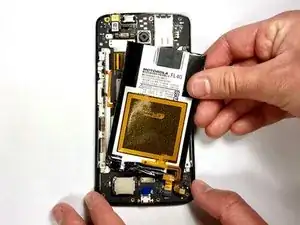
    • Remove the disconnected battery from the phone.

    Where can I get a replacement battery for this model?

    Joel . Harness -

    The NFC pad has to be transferred to the new battery or it won’t charge correctly if at all. The black appears to be graphite. No matter how carefully I picked the charging coil off, the black still came off in places. Most of it was still intact so the battery charged to 100% (Yay!) and although the battery discharged at a normal rate, Asurion Battery Health app shows it working at only 637% which, oddly enough, is about the amount of graphite that was scraped off during the removal process.

    Rongwey -

  8. foTNFfZlOLEulgKQ
    foTNFfZlOLEulgKQ
    hpEOIVieOsRX5K6T
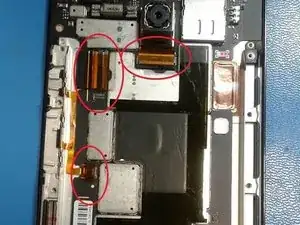
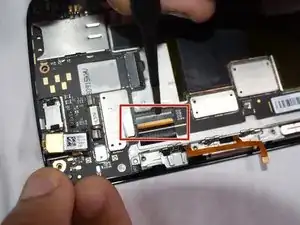
    • We will be removing these 3 ribbon cables.

    • Using an opening pick, lift the grey tab on the rear camera's ZIF connector. Remove the ribbon cable and the camera.

    • Use tweezers to lift up on the grey latch on the ZIF connector.

    • Remove the ribbon cable from the ZIF connector.

  9. 4b1uXkQGkEtO1FZ5
    4b1uXkQGkEtO1FZ5
    Lr4ugvMYgylygNCA
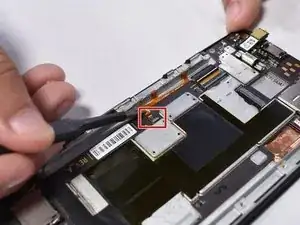
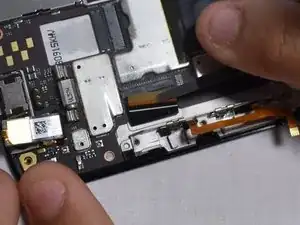
    • Use a pair of tweezers to lift up the black latch on the ZIF connector.

    • Pull the ribbon cable out of the ZIF connector.

  10. ZAEAXlNMiRLAerEG
    ZAEAXlNMiRLAerEG
    YukyRyFCT66fFXyQ
    UZG6A2C5erOp22qg
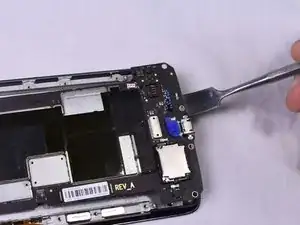
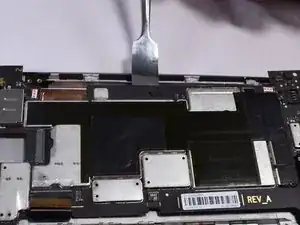
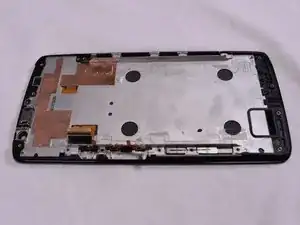
    • Using a metal spudger, work your way around the perimeter of the main board and screen.

    • There is a lot of adhesive between the two pieces, so be careful to try to remove the adhesive slowly in order to not break anything.

  11. RaYwbujLZnwxKSXN
    RaYwbujLZnwxKSXN
    wYvnOZrOKwQXtSvO
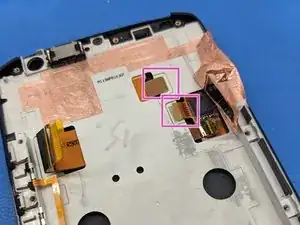
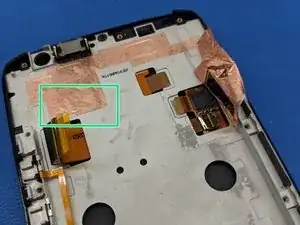
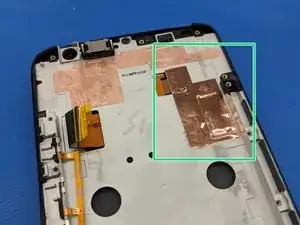
    • Use an opening pick or metal jimmy to carefully peel up a corner of this section of copper tape.

    • Slowly peel the entire piece of copper tape off of the frame, trying not to tear or kink it. Set aside and re-install after attaching new display.

    • Using the pointy tip of a spudger, detach these display cable tabs from the frame.

  12. T4EF1SC5hZPPk5ln
    T4EF1SC5hZPPk5ln
    yJPqliNooluvMgCy
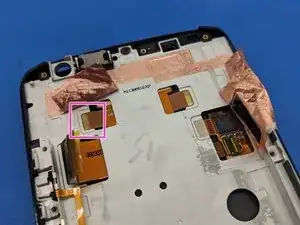
    • Carefully peel up the bottom part of this piece of copper tape and fold it over.

    • Using the point of a spudger, detach this display cable tab from the frame.

    • The plastic edge around the digitizer is very fragile. Use caution when separating the adhesive.

    • Heat the top bezel to soften the adhesive and carefully start removing the display from the frame using a plastic opening picks and a metal jimmy as necessary.

    • The display cable is lightly adhered to the frame. Remove the display starting from the top.

Abschluss

To reassemble your device, follow these instructions in reverse order.
Patrick

Mitglied seit: 14/05/14

6439 Reputation

0 Kommentare