Einleitung

The battery is responsible for most of your phone's functions. When the battery malfunctions, the phone may not function properly, and needs to be replaced.

If your battery is swollen, take appropriate precautions.

  1. fh2f6qbaiY3jZQue
    fh2f6qbaiY3jZQue
    QAfpfKqO2xjFSI4f
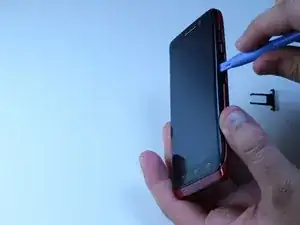
    • Pull out the volume keys using the iFixit opening tool.

  2. x2jqEeCpjfvu3hKl
    x2jqEeCpjfvu3hKl
    qklQHpTvUFWQMwaQ
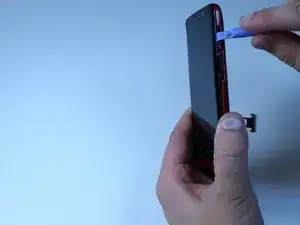
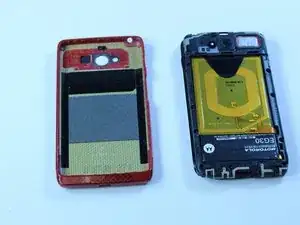
    • Pry off the back case gently using the iFixit opening tool.

    • Make sure to go around the entire perimeter of the case.

    I want to buy back casing of Motorola Altra mini

    Farah Azeem -

  3. fMj4RrBcsvbo1xVU
    fMj4RrBcsvbo1xVU
    cdHNXiytYrvnl6lE
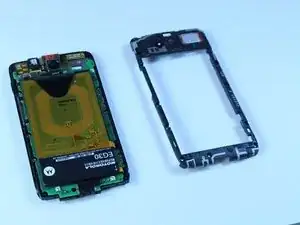
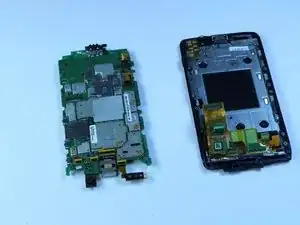
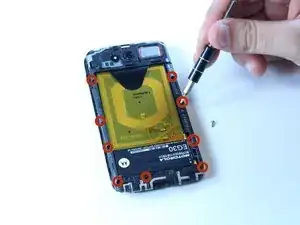
    • Use the T5 screw head to unscrew the 9 silver screws from the housing frame.

    • Carefully separate the housing frame from the motherboard.

  4. wKZxLB1RMmxGqZhn
    wKZxLB1RMmxGqZhn
    stn2l5aCyDgfdD4F
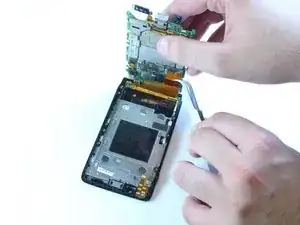
    • Carefully use the tweezers to separate the motherboard from the screen.

  5. woLF5UCSTSFnlANK
    woLF5UCSTSFnlANK
    lcAtlNbYmEyxEcNm
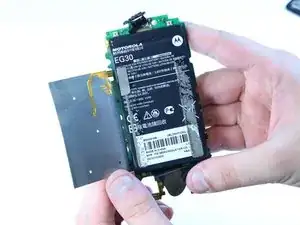
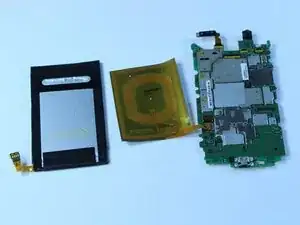
    • Carefully peel back the orange adhesive from the battery. Make sure to remove all the adhesive attaching the battery to the motherboard.

    • Use the black triangular tab to pull battery completely off the motherboard.

Abschluss

To reassemble your device, follow these instructions in reverse order.

Arielle

Mitglied seit: 09/10/14

619 Reputation

8 Kommentare

There are a few things missing from this guide that should be included.

1) In additon to the 9 screws shown there are three more across the top of the housing frame. (Not all these screws are silver on some models.

2) The battery is not glued to the motherboard it is glued to the NFC antenna. Remove with care.

3) Both the antenna jack on the motherboard and the battery jack require the cable plug to pushed straight down.

4) The batteries come with a protective cover over the end of the connector remove before installing.

3) There is a metal strap not shown in the picture across the bottom of the battery that must be popped out. It pops out from one side and the you unhook the other side.

Edward Garner -

Fantastic, this was very helpful!

Note there are three screws along the top of the housing frame (similar to the three on the bottom) and one gold screw near the camera.

There are also two screws under the housing frame holding the motherboard down.

David Gianforte -

Thanks so much to the author and the first 2 commentators. All 3 helped make my 1st intricate repair a success! Along with a mini tool kit for cell phones. I like picture/text better than video. Thanks again. Danny North
Danny North -

The black screws can be difficult: I found a 1.5mm flat head was the only way to unscrew some of them- the torx T5 did not seem to bite.

Luc Morton -

Also... there are 2 large headed silver screws that need to be removed to tip up the motherboard to access the battery connector-The motherboard does not need to be removed- just tipped up to get at the connector. Also there is a brass colored screw that needs to come off with the first black and silver screws, or the frame can not be removed.

Luc Morton -

I finished everything, but now my screen won't turn on, and my phone keeps vibrating ever 10 seconds. What did I do wrong?

Kareem Azer -

Everything works except now my headphone jack doesn't work. I see when I take it apart again that there is a flex cable that needs to either touch or attach to the motherboard. Which is it? Does it need to 'snap on' like the other flex cables? It is in a nearly impossible location to reach. Thanks!

Segue -

Arielleeeee... Look at you! Look what a BICH you've become ! Children are coming here...watching at your SHAMELESSNESS !...and then imitate that f**** attitude ?! Shame on You !!! Remove this pervert pic for God sake !!! Don't you have A NORMAL ONE ?

Disgusting ! Nowadays no one even thinks about Children and harlotry that they have been watching all the time... DISGUSTING !!!

Krasimir -