Einleitung

Give life back to your Droid RAZR with a new battery.

If your battery is swollen, take appropriate precautions.

  1. DKiykJmwsGxc4JNW
    DKiykJmwsGxc4JNW
    bxQ1uZIdV1vomdK3
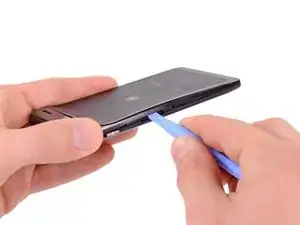
    • Insert a plastic opening tool between the back cover and rear case at the lower left edge of the back cover.

    • Pry the back cover up with the plastic opening tool to free the plastic clips.

    • Continue prying along the left edge of the back cover towards the top of the phone.

  2. WhBwmtexA3AHAh3D
    WhBwmtexA3AHAh3D
    GAqNhHefYAYcrIdQ
    VPH3HbwNuoYlSZI4
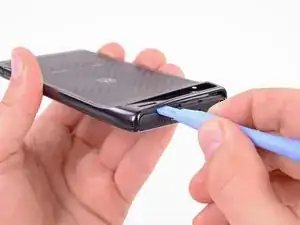
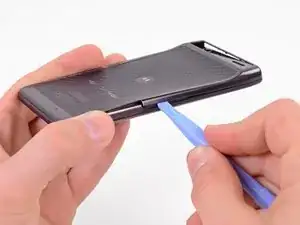
    • Work the plastic opening tool across the top of the back case to free the plastic clips.

    • The top edge of the back case is very thin. Pry carefully to avoid cracking or snapping it.

    • Continue prying down the right side of the back cover to free the remaining clips.

  3. iJGdkuJvFky3qlQk
    iJGdkuJvFky3qlQk
    qAMSNdTDR4LJI1WF
    TrkxGEOUjJ5p2UYn
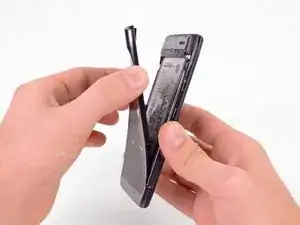
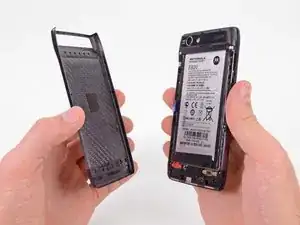
    • Pull the back cover away from the phone to remove it.

    • The back cover is attached to the battery with a generous amount of adhesive, so you may have to use quite a bit of force to separate the two pieces.

    • The battery must remain in the phone and not come off with the back cover or you will break the power lead.

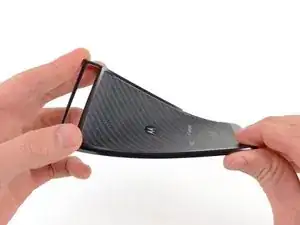
    • Since the back cover is made of Kevlar, it can handle a fair amount of twisting and tugging without breaking.

  4. WAraXIqPkyFMYrXV
    WAraXIqPkyFMYrXV
    dbRnRDExY1NTPXrn
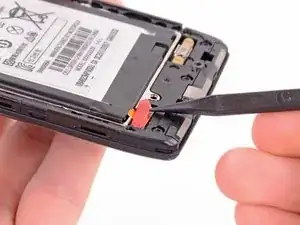
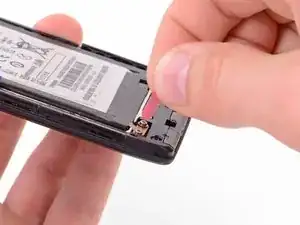
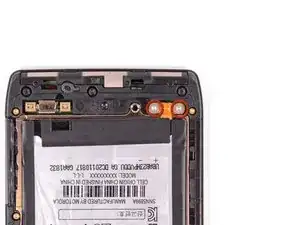
    • Use the tip of a spudger to lift up the red silicone cover over the battery terminal screws and remove it.

    I did this repair on a Droid Razr model xt912. My version has a plastic shield over the battery connectors; the shield is part of the rear case, so I had to do steps 6-9 before I could do steps 4 and 5.

    kpnine -

    Thank you so much for this comment - saved me a lot of confusion.

    Also noted that not all screws were the same as noted. I was just careful and made sure they bit fit before torking.

    Matt Madsen -

    What are steps 6-9? This article store at step 5. The terminals on my phone are covered too and it's not obvious how it is removed.

    ronsutton1957 -

    Excellent guide, but it forgot to include that you need to get double sided adhesive to replace the old adhesive. Maybe its implied? Anyways I got mine from here: http://www.repairsuniverse.com/3m-double...

    derekz732 -

    Step 1 should be to remove the case screws. No way your removal tool will get the back off with the screws still on.

    Mine was on too tight to pry off. Even with small screwdrivers I was unable to get the case opened up all they way around without bending the edge metal out of shape (which is the reason for a plastic tool).

    theshop -

    If you have the wireless charging coil installed, you can forget the adhesive back.

    MOLON LABE -

  5. sH3SWMh4xVCIp12K
    sH3SWMh4xVCIp12K
    kYWOVGSDusXSn5jk
    qMHqLAi1sgPBYlFU
    • Remove the two 3.3 mm T5 Torx battery terminal screws.

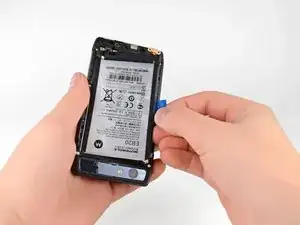
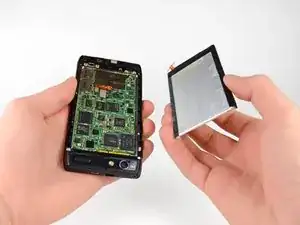
    • Grab the blue battery removal tab and lift the battery out to remove it.

    • There is quite a bit of adhesive securing the battery to the motherboard. Work slowly to avoid deforming the battery.

    • Your phone will have a number of metal EMI shields on the motherboard, rather than the bare ICs seen here.

    Very helpful, but I needed to remove the frame around the battery before I could actually get the battery out. No big deal, just a few more screws. Thanks.

    Jfga -

    That’s actually pretty vital to the whole removal process.

    MOLON LABE -

    Anyone know somewhere to purchase these “3.3 mm” terminal screws if ever lost?

    Kyle Miller -

Abschluss

To reassemble your device, follow these instructions in reverse order.

David Hodson

Mitglied seit: 14/04/10

148365 Reputation

8 Kommentare

Where can i get a battery?

Jennifer Monticello -

You can find a replacement Droid Razr Battery at www.cellphone-repair-shop.com

H M -

Great guide. Honestly the spudger tool made it soooo easy.. I even used the spuder to remove the case from the phone. gently inserting the spudger while using slight pressure on removing the case. you could hear the small cracks as the adhesive gave way.. Take your time when doing this and it will come out just fine.... Also used the spudger on removing the battery from the case..... again carefully inserting the tool while pulling up slowly with the blue tab...

You guys rock.....Thanks again.

alphageek20 -

I bought a knock off brand battery off of amazon and used it. At first i thought it wouldn't work but after a little playing around with it i got it to fit. Big thing is be delicate, SLOWLY remove the back paneling and try not to bump the bottom thing where the screws go.
Thomas Butler -

Very helpful and informative article, it made it easy for me to fix my phone at home. Thank you a million!

Squedwart • -

Hiya, this is similar to the blank screen. It loads the motorola logo when first starts then goes blank but with a faint light very faint light. Can you help pleaseeee

Abby timms -

OMG, thank you for this guide, saves me about $40 and brought new life to old phone. Be Blessed!

D Jones -

my used phone is missing the red silicone cover…is that important to have….(I just ordered a replacement battery…my phone won’t stay on.) Thank you.

Karen -