Einleitung

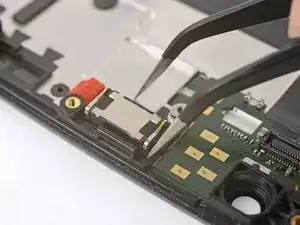
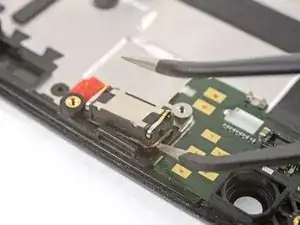
Diese Anleitung zeigt dir, wie du den Ohrhörer-Lautsprecher austauschen kannst.

  1. DOH6pPioTXXOVEq6
    DOH6pPioTXXOVEq6
    5kpgSFKccBIKR6W2
    LRCCOUWqpnKRKexl
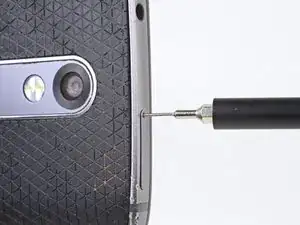
    • Schalte dein Smartphone vor der Reparatur aus.

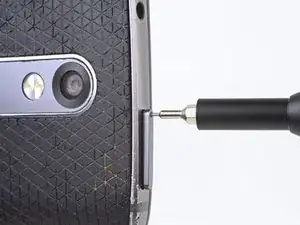
    • Setze ein SIM Auswurfwerkzeug, ein SIM Auswurfbit oder einfach eine aufgebogene Büroklammer in das kleine Loch am SIM Einschub ein.

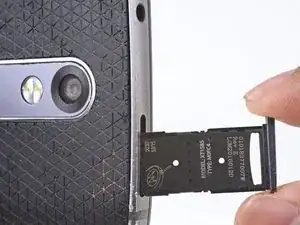
    • Drücke es hinein, um den SIM Einschub herausspringen zu lassen.

    • Entferne den gesamten SIM Einschub vom Smartphone.

  2. fUqgjxTNDxqum3Pc
    • Erwärme einen iOpener und lege ihn eine Minute lang auf die Oberkante des Smartphones auf.

    • Ein Haartrockner, ein Heißluftgebläse oder eine Warmhalteplatte können auch benutzt werden, achte aber darauf, dass das Gerät nicht überhitzt wird - das Display und der Akku können durch zu viel Hitze leicht beschädigt werden.

    After you heat the Iopener, lay the shiny side on the phone. With all the warnings of how hot it could get, I handled it with oven mitts. It wasn’t until I struggled for some time trying to get the back of that I grabbed the Iopener with my bare hand and found the the shiny side was still hot, but the textured side was quite cool. Apparently it has some insulating properties.

    Gary Holstein -

  3. vpZcil4hrSWQBQiR
    vpZcil4hrSWQBQiR
    anxsr5VLYrHOyldJ
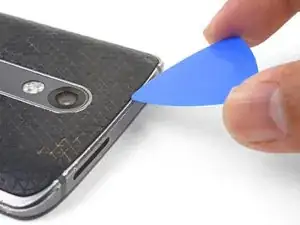
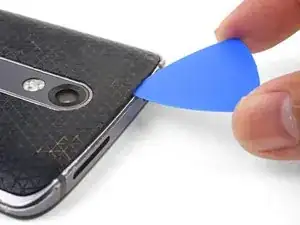
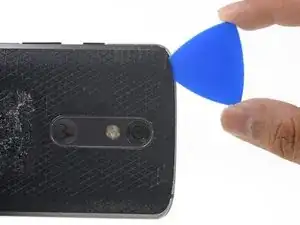
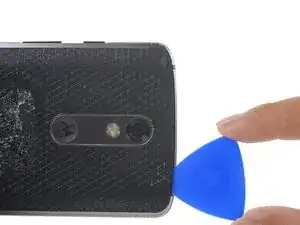
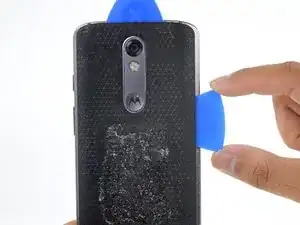
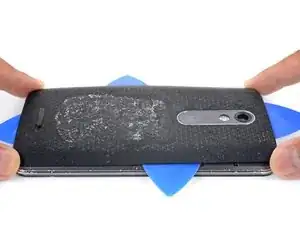
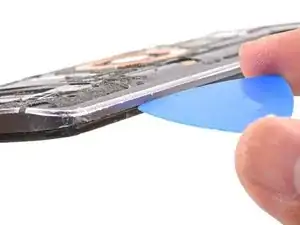
    • Setze ein Plektrum in einem Winkel an die rückseitige Abdeckung an und schiebe es kräftig drunter.

    • Je nach Alter des Smartphones kann das ziemlich schwierig sein. Zusätzliches Erwärmen mit dem iOpener kann hilfreich sein. Du kannst sehr vorsichtig mit einem Metallspatel einen Spalt für das Plektrum aufhebeln.

    Use a heat gun to loosen adhesive prior top using spudger

    chris.reinert -

    If the Phone has the nylon back, there is a plastic layer that the material is attached. be sure to get the plastic layer beneath the nylon.

    bludyone -

    Don’t be fixated on the top edge. On my phone there was more space at the bottom edge to get the picks in, which allowed an easier start than the top.

    Kyle -

  4. iUN1TRGoovo2iJEV
    iUN1TRGoovo2iJEV
    WDPYVdttQO4ubfEv
    3pQOcFpDqudjORj1
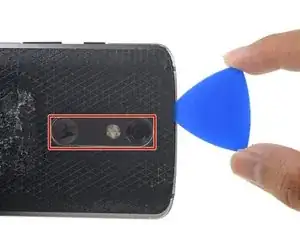
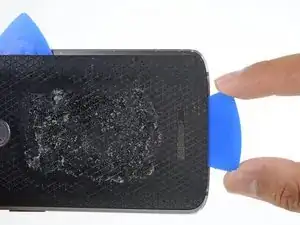
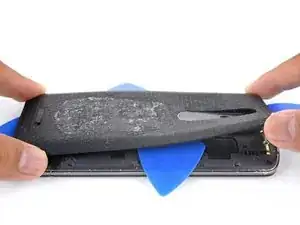
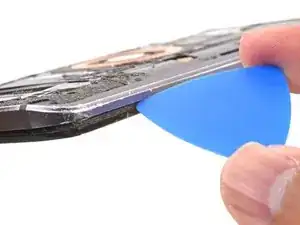
    • Schiebe das Plektrum an der Oberkante des Geräts entlang und trenne die Klebeverbindung auf.

    • Löse die Bereiche weiter innen mit dem Plektrum, vermeide es aber in der Zone um die Kamerablende hindurchzuschneiden.

    It took me over an hour to pry the back cover off the phone.   Don't give up – it can be done!  It takes some time, heat, and persistence to wedge the blue picks under the back.  And not knowing what is under there can cause stress!  Bottom line - don't be afraid to apply pressure to the pick to break the seal between the back and the metal edge, and then you can slide the pick in under the back cover without breaking any electronics.  I did not notice the blue plastic prying tool until after I wrestled the back off – I think that would have helped with the final peeling off stage.

    Thomas Johnson -

  5. r5QPlJ5vBuFD5wH4
    r5QPlJ5vBuFD5wH4
    VXk6AEG1GLKhcAZi
    1UZHvdcnFKVFep1N
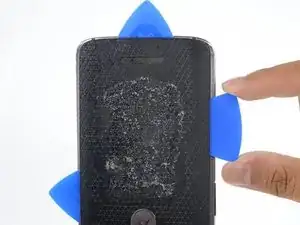
    • Wiederhole das iOpener Verfahren (Aufwärmen und Auftrennen) für die übrigen drei Seiten.

    • Achte darauf, auch auch tiefer hinein zu schneiden, da die Rückabdeckung mit breiten Klebestreifen befestigt ist.

  6. LC26jvxP4BAOKOpY
    LC26jvxP4BAOKOpY
    MCE3ZihNsyYugeRI
    3QKFloLGXsZHbDmK
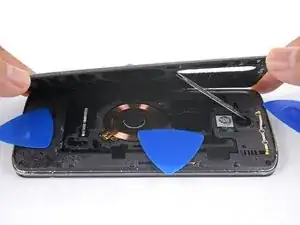
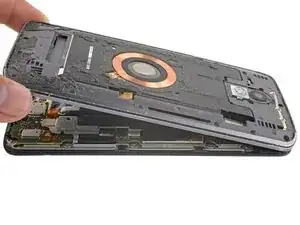
    • Wenn du die Klebeverbindung aufgetrennt hast, kannst du die rückseitige Abdeckung langsam vom Rahmen ablösen.

    • Entferne die rückseitige Abdeckung.

    • Benutze beim Zusammenbau diese Anleitung zum Festkleben der Rückabdeckung, um die vorgestanzten Klebestreifen korrekt anzubringen.

    Getting this back cover off with 4 little picks is nothing less than Fake News. The picks (and a halberd spudger) were good for cutting through adhesive on the outer edges, but a fair amount of heat and several plastic “playing cards” were needed to get to the adhesive holding down the cover on the middle of the device. Be VERY CAREFUL as you near the charging coil…2 little connectors near the bottom right could be easily severed. Take your time, use heat and patience.

    Jeana Morales -

  7. LcTsUNkaRVMFUTcM
    LcTsUNkaRVMFUTcM
    FMNpxDSRHKKQ2vaE
    iSBKNAWAvUvblPMW
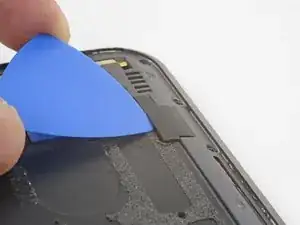
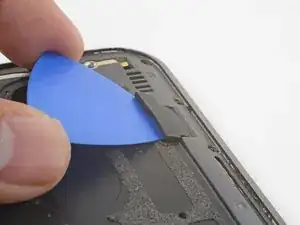
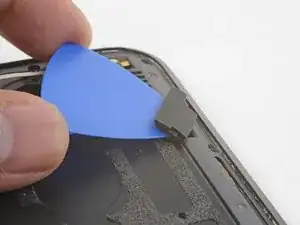
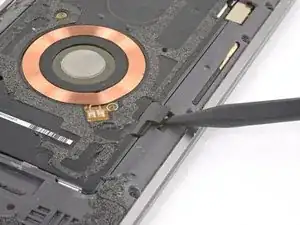
    • Setze ein Plektrum unter die Gummiabdeckung des Blitzsteckers, heble sie hoch und entferne sie.

    • Um die Abdeckung wieder einzusetzen, musst du sie zuerst passend aufsetzen, und dann mit den Fingern nach vorne drücken, bis sie hineinpasst.

    The two plastic covers do not fit snugly in place, so after putting them back in place, use small bits of electrical tape to secure them before installing a new adhesive back cover. I tested my phone thoroughly before the last step, so that I would not have to buy a new cover if something didn't work.

    Bill Koonce -

  8. eGjkLOJh6CKZRv6O
    eGjkLOJh6CKZRv6O
    dMsFvduM1NHQBElI
    K513U44gGWPEXdrG
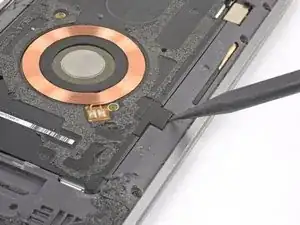
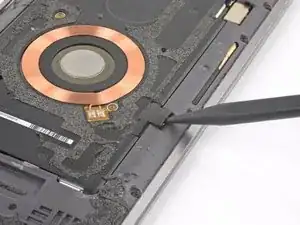
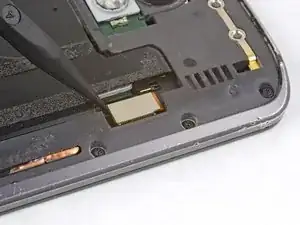
    • Heble mit der Spudgerspitze die Gummiabdeckung über dem Stecker der Ladespule hoch.

    • Um die Abdeckung wieder einzusetzen, musst du sie zuerst passend aufsetzen , drücke sie dann mit den Fingern nach vorne, bis sie passt.

    Careful! The cover popped off and flew 8 feet! (Over 2 meters!)

    Kenneth Lacewell -

    Absolutely true. Mine popped off and shot across the room. I was lucky to be able to find it.

    Gary Holstein -

  9. X2VUv2JcotMcLOrZ
    X2VUv2JcotMcLOrZ
    vltJGHBb1ANwgXa1
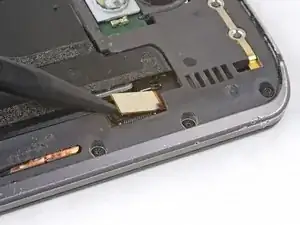
    • Heble den Stecker zum Blitz mit der Spudgerspitze hoch und löse ihn ab.

    • Um Press-Fit-Verbinder wie diesen hier wieder anzuschließen, musst du ihn erst sorgfältig ausrichten und auf einer Seite herunterdrücken, bis er einrastet. Wiederhole das Ganze für die andere Seite. Drücke nicht in der Mitte. Wenn der Stecker falsch ausgerichtet ist, können die Kontakte verbogen und dauerhaft beschädigt werden.

  10. XnyheDHEcDIk3UWg
    XnyheDHEcDIk3UWg
    JgqhkOn2pXpQJLnr
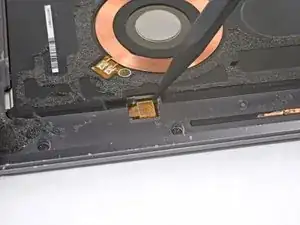
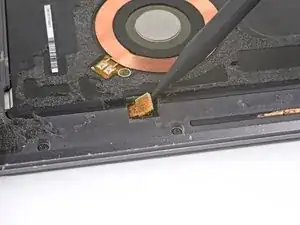
    • Heble den Stecker zur drahtlosen Ladespule mit der Spudgerspitze hoch und löse ihn ab.

  11. vey2pfLO2ct4dNxy
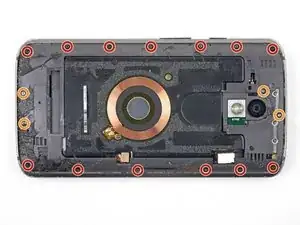
    • Entferne folgende Torx T3 Schrauben, welche den Mittelrahmen befestigen:

    • Dreizehn schwarze 3,1 mm Schrauben

    • Vier silbernfarbene 4,3 mm Schrauben

    • Bit-Einsätze passen nicht immer 100-prozentig. Wenn ein T4 nicht ganz passt, probiere es mit einem T3.

    My phone (purchased 12/2015) has only 2 silver screws top and bottom (4 total), and they're also T3, not Philips.

    With a Torx screw this tiny, it pays to take time to make sure that the driver is well seated before turning it. This will eliminate stripped screws. Also, I loosened each screw first, and then removed them. Breaking them free before turning them also helps prevent stripping.

    Bill Koonce -

    eitherway its a T4 torx in my phone. Double checked my bit. T-4 same for all these screws

    Raymond Lewis -

    T4 in mine as well. Stripped out a T3 bit figuring this out.

    Shane Kennington -

    They were all T3’s in the one I am repairing. Must be different depending on where it is manufactured.

    James Blaine -

    I recommend placing your phone down on a flat surface and then you can put good pressure straight down to remove the screws.

    Leif Thorson -

    One of the small screws was stripped. I used a 1/8” drill to eliminate the head - very . The mid-plane came off, and I finished removing the screw with a small pair of needle-nose pliers.

    Larry Peterson -

    the phone I opened used a T4 bit as well

    Josef Bosnyak -

    The screws in my phone were both sizes. I had to use the T3 and T4. A few of the screws would not take either bit (I had to use a dremel tool to strip it slightly so the T4 would fit it). Luckily, I had some replacements.

    Beth -

    At first I thought my toolkit only came with a T5, which was too large. Then I found the T3 bit in a ziplock back with an alcohol swab. It worked, but it had some slack, so my screws may have been T4, but I didn’t have that option.

    Brian Martin -

    The device I’m fixing now is T4. Stripped 2 heads and had to drill them out. Wish this walkthrough had a note that some are different so I would have double checked before I stripped them out.

    Matt Peacock -

    Hi Matt,

    Thanks for your feedback! So many people are having an issue with this—I’ve added a note to the step as you suggested.

    Arthur Shi -

  12. VQjeixkgYEVHV1hu
    VQjeixkgYEVHV1hu
    eGl3ijGaYluuYR4G
    • Setze ein Plektrum in die Naht des Rahmens und verdrehe es leicht, so dass sich der Mittelrahmen vom Smartphone löst.

  13. HHgJAoFNqIZVlJ6S
    HHgJAoFNqIZVlJ6S
    UDChpByFXBEtDJjv
    • Entferne den Mittelrahmen vom Smartphone.

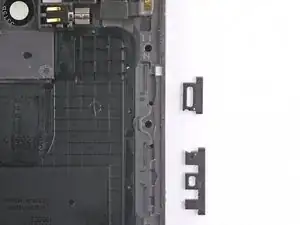
    • Du kannst ein Klebeband über den seitlichen Tasten anbringen, damit sie während der Reparatur nicht herausfallen.

    • Wenn irgendwelche Tasten aus dem Mittelrahmen herausfallen, dann setze sie wie im Bild gezeigt wieder ein, bevor du den Mittelrahmen wieder einbaust.

    The buttons will NOT "fall in" when reassembling, so it's important to remember to put them back. I found that putting them in the frame before replacing it is the only way. Check to see how they fit on the phone first, then drop them into their slots outside-in. The power button will fit only one way; the volume buttons should go in oriented as they fit best on the phone. Be sure to test them to make sure they click freely often! It's easier to readjust them before all those screws are back in.

    Bill Koonce -

    Going to make a small etch on the very bottom (as the phone is held portrait) of each button before beginning the project. A fine tip Sharpie might also work for some people.

    Dan -

    I have not done this yet but, try using a small bit of electrical tape to secure them to the mid-frame before removal

    jerryj26 -

    Yes, a small strip of tape on the mid frame to hold the buttons in place works great. Thanks for the idea. I simply put a piece over the buttons and onto the whole frame, then cut it carefully along the edge between the glass an mid frame when I separated the two piece. This held the buttons nicely in place and ready for reinstalling.

    Rob Reynolds -

    Be careful putting the mid-plane back on. The volume control innards were bent and straightening it back out took a lot of time - on phone #2.

    Larry Peterson -

    My contact wires got bent the first time I took a phone apart. I am pretty sure I bent them when I was prying the phone open (not while I was putting back together). Now I'm extra careful prying the phone open on the volume button side and it hasn't happened again.

    Beth -

    It sounds like people like the tape idea and it’s a helpful step, so I’ve added it into the guide step. Thanks for the comments!

    Arthur Shi -

    I tried taping the side buttons on but they slipped out anyway.  Observe the photo to replace them in the proper orientation.  It’s actually quite easy, and I’m not certain how effective taping them would ultimately be as it’s important to seat the slots over the tabs inside the body.  You need to be an extraordinary taper to stick them in place such that they “presto!” drop in place when reinstalling the mainframe

    Thomas Johnson -

    I found that it helped a lot to put a screw in around the down volume button, when reassembling, to prevent the buttons from falling out. That is after you had popped the mid frame and the phone together. I also agree with using the electrical tape to prevent the buttons from falling out.

    Michelle Dailey -
  14. TaWLlRlrDHkRgQFr
    TaWLlRlrDHkRgQFr
    GgfrelTyQGMgfLVk
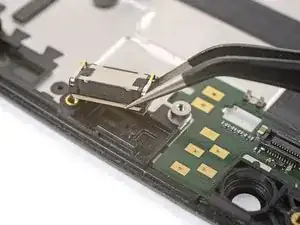
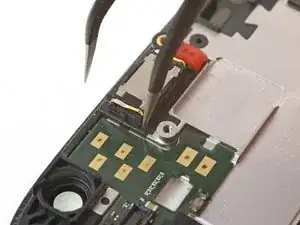
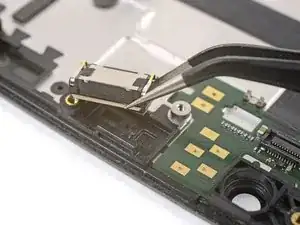
    • Die Ohrhörer-Lautsprecher Komponente ist sehr empfindlich und geht leicht kaputt. Sei beim Arbeiten an dieser Komponente sehr vorsichtig.

    • Setze die Spitzen einer Pinzette an einer Ecke so weit wie möglich unten ein.

    • Heble ganz leicht, damit sich die Komponente löst.

    • Wiederhole dieses Verfahren an den anderen Ecken.

    The warning about the speaker module being “very delicate and prone to breaking" is no joke! I took the speaker out of the phone I was repairing with no issue. When I attempted to take the speaker out of the phone I was salvaging parts from, the front “screen" part of the speaker stayed stuck to the phone as I pulled the module out. It fell apart, accordion style; the innards falling out in stages. I'm guessing I did not shove the point of the tweezer quite far enough in while I was prying it out.

    Beth -

  15. UZHqMWYQ1dKwYXZB
    UZHqMWYQ1dKwYXZB
    jdW5L5sxXiHNUV2L
    lEEcfxYXdOMjHVLB
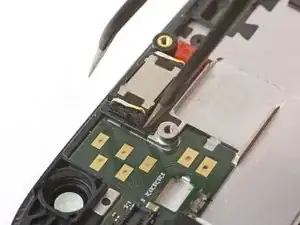
    • Heble weiter mit den Spitzen der Pinzette, bis sich das Ohrhörer-Komponente lose anfühlt.

    • Entferne das Ohrhörer-Komponente.

Abschluss

Um dein Gerät wieder zusammenzusetzen, folge den Schritten in umgekehrter Reihenfolge.

Entsorge deinen Elektromüll fachgerecht.

Die Reparatur hat nicht den gewünschten Erfolg gebracht? Schau bei unserem Motorola Moto Droid Turbo 2 Forum nach, dort kann dir geholfen werden.

Arthur Shi

Mitglied seit: 03/01/18

218614 Reputation

Ein Kommentar

I replaced my earpiece speaker but the volume is still extremely low. My headphones jack output is also very low when I plug it into and external speaker. Before this happened, This all started after I accidentally got some water on my phone but not enough to drench it. My speaker first sounded distorted when making a phone call and now the volume is so low that I can just barely hear it. Definitely too low to converse with someone. Is the fault in my motherboard? I've cleaned up all the obvious grounding points in my phone. Not sure what else I can check. Thinking about completely disassembling, replacing the ear speaker again doing a hard reset and if all those fail replace the phone. Any thoughts?

jeffrey -