Einleitung

In this guide you will be taught how to take apart the plastic shell of your parent unit and remove the speaker. Some soldering will be required to fully replace the speaker.

  1. DSRFAJ4GPJPiTnw1
    DSRFAJ4GPJPiTnw1
    QuomsLQXcDJPBnko
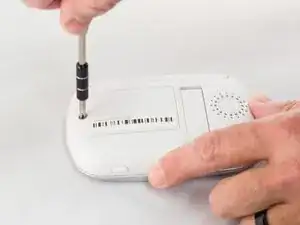
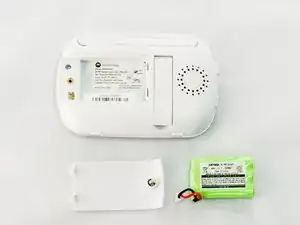
    • Using the Phillips #1 screwdriver, remove the battery cover screw.

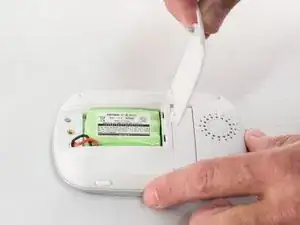
    • Remove the battery cover from its hinges and set aside.

    NI-MH battery!

    goricijan -

  2. 1uno13lyslbqquK2
    1uno13lyslbqquK2
    6ED6bNuVKqKnR2er
    ZDROkuiiyn6rFXJV
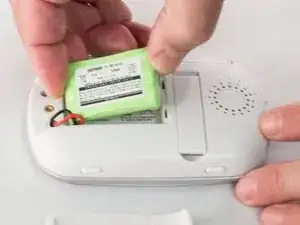
    • Lift the battery from its slot.

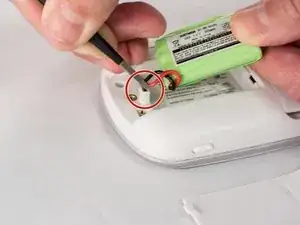
    • Using precision tweezers, grip the connector plug.

    • Wiggle the connector plug and pull up to remove the connecting wires.

    • Remove the battery from the unit and set it aside.

  3. hV4QkMMCKAanjgsi
    hV4QkMMCKAanjgsi
    BJehkB3xgWNQjxrc
    KflvAqckQuiF322U
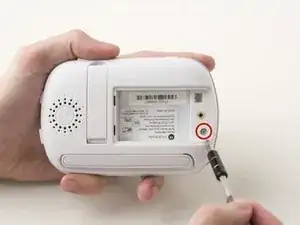
    • Using the Phillips #1 screwdriver, remove the 7mm screw under the battery cover.

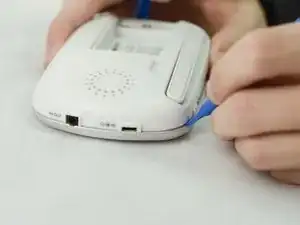
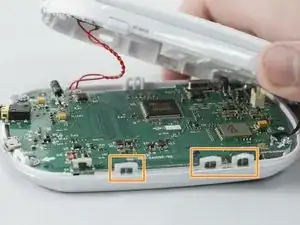
    • Using the blue plastic opening tools, begin prying open the corners and disconnecting the seven clasps around the edges of the parent unit.

    • There should be seven plastic clasps that hook the top portion of the plastic shell to the bottom. These clasps may become damaged while disassembling.

  4. bDDFeGE1YH1PCm3n
    bDDFeGE1YH1PCm3n
    RiVaAWbHDEcxAbby
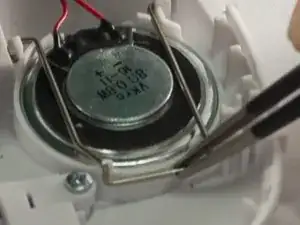
    • Grip the speaker's metal clasp with tweezers and then pull on the clasp to remove.

    • If pulling on the clasp is not working, try gripping the clasp with the tweezers again. Then tilt the tweezers towards the speaker. This should press the metal of the tweezers against the plastic holding the speaker in place and create enough leverage to pop the clasp out of place.

  5. bgFnCNONW5VxaNMm
    bgFnCNONW5VxaNMm
    JwI1qIFnleLOdHj2
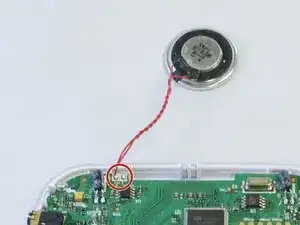
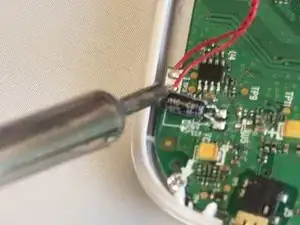
    • Desolder the wires connecting the speaker to the circuit board.

    • Beware of overheating, the soldering kit is capable of damaging the circuit board.

    • Beware of the potential for personal injury from heated metals.

    • For soldering procedures please refer to iFixit's guide to Soldering Skills

    Step 5, top right corner, metal oval shaped piece with two solder connections on the under side. Can you tell me what this piece is for? The solder connections broke off and I had to put them back in place, but was just curious what this part is.

    chradek422 -

Abschluss

To reassemble your device, follow these instructions in reverse order.
Ely Tilley

Mitglied seit: 28/09/17

672 Reputation

0 Kommentare