Einleitung
Benutze diese Anleitung, um die Ladeplatine in deinem Motorola Moto E4 (XT1762) zu ersetzen.
-
-
Schalte dein Handy aus, bevor du anfängst.
-
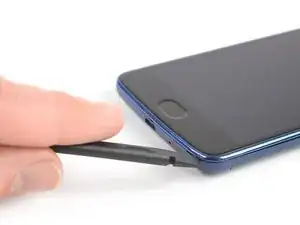
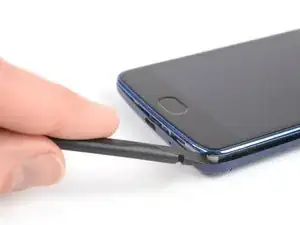
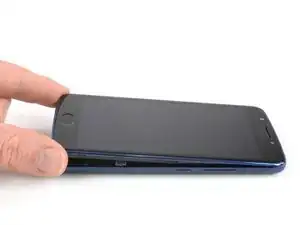
Setze einen Fingernagel oder einen Spudger in die Kerbe an der unteren rechten Ecke und fange an, die Rückabdeckung vom restlichen Gerät zu lösen.
-
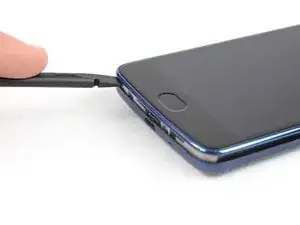
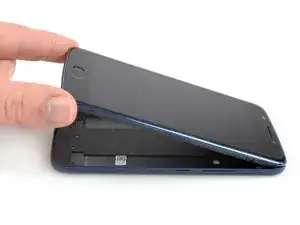
Führe ihn zur linken unteren Ecke und heble das Gerät aus der Rückabdeckung heraus, bis du es gut fassen kannst.
-
-
-
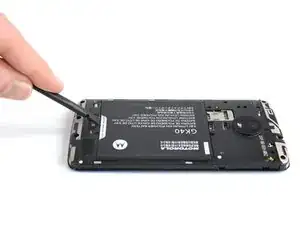
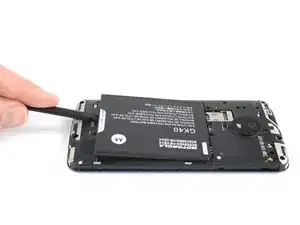
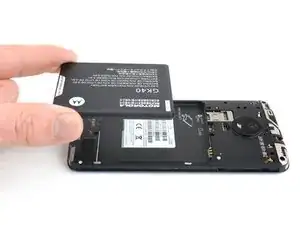
Setze deinen Fingernagel oder einen Spudger in die Kerbe am unteren Ende des Akkus.
-
Heble den Akku aus seiner Vertiefung heraus und entferne ihn.
-
-
-
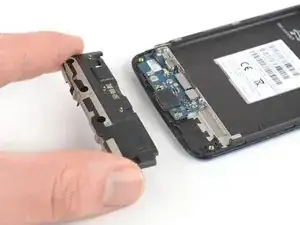
Setze ein Plektrum zwischen den Lautsprecher und den Rahmen und heble ihn hoch, indem du das Plektrum verdrehst.
-
Entferne die Lautsprecher-Einheit.
-
-
-
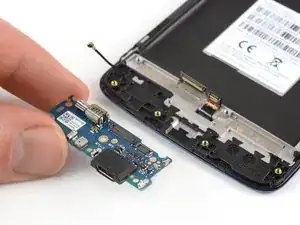
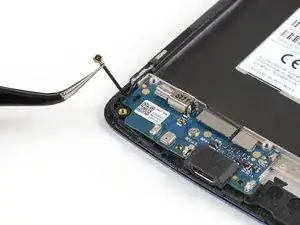
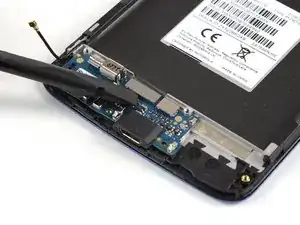
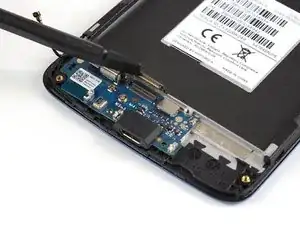
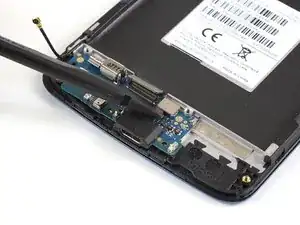
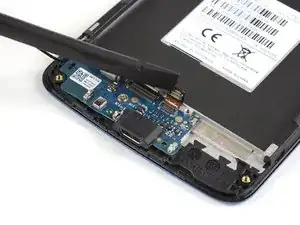
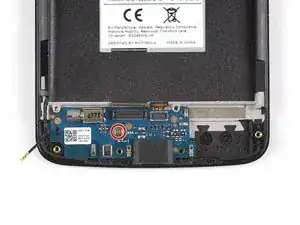
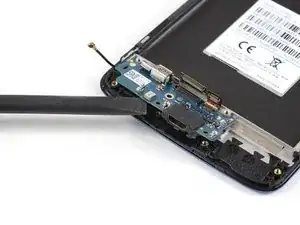
Benutze die Kante eines Spudgers, um das Kabel des Fingerabdrucksensors hochzuhebeln und zu trennen.
-


Kontrolliere vor dem Zusammenbau, ob irgendwelche Komponenten vom alten Teil auf das neue übertragen werden müssen (z.B. die Gummidichtung des Mikrofons).
Um dein Gerät wieder zusammenzubauen, folge den Schritten dieser Anleitung in umgekehrter Reihenfolge.
Entsorge deinen Elektromüll fachgerecht.
Lief die Reparatur nicht wie geplant? Auf unserem Antwortenforum kannst du Hilfe bei der Fehlersuche finden.

I hve a question not a comment. I would like to know if this battery model will work in my moto E 4 Model # XT1775. Thank you.
Gamaliel Gooding -
This models battery is compatible with the Moto G4 Play, E4, and E5 Play:
Motorola Moto G4 Play, E4, and E5 Play Battery - Genuine
You’re probably looking for the Moto E4 Plus (XT1775) battery:
Moto E4 Plus Battery - Genuine
Tobias Isakeit -
My US XT1768 did not have a notch here. I used my fingernails to pop the back cover off. Also, I followed this guide to successfully repair my US XT1768 in about 2 hrs. I’ve added a few comments below to point out the slight differences I found along the way
Tom Bartol -