Einleitung

This guide will show the user how to replace the screen assembly in the Motorola Moto E6. It should be replaced if it is malfunctioning or broken. A cracked screen is prone to further damage and should be fixed promptly. A cracked screen can also be potentially hazardous and the user should be cautious while replacing.

  1. 5DLybpmrS5JLDGOb
    5DLybpmrS5JLDGOb
    EjyLcSxeRZN3cTRi
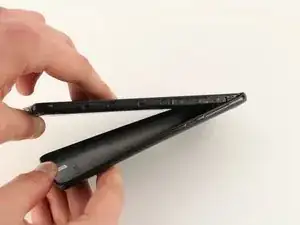
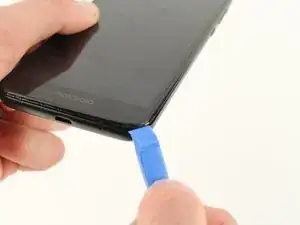
    • Begin by prying open the bottom right of the device using the plastic opening tool.

    • Work your way around the edge of the device, slowly prying open the casing until it pops off.

  2. NJwmxmXAKbTQ3V21
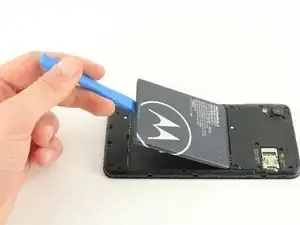
    • Use the opening tool on the divot located below the battery to pop it out.

  3. bJcumvCOZYQYG34S
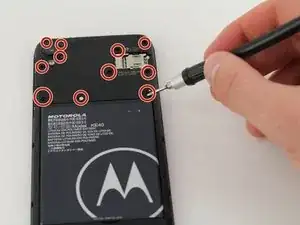
    • Remove the eleven 3.8 mm T4 Torx screws located above the battery compartment.

  4. y2qRXN14xCkwLyZI
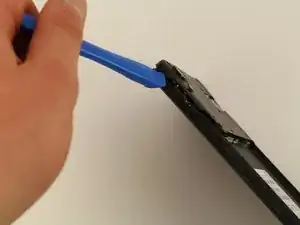
    • Use the plastic opening tools to pry open the piece located at the top of the device.

    • Start by prying open the side of the compartment and work your way towards the camera module, prying open the compartment as you go.

    • Pop off the piece above the battery compartment.

  5. 6fvvCa1XWDQwFIJM
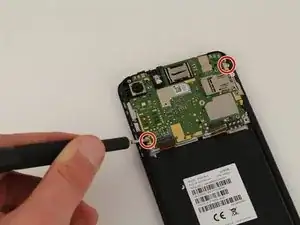
    • Remove the two 1.1 mm T4 Torx screws from the bottom left and top right sides of the motherboard.

  6. NcyEoQdWP3GIkffa
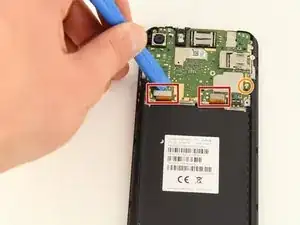
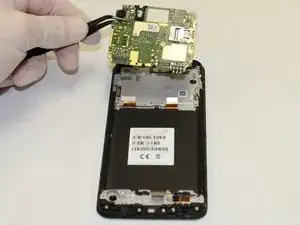
    • Remove the two press fit cables at the bottom of the motherboard with the plastic opening tool.

    • Remove the coaxial cable using the plastic opening tool.

    • After removing the cables, remove the motherboard from the phone by hand.

    Hi is there a gps chip that can be removed from the motherboard inside of these phones

    burn1987reagan -

  7. QcUnil53xwCZQStP
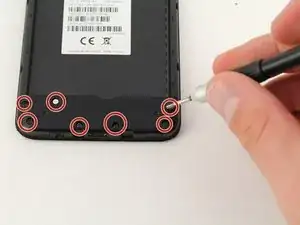
    • Remove the seven 3.8 mm T4 screws on the piece located below the battery compartment.

  8. ntbGhvXRLIuIeLcg
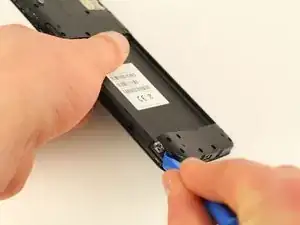
    • Begin prying off the bottom piece with the opening tools on the divot located at the bottom left.

    • Work your way around the piece until it pops off.

  9. ZPhx1n4rENQ5MbIM
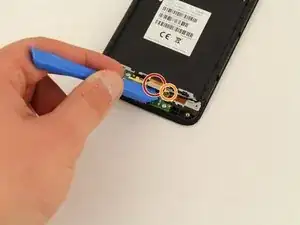
    • Remove the press fit cable at the top of the charging dock with the plastic opening tool.

    • Remove the coaxial cable using the plastic opening tool.

  10. LMIxWKSXSZiyPrjX
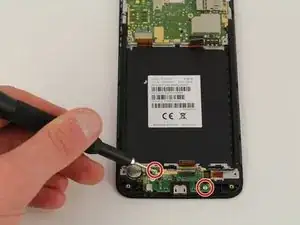
    • Remove the two 1.1 mm T4 Torx screws on the bottom right and top left sides of the charging dock.

    • Remove the charging dock by hand.

    The white round sticker, below the top left screw on Step 6, is pink now. Do I need a new charging dock? The sticker on the battery is still white, but I plug in the charger and only a little blue light flashes on the outside top. It doesn’t hold a charge and the screen doesn’t come on anymore. It did until the phone finally died. Im just trying to find the precise problem. And thanks so much! The information and steps were very helpfully accurate.

    Megan Skates -

    Love my moto e6 phone as changing the battery is so simple. When it was clear that the charging port was causing the problem, I wasn't sure where to begin. I didn't want to buy a new phone or have someone else fix it. Was glad to find these instructions on how to change the charging port. Was a bit apprehensive as I didn't want to mess anything up. I ordered the part, but didn't realize I didn't have the correct screwdriver. Was glad to have the specific kind I needed in the instructions. Once I had the right tool following the pictures and instructions made it very easy. A couple of really close up zoomed in pictures would have been even more helpful. This included all the steps needed to replace the charging port. My new port works just fine now. Thank you!!!

    elasue -

    Thank you!! I got the part on Ebay. Had the tool that came with a replacement battery I bought a few years back for another phone and it was the right one for this. Looks like my phone is fixed. Much appreciated!

    hjwellers -

  11. GWTJs1AwCdTsLsNR
    GWTJs1AwCdTsLsNR
    kiLBaYVCoNsRYuVT
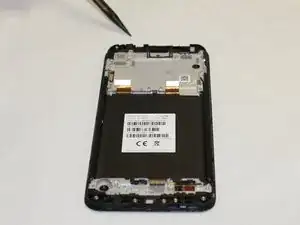
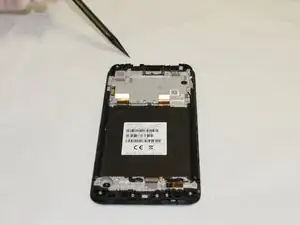
    • After removing the motherboard and the charging dock, the screen assembly can be replaced.

    How do I replace my cracked screen & where do I get a new screen at…..

    Derrick Jones -

Abschluss

To reassemble your device, follow these instructions in reverse order.

Ty Duben

Mitglied seit: 16/09/20

136 Reputation

3 Kommentare

Pro Tip.

The OEM parts for this do not include the flex that connects the Sub to main PBA, nor the earspeaker, nor the buttons or Vibration motor, so all of those will need to be moved over if you are utilizing OEM original components.

Aksel Barnes -

you get me right to the point where i can get to the screen. now, how i do iget it off? put the new one on???

Bobby Browning -

Use heat on the display to loosen the adhesive. Then you can separate the display and put in the new one.
Thaddeus Ervin -