Einleitung

Wenn dein Handy nicht lädt oder die Ladung gut behält ist möglicherweise der Akku defekt. Ein Wechsel ist zum Glück einfach.

Wenn dein Akku aufgebläht ist, dann treffe entsprechende Vorsichtsmaßnahmen.

  1. IKvk5vWcZXNbWEib
    IKvk5vWcZXNbWEib
    6aQAk2JdCgSuA5r5
    Ohd5TKw2HMYukHYo
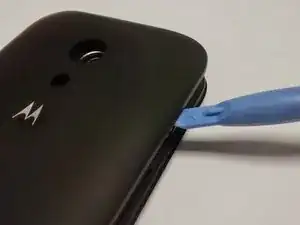
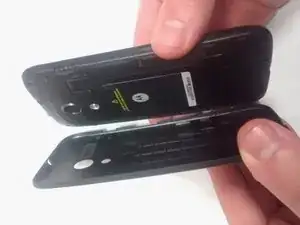
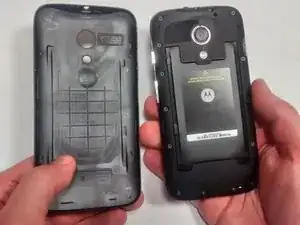
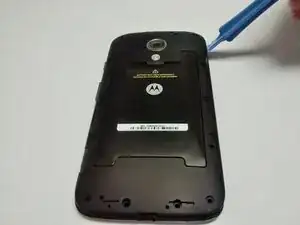
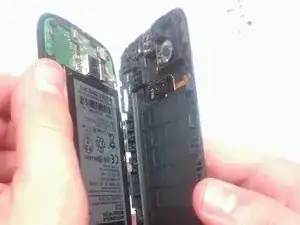
    • Mit einem Plastikhebel kannst du die rückseitige Abdeckung entfernen. Danach wird die innere Abdeckung sichtbar.

    • Das ist ein bisschen schwierig, besonders wenn du es bisher noch nie gemacht hast.

    • Vielleicht benötigst du ein paar Versuche, sei geduldig. Der Deckel ist erstaunlich flexibel, aber nicht genug um kräftigen Druck standzuhalten.

  2. sZW3bP2GCkAwKygK
    • Schalte das Smartphone aus.

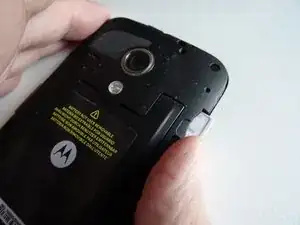
    • Drücke auf die SIM Karte, bis sie herausspringt.

    • Entferne die SIM Karte.

  3. BVxHRBcWe4tTqfwf
    BVxHRBcWe4tTqfwf
    33rQkJPSODUnYGiA
    hwFVsxUHf6ZSFGfp
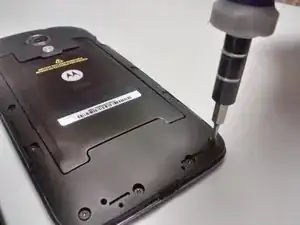
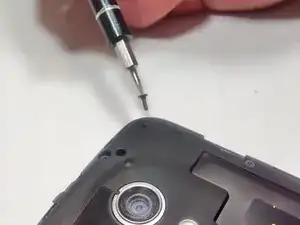
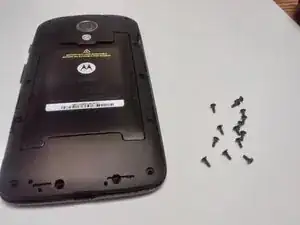
    • Mit einem Torx T5 Schrauber kannst du die 14 Schrauben (3,5mm x 5mm) entfernen.

    • Achte gut auf die Schrauben, nicht verlieren!

    • Mit einer Magnetmatte kann man die Schrauben gut festhalten, genauso viele andere kleine Metallteile.

    Die Schrauben sind Torx T4!

    Armin Jacob -

    To confirm Armin’s comment - yes, the screws are T4 not T5.

    Richard H -

    I used T5 and it worked, but it was a very tight fit. I guess tight fit is better for the screws than loose fit, but still, consider trying a T4 screwdriver.

    Patrick Signoret -

  4. Pp3uMeVL3h2H4ooZ
    Pp3uMeVL3h2H4ooZ
    ovwEYky4SpHBqg43
    cmJ1tpTwjqV2fSNi
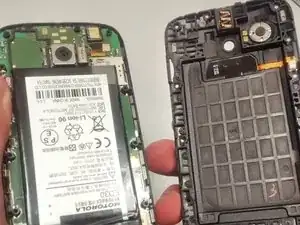
    • Nachdem die Schrauben entfernt sind kannst du mit dem Plastikhebel den inneren Deckel ablösen.

    • Nun liegt die Hauptplatine und der Akku frei.

    • Achte auf die beiden Knöpfe an der Seite, die nun leicht herausfallen können.

    It’s a good idea to make a note now of which way the buttons go back!

    Richard H -

  5. uwHxAgrrnY6WbndG
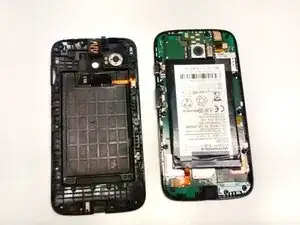
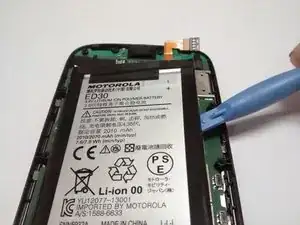
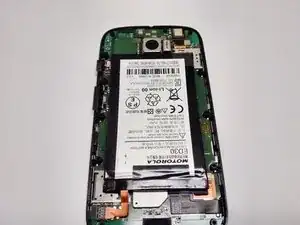
    • Wenn du das innere Rückteil abnimmst liegt der Akku frei. Erschrick nicht, seine Aufschrift steht auf dem Kopf.

    • Er ist festgeklebt und mit der Hauptplatine mit einem Flachkabel verbunden. Mit einem Plastikheber kann man es lösen.

  6. i1VOrGQW2FNuuEKq
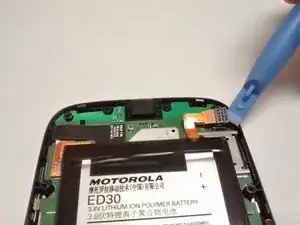
    • Der Akku ist mit dem orangenen Flachkabel und einem Stecker angeschlossen.

    • Setze einen flachen Plastikheber unter die rechte Kante und drücke nach oben. Der Stecker sollte sich mit minimalem Aufwand lösen.

    Where do I buy the battery Motorola ED 30 for Moto G.

    My location Noida 201301,uttarpradesh, India.Request Email ddrakheja@yahoo.com

    Dindayal Rakheja -

    My Moto g battery requires change.wish to buy one.Request intimate your store in Noida, India.

    Thanks.

    Dindayal Rakheja -

  7. Hij2MGOdZBw4cQnr
    Hij2MGOdZBw4cQnr
    HXZaHonmQqgXEsaL
    lZBiqXhYZcRCfpkP
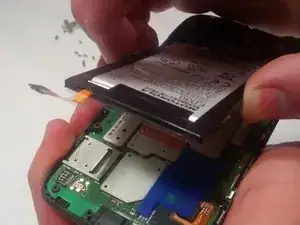
    • An der rechten Kante des Akkus lässt sich am Besten hebeln.

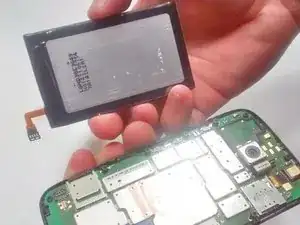
    • Mit dem Plastikheber kann man den Akku anheben. Denke dran, dass er festgeklebt ist.

    • Vermutlich wirst du einen größeren Widerstand bei diesem Schritt spüren. Wenn der Akku zu sehr an der Platine festklebt versuche ihn mit dem Plastikheber ringsum freizuarbeiten.

    • Sei nicht ungeduldig. Arbeite langsam und sorgfältig um nichts zu zerstören. Der Akku kommt schon frei, wenn du den richtigen Ansatz gefunden hast!

  8. LUBoTT5PRfWxLknF
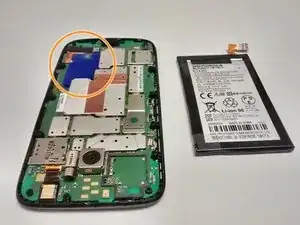
    • Wenn der Akku erst mal draußen ist kannst du den neuen einsetzen, indem du ihn unter die Rückkamera (die kleine silberne Schachtel auf der Platine) schiebt und das Kabel einsteckst.

    • Achte darauf, dass die blaue Abdeckung (im orangenen Kreis oben links) richtig sitzt. Sie schützt empfindliche Stellen.

    Great and precise guide!

    Fawad -

    thanks, this was a very good guide and helped me give a new lease of life to an otherwise good phone. My 10yo daughter, who disconnected and reconnected the battery and did most of the screws, says thanks too.

    Tim Richardson -

    The instructions were good. Didn’t take long to do, once I had the right tools (I bought a Torx T5 driver, as the tool included with the aftermarket battery was the wrong size; the seller credited the cost of it back to my purchase). The connector was the *only* other challenge: getting it properly lined up & seated.

    Oh, I didn’t have a spudger handy. I used a plastic knife, worked fine. The adhesive was double-stick tape.

    Phone is charging & rebooting right now. Total cost, $13.52, including tool, tax & shipping.

    Ric Lobosco -

    Where did you buy your battery from for such a cheap price?

    Also, others claim that it’s a T4 Torx screwdriver, not a T5. Did you T5 still work?

    FixWiki -

    The T5 worked for me, though it was a very tight fit.

    Patrick Signoret -

Abschluss

Zum Zusammenbau folge den Schritten in umgekehrter Reihenfolge.

Rebecca Montgomery

Mitglied seit: 25/09/14

3982 Reputation

30 Kommentare

Good clear instructions. Thanks.

Motog Steve -

seemed to work for me. fiddly screws though.

Joe Turner -

This shows the second gen moto g but the title is for 3rd gen. Is there a tutorial for the 3rd gen?

wjobrie3 -

This is the 3G version (moto g 2013, the all first version) but not the 3rd version :)

Antoine -

It’s none of those, It’s the original NON-LTE 1st gen, and yes the title says 1st gen

01110011 01101000 01110101 01110100 00100000 01110101 01110000 00100000 01101001 01100100 01101001 01101111 01110100 01110011

Nordii -
Great job. Crystal clear instructions.

stevekoesterer -

The youtube presentation includes mention of the plastic pull tab

which might reduce prying.

And I would've like to have seen {which?} buttons are

liable to fall out ("Take note that once inner back cover is removed the two buttons on the side can easily fall out or be removed.")

But TNX...well done!

jamesT

hastigo -

Thank you so much for the clear instructions and clear pictures. Funny enough, the pictures were good enough and this process easy enough that I didn't need the text. I read them anyway at the end. (I know, I know, bad form. lol)

Matt Sawicki -

One of the metal plates with holes has moved while i was replacing the battery, Is that important?

David Sinapellido -

Awesome instructions!! Thank you!!!

Lorie Bolden -

Haven't tried it yet but am ecstatic that I don't have to buy a whole new phone. Thank you, thank you, THANK YOU!!! Just have to find a plastic pry tool now.

Rhonda Tannehill -

Should the replacement battery have any kind of adhesive to hold it in place like the original?

Chris Caudle -

where the battery for this phone is the date of manufacture? How to find it and read it?

kitachi -

It's a big pain in the ass. Average time to replace the batter is 1 hour? WTF. My old Motorola Atrix 4g takes me 30 seconds total time to replace the battery. One would;d think that newer androids would be easier not more difficult. Should have bought a different phone. I also have trouble with the phone freezing up and may have to reboot it three or four times a day. What a piece of crap.

perkeneff -

Does it matter if I initially didnt re-install the blue cover (rubbery piece) that sits under the battery (to protect the LCD cable underneath) that when putting the battery over it (didnt connect it to motherboard before discovering I forgot to put back the blue cover) it would have damaged the LCD/digitizer in any way? I put my phone back together and when I powered it back on I noticed that there is some distortion on the LCD screen and the touch screen (digitizer) is not working. I'm wondering if just placing the battery over the LCD connector without the blue cover in any way damaged the circuitry, even though the bettery was never connected to the board.

kdrymer -

If there is a higher capacity battery available, like 2500mAh instead of 2070 is it safe to replace

Akrit -

Hey there,

thanks ever so much for this. Saved my ass.

Hardest part was tracking down a battery (same day) - and oddly enough the Torx 5.

Ended up having to by a smart phone tool kit...Oh well...

Thanks again -- and keep that info flowin'!

rupertredd -

when the new battery and tools arrive I will follow this guide.

Tony Kelts -

After an hour or two with a hammer and chisel, 4 ,cans of Guinesss. 10 naughty smokes. and 14 Valium. I decided the best bet

is a visit to my local, friendly, pc shop in the morning, yes folks the old 'uns were a lot easier, Progress.. don't mak me laugh!!

But, sincere thanks to the person who posted the info, I am very grateful; If we ever meet, I will invite you to dine with me, LOL;

Eagle...

Bernard -

I broke the battery connection to the motherboard. The soldering has come out. What do I do? Please help asap :(

Vineet Ashtekar -

Thanks you very much, I followed the steps and I have to admit it is really simple.

mayerly -

Precise and concise guide. Very useful and it only took the forecast 20 minutes! Many thanks.

Christopher Tierney -

I did it used finger nail, it works.

edgardundas -

Instead of the prying to let her use my finger nail and it worked only lost two of the 11 screws,, and it works great.

edgardundas -

Excellent instructions!

Babel 17 -

Thank you it works fine for

Moritz -

Is it necessary to recalibrate the battery after replacement?

Oleksa Stasevych -

Thank you very much! Clear and correct instructions!

Ello Gallo -

Vielen Dank, die Anleitung war super.

Marion Kratel -

Do these instructions work for the Moto G 5.1 phone?

grammygal1018 -