Einleitung

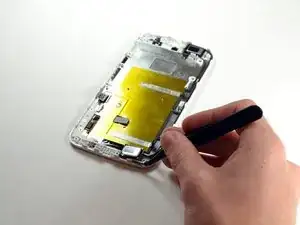
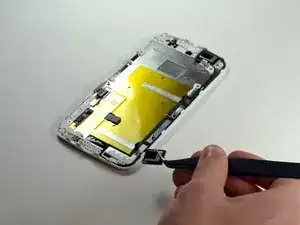
Mit Hilfe dieser Anleitung kannst du die Lautsprecher eines Moto G2 austauschen. Der Austausch selbst ist nicht schwierig, allerdings musst du dich vorher durch einige Schichten durcharbeiten. Du benötigst nur einen Torx T5 Schrauber und einen Plastiköffner.

  1. QtHONK4g2ZajCstS
    QtHONK4g2ZajCstS
    JhmVNqAQbZWB1JDW
    HMVrTcKNZvMGpmBT
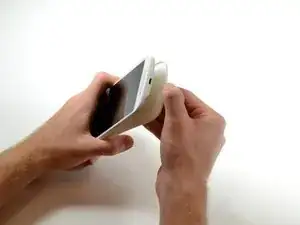
    • Schalte das Moto G ganz aus und entferne alle SIM- und SD-Karten, bevor du beginnst.

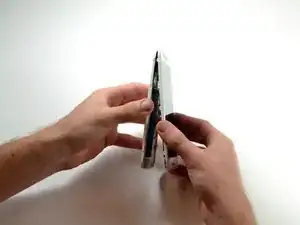
    • Beginne am USB-Anschluss mit dem Ablösen der Rückabdeckung mit dem Finger.

    • Löse weiter den Seiten entlang ab, zerbrich dabei nicht den Rückdeckel.

    Important - remove SIM cards before opening the phone.

    Wojciech Dyba -

  2. FNO2UT3VJwRQbL2u
    FNO2UT3VJwRQbL2u
    DTI5yptIECRYOSWY
    BHncB65JemqnEYwH
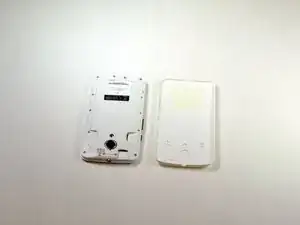
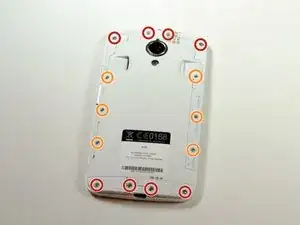
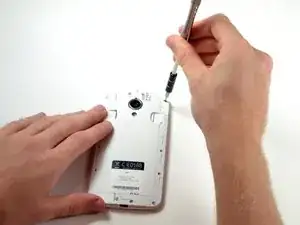
    • Drehe acht 4,2 mm T5 Schrauben am oberen und unteren Ende heraus.

    • Mit dem gleichen Schrauber kannst du die sechs 3,2 mm Schrauben an den Seiten entfernen.

    • Jetzt kannst du die nächste Schicht des Handys mit den Fingern ablösen.

    On mine, they’re all Torx T5

    Stanley Reynolds -

    You neglected to mention that the two buttons might fall out when you remove this part.

    Stanley Reynolds -

  3. GFCGVJxU3GZCKVoW
    GFCGVJxU3GZCKVoW
    FaftYIZ2SvsV4xBQ
    Ya6aRbDmEyeFeEQK
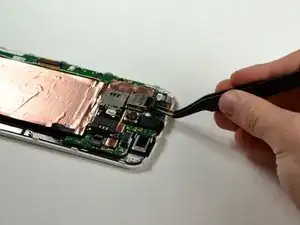
    • Mit dem Plastiköffner oder einer Pinzette kannst du den SIM/SD Kartenleser entkoppeln.

    • Öffne den Akkuverbinder indem du ihn von der Hauptplatine ziehst.

    • Entkopple den Vibrationsmotor indem du seinen Stecker von der Hauptplatine löst.

    sir when I put on for charging it shows 50% charging after 1 hour when I removed the charger its showin 0 and total is dead. what is the reason

    leela -

    moto g 2 completely dead what the reason

    leela -

    There's no need to remove the battery or motherboard to get to the speakers - they are accessible as soon as the back cover is removed. Skip this step and jump straight to step 10

    Paul Abraham -

    In fact it is not necessary to remove the simcard rack. I managed to remove battery with the rack on. It is possible to remove the foil startingfrom the bottom of the battery and once peeled off the battery can be removed. You only need to disconnect the battery from the mother board.

    Wojciech Dyba -

  4. DECeeVvsZVWIAibV
    DECeeVvsZVWIAibV
    cwAqKDnNRLXatKNk
    pfJNBTO6rhjFsOOm
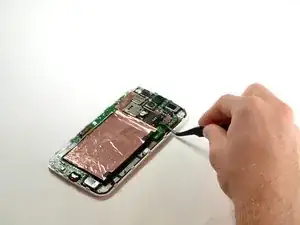
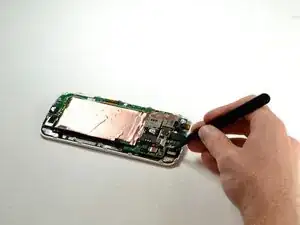
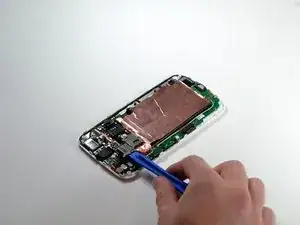
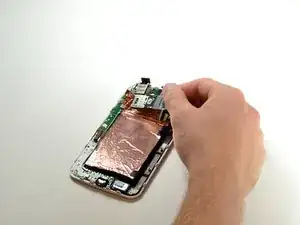
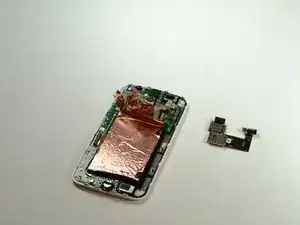
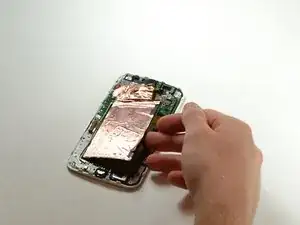
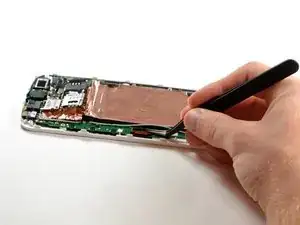
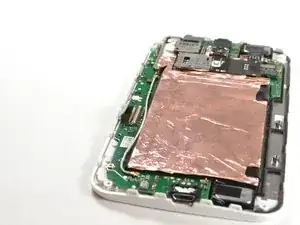
    • Mit dem Plastiköffner kannst du ganz vorsichtig die gesamte SIM/SD Kartenleseeinheit ablösen.

    • Wenn die Kupferfolie ein paar Falten erhält ist das nicht schlimm, man kann sie leicht wieder anlegen.

    • Wenn du das Handy wieder zusammen baust versuche nicht die Folie mit dem Finger zu glätten. Du könntest dich dabei schneiden.

    • Der Akku kann auch ausgebaut werden, ohne den SIM/SD-Kartenleser zu entfernen. Du musst nur einfach die Kupferfolie vom gegenüberliegenden Ende her abziehen und vor dem SIM/SD-Kartenleser anhalten.

    As mentioned in a comment on the previous step, you don’t actually need to remove the SIM/SD card reader at all.

    If you peel back the copper foil from the opposite end of the device, you can sneak the battery out (and the new battery in) by just sliding the battery ribbon cable out from under the SIM/SD card reader.

    David -

    Thx for the idea. I’ll let you know if it was working - I’ll my battery soon. regards!

    ausssiefan -

    Perfect as mentioned - just slide the cable foil under the sim rack - no need to remove the rack. Works flawlessly, quick repair.

    ausssiefan -

  5. ywGYmqT2iHpjqGMv
    ywGYmqT2iHpjqGMv
    jSVacEWd64EIGPYX
    a2WUMZDwSBNMiKTd
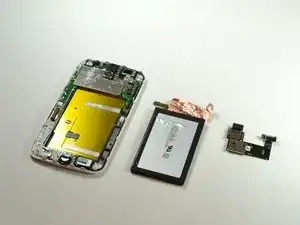
    • Mit dem Finger kannst du die beiden Klebestreifen auf dem Akku abheben.

    • Entferne den Akku indem du die rechte Seite hochziehst.

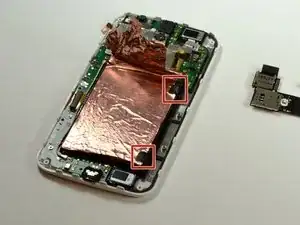
    • Die schwarzen Aufkleber sind die Enden zweier parallelen Klebestreifen, mit denen der Akku festgeklebt ist. Im dritten Bild kannst du die Klebestreifen sehen. Arbeite besonders an diesen Stellen.

    • Wenn du im vorhergehenden Schritt nicht den SIM/SD-Kartenleser ausgebaut hast, dann musst du das Flachbandkabel zum Akku behutsam unter ihm hervorholen, wenn der Akku von den Klebestreifen abgelöst ist.

    HINT: The ‘two black stickers’ are the ends of the two parallel adhesive strips which hold the battery in. There is no other adhesive holding the battery, so focus your attention on these regions when prying the battery out!

    David -

    If the copper foil is damaged beyond repair, what can be used to replace it?

    Xander Squier -

  6. QIFOEfakODgJSopN
    QIFOEfakODgJSopN
    MRYVRA5rsGhsxWtS
    fqkVKWBr1LSq65qo
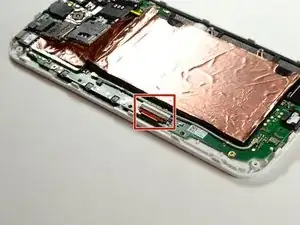
    • Löse den Stecker des Displaykabels indem du die schwarze Plastikklappe anhebst.

  7. stvt4ABAstqwJSPk
    stvt4ABAstqwJSPk
    Pj2morn3kiDSeYWu
    GTSsSsUKiaMlJSi1
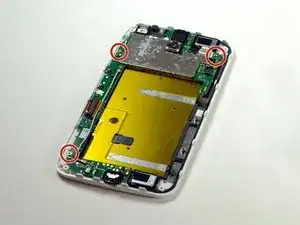
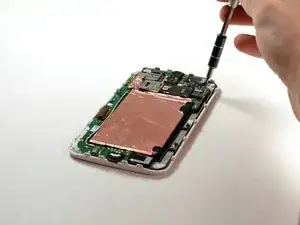
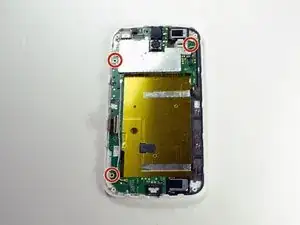
    • Mit dem T5 Schrauber kannst du die drei 2,2 mm Schrauben ausdrehen, die die Hauptplatine befestigen.

  8. s3cxJDwPV3hxbUJF
    s3cxJDwPV3hxbUJF
    vBTRvTvWjZFJZfvB
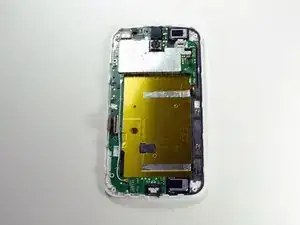
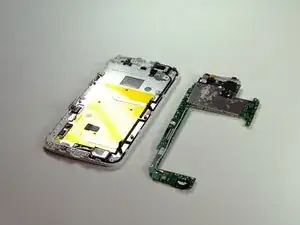
    • Hebe die Platine vorsichtig heraus.

    from here ill get motherboard for g2

    prem surve -

  9. IKb2UXVqmiiBNWPc
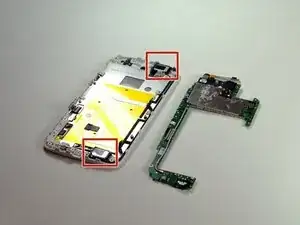
    • Hier findest du die Lautsprecher, wenn die Hauptplatine weg ist.

    I also would like to know know why it would be necessary to remove the board before removing the speakers? Nothing is prohibiting the speakers from being removed right away.

    Jennifer -

  10. JYfHC1qZTQh1kijd
    JYfHC1qZTQh1kijd
    uhIHFEffHhn5aOyT
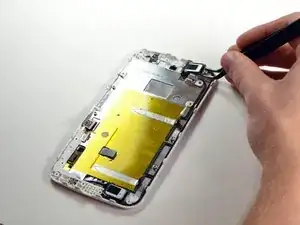
    • Die Hauptplatine ist entfernt. Mit einer Pinzette kannst du den oberen Lautsprecher vorsichtig anpacken.

    • Entferne ihn und setze den neuen wieder ein.

    Speaker not working after replacement, what is trick to setting the correct height of the speaker to make proper contact with the spring terminals?

    brian351max -

  11. 6DlN4PtwuOoGbLib
    6DlN4PtwuOoGbLib
    Qyg2aUB6vOit4LlJ
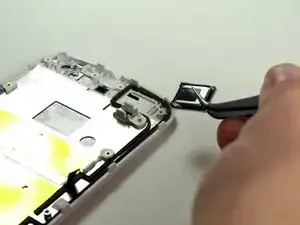
    • Mit einer Pinzette kannst du den unteren Lautsprecher vorsichtig anpacken.

    • Entferne ihn und setze den neuen wieder ein.

Abschluss

Um das Handy wieder zusammen zu bauen folge den Schritten in umgekehrter Reihenfolge.

Jacob Garzini

Mitglied seit: 08/10/15

485 Reputation

10 Kommentare

Same problem happened to me when I replaced the screen, had to remove the speaker and when I put it back the upper (left) didn't work and the lower (right) had terrible distortion noise. playing a little with the upper speaker location made it work but with noise as well.

The phone is useless without this speaker, it's pretty shame that nobody pays attention to this point in their guides.

Tal wns -

Have you fixed your speakers? Did you at least discovered why it happened?

Erick Carvalho Campos -

I had a similar problem after replacing my battery. After I put the phone back together, my bottom speaker was not working. I went ahead and ordered a speaker to replace the one that was not working, and it still didn't work. Knowing that my top speaker was working okay, I replaced the top speaker to see if the new one I received was working, and it didn't work on top either. As a matter of fact, I put back the original top speaker that was working okay, and now it doesn't work. So now neither one of them are working. I have to use earphones to hear my phone. I don't know what happened. The instructions to replace the speakers are not that difficult.

Does anyone have any suggestions on what I should do? I'm not ready to give up my phone just yet.

Betsey -

I replaced the speakers recently and it is not recessary to remove the motherboard to replace them.

Dan Eff -

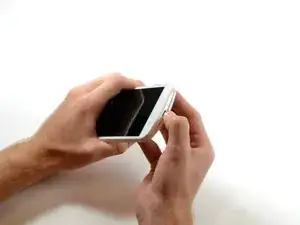
To corroborate with the other commenters: removing the motherboard is unnecessary. The speakers are only held in with a small ring of adhesive, which can easily be pried out. Additionally, the two speakers are identical.
Gavin Lochtefeld -

Where can I get new speakers?

hlwjrnc -

My moto g2 handset was burnt by short circuit and hence not opening only rather i may say that it was damaged. So, help me in repairing the handset.......

dipa10000 -

I was having trouble removing the adhesive copper foil above the battery, most of it ripped and is ruined. How much will that affect phone performance?

Andy Ludowese -

I had no sound after replacing my screen, but it's kind of working now after footering about, so I thought I'd share my thoughts for anyone in a similar predicament (I'm very much a chancer - happy to be corrected by someone who knows what they're on about!)

It seems like the speakers are connected via conductors on the back panel. I think the reason I had no sound after transferring them (along with everything else) to the new screen assembly was that the clear plastic/adhesive bit on the new thing wasn't thick enough, so the speaker wasn't being pressed against the back panel hard enough to make a good contact. I swapped this in from the old one and hey presto! A bit distorted, but working :)

So when performing Steps 10 and 11, make sure you don't leave a bit of transparent plastic behind - I'm not sure whether this is additional to the adhesive, or whether it's just turned hard in the meantime, but either way, the speaker needs to be at a certain height to work.

Ross McCrae -

I have the same problem as others. After I replaced the display, the speaker don’t work anymore.

I’m buying new one but I need to know, Are the two speakers identical?

Giuseppe Geppo Cattaneo -