Einleitung

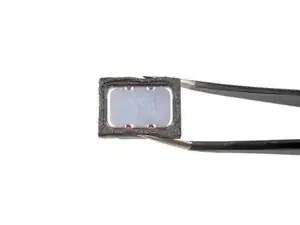
Nach einiger Zeit kann der Lautsprecher am Motorola Moto G4 knacken oder für Tonstörungen sorge. Diese Anleitung zeigt dir, wie du ihn austauschen kannst.

  1. amtvddjAmwhmrnqH
    amtvddjAmwhmrnqH
    OWi4m4XCxfEBgDMt
    EwJnFXXfcwhAWbTc
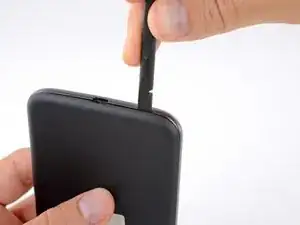
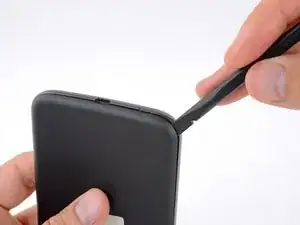
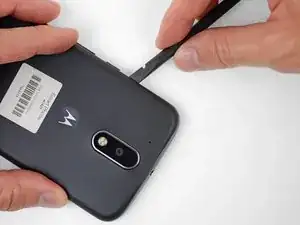
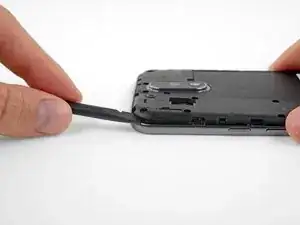
    • Setze einen Fingernagel oder einen Spudger in die Vertiefung an der Unterkante nahe der Ladebuchse ein.

    • Verdrehen ihn leicht, damit sich ein kleiner Spalt zwischen Rückabdeckung und dem Smartphone bildet.

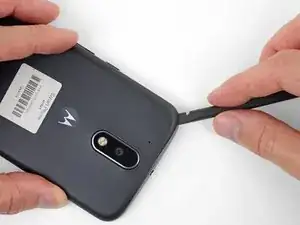
    • Lasse das Werkzeug (oder den Fingernagel) im Spalt zwischen Rückabdeckung und Smartphone eingesetzt und schiebe es um die Ecke herum. Löse so die Rasten , mit denen die Rückabdeckung befestigt ist.

  2. HLqMHMbmASfwFDVU
    HLqMHMbmASfwFDVU
    wkbdCQWZyeoURicu
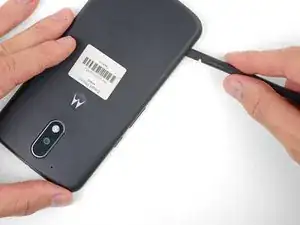
    • Schiebe das Werkzeug an der Seite entlang, um noch mehr Rasten zu lösen, mit denen die Rückabdeckung befestigt ist.

  3. IRICjJRMR1eUHQvd
    IRICjJRMR1eUHQvd
    frOdNGBIe3yRUYUQ
    DJCAEbwhl6ZN2xON
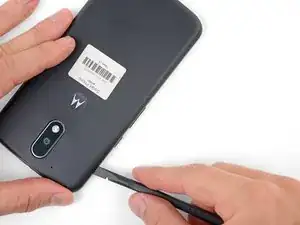
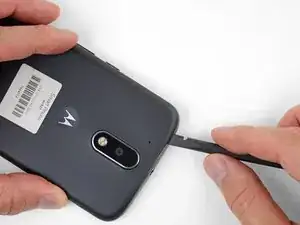
    • Halte das Werkzeug weiter leicht unter der Rückabdeckung eingesetzt und schiebe es um die obere Ecke herum.

    • Wenn nötig, schiebe es auch noch um die anderen Kanten herum, bis sich die Rückabdeckung löst.

  4. pTETy5GBsJCUgxsO
    pTETy5GBsJCUgxsO
    vKqBpOYKSASlbQkv
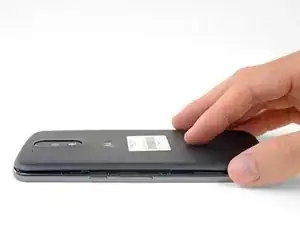
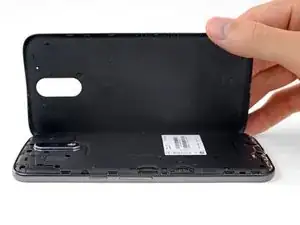
    • Entferne die Rückabdeckung.

    • Um die Rückabdeckung wieder einzusetzen, musst du sie sorgfältig über dem Smartphone ausrichten und vorsichtig an allen Kanten nach unten drücken, bis die Rasten wieder einschnappen.

  5. ffDFM5MxvYRYGd3M
    ffDFM5MxvYRYGd3M
    KLonmPJiytRfZMPP
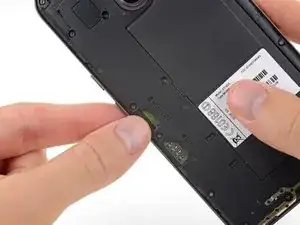
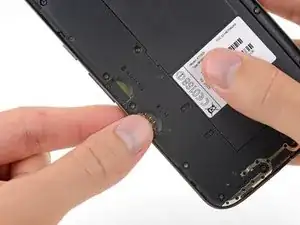
    • Entferne die Einschübe für MicroSIM und SIM (falls noch drin).

  6. CblUBFHebOPfmwHn
    CblUBFHebOPfmwHn
    Y5AmMCGdT5C4OWM1
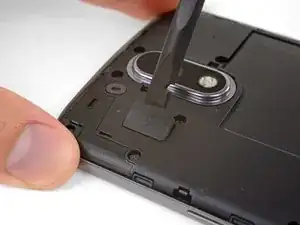
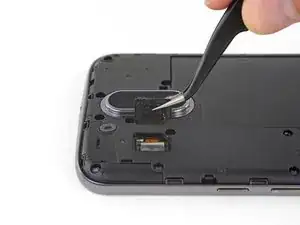
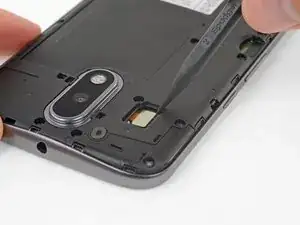
    • Heble die Gummiabdeckung vom Stecker des Kamerablitzes mit dem Spudger ab.

  7. MBcHXGXsJATGCWMj
    • Entferne die Gummiabdeckung.

  8. 2PT4qZOgF5piDHIy
    2PT4qZOgF5piDHIy
    OALHZ2QuglNBlykt
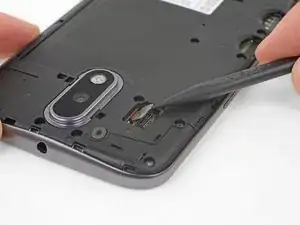
    • Heble den Stecker des Kamerablitzes mit einem Spudger gerade nach oben und löse ihn ab.

  9. R52jISsgc6PJMUYW
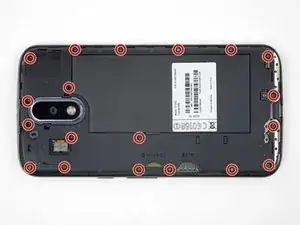
    • Drehe die neunzehn identischen 3,1 mm Torx T3 Schrauben heraus, mit denen der Mittelrahmen befestigt ist.

    In my kit, the T3 Torx bit came in the ‘repair part’ box, while a T5 Torx bit was in the ‘repair tools’ box.

    Joseph Albert -

    my phone had t4, not t3

    Donald Smith -

    Screws are stuck quite hard, apply a hefty amount of pressure when removing. Otherwise you’ll destroy the thread

    face -

    unable to remove 8 of the screws. any suggestions?

    wayne malcom -

    My T4 is the tool that fit. I can see why people strip these. They were dam tight for such little screws.

    I also had a tough time getting them out of the socket once loose. Magnet in the tool was not very strong. I used my tweezers, and scratch the screw heads. That means they are real soft steel, and strip easy.

    P 38 -

  10. CdvPqSLWgj4YR1Im
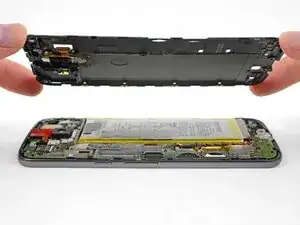
    • Setze einen Spudger in der oberen linken Ecke des Mittelrahmens ein und verdrehe ihn vorsichtig, damit sich der Mittelrahmen vom restlichen Smartphone löst.

    I couldn’t get the spudger in, but had success with the opening pick instead.

    Bernd Mast -

  11. D5HjSM3XUBUJOE6T
    • Entferne den Mittelrahmen.

    During the midframe removal, be careful and do not put too much torsional stress on the loudspeaker pickup wires (to the right of the main camera). It’s not that difficult to crush or shear the pickups there. Doing so will render your phone silent.

    Kevin Kwan -

    Exactly what happened to me. Both contacts broke off and if just loosely put where they were, they can't make proper contact anymore.

    There should be a warning about this in the guide itself!

    Simon Vetter -

  12. fGFKgOBXsMKoWbQr
    fGFKgOBXsMKoWbQr
    Zqb15SXcygILmYyg
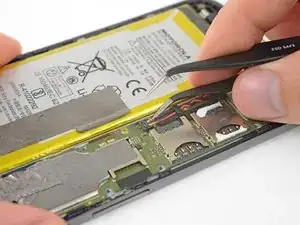
    • Setze eine dünne Spitze (z.B. einer Pinzette) unter die roten und schwarzen Akkudrähte und schiebe sie unter den Akkustecker.

    • Heble vorsichtig gerade nach oben, um den Akku abzutrennen.

    • Heble nur an der Seite, wo die Drähte am Stecker befestigt sind. An anderer Stelle kann der Anschluss kaputt gehen.

    • Richte beim Zusammenbau den Stecker mit dem sichtbaren Kupferdraht nach oben über dem Anschluss aus. Drücke ihn gerade nach unten, um ihn zu verbinden. Wackle dabei ein bisschen, so dass er korrekt einrastet.

  13. bAgESkIdj6wZYjwT
    bAgESkIdj6wZYjwT
    6udfPlsXr4DBpEpw
    EBWjEyDcp2HqynmD
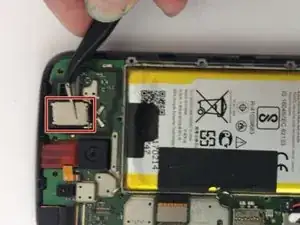
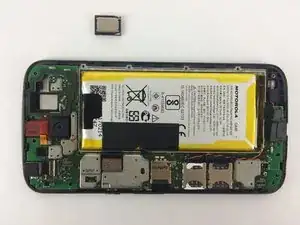
    • Der Ohrhörerlautsprecher ist stark verklebt. Wenn nötig, musst du Wärme anwenden oder etwas Isopropylalkohol eintropfen, um den Kleber zu schwächen und die Demontage zu vereinfachen.

    • Hebele den Lautsprecher mit einem geeigneten Werkzeug oder einer Pinzette hoch. Achte daruf, dass du keine umliegenden Bauteile beschädigst.

    • Wenn du den Lautsprecher wiederverwenden willst, dann achte daruf, dass du nirgends anders als an seinem schwarzen Plastikgehäuse hebelst, er ist leicht zu beschädigen.

    • Überprüfe vor dem Wiedereinbau, ob der Kleber am Boden des Ohrhörerlautsprechers noch gut haftet. Mit etwas Wärme von einem Haartrockner kannst du den Kleber wieder weich und klebrig machen.

    • Die Rückseite des Lautsprechers ist magnetisch. Achte darauf, dass du damit keine Teile auf der Hauptplatine berührst.

    You should have clearly told us not to use the tweezers in such a way as to touch the bottom side of that speaker box. I accidentally touched the other side with my tweezer while removing which caused a hole in the thin metal membrane. Now my speaker works but has an incredible amount of distortion. You MUST put a warning for these things. Now I have to buy a new speaker module.

    Anu S -

    On my Moto g4 plus I can't hear with ear piece speaker but I can hear with speaker phone mode, even after replacing with new speaker

    Dr.amol bhosale -

    4 steps on how to remove the battery cover. Really? Anyone who has ever owned one of these would know how to pull it off. Why not just say 'remove back cover? Ridiculous.

    Nigel -

Abschluss

Um dein Gerät wieder zusammenzusetzen, folge den Schritten in umgekehrter Reihenfolge.

Kierra Schau

Mitglied seit: 28/09/17

1481 Reputation

4 Kommentare

i have problem with speaker. no sound. tried direct connecting external speaker . still no sound. so seems like its not sending signal. i checked all the settings

SHAIK Rahman -

You should have clearly told us not to use the tweezers in such a way as to touch the bottom side of that speaker box. I accidentally touched the other side with my tweezer while removing which caused a hole in the thin metal membrane. Now my speaker works but has an incredible amount of distortion. You MUST put a warning for these things. Now I have to buy a new speaker module.

The warning should have told us to touch only the plastic black parts with the pointy end of the tweezers

Anu S -

will use on my other phone, people can hear me, I can’t hear them after a drop. Now I know how to check the phone speaker. Thanks
gabriel johnson -

Is it essential to disconnect the battery? Or is that more safety protocol?

Andy Morley -