Einleitung

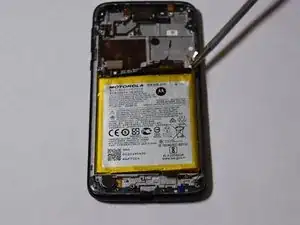
Diese Anleitung zeigt, wie der Akku im Motorola Moto G7 Play (Modellnummer XT1952-3 oder XT 1952-2) ausgetauscht werden kann. Der Akku hält das Smartphone am Laufen, wenn es nicht am Ladegerät angeschlossen ist. Wenn sich das Gerät nicht einschalten lässt, oder nach kurzer Zeit aus geht, ist möglicherweise der Akku defekt. Prüfe nach, ob er aufgebläht ist oder Flüssigkeiten austreten. Sei in diesem Fall besonders vorsichtig und beachte die Empfehlungen von iFixit bei aufgeblähten Akkus.

  1. 4Xbb5Dwi5GPdt152
    4Xbb5Dwi5GPdt152
    kI3eKVi2FslU3c1m
    • Schalte das Gerät vor Reparaturbeginn aus

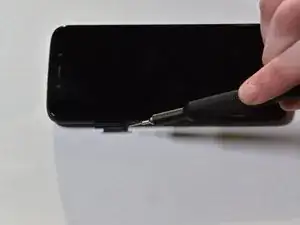
    • Setze ein SIM-Auswurfswerkzeug oder eine aufgebogene Büroklammer in die kleine Öffnung im SIM-Karteneinschub rechts an der Oberkante des Smartphones ein.

    • Drücke das Werkzeug hinein, bis der Einschub herauskommt.

    • Entferne den SIM-Karteneinschub.

  2. HSvptNHQiyevqvmB
    HSvptNHQiyevqvmB
    lFYEQSrJXNS2cnDo
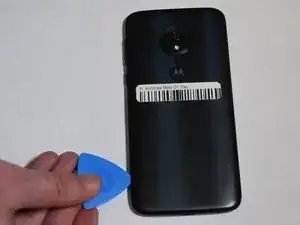
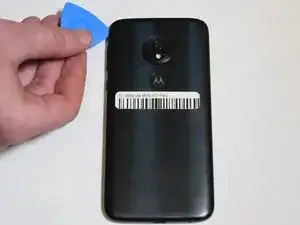
    • Trenne den Kleber am Rand der Rückseite mit einem Plektrum auf.

    • Benutze einen Haartrockner, Heißluftgebläse oder einen iOpener, um den Kleber vorher aufzuweichen.

  3. fUgtTjaaQHTsNH3Y
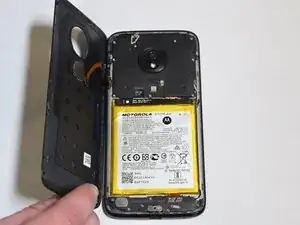
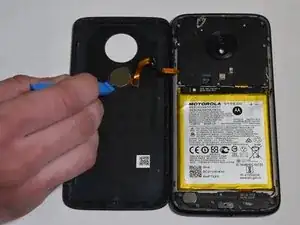
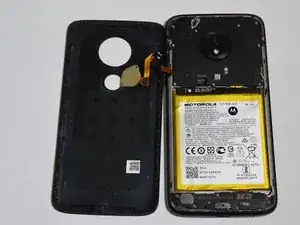
    • Löse die Rückseite vom Smartphone ab.

    • Es ist wichtig, dass du die Rückseite von rechts nach links aufklappst, damit das Kabel zum Fingerabdrucksensor nicht beschädigt wird.

  4. GPeuMx6mJ5PjcBNW
    GPeuMx6mJ5PjcBNW
    nMOhjnWuvKnpWOWG
    • Heble den Fingerabdrucksensor mit einem Plektrum und einem Hebelwerkzeug aus Kunststoff aus der Rückseite heraus.

    You can save a step here by keeping the fingerprint scanner attached as long as the back plate is supported by a minor angle. You’ll detach the other side at the system board in step 7, at which point you can put the whole piece to the side.

    drpotter -

  5. rYX3YWkkMY5YyIT2
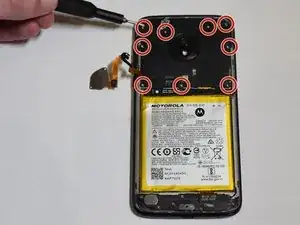
    • Entferne die neun 3,2 mm Kreuzschlitzschrauben #00, mit denen die Abdeckung der Hauptplatine befestigt ist.

  6. dDac1MqtLgSscSoU
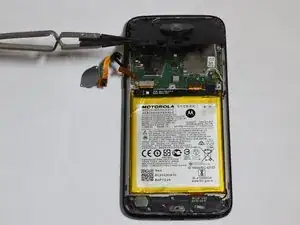
    • Hebe die Abdeckung der Hauptplatine vom Gerät ab.

    • Falls nötig, benutze eine Pinzette oder ein anderes geeignetes Werkzeug.

  7. SPDNfriDk5F2RWZ2
    SPDNfriDk5F2RWZ2
    CRjaOhwQfGSGGxSG
    odh5JgPWAYDMDXv3
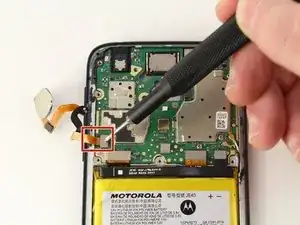
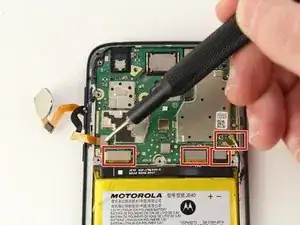
    • Trenne den Fingerabdrucksensor und die anderen fünf Kabel mit einem geeigneten Werkzeug ab.

    You’ll also want to detach both two antennas here and note the specific wire and its position on your system’s board. The antennas on mine are closer together, making it easy to re-connect them to the wrong terminal.

    drpotter -

  8. bKssRBEa1iQSUYyg
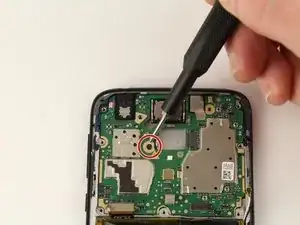
    • Entferne die 0,4 mm Kreuzschlitzschraube #00 von der Hauptplatine.

  9. sYr3MaWbARrMLuEm
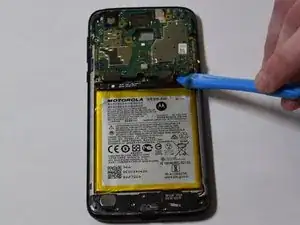
    • Heble die Hauptplatine behutsam mit einem Kunststoffwerkzeug aus dem Gerät.

  10. QuROHCR6tIKSg2vH
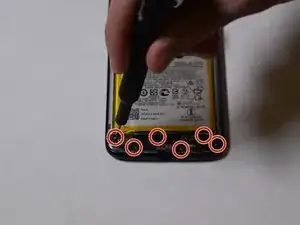
    • Entferne die sechs 3,2 mm Kreuzschlitzschrauben #00, mit denen die Abdeckung über der Ladebuchse befestigt ist.

    • Entferne die Abdeckung.

    Hello, I’m a new member to IFIXIT and so far your instructions have been crystal clear and easy to follow :) I was wondering if you could inform me on ways I could remove one of the six 3.2 mm screws from the charging port if the screw was stripped? I’m unable to proceed further with your instructions while one of the 3.2 mm screws is stripped.

    Theodore Allah -

  11. AO2qVcFpJRVopSMt
    • Heble die Abdeckung der Ladebuchse behutsam mit einem Kunststoffwerkzeug hoch.

  12. o5yEbwgIC2lcEgwU
    o5yEbwgIC2lcEgwU
    3xtuR3fXAVFHCs6h
    • Trenne die Kabel an der Ladebuchseneinheit mit einem geeigneten Werkzeug ab.

  13. gTEXDusvYOHWrq65
    • Heble die Ladebuchseneinheit behutsam mit einem Kunststoffwerkzeug hoch.

  14. dBxVpcdR5C4e2xHg
    dBxVpcdR5C4e2xHg
    jVEEIpHdvBr4DpPh
    XwryeKnIHfQLeAfq
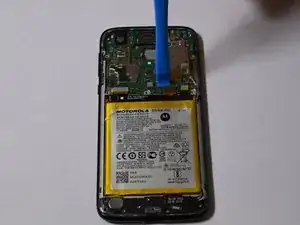
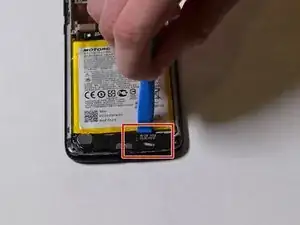
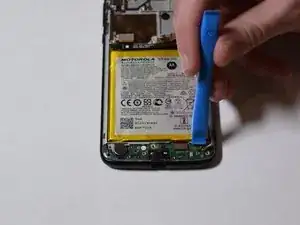
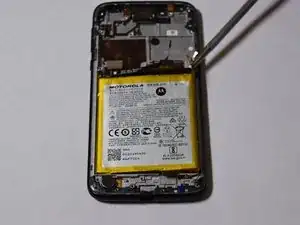
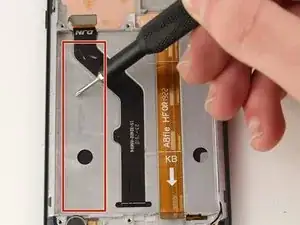
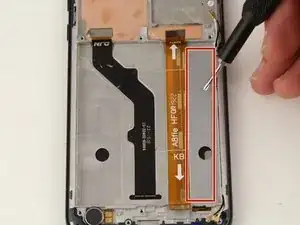
    • Löse die beiden Klebestreifen auf der Rückseite des Akkus mit Hilfe eines Spudgers ab.

    • Benutze kein Werkzeug aus Metall, du könntest damit andere Komponenten anstechen und beschädigen.

    This task needed a fair amount of heat, using both a heated pad (ifixit iOpener) and a hot air gun. Insulated gloves makes this step effortless. Heat both ends just near the adhesive until you think it’ s too hot to touch w/o your gloves, then gently pry the battery out using a long plastic spudger. I started on the right side, broke it free, then worked my way left. A hand held hot air gun here is perfect for this because the adhesive, at a good temperature, cleanly peels away from the battery and stays on the phone surface, making it perfect to reuse.

    drpotter -

  15. MAuCUNvPMMgOL6Hj
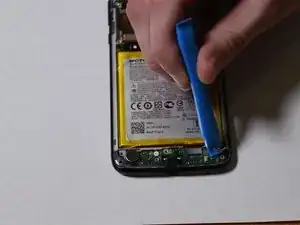
    • Wenn die Klebestreifen abgelöst sind, kannst du den Akku hochhebeln.

    When beginning re assembly and reusing the backplate seal, a fair amount a heat with a hot hair gun helps to evenly reseal it.

    drpotter -

Abschluss

Um dein Gerät wieder zusammenbauen, folge den Schritten in umgekehrter Reihenfolge.

Monserath Casillas

Mitglied seit: 10/02/20

1101 Reputation

4 Kommentare

I found this useful although I was dismantling a G7 Power. The screws are in different places but most parts and the the battery are the same or similar. Fortunately, though I discovered that steps 8, 9 and 13 were unnecessary. The motherboard and charging boards could be left in place (only the plastic covers had to come off) while the battery was removed.

keithmoseley -

I successfully changed a battery on a G7 Play. I skipped steps 4, 7, 8, 10, 11, 12, 13, 14, and 15. The instructions for removing the battery are risky. I pried the battery up a little and put constant pressure on it until it came loose which took about 60 seconds. The battery comes with a tiny connector at the end of a ribbon cable. This is plugged into a board, and then the motherboard holds it in place. In general, the phone is not designed for the battery to be replaced which surprised me.

Joe Doll -

Thank you! I successfully disassembled my G7 Play after an unfortunate dive in a lake to let it completely dry. It's now working as new!
Matthieu Bister -

I followed all the steps and my phone will do nothing. Like it has no power any

Any suggestions?

hodgine -