Einleitung

Other good videos:

https://youtu.be/fidHKn-J-0M?list=PLHnuY...

Even though this one is not in english its easy to follow and the most detailed:

https://youtu.be/h6uFJWzjj9U?list=PLHnuY...

  1. tTxHPJYLT4GVrDsJ
    tTxHPJYLT4GVrDsJ
    LFPQvSWwuDbSl31f
    NUD4SxVQCYyQ6Spt
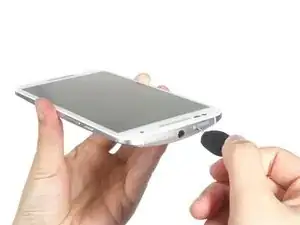
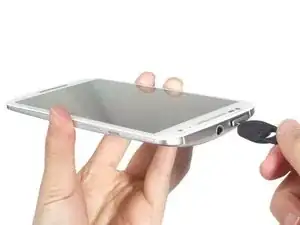
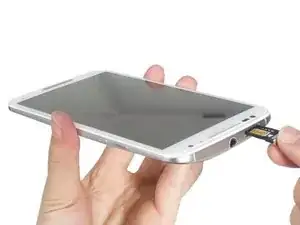
    • Remove SIM card tray.

  2. X35dIEdCqcdBRHtl
    X35dIEdCqcdBRHtl
    jrOhZGT5T2PYpBc6
    qxH1MZxxyoWwnPHC
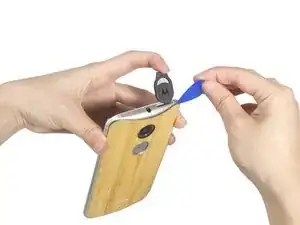
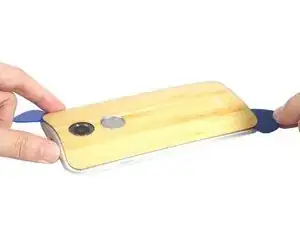
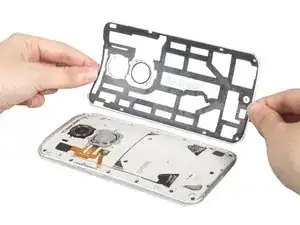
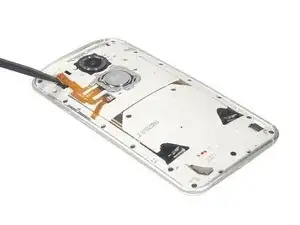
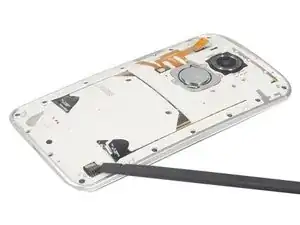
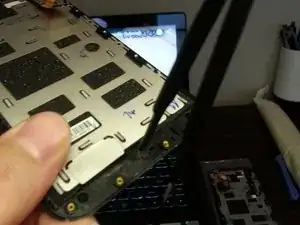
    • Remove back cover.

    • Shove the sim card remover or blunt (not sharp!) metal object into the hole that is inside the sim card slot. There is a specific hole that appears to designed to allow you push the back cover off with a small metal rod.

    • The leather back seems very fragile. It folded and bent easily so peel back with extreme caution and go slowly.

    • It might not be obvious from the pictures, but the black "lattice" on the inside of the cover is the adhesive. It must be pried loose (carefully!) for the back to come off.

    I generally use a Pentalobe screwdriver to eject SIM trays. Would that work fine here? I can't possibly conceive a reason why you would specifically need this tool.

    Max B -

    Tool comes with phone, so no need to get it.

    arvidasentaja -

    Make sure and use a rounded prying device else you can catch and break one of the cables. Don't ask me how I know this :(

    john -

    Also, the adhesive is very sturdy. Try heating up the backplate with a blowdryer/heatgun for better results.

    Also be sure to buy some replacement adhesive in advance or you will not be able to put the back cover again once you are done with your repair. You can find it online, it's very cheap.

    Rodrigo Del Pozo -

    Remova a tampa traseira.

    Shove o removedor do cartão do sim ou o objeto de metal romo (não afiado!) No furo que está dentro do entalhe do cartão do sim. Há um buraco específico que parece projetado para permitir que você empurre a tampa traseira com uma pequena haste de metal.

    A parte traseira de couro parece muito frágil. Dobrou-se e dobrou-se facilmente para descascar com extrema cautela e ir devagar.

    Pode não ser óbvio a partir das imagens, mas o preto "treliça" no interior da tampa é o adesivo. Deve ser solto (cuidadosamente!) Para que a parte traseira saia.

    Maximiliano Fischer -

    • Note that it might not be obvious from the pictures, but the black "lattice" in the picture and on the inside of the cover is the adhesive. All of this portion must be pried loose (carefully!) for the back to come off. I used tweezers to pry off the center portions.

  3. ddsXoMENSPKgOvME
    ddsXoMENSPKgOvME
    OawhViEZ3yqSluBF
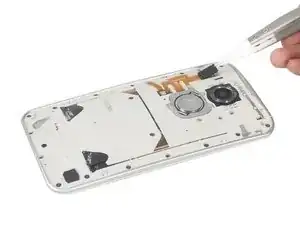
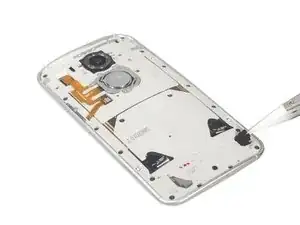
    • Remove those two rubber covers which securing power button connecting flex connector and battery connector.

  4. h5jFoQtPPSw3JB1w
    h5jFoQtPPSw3JB1w
    W3ZcOt52yaJV5ORB
    • Release the connectors under the covers.

  5. VG4alRsSFFM1pIp1
    VG4alRsSFFM1pIp1
    PDRcvwhQIRAvkRkp
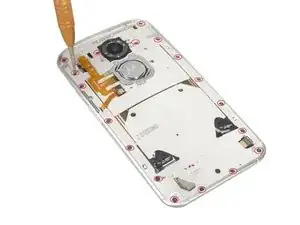
    • Twist off all 18 black torx screws and remove the front assembly from middle housing.

    I was able to use a T4 screwdriver on these 18 screws. T3 Torx screwdrivers are a bit of a challenge to find in brick and mortar stores but luckily I was able to find the "Husky 8-in-1 Star Precision Screwdriver Set" at Home Depot for just under $10.

    Alex Spiva -

  6. LGOcPYCCKOoxvGBJ
    LGOcPYCCKOoxvGBJ
    vplD33EvqmkfhWYo
    • Release LCD connector.

    In the first picture, the tool is lifting the connector. The second one shows the cable is being released under the connector. Do not try to pull it up or it will break the connector.

    Rafael Fernandes -

  7. EVGx3LuOsFXLMDGM
    EVGx3LuOsFXLMDGM
    RtoQQQyFUtfGSMsQ
    • Release touch digitizer connector.

    Not only this little cable has to be disconnected but the whole black squared flat cable that comes from the display underneath. I almost split the cable trying to figure out how to disassembly it. I slid a little plastic piece under the black flat cable to unglue it.

    Rafael Fernandes -

  8. O6vxGPpwRMgIu4CA
    O6vxGPpwRMgIu4CA
    uCgGUyWxWebOmLSd
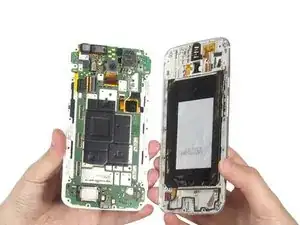
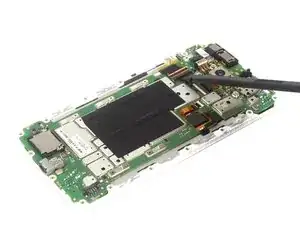
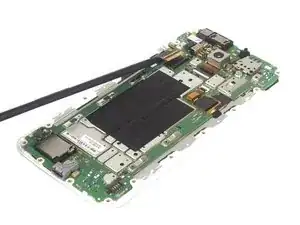
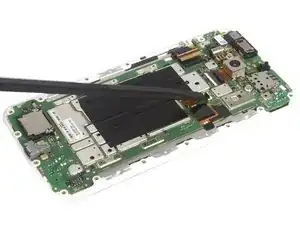
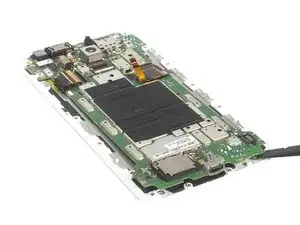
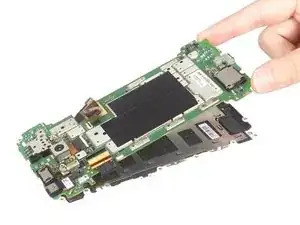
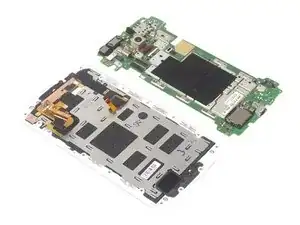
    • Pry up the motherboard from right and bottom corner. Remove the LCD screen from motherboard.

  9. xJrmNPjrPSgVxQaM
    • Tips: The LCD screen is difficult to separate from bezel even though by heat. So you'd better prepare the screen replacement parts with bezel together. And the metal shield can be removed easily.

  10. hJyxMjrxPKmFIJ1i
    hJyxMjrxPKmFIJ1i
    mGhaZaiFPJDhaERB
    sOpvVHACu4XbIGIi
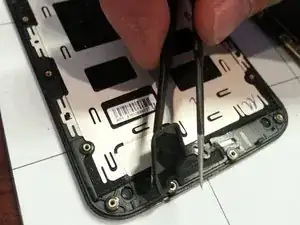
    • The newly purchased screen will likely not have speaker grills so you must remove them from the broken screen and put them onto the new screen

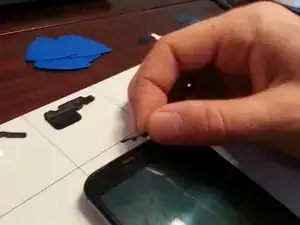
    • On both the upper and lower speakers remove the speaker foam that is adhered lightly. Peel away gently. This foam will not be reused so its ok if it gets torn.

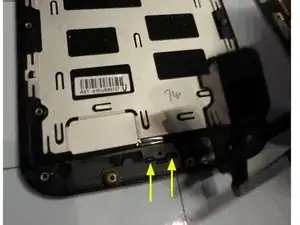
    • Locate the two tabs that holds the speaker grill in place. Highlighted in photo with yellow arrows.

    • Push out the speaker grill by forcing either one of those two tabs out of the frame by pushing onto the tab with a tweezer end. It requires a bit of force and it will pop out.

    • The photo only show the lower speaker grill removal, but the upper speaker grill is removed in the same manner.

  11. FvK6eLoRludhpygJ
    FvK6eLoRludhpygJ
    hIvqTtgypRx5yYv5
    gKHqfbNCpGDtKPZT
    • After removal of both speaker grills they can be put into the new screen. Wait until the phone is fully reassembled to put the old grills into the new screen.

    • Align the two tabs of the grill with the two slots in the new screen

    • Carefully push the grill into the two slots. Start by pushing with your thumb and nail over one tab and only push one of the two tabs in at a time. A lot of pushing pressure is required so be careful not to damage the new screen.

    • If you are unable to push the grills in with your thumbs, try placing the grills in position and then pushing the screen face-down against a flat surface.

    • After one of the tabs is into the slot then the second tab can be pushed into the slot with some additional pressure. Both speaker grills can be replaced in this manner.

    • A couple people reported breaking their newly installed screen while popping in the speaker grill. Its also OK to not even install the cosmetic speaker grill.

    I wasn't able to push the speaker grills by thumb pressure, so instead just pushed the screen face down onto a flat surface. The speaker grills then snapped in place easily.

    Faraz Abbasi -

    I just broke a brand-new screen by trying to get the speaker grills in. Pushed it down onto a flat surface ... the screen then broke in the bottom. I still haven't managed to get the speaker grills in. Be very, very careful if you try this.

    ibreakit -

    I also cracked the new screen trying this. Didn't seem to take much force to break it. Never did get the speaker grills in. I would advise don't even try.

    David Furphy -

    You can use sandpaper to rub off some metal from the edges of the two heads. Pops in easily and you can use a little bit of glue to keep it firmly in place.

    Jason Paterakis -

Abschluss

To reassemble your device, follow these instructions in reverse order.

Sophia

Mitglied seit: 25/03/14

43756 Reputation

18 Kommentare

Note that the screen linked in the description does not include a bezel. This guide points out that removing the bezel from the old screen is hard, so you are better of buying a screen with bezel included.

KarinT -

Asking what little bit I don't hear about removing the top and bottom speaker pieces and if someone can give me a little more detailed information as to how to remove them so that I can reuse them in the new LCD and digitizer assembly that I got. For whatever reason it didn't occur to me when I ordered it to make sure that it came with new speaker pieces but thankfully because of a discount code and free shipping I can't complain much for getting the assembly combo for $85 with the exception of it not coming with new speakers or I know the bottom one of the speaker and the top one isn't but hopefully you get what I'm saying. So any more info I would appreciate it

Amanda Cottingham -

What would cause the new screen to just shut off intermittently and power the phone down. I also experience a good amount of heat towards the lower portion of the screen assembly when powered on or plugged into a charger. I have changed the power/volume button flex cable assembly, both pieces and that didn't solve my issue with screen powering off.

Damon Ohh -

I'm experiencing a similar issue. I've been scratching my head after replacing a screen on a customer's device for several days now. When I power up the device, everything appears to work except for the AT&T network (not sure if has been disconnected or not). Though, once the phone goes to sleep on it's own, or it's left alone for too long, things start to act funky. I wake the phone up after falling asleep for the first time since boot, the home screen appears, but there is no sense of touch/the digitizer isn't functioning anymore. Once the screen falls back asleep due to no interaction, it will not wake back up by pressing the power button and the LCD remains completely black. When I put the original screen back into the phone, however, the phone works as it should. The only way to reset the device is to unplug the battery, which results in app optimization after every trial (time consuming). There is also a bit of heat coming from the middle of the phone. I'm running out of ideas. Please help!

John Snow -

I am having exactly the same issue. I replaced the screen (which came with a frame) without incident. Phone powered up fine, touch worked normally, all apps and connectivity normal. After the screen goes black and I power it back on, the touch won't work. After it goes black again, the phone shuts down completely, I have to turn it on by unplugging the power cord and then holding the power and volume up buttons. Apps must initialize again, takes a few minutes. I suspect that there may be something defective with these screens? I got the following part: 2-O-1932-TK1887 Motorola Moto X 2 Screen Assembly with Frame - White (Add Toolkit) from Strive Mobile. Anyone else?

Dallas Elleman -

Screen work incorrectly after screen replacement was having the same issue this fixed the problem!

Alex Pichot -

I'm currently having the same issue with my replacement. I went ahead and ordered a second assembly to make sure the replacement part wasn't the issue, with no success. I'm still experiencing the screen cutting off randomly and heat coming from the board.

Steve B -
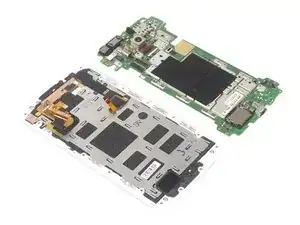
Be careful! The replacement LCD screen linked above is not the one used in the video or the step by step guide!!!

The piece linked there is the screen alone, without the support frame, and it is very difficult -if not impossible- to scrap the support frame from your broken screen.

You will want to purchase a screen Assembly instead, which will include the support frame, such as this one (from the same website): http://www.witrigs.com/oem-lcd-screen-as...

Great guide nonetheless.

alph0n5e -

hello! i have broken my moto x 2nd gen LCD last week, but the touch works all fine. I wanted to know if it is possible to replace the LCD without the digitizer.

http://www.flipkart.com/gyscol-motorola-...

Nymesh -

Does anyone know where I can pick up the speaker grill for this phone?

Chris Vetter -

I'm having a problem with my cell phone, everytime I turn it on, it shows me a couple of vertical lines that start to show up, then it becomes a big thing on it, with a lot of coloured points, like the sky at night, like a galaxy (not the cell phone, a real galaxy).

I don't know what to do, I never dropped it off.

What if I try to remove and replace the LCD flat cable?

Roger Botolo -

Question, the LCD frame attached with the screen is made of plastic?

[deleted] -

I broke the digitizer on my Moto 2nd gen X1095 few weeks ago. The top glass is intact, but I can see it is broken in the second layer through the glass.The screen won't light up at all. I've already got a replacement phone (Moto X Pure) but out of pure stubbornness and curiosity want to fix my old one. I've replaced the screen+digitizer combo according to this guide. But the new screen won't light up. The phone buzzes and I could even answer a phone call by imitating call answer swipe motion on the screen. In the process of disconnecting the old LCD screen from the motherboard, I've manager to break the latching black plastic piece that is suppose to hold the ribbon in place and bend one of the teeth on the far end of the connector. But it does not seem to affect how deep the ribbon cable goes into the connector and I've placed sticky tape over the connector instead of the latch. Could that be the reason the screen won't light up? Any ideas why else it could be happening?

Irina Sarkisova -

Did you solve your problem of the LCD screen not lighting up?

ravionweb -

Beware a T3 didn’t work for me unlike what this guide is suggesting I had to use a T2.

malcr 001 -

From where will i get the screen replacement from?

Want to change my phone screen desperately… Please Help Me…

Thank You…

Tashi Dema -

If your screen comes with the speaker grills, DO NOT remove them to reuse the original ones. The risk of cracking the screen, especially on the outside edge is not worth it. Just live with the color grill you get.

Barry Padgett -

Good guide, thanks for sharing. As a side note, I used my heat blower in the low setting (50 C) to soften the original adhesives in some removal procedures and after that I clean the adhesives all with a fine brush and isopropyl alchohol. After well dried I heat them again in 50c setting with eventual higher temp bursts prior gluing to assure an even bond. Thanks!

Jeffo Moreira -