Einleitung

  1. LoKqmK6hqc2HYG6w
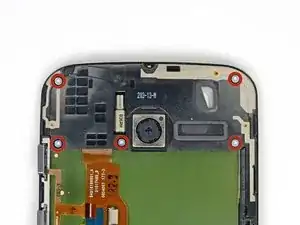
    • Entferne die fünf 3 mm T3 Torx Schrauben an der Einheit aus Kopfhörerbuchse/Lautsprecher.

    These screws appear to have some yellow locktite on them. I rounded 2 of them, so take caution and make sure your screw driver fits correctly. Otherwise you will need to find a drill press to extract them.

    stevengrey -

    Is the glass glued to the LCD like the iPhone 5? Is it possible to repair a broken front glass without changing the whole assembly?

    Alisio -

    Yes and Yes. Just fixed mine.

    Buy a Glass+Frame from ebay. Do steps 1-18 and 37. Then just open the bottom two torx screws, no more. They are the only ones connected to the front frame. Then heat&remove the glass, tear off the frame with pliers. Then you just need to clean the screen from residue and apply LOCA and the Glass+Frame.

    Adrian Koch -

    Yep, I rounded the bottom-left and bottom-center screws as well as my Torx driver, then slipped with the drill bit and went right through the mobo.

    Coinneach -

    All screws appear to be Torx T4.

    ktmorimoto -

  2. 5monVoWGMNYGqDOs
    5monVoWGMNYGqDOs
    e1cMTIIkOhvSHVvV
    Y1BlIuvZHeOJyiUN
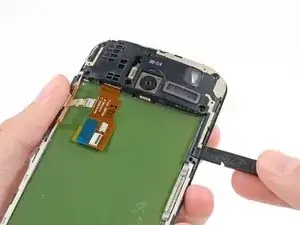
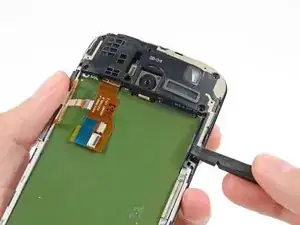
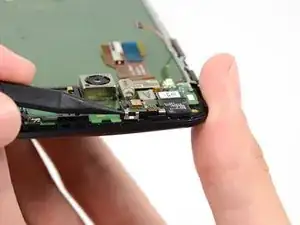
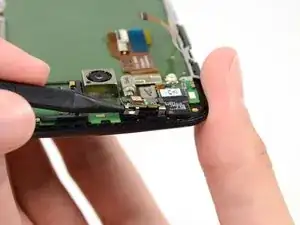
    • Setze einen Spudger unter das Anhängsel der Einheit aus Kopfhörerbuchse/ Lautsprecher und hebele diese aus ihrem Sitz.

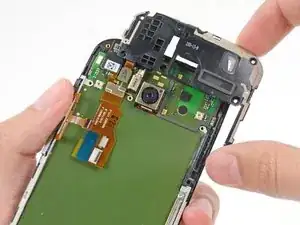
    • Entferne die Einheit aus Kopfhörerbuchse /Lautsprecher.

    The microphone assembly has foam tape adhesive on it and will want to separate with the headphone jack / speaker assembly.

    Jacob Jaeggli -

  3. MFEXiWnffQvWgXUb
    MFEXiWnffQvWgXUb
    mAWxOLYfhKsZdywK
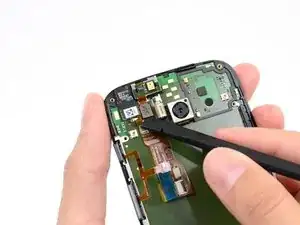
    • Schiebe eine Spudgerspitze unter die Klammer an der Mikrofoneinheit und löse sie vom Ohrhörer-Lautsprecher.

  4. tKfF4JCtgltZb4Hd
    tKfF4JCtgltZb4Hd
    WFTSkkH1M2SFQiaE
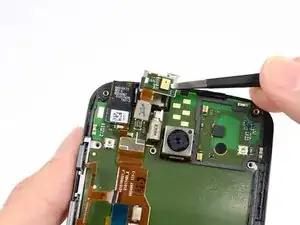
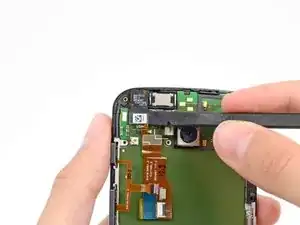
    • Löse den Verbinder am Kabel zur Mikrofoneinheit mit dem flachen Ende des Spudgers.

    • Entferne die Mikrofoneinheit mit einer Pinzette.

  5. StULsfGfTxAkTUNd
    StULsfGfTxAkTUNd
    WjKZdvSjujEj5cRf
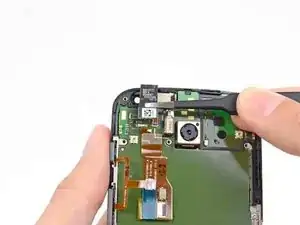
    • Löse den Verbinder am Flachbandkabel zur Frontkamera.

    • Hebe die Frontkamera mit einer Pinzette aus ihrem Sitz.

    There is a thin black foam gasket (like a small washer) that is stuck to the front of this camera lens housing. On mine, the gasket was stuck off-center with the inner edge in the field of view of the lens. Using tweezers, I removed it and re-attached it on center. The image is now much sharper!

    ktmorimoto -

  6. dRIQ2QbZkyvu5u2W
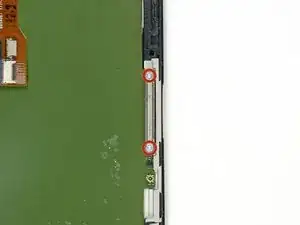
    • Entferne die letzten beiden 3 mm T3 Torx Schrauben an der Halteklammer des SIM Einschubs.

    On my XT1053 Developer Edition, the Torx screws on the sim slot bracket were not T3 like all the others, they were T4. Trying to use a T3 screwdriver resulted in twisting off the tip of the screwdriver. A T4 screwdriver removed them just fine.

    geekapproved -

  7. XN2t6ymhBNrwawaP
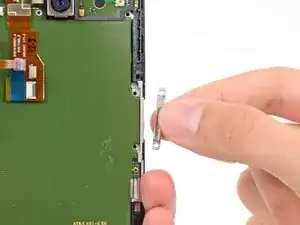
    • Entferne die Halteklammer des SIM Einschubs von der Hauptplatine.

  8. wgthpCuFIycAIGbF
    wgthpCuFIycAIGbF
    Vc5fneieM6LqeCMP
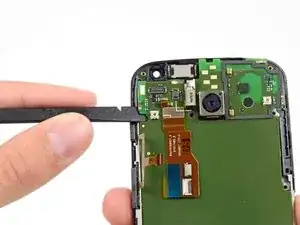
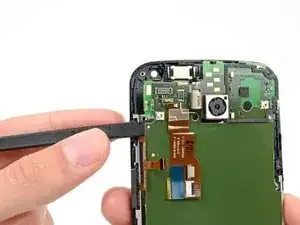
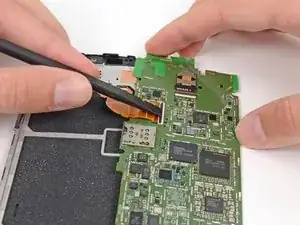
    • Setze das flache Ende des Spudgers unter die Hauptplatine über dem Kabel zur Tastengruppe und hebele sie aus dem Smartphone.

    • Achte darauf, dass sich keine Kabel verhaken.

    • Die Tasten können aus ihren Vertiefungen herausspringen, verliere sie nicht.

  9. MtZOmRIyaJMTkNEn
    MtZOmRIyaJMTkNEn
    1RcYy5HienCEkJlb
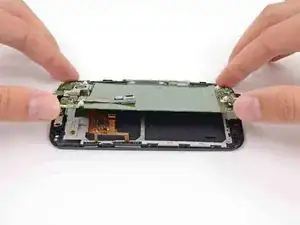
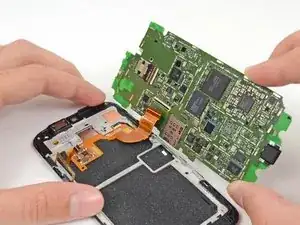
    • Hebe die Hauptplatine vorsichtig aus dem Smartphone, drehe sie dabei weg von der Kante mit dem SIM Einschub.

    • Versuche noch nicht, die Platine ganz zu entfernen, sie ist immer noch durch das Displaykabel mit dem Display verbunden.

  10. Nk4kajCtBOeLTjCP
    Nk4kajCtBOeLTjCP
    jKQYJ3WYMHNGTLWH
    fVIXRWJwsrn1DHkR
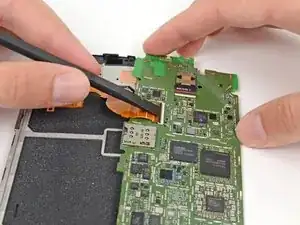
    • Lege die Hauptplatine so hin, dass du an den Verbinder des Displaykabels gelangen kannst.

    • Klappe den Sicherungsbügel am ZIF Verbinder des Flachbandkabels zum Display mit dem flachen Ende des Spudgers hoch.

    • Ziehe vorsichtig das Displaykabel aus seinem Verbinder, während du die Hauptplatine von der Displayeinheit entfernst.

    When trying to put the motherboard connection back together I cannot get the flap to hold down. Anyone have a trick to help me get this connection to hold?

    Dave -

    I also struggled getting this cable back in, I actually assembled it thinking it was "in enough", only to find out I had to take it back apart and push it in further.

    I found that you can lay the screen face down, with the cable upright at a 90 degree angle, then push the motherboard down onto the cable. When it goes in enough, it snaps in fairly well. If it's not in enough, it will be impossible to close the clamp.

    Eric Moe -

    There is a small black plastic piece which goes over the proximity sensor which can easily fall off. If it does, the sensor will malfunction and think that you are always close, which means you will not be able to hang up or do anything else with your phone while you are on a call and will just have to wait for the other person to hang up. I had to do more or less the whole job over again to reinsert this piece (I couldn't tell where it had fallen from and just hoped my phone would be alright with out it).

    This is discussed in the thread here:

    Can you disable the proximity sensor, Moto X?

    You can see the black plastic over the proximity sensor in these two photos:

    https://d3nevzfk7ii3be.cloudfront.net/ig...

    https://d3nevzfk7ii3be.cloudfront.net/ig...

    Whereas it is missing in this photo:

    https://d3nevzfk7ii3be.cloudfront.net/ig...

    (The sensor is on the lower left in this last photo).

    Malcolm Sailor -

    When lifting the motherboard, note that there will be some resistance near the USB port due to an adhered foam gasket/funnel which channels sound from the tiny hole in the glass to the voice mic on the back side of the motherboard. Before re-installation of the motherboard, inspect the shape and hole in this foam gasket. It should look like cylindrical standoff about 0.1 inch tall. If it is not a clear sight to the tiny hole in the motherboard, sound will not reach the voice mic. I used the point of a spudger to re-form the hole.

    ktmorimoto -

Abschluss

Um dein Gerät wieder zusammenzubauen, folge den Schritten in umgekehrter Reihenfolge.
Sam Goldheart

Mitglied seit: 19/10/12

457712 Reputation

0 Kommentare