Einleitung

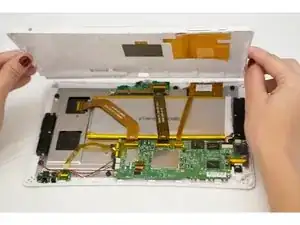
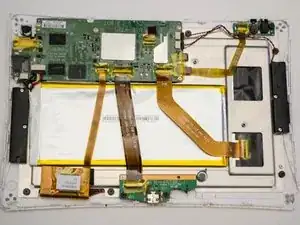
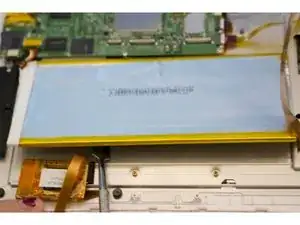
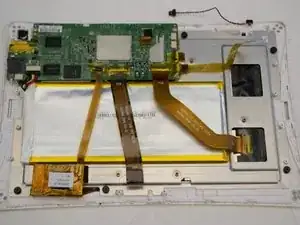
The battery is one of the most important components of any portable device, because without power, the device will not be able to function. The battery equipped in the DreamTab resembles an aluminum foil-wrapped chocolate bar which is very malleable. The battery itself is attached to the device using strong adhesive, so it is important to remove the battery with care as it will bend if excessive force is used. We recommend using the metal opening tools only if the plastic opening tools don’t provide enough leverage to remove the battery from the adhesive.

  1. ZrqyvvJbSiwTnV5K
    ZrqyvvJbSiwTnV5K
    oq2Oo6meCukCSVDd
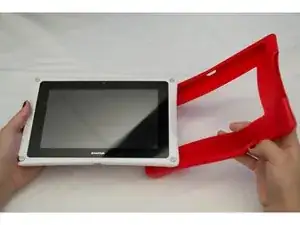
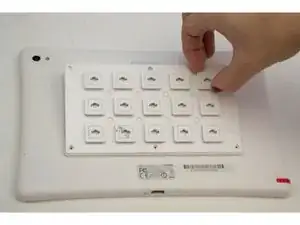
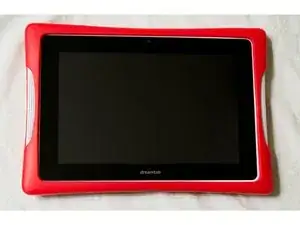
    • Position the Nabi DreamTab onto a non-metallic surface so that the screen is facing towards the ceiling, and the DreamTab logo appears closest to you.

    • Remove the red silicone case from the Nabi DreamTab HD8.

    • These steps are specific to the included manufacturer case. If you have a different protective case, please refer to the respective manual for removal.

  2. GyWNl4xLaZCYTPTB
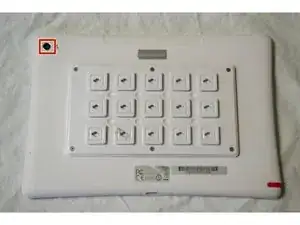
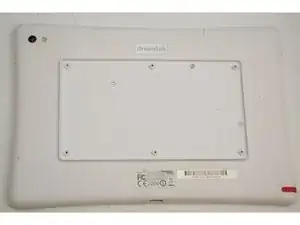
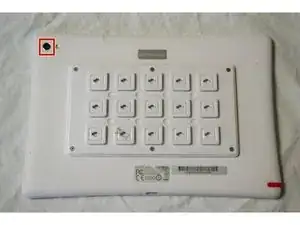
    • Turn it upside down, ensuring the small black circular camera is in the upper left hand corner.

    • Proceeding beyond here will void the manufacturer's warranty. If you wish to continue, follow these steps carefully.

  3. KTu2EFELfOjfv2al
    KTu2EFELfOjfv2al
    F5wAFsbRVww2kEgU
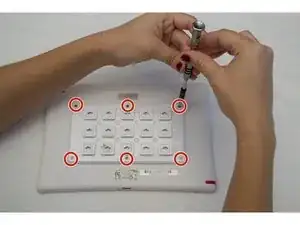
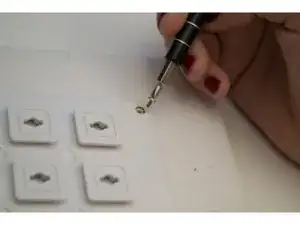
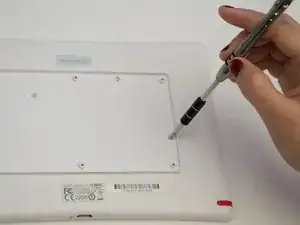
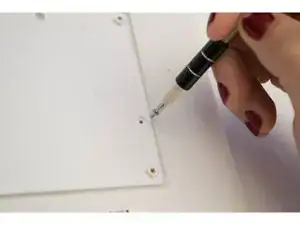
    • Remove the six 2.5 mm JIS #000 screws attaching the custom grid to the back panel.

  4. VvtcEImjOASmg5XG
    VvtcEImjOASmg5XG
    idisrdwxaEXLXWRD
    • Grasp one of the protruding squares and gently lift off the back plate. Place it aside for later reassembly.

    • This piece should come off very easily. If you have trouble removing it, all of the screws may not be completely removed. Check and proceed.

    • Do not confuse the golden threads for screws.

  5. IM2LAN6kQIcwBtJY
    IM2LAN6kQIcwBtJY
    orytEWIqRe1Ckhh3
    yDsJFYKWBX3ZrHiJ
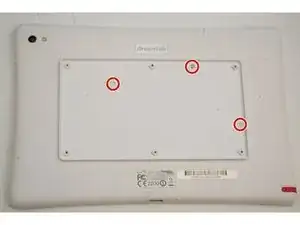
    • Remove the three 3.5mm screws using the J-0 screwdriver attaching the back panel to the device.

  6. SxaAjswo4tYFJnjO
    SxaAjswo4tYFJnjO
    RqAWxMB25SoXfjyM
    QLALYXb5ASuCcALn
    • Rotate the top of the device towards you so that the audio jack appears on the right side of the device.

    • The audio jack will have a small symbol of headphones next to a small 3.5mm diameter hole.

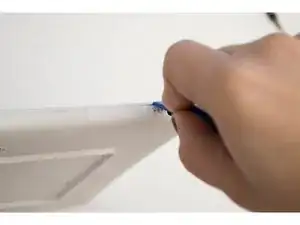
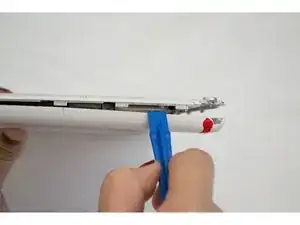
    • Wedge the plastic opening tool between where the front and back case panels meet near the audio jack.

    • Pry the device open using moderate force until you hear a clicking sound. This is the sound of the clips unlocking.

    • Move along the perimeter of the entire device using the same prying motion to gradually separate the front and back panels.

    • Once the edges are open return to the same starting position next to the audio jack.

    • During this step, you may crack some parts of the case. Gently pry around the speakers, audio jack and charging cable ports to reduce this damage.

  7. YMCRLxRNIwfh6LmW
    YMCRLxRNIwfh6LmW
    qedvQhYVdXLAwaqN
    SMJYoq21fIVDAORA
    • Once you've completed separating the front and back panels, place the device back onto the table, display facing downward and camera at the top left.

    • Lift off the back panel and rotate the device 180 degrees while the screen is facing down.

  8. xBYUeYMG31qCjyGc
    • Before removing the battery, be aware that it is held together by a strong adhesive. The battery itself is very malleable and flimsy, so make sure to handle it with care.

  9. AfyJnlSZmUMqN1qj
    AfyJnlSZmUMqN1qj
    xPwjAhZkn5bh4jqw
    Yn3tONE3vpdUSR6H
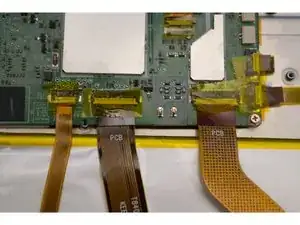
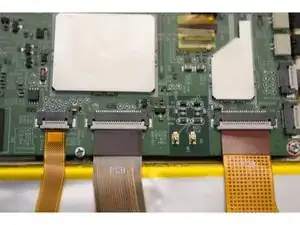
    • Remove the remaining yellow plastic film from the surrounding connectors so that the battery can be easily removed.

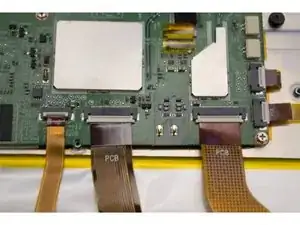
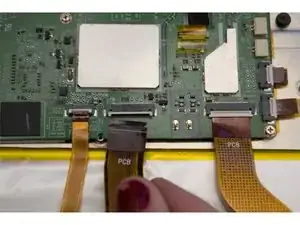
    Great pictures, you failed to mention that the grey clips flip open to release the connectors. I am NOT complaining, great step by step.

    laylo2769 -

  10. 45FJ2c1pMeQNlEVh
    45FJ2c1pMeQNlEVh
    4r1xBOnDXkJCTZjP
    voUIvkp2MuNTWxwt
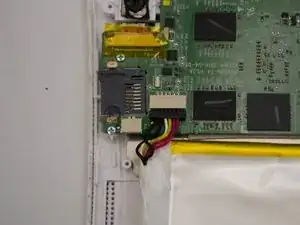
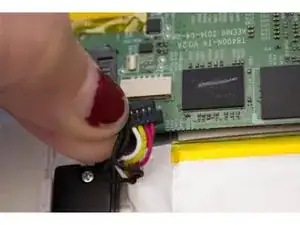
    • Disconnect the two plastic connectors overlapping the battery from the motherboard.

  11. 5O4XIZQ6F1Nrsm1Z
    5O4XIZQ6F1Nrsm1Z
    e1dnrvRI5M5pbXro
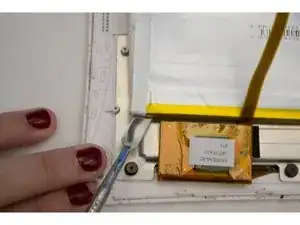
    • These images show the use of a metal spudger. Use a plastic card or opening pick to avoid puncturing the battery.

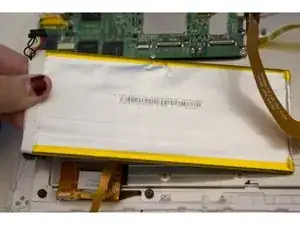
    • Slide a plastic card or opening pick between the battery and case. Gently pry the battery out of the case.

  12. 11KiPlnYWSFrHCEF
    11KiPlnYWSFrHCEF
    sE1fNt4ODgdIGDQy
    3LuMya4YG3cT5VNT
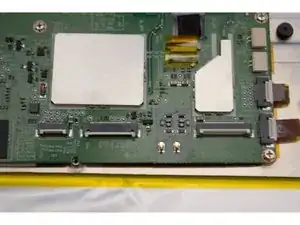
    • Disconnect the final battery connector from the motherboard.

    • Remove the battery.

    Is there any site to buy this battery

    Vinayak vijayan Snc kollam -

Abschluss

To reassemble your device, follow these instructions in reverse order.

Luis Delgado

Mitglied seit: 17/09/15

263 Reputation

8 Kommentare

Great directions. Good to know stuff. Where, if I may ask, did you find the replacement battery. Thanks in advance, and, keep on keeping on.

Jim Osburn -

The inside of my DreamTab looks NOTHING like this. For one, the battery is NOT foil wrapped. Other than that, still nothing like your pictures.

Amy Lathrop -

There are two different DreamTab models: DMTAB-IN08A and DMTAB-NV08B.

This procedure is using the DMTAB-NV08B.

Adam Bright -

Restaure mi nabi dream 8 pero ahora no puedo acceder a mi correo me dice , comprobando disponibilidad y no pasa de ahi
Agustin Zapata Martinez -

Your guide along with time and patience brought my DT back to life. Thank you sooo much.

laylo2769 -

Very good instructions

Tricia Barrett -

Very good instructions the pictures a bunch of help as well as the notes about being careful

Tricia Barrett -

This battery available in any online site

mangarans likes -